• Cookbook
  • About
  • Video
  • Recipes
  • Travel
  • Inspiration
  • Services
  • Contact
Menu

Andrea's Cooktales

Street Address
City, State, Zip
Phone Number
A STORY BEHIND EVERY RECIPE

A STORY BEHIND EVERY RECIPE

Andrea's Cooktales

  • Cookbook
  • About
  • Video
  • Recipes
  • Travel
  • Inspiration
  • Services
  • Contact

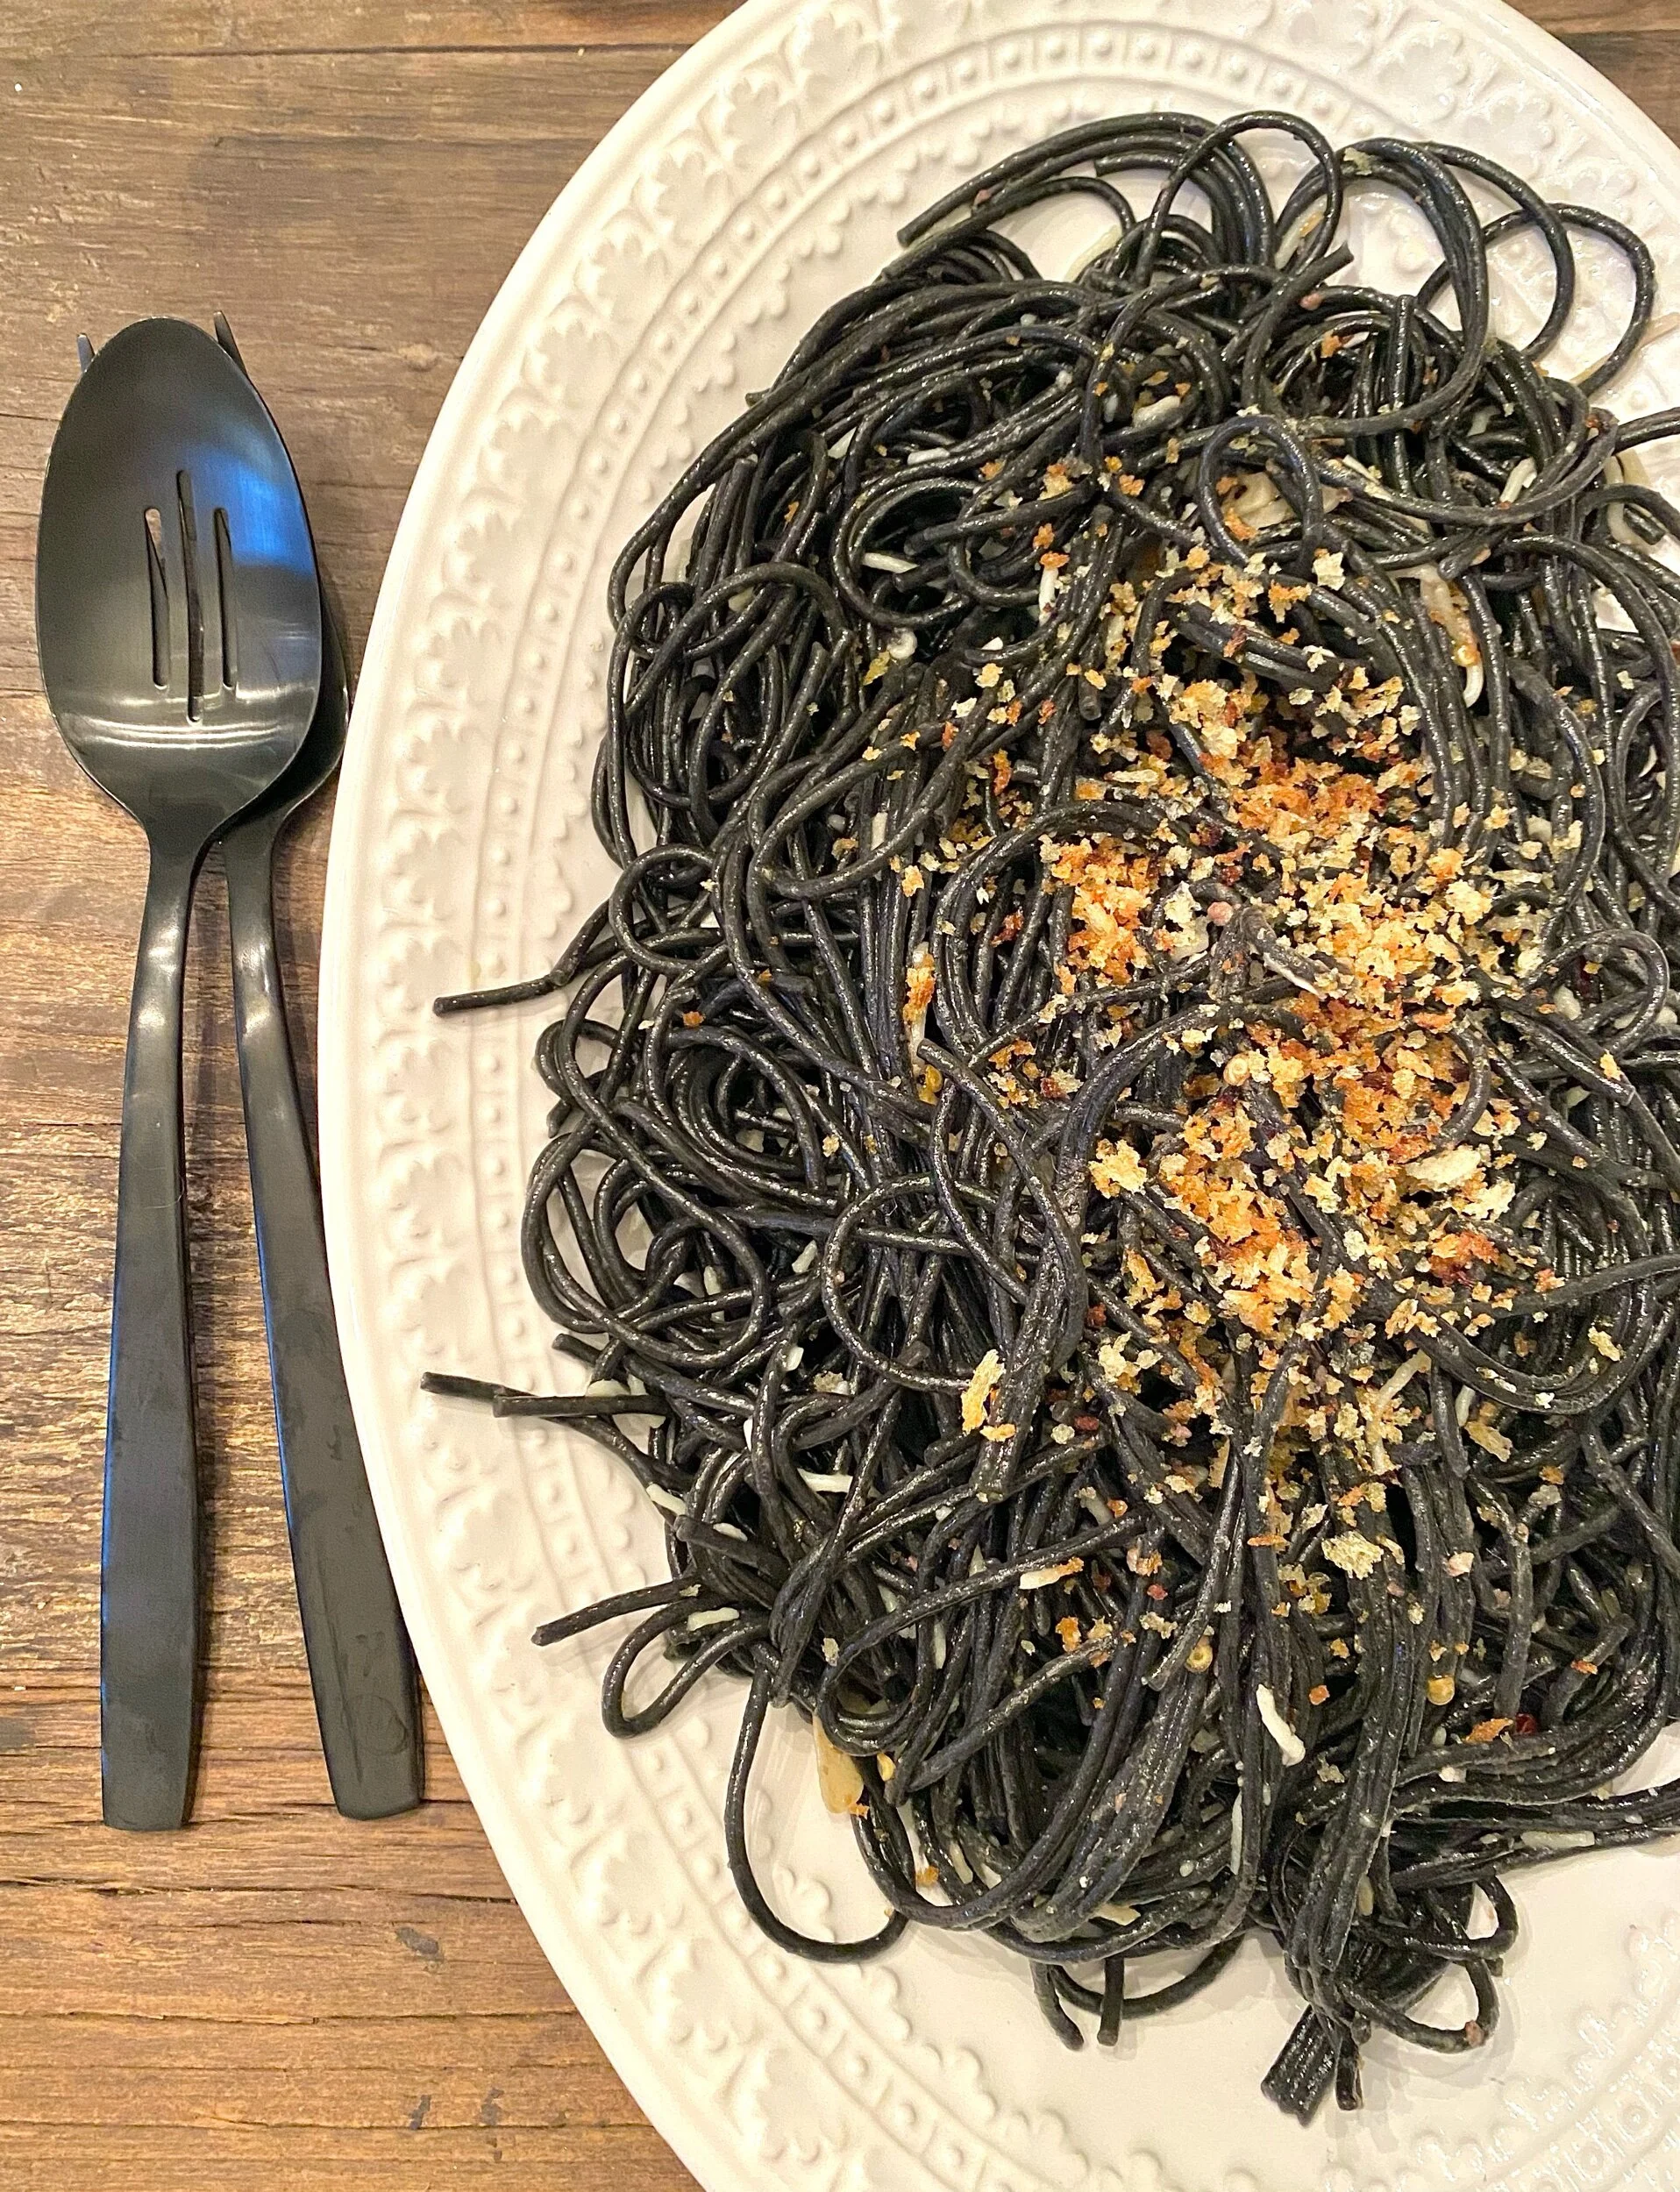
Squid Ink Spaghetti with Garlic Anchovy Sauce and Toasted Breadcrumbs

December 18, 2020 Andrea LeTard
IMG_1072.jpeg

A beautiful dish with a lot of flavor - this will be a family favorite! If you’re not an anchovy person, don’t let that alarm you - the anchovies in this dish are merely there for the salty flavor they give. Plus, they’re minced so tiny you won’t even know they’re there. You may be shocked at how many restaurants use anchovies for their unique salty flavor. If you think you don’t like anchovies, you may be surprised at how many times you’ve actually had them without even knowing. They give a flavorful saltiness not even the best salt can give! 

1 pound black (squid ink) spaghetti 

1/2 cup good quality olive oil + 2 tablespoons 

5 garlic cloves - minced or grated 

4 anchovies - minced finely into a paste 

1/2 teaspoon red pepper flake + more to taste 

1/2 cup grated Parmesan 

1/2 cup panko breadcrumbs 

Bring a large pot of very salty water to a boil. Boil spaghetti according to package directions or until al dente. While pasta is boiling, heat the 1/2 cup of olive oil over low heat in a large sauté pan. Add the garlic, anchovies, and pepper flake. Sauté for about one minute or until fragrant. Take off the heat so the garlic doesn’t burn. When the spaghetti is ready, using tongs, immediately transfer to the sauce. Add about 1/2 to 1 cup of pasta water and Parmesan. Toss together until combined and creamy - add more pasta water as needed if spaghetti gets dry. In a small sauté pan, add the remaining 2 tablespoons of olive oil and the breadcrumbs over medium heat. Toss together until golden in color (breadcrumbs can also be made ahead and stored in a container on the counter up to a couple of days before). Serve breadcrumbs atop the spaghetti. 
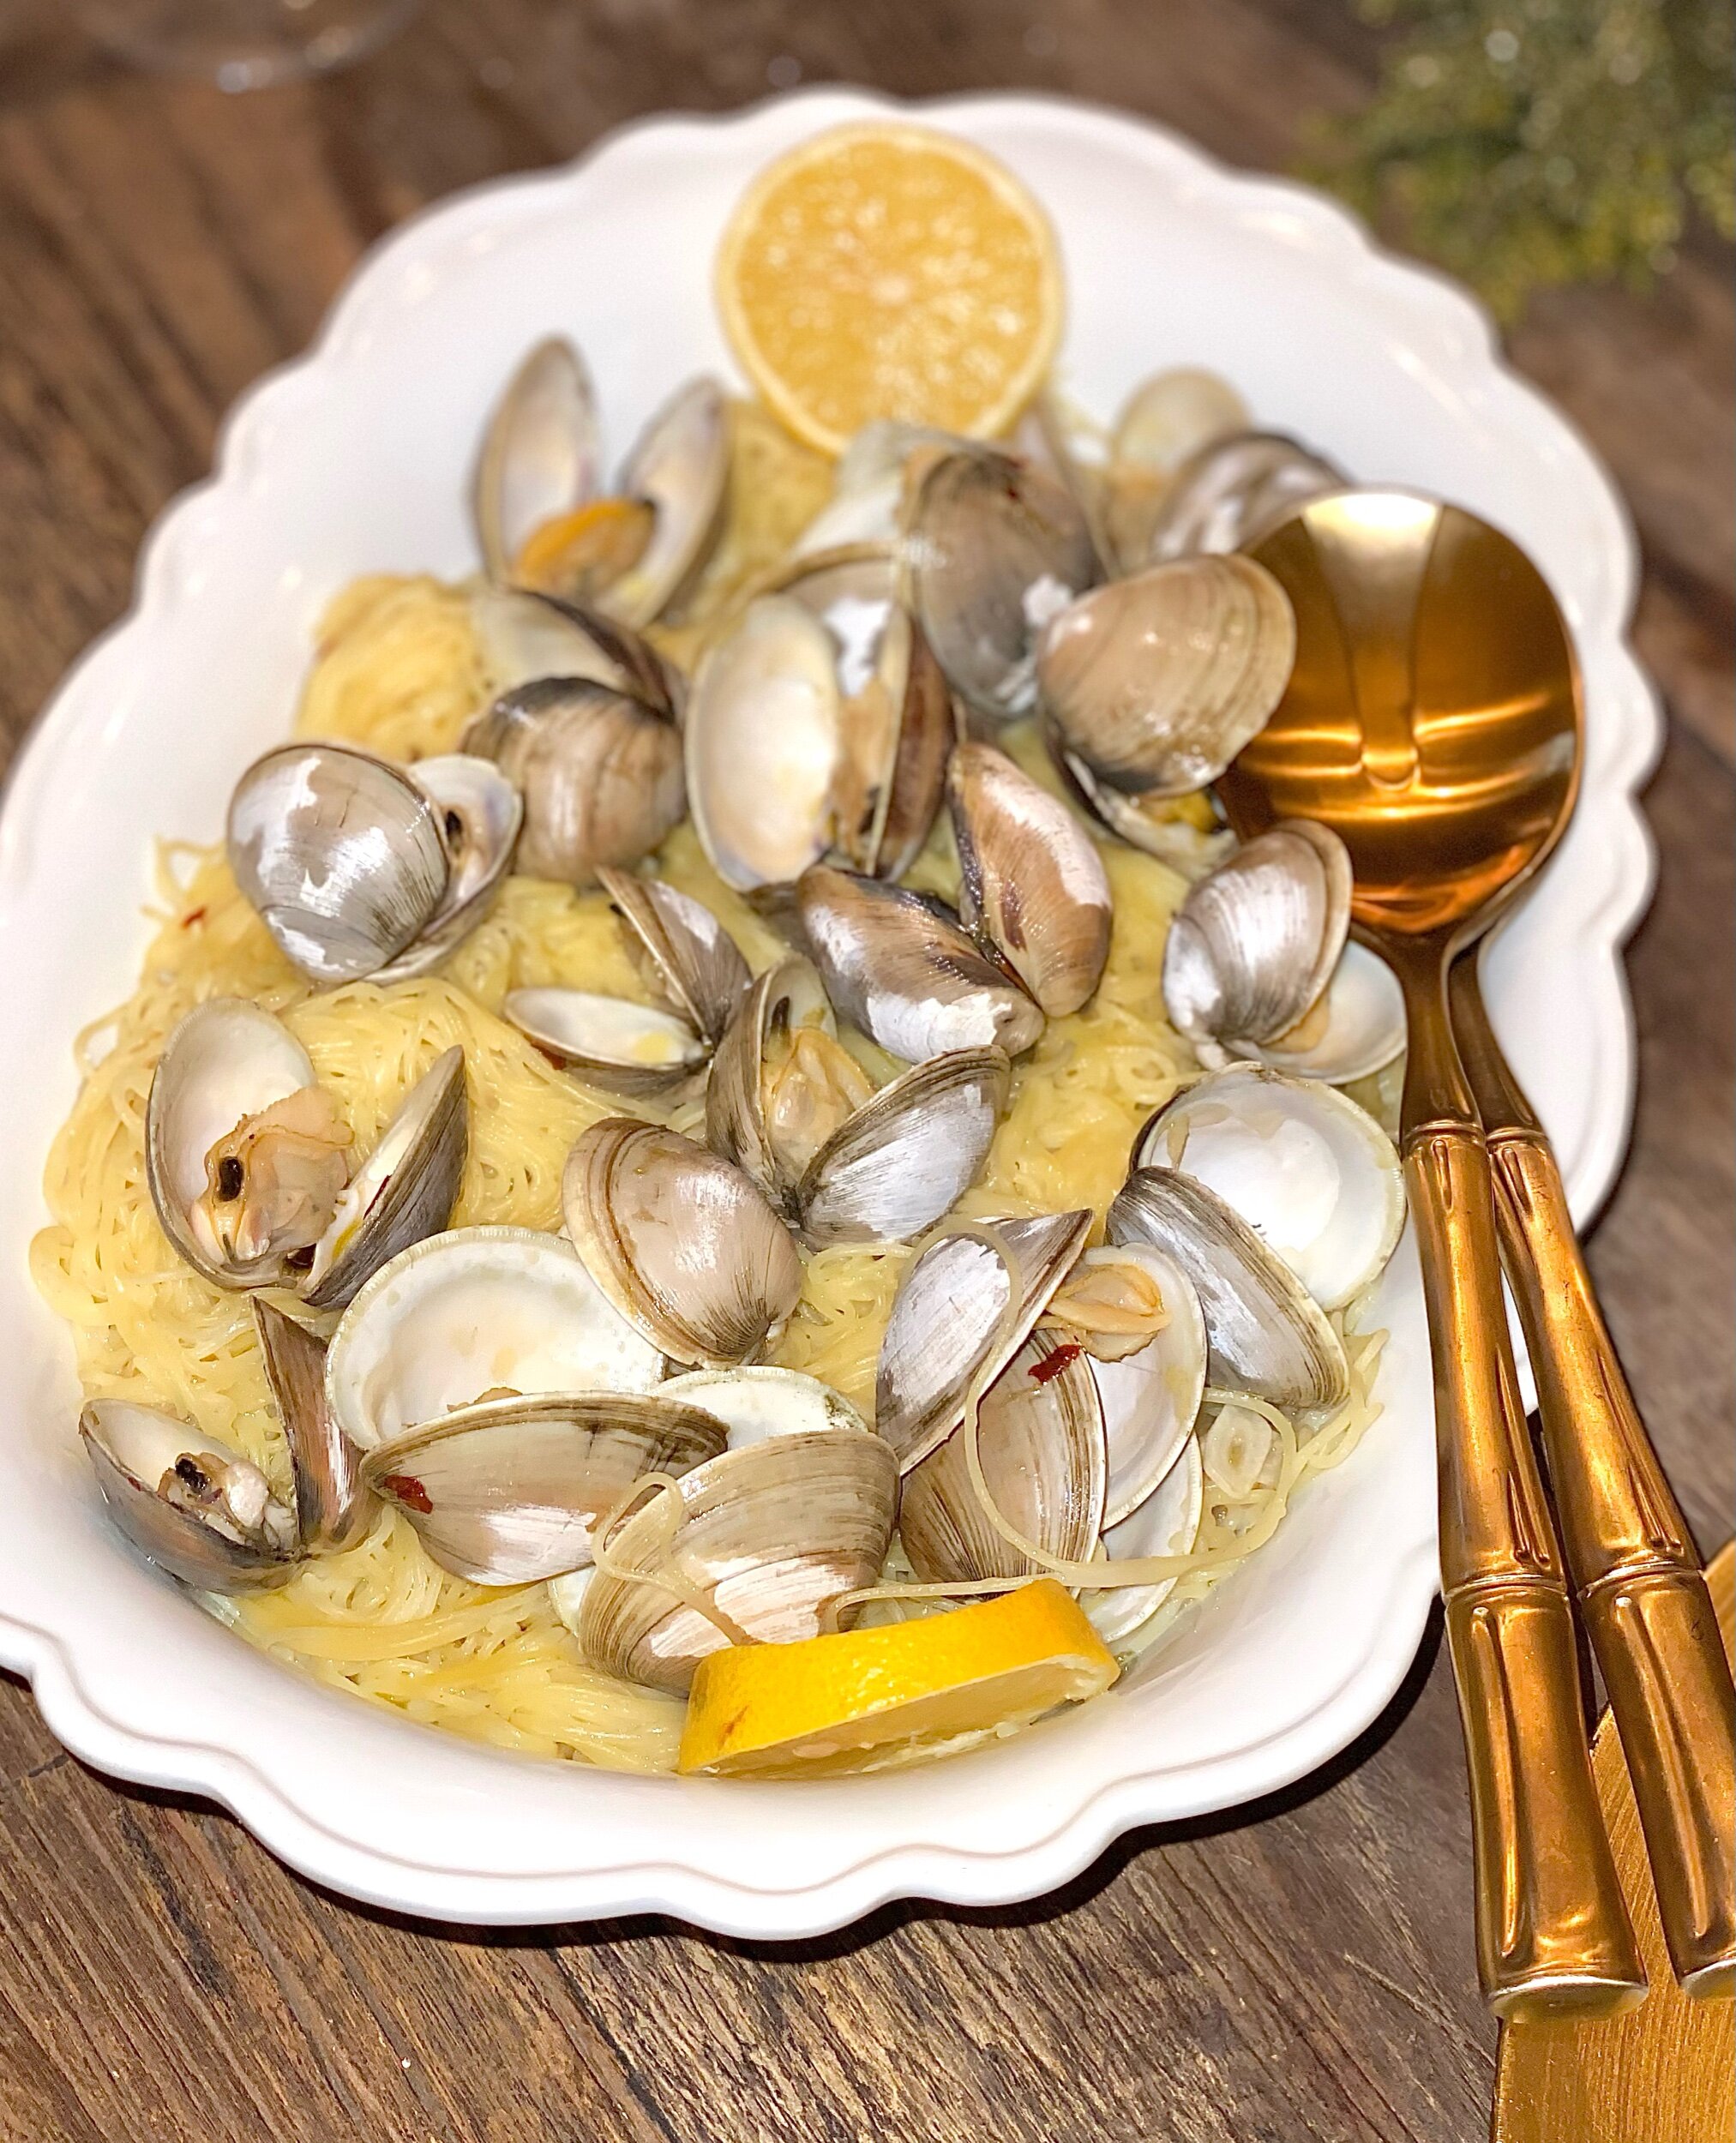
Lemon Capellini with Clams

December 18, 2020 Andrea LeTard
IMG_1080.jpeg

This recipe is a simple, clean, and healthy way to enjoy pasta. The aroma of lemon is delightful and the creamy olive oil makes it decadent without being too heavy. It’s also the perfect elegant dish to impress dinner guests!

1/2 cup olive oil

3 garlic cloves - thinly sliced by mandoline 

1/4 teaspoon red pepper flake 

Kosher salt and freshly cracked pepper 

1/4 cup white wine 

2 pounds clams - scrubbed clean 

1 pound capellini or angel hair pasta 

4 lemons - zested and juiced 

1/2 cup grated Parmesan 

Bring a large pot of heavily salted water to a boil. In a large, deep sauté pan, add the olive oil and heat over low heat. Add the garlic, pepper flake, and a heavy dash of salt and pepper. Cook for one minute or until fragrant. Add the wine and bring to a boil. Lower the heat to a simmer, add the clams, and cover the pan with a lid. Cook, covered, until clams have opened up - about 7 minutes. Discard any clams that didn’t open. Boil pasta in the large pot of water for about 2 to 3 minutes or until al dente. Using tongs, transfer the pasta directly into the pan with the clams with about 1/4 to 1/2 cup of pasta water. Add the lemon zest, juice, and Parmesan. Toss everything together and serve warm or at room temperature. Add more pasta water if the pasta noodles get dry or clumpy while sitting. 

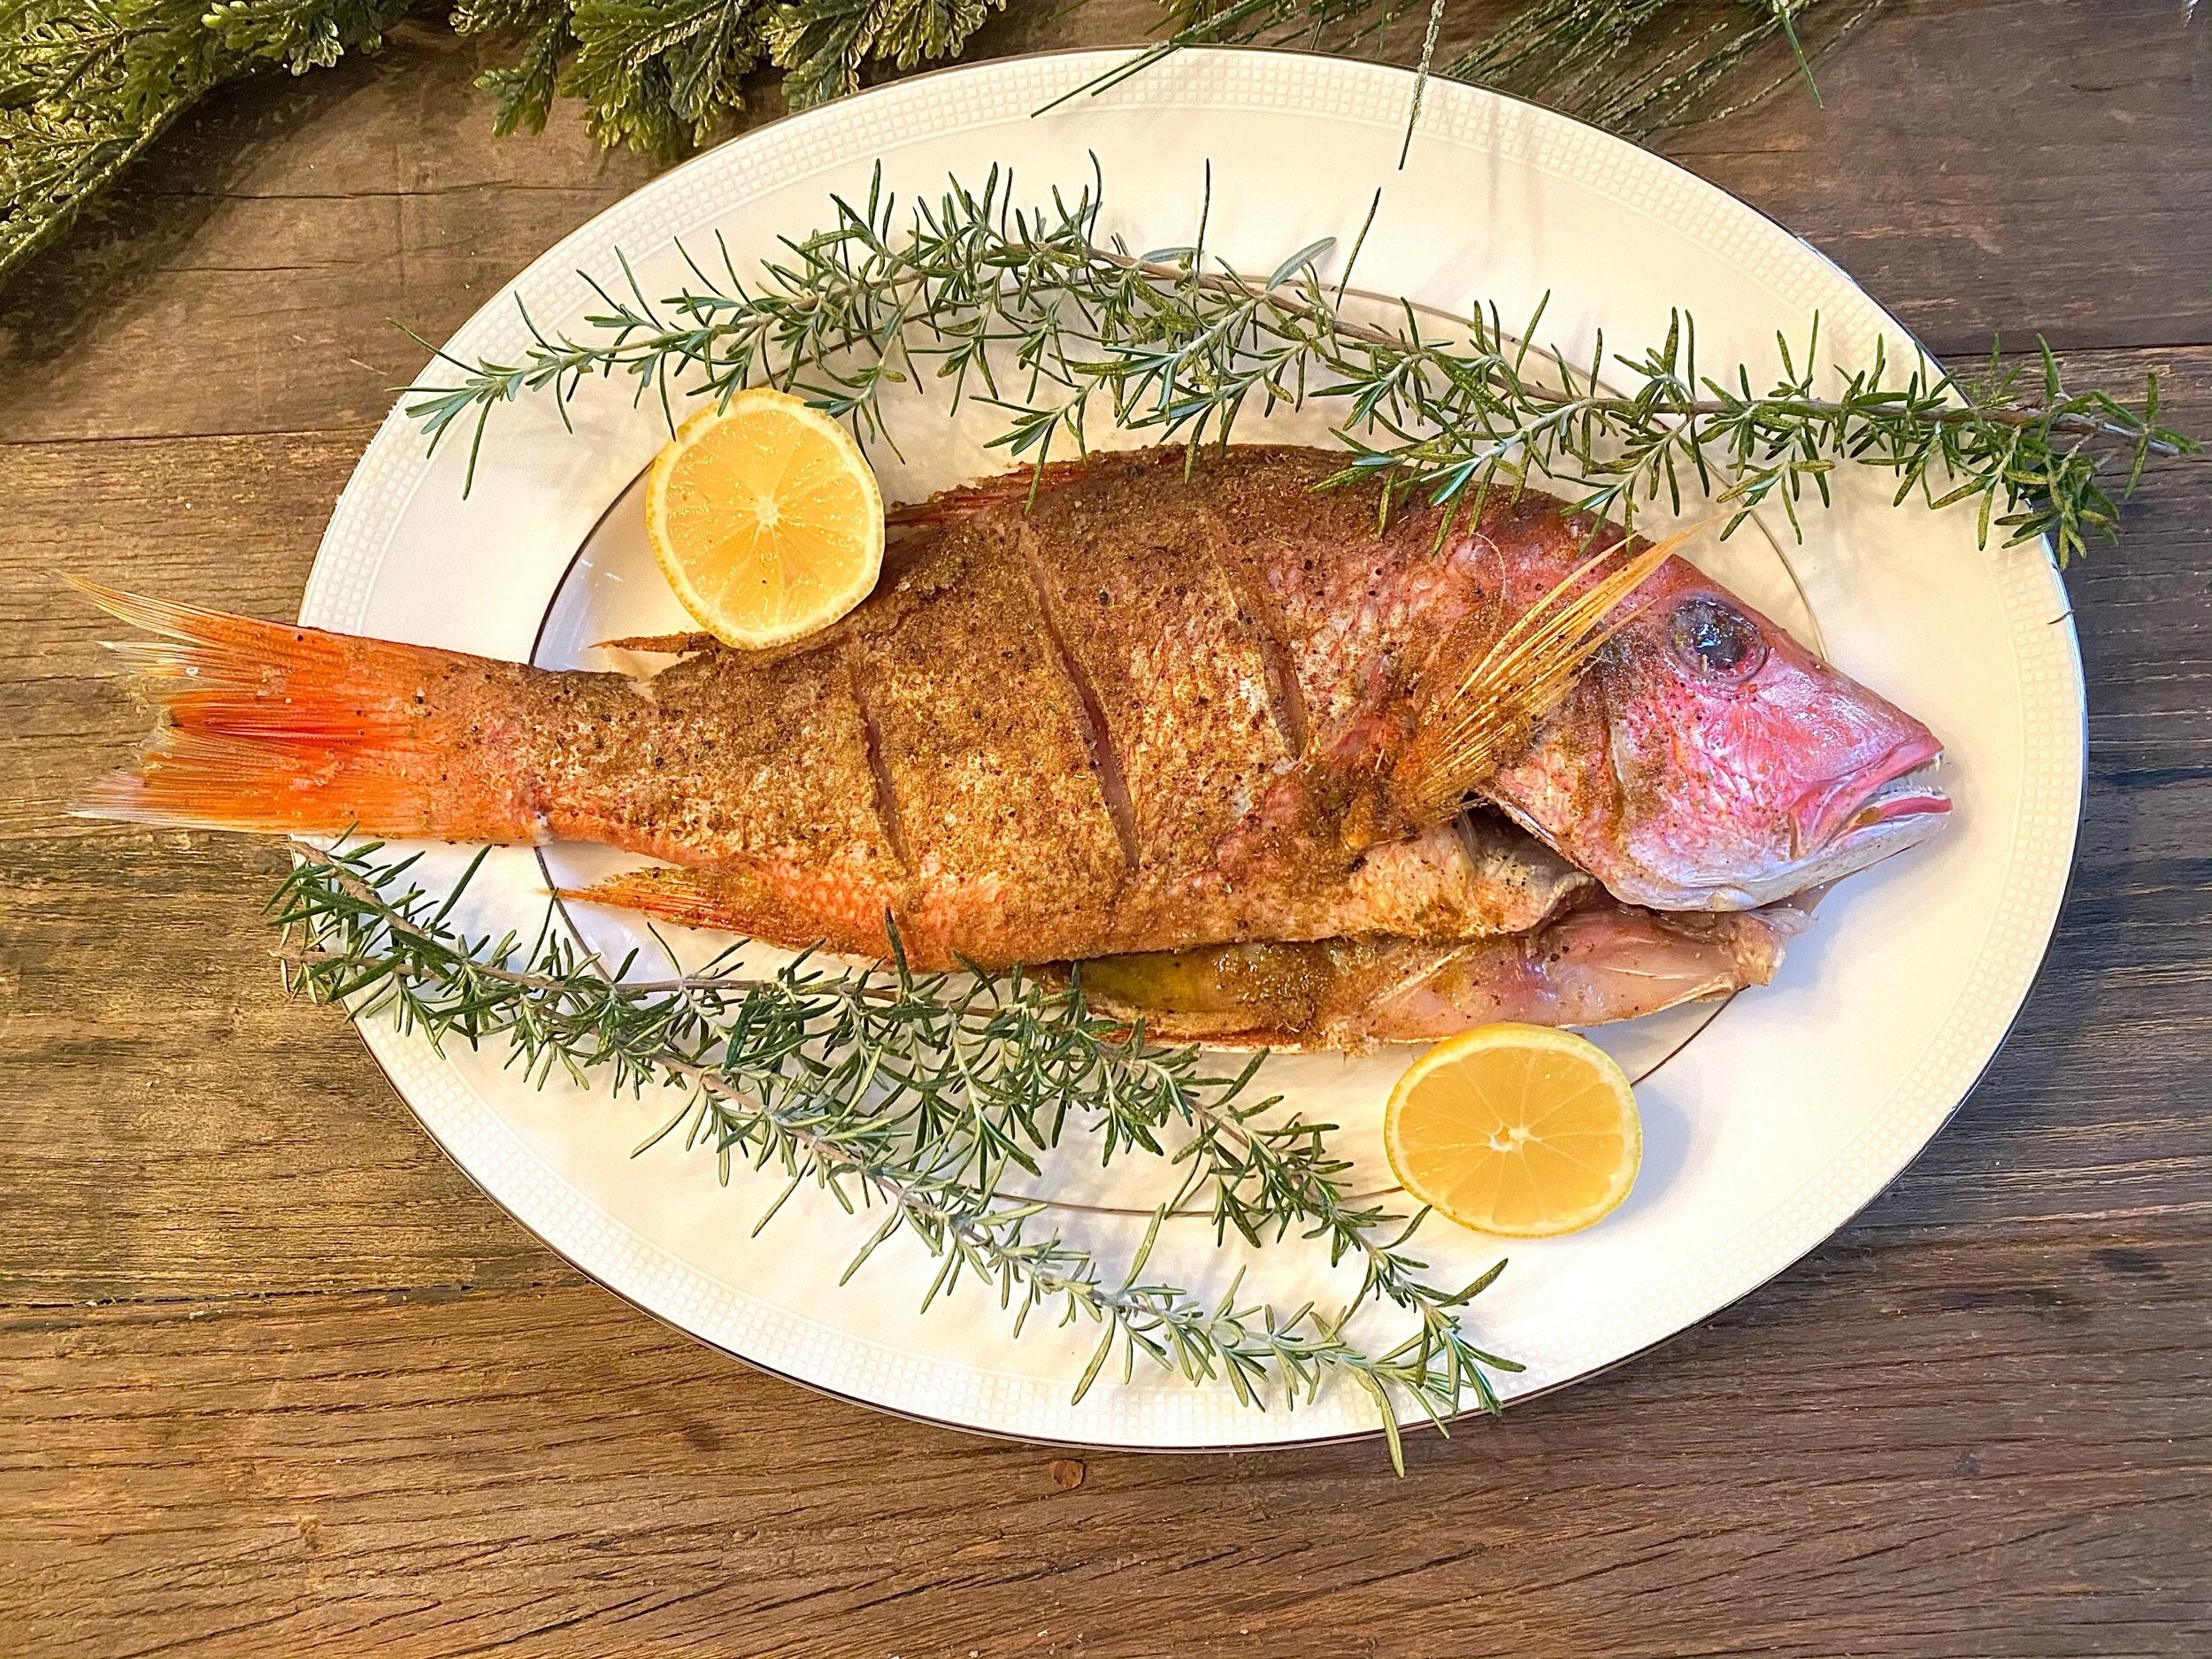
Easiest Whole Roasted Red Snapper

December 18, 2020 Andrea LeTard
IMG_1074.jpeg

Whole roasted fish is the easiest, healthiest, quickest meal to cook! Plus, who doesn’t love picking at a fish for hours at the dinner table? When you eat whole fish, you have to watch for bones so it forces you to eat slow, enjoy the sips of wine in between bites, and savor every moment at the dinner table with family and friends!

1 whole large red snapper - gutted, cleaned, scaled 

Kosher salt and freshly cracked pepper 

2 lemon slices + 1 lemon for serving 

2 stems rosemary + more for garnish 

1 teaspoon cumin

1 teaspoon garlic powder

1 teaspoon coriander 

Good quality, fruity olive oil 

Preheat oven to 425 degrees. Rinse and pat the snapper dry and place on a baking sheet. Cut 3 slits on each side of the fish. Salt and pepper the cavity (belly) and both sides generously, pressing to adhere. Stuff the cavity with lemon slices and rosemary. In a small bowl, mix together the cumin, garlic powder, and coriander. Sprinkle on both sides of the fish, pressing to adhere. Drizzle olive oil generously over the top. Place in the oven and roast for about 25 to 30 minutes or until cooked through and easy to flake with a fork. Serve whole with more olive oil drizzled atop and fresh squeezed lemon juice. Garnish with rosemary if desired. 

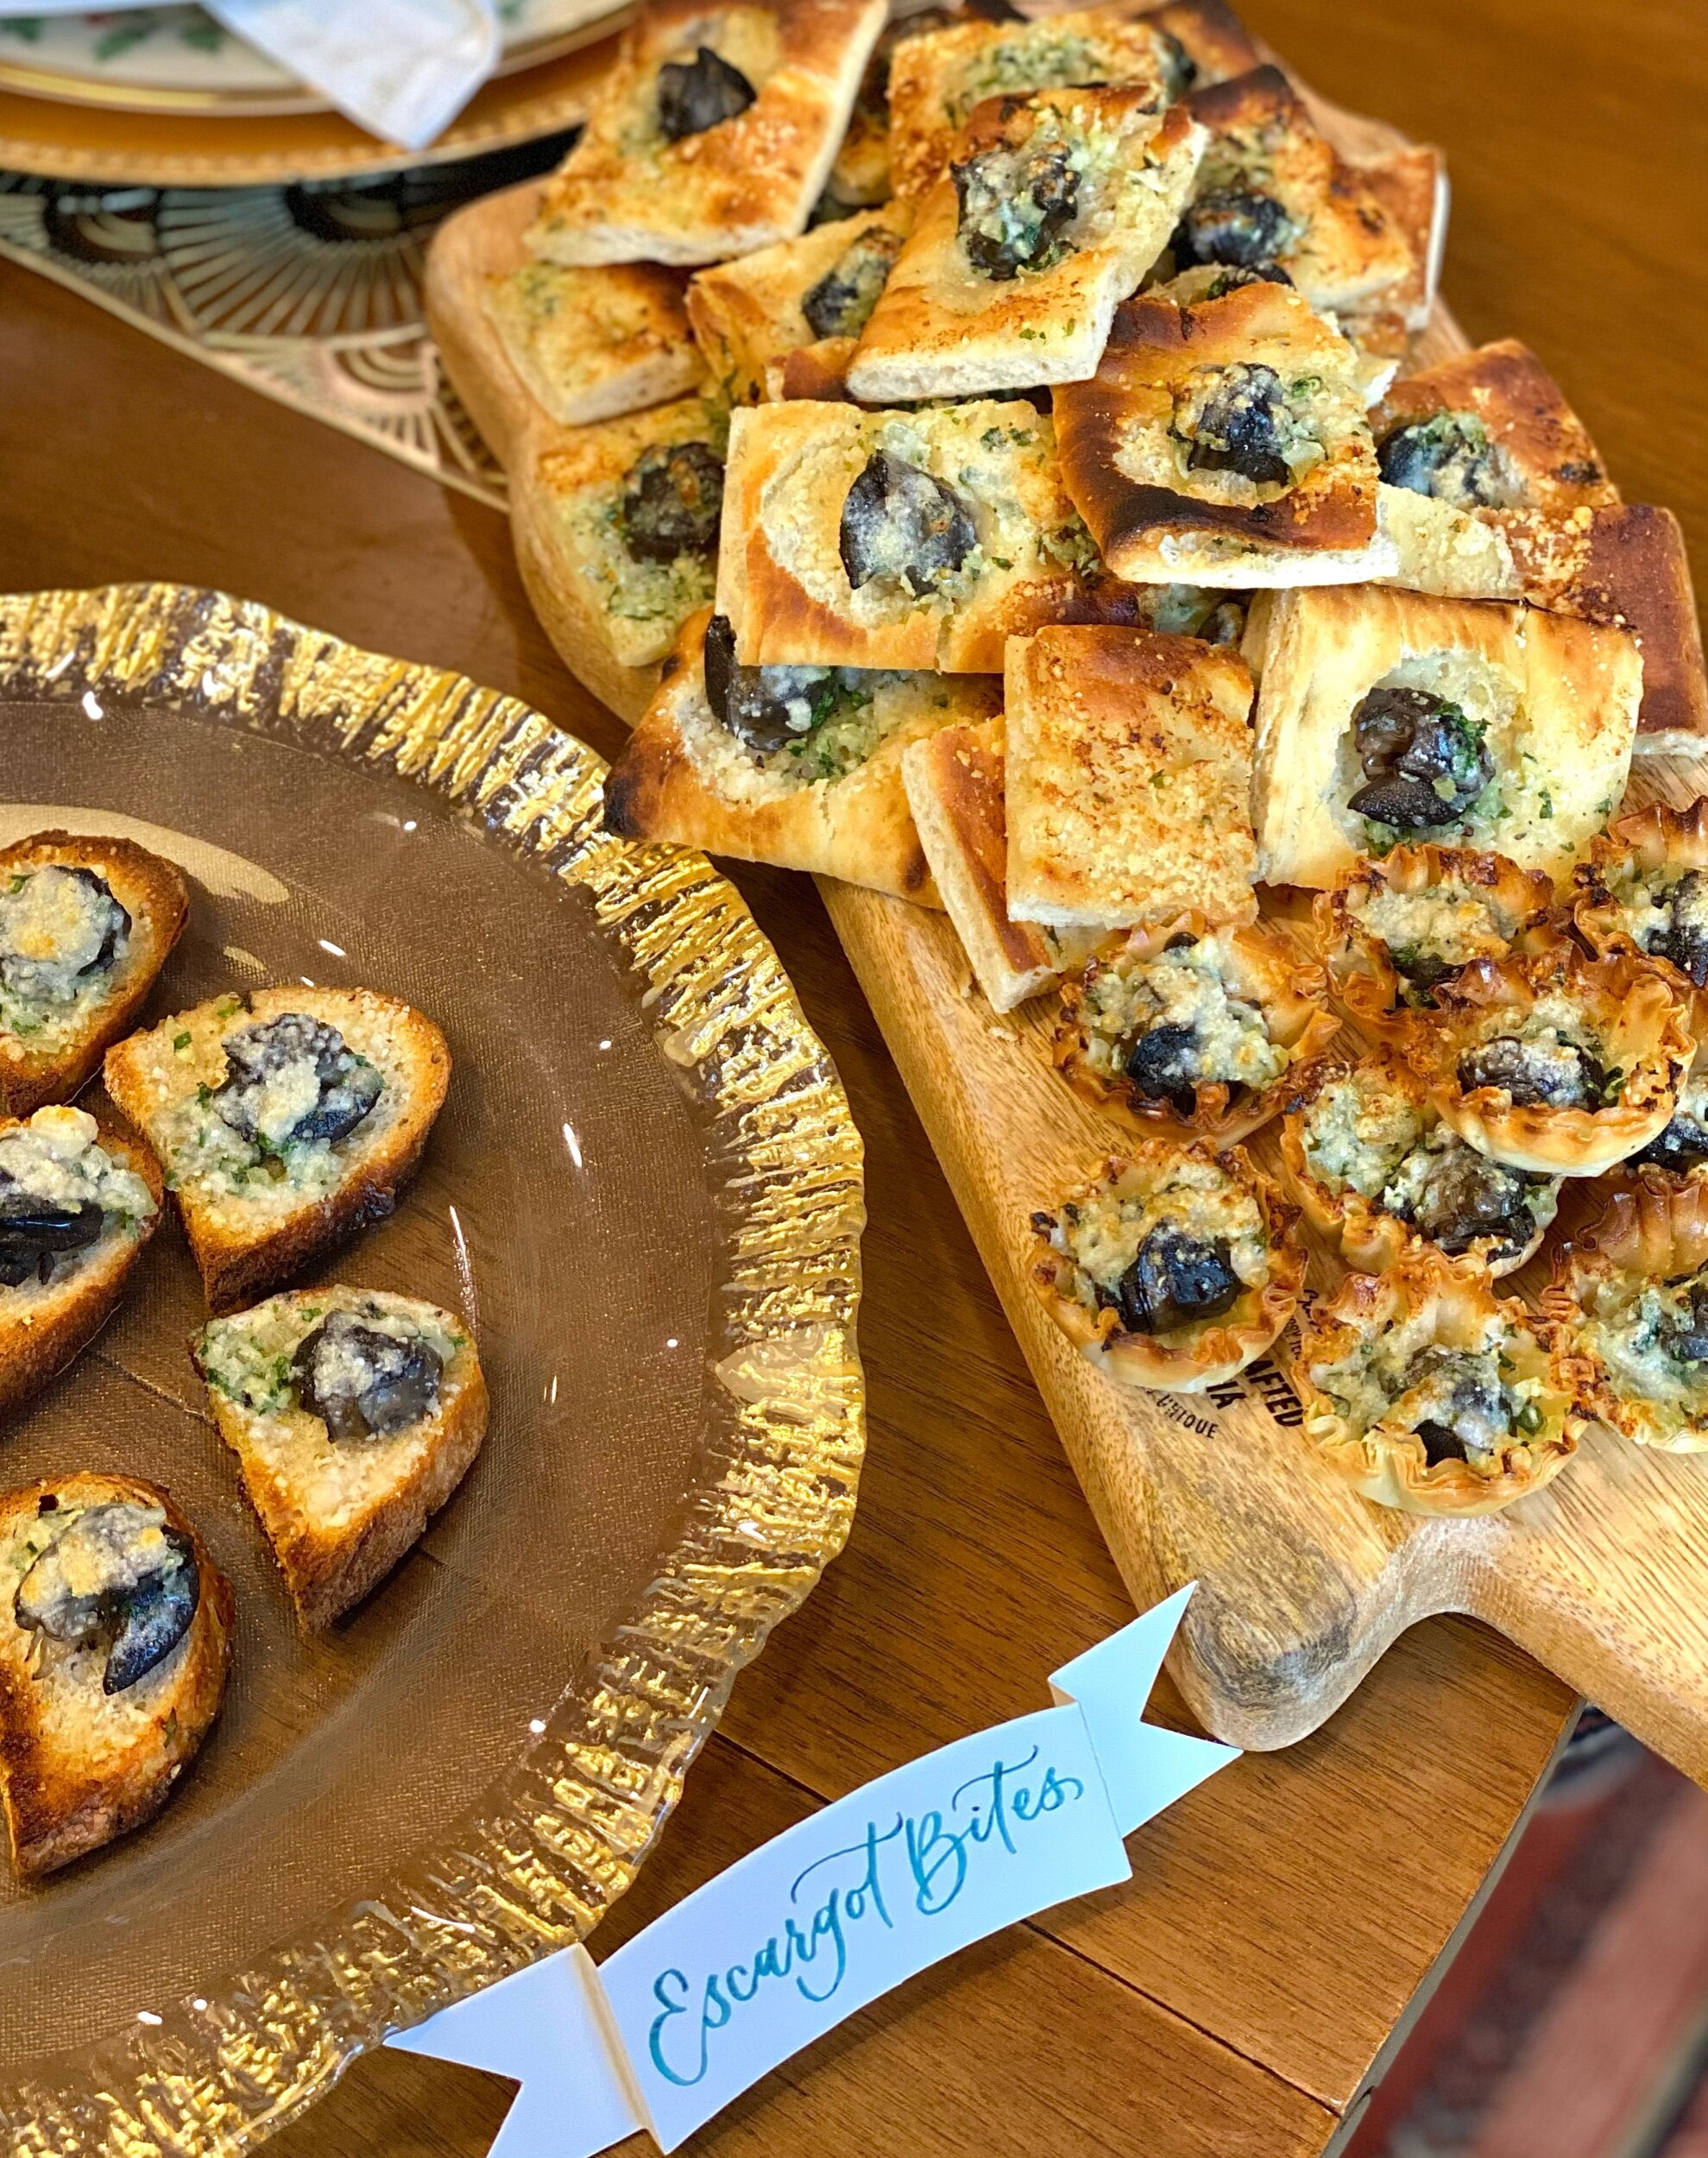
French Escargot 3 Ways

December 9, 2020 Andrea LeTard
IMG_0551.jpeg
IMG_0561.jpeg

Escargot is a very common bite of food in France - as a matter of fact, I can’t think of many restaurants I’ve been to in France that didn’t have it on their menu in some form. Unfortunately, sometimes these little bites of goodness are very misunderstood in the US. Maybe it’s because we didn’t grow up eating it? Maybe it’s because it’s not menus at most restaurants? Either way, I’m here to tell y’all, we missed out! “Snails” may not sound like the most appetizing food but I’m here to tell you, THEY ARE! I went to Paris many years ago and fell completely and utterly in love with them. 

They’re truly one of my favorite foods that I tend to only make at home for very special occasions. That’s why they’re perfect for the holidays! And I’m here to help you fall in love with them if you think you’ve never liked them before. They’re traditionally served in individualized ramekins as a starter or first course - served with a side of bread to dip in the garlic, butter goodness! Unless you’re the biggest escargot fan in the world, I’ve never seen the point in purchasing a bunch of these. I like serving them as small bite appetizer. Or even better, I show you here how to make your own ramekin out of bread - combining the traditional way + the side of bread normally served on the side. 

So what are escargot like and why will you love them? I’ll start with why you’ll love them. Three words: garlic, butter, bread, and sometimes Parmesan cheese. That’s pretty much what the dish is made up of with a little addition (the escargot itself). The texture can be described like a mushroom - as a matter of fact, we went to a restaurant once in Carmel, CA that had “vegetarian escargot” on the menu, and the only difference was a mushroom replaced the snail. I promise, there’s nothing like them and once you try one, you’ll be addicted! Finally, another reason to love them: they’re such an elegant, fancy dish to serve that will throughly impress dinner guests and they’re quite inexpensive! I buy the canned version and they’re right around $5 a can. You can also purchase the snail shells separately at certain stores (or I’ve heard order them online) if you want to serve them extra traditional! These three recipes require no shell. So, did I sell you on them? I certainly hope so because if I didn’t you will definitely be missing out! 

Basic Butter Recipe:

*This is enough for 24 escargot - the standard amount in a can. You can use all of this for one of the three ways or split them in thirds for samples of all three. Whatever floats your boat!

2 sticks salted butter - softened 

1/3 cup roughly chopped shallots 

1/4 cup cup parsley leaves - chopped 

4 garlic cloves - chopped

Pinch salt and pepper 

Place the butter, shallots, parsley, garlic, salt, and pepper in a food processor. Process until the mixture comes together and everything is finely minced into the butter. Set aside or refrigerate until ready to use. If refrigerated, bring to room temperature to soften before using. 

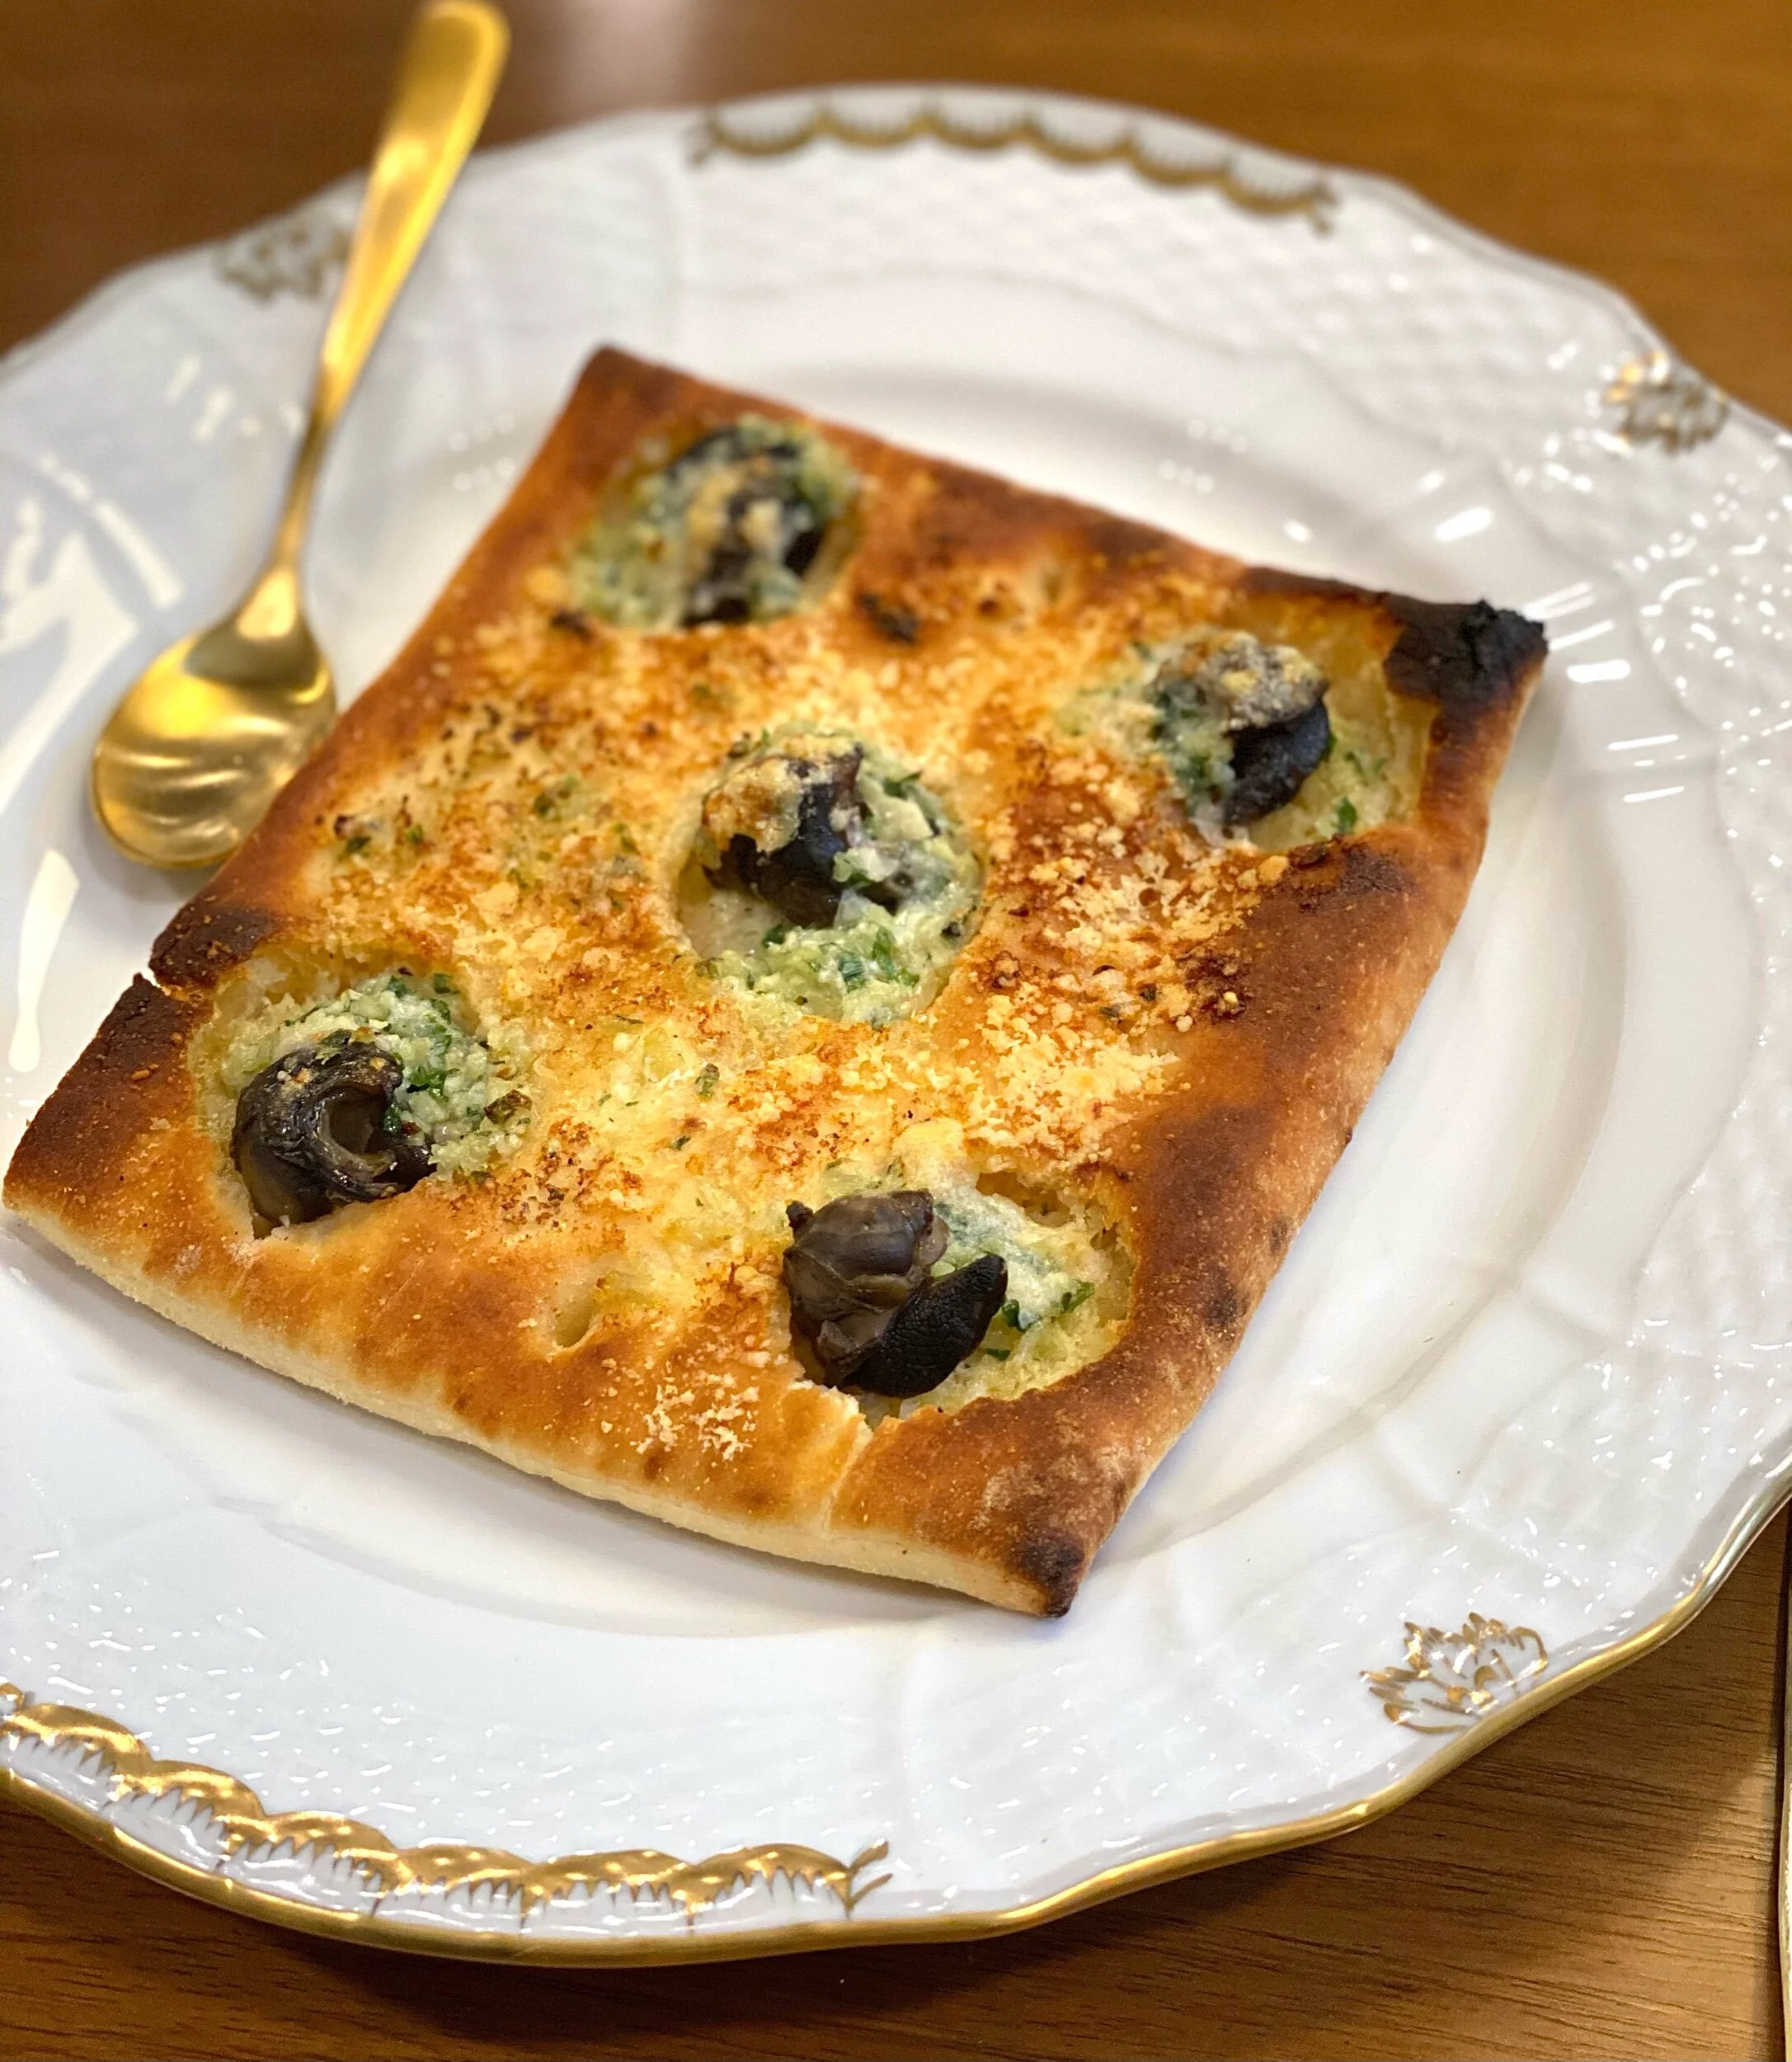
Way 1: Bread “Ceramics”

IMG_0539.jpeg

4 flatbreads or focaccia cut into fourths 

1 can (24 count) escargot 

Butter mixture 

Parmesan 

Preheat oven to broil. Place bread “dishes” on baking sheets. Using a tiny circular cookie cutter or a sharp knife, lightly cut 5 to 6 circles (each big enough to fit a snail) in the top of the bread - be sure to not go all the way through - then scoop the top layer of the bread off each circle. The circles should be should be like tiny, little bread bowls. Place a snail in each hole and cover with butter mixture - you can even spread the extra butter all over the bread around each hole. Sprinkle Parmesan over the top and broil for a few minutes until brown and bubbly. 

Way 2: Crostini 

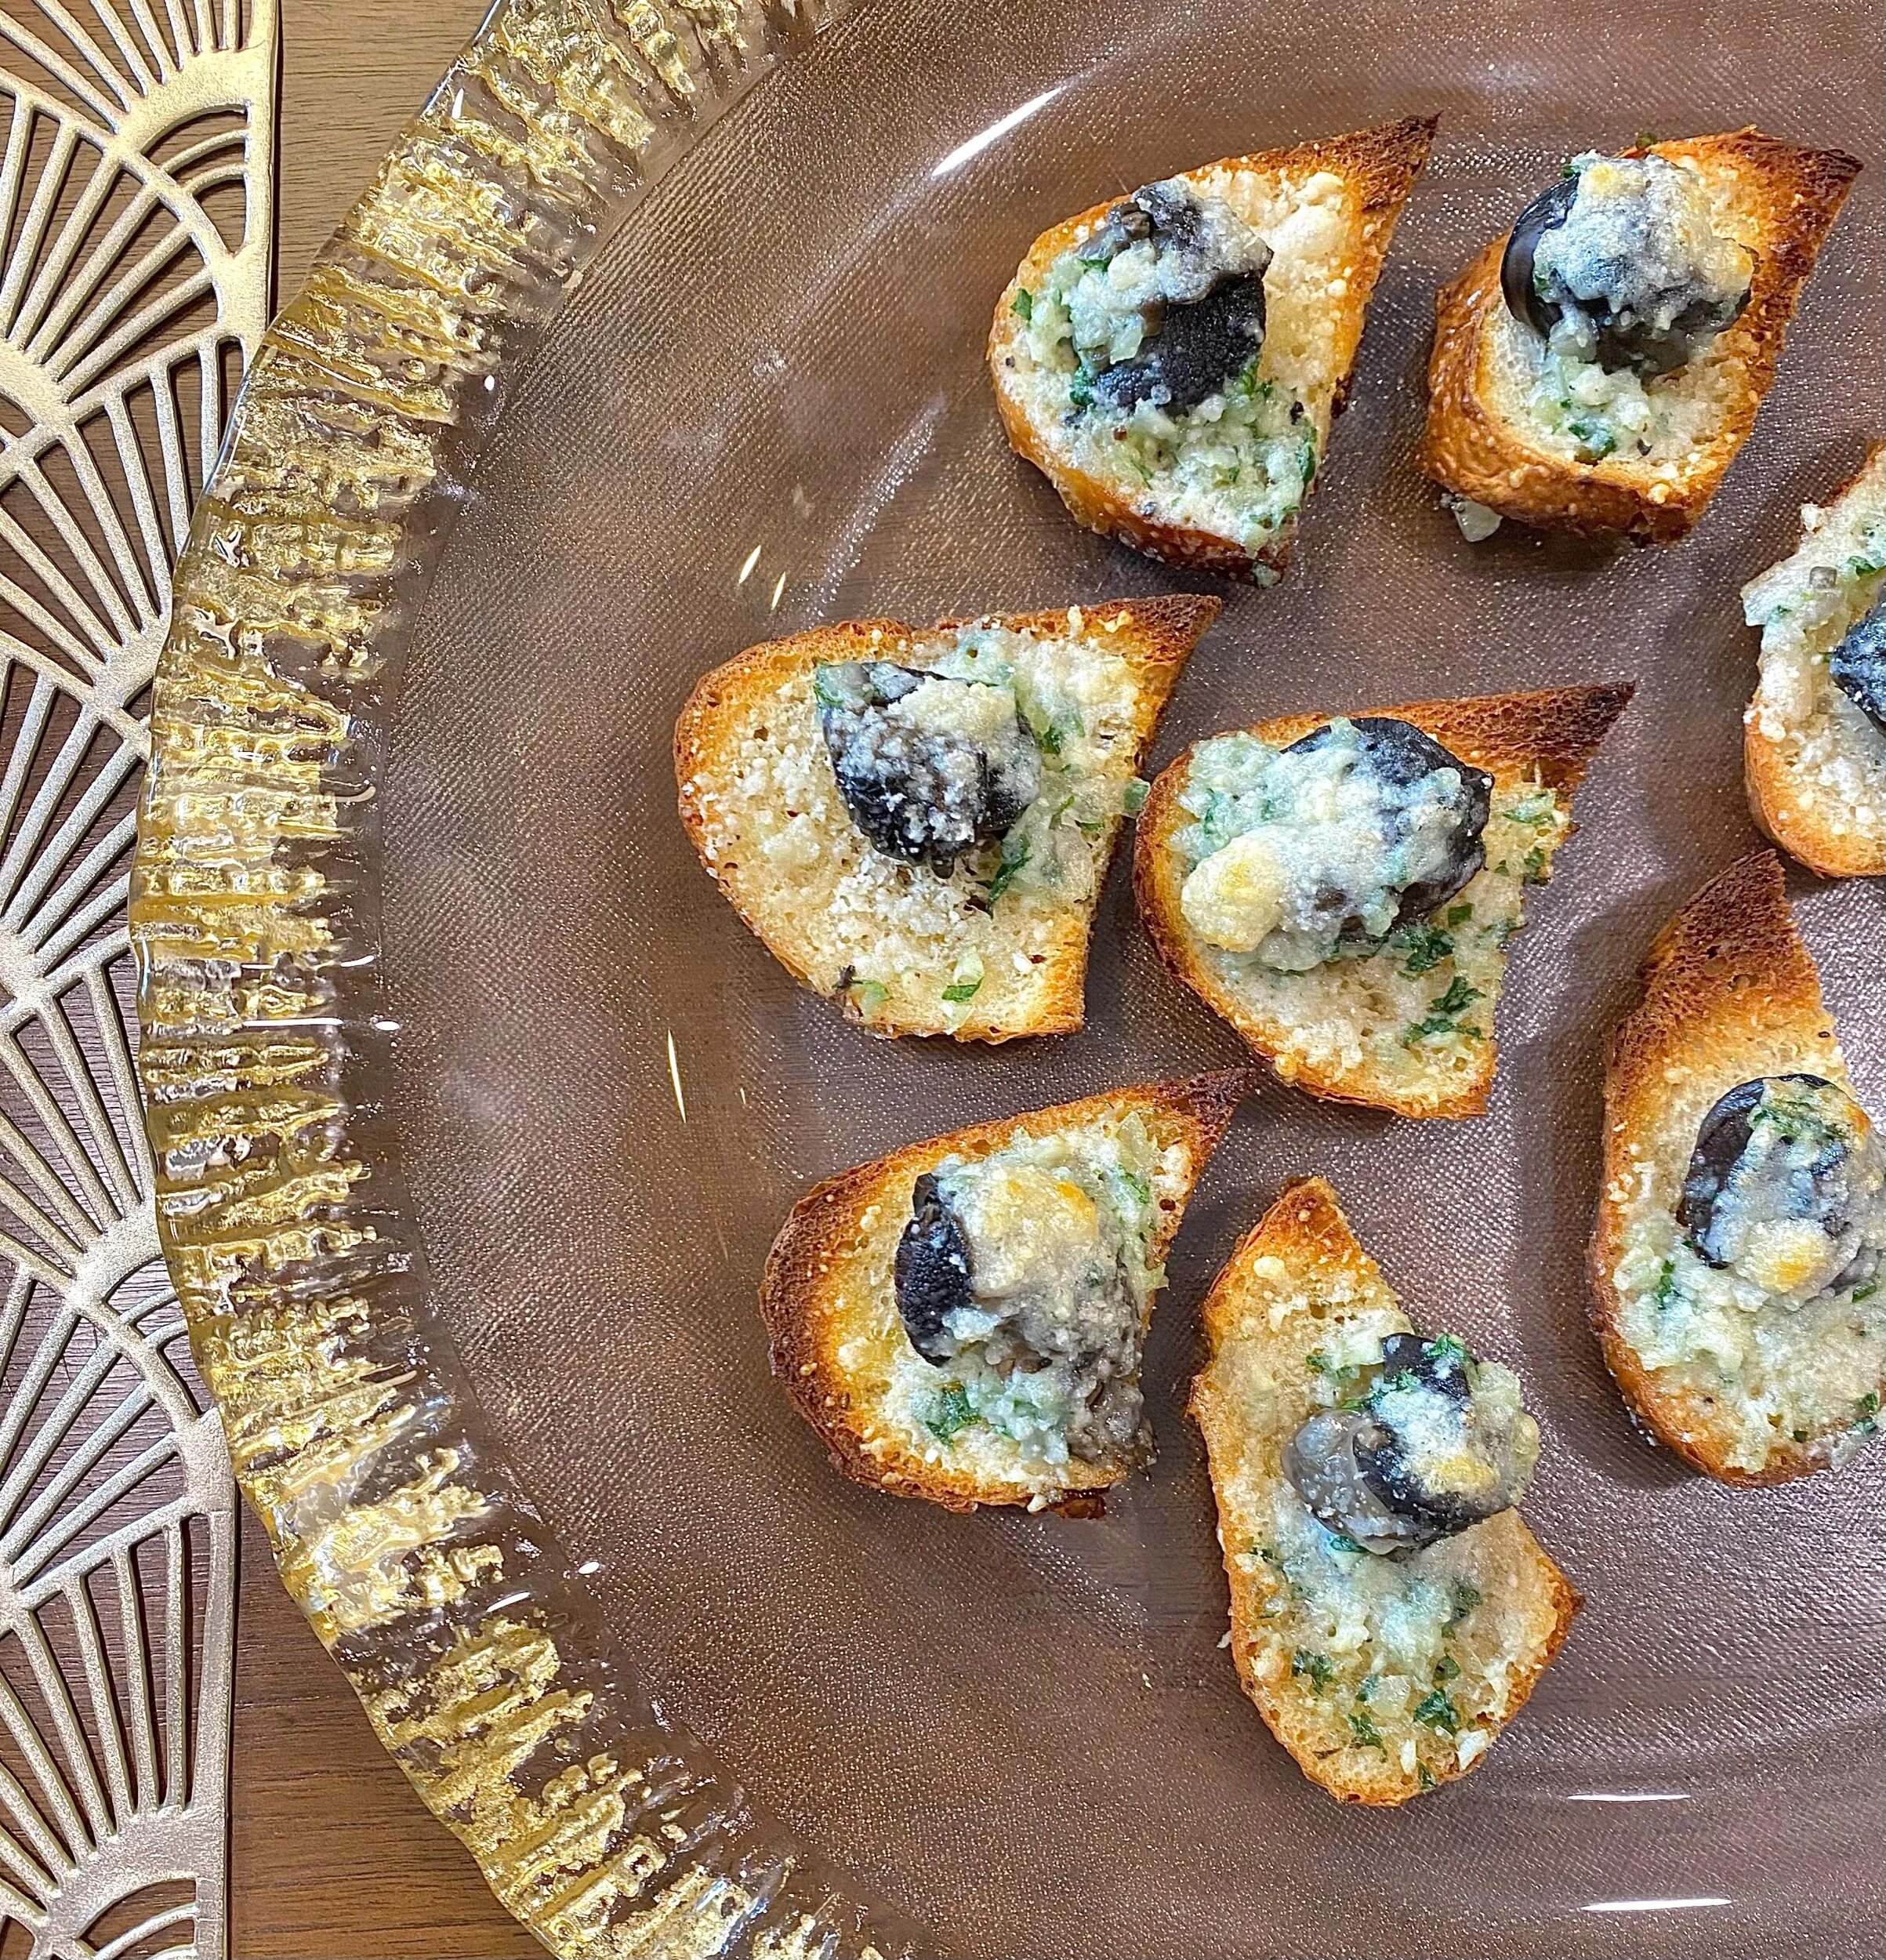
IMG_0553.jpeg

24 crostini

1 can (24 count) escargot 

Butter mixture 

Parmesan 

Preheat oven to broil. Line the crostini on a baking sheet. Place a snail on each crostini and cover with a large dollop of the butter mixture (approximately 1/2 tablespoon). Lightly sprinkle with Parmesan cheese and broil for a few minutes until Golden and bubbly. 

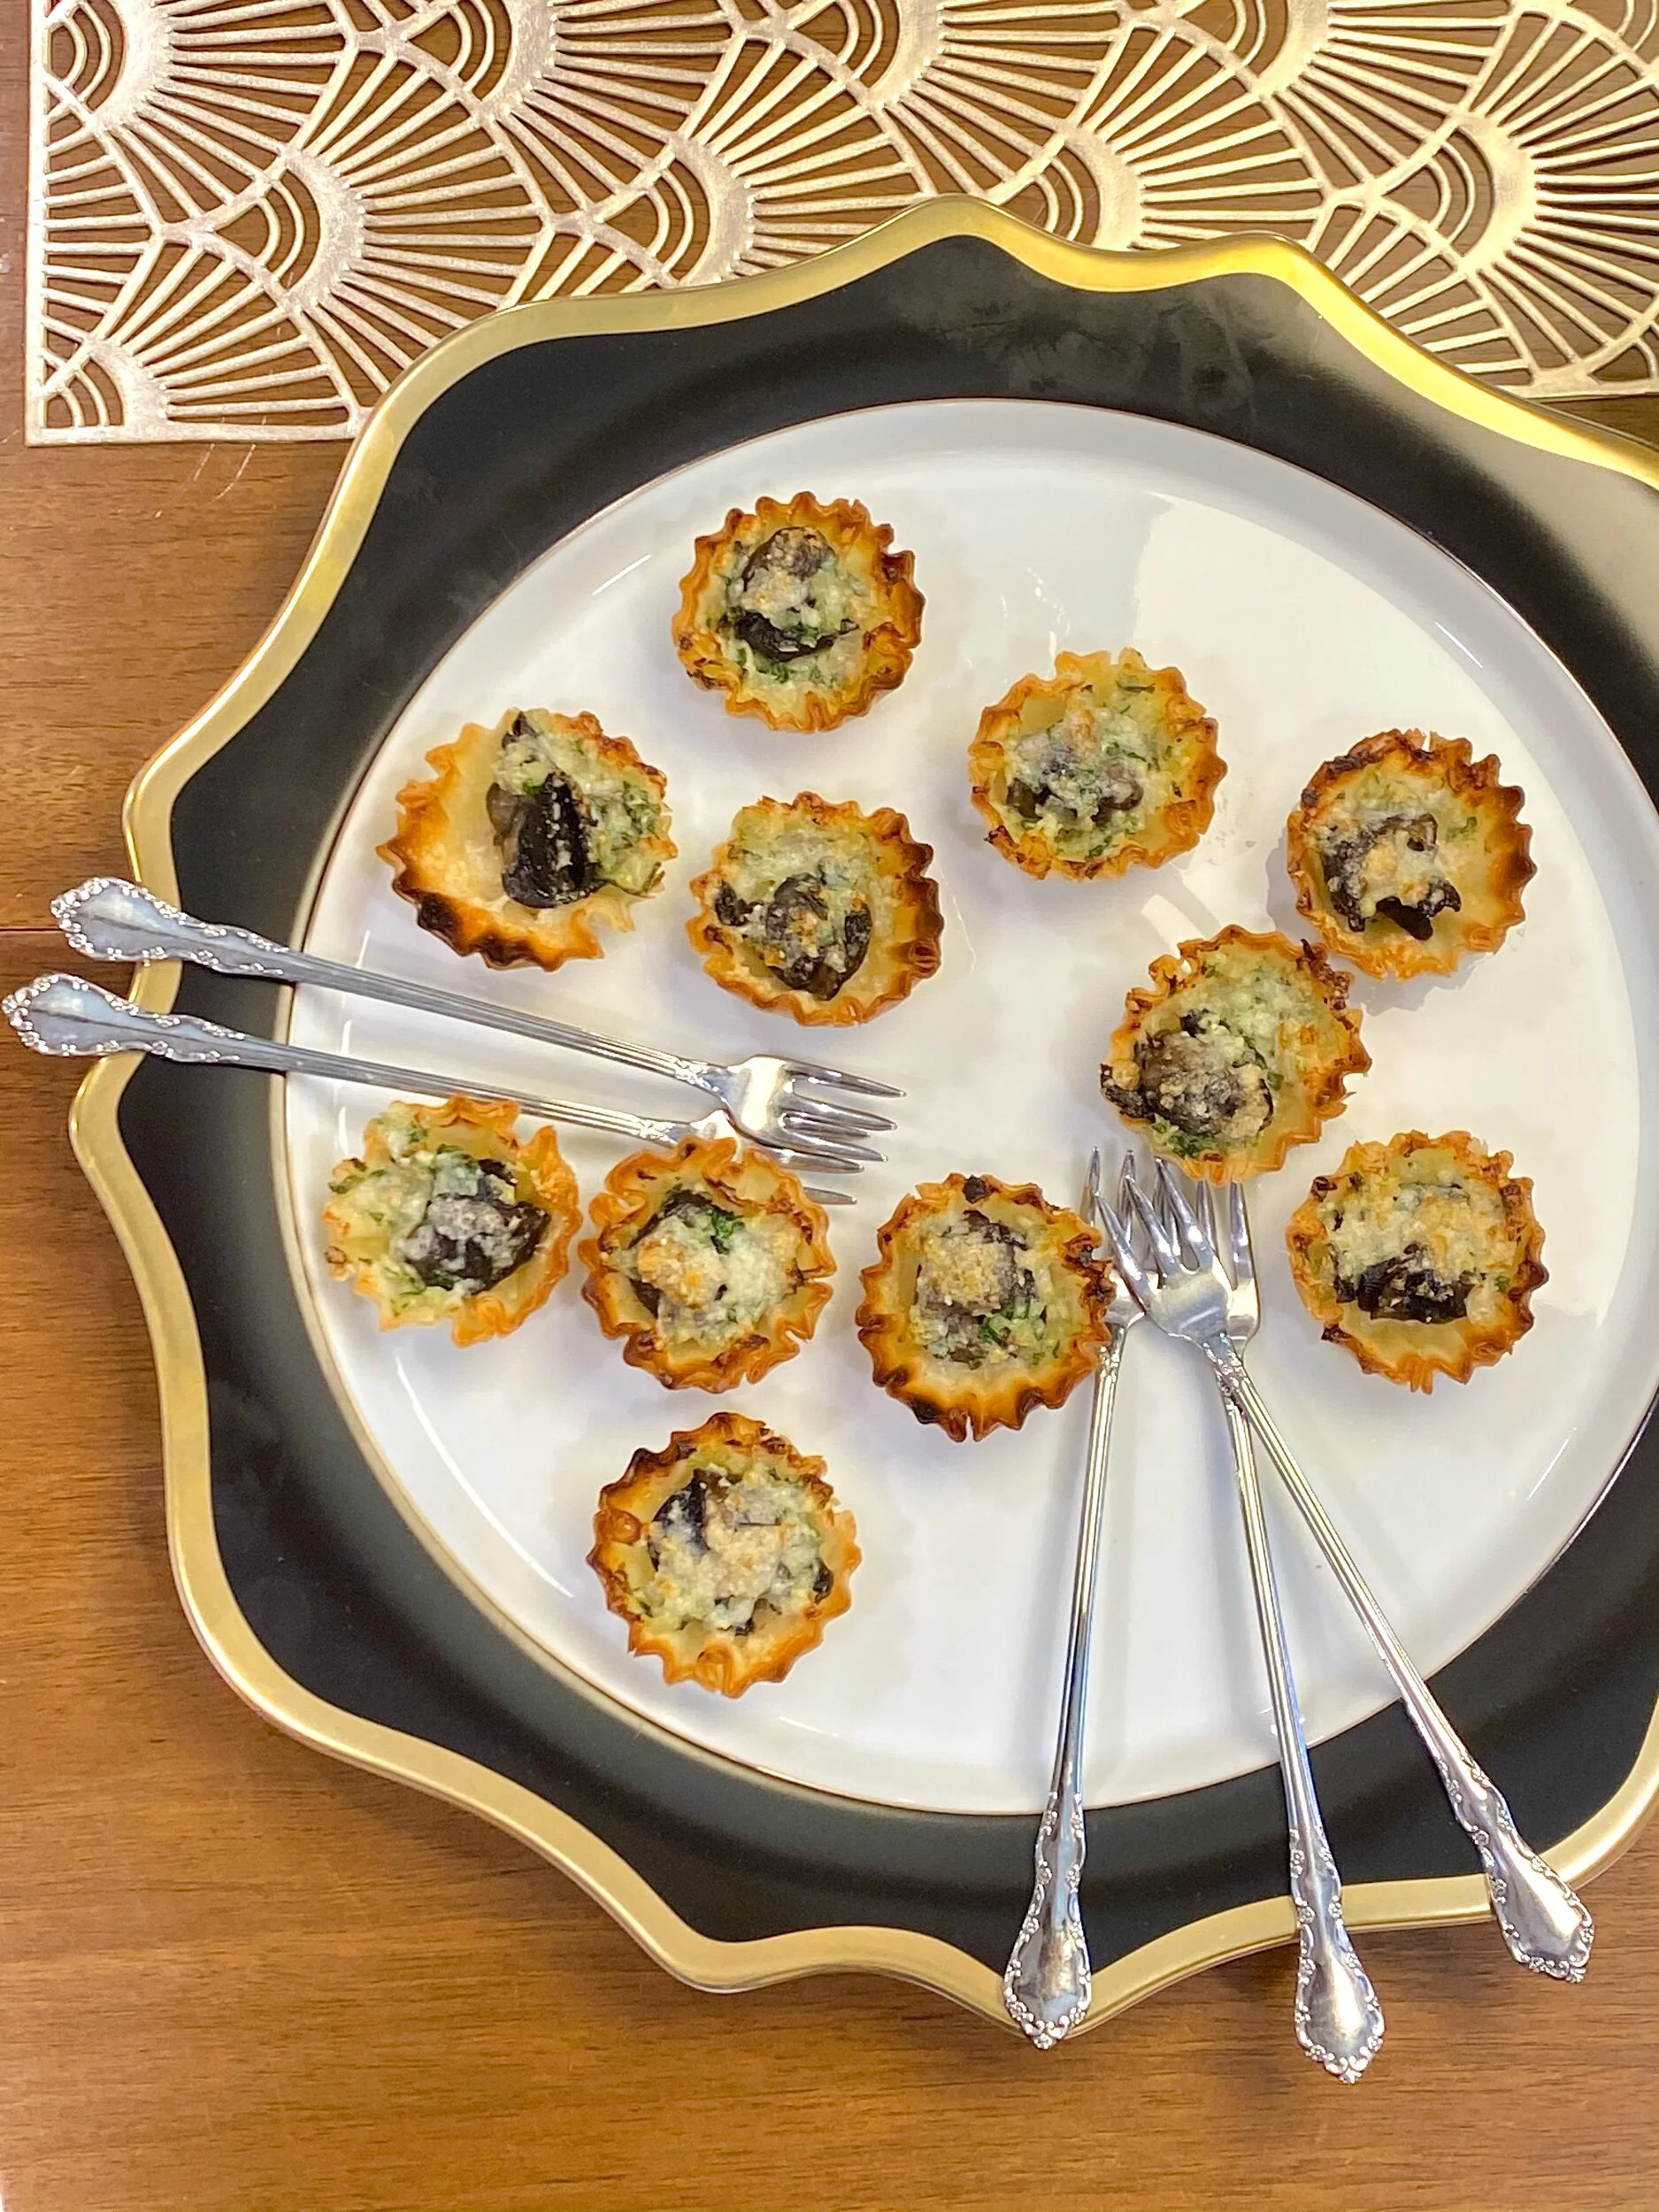
Way 3: Phyllo Cups

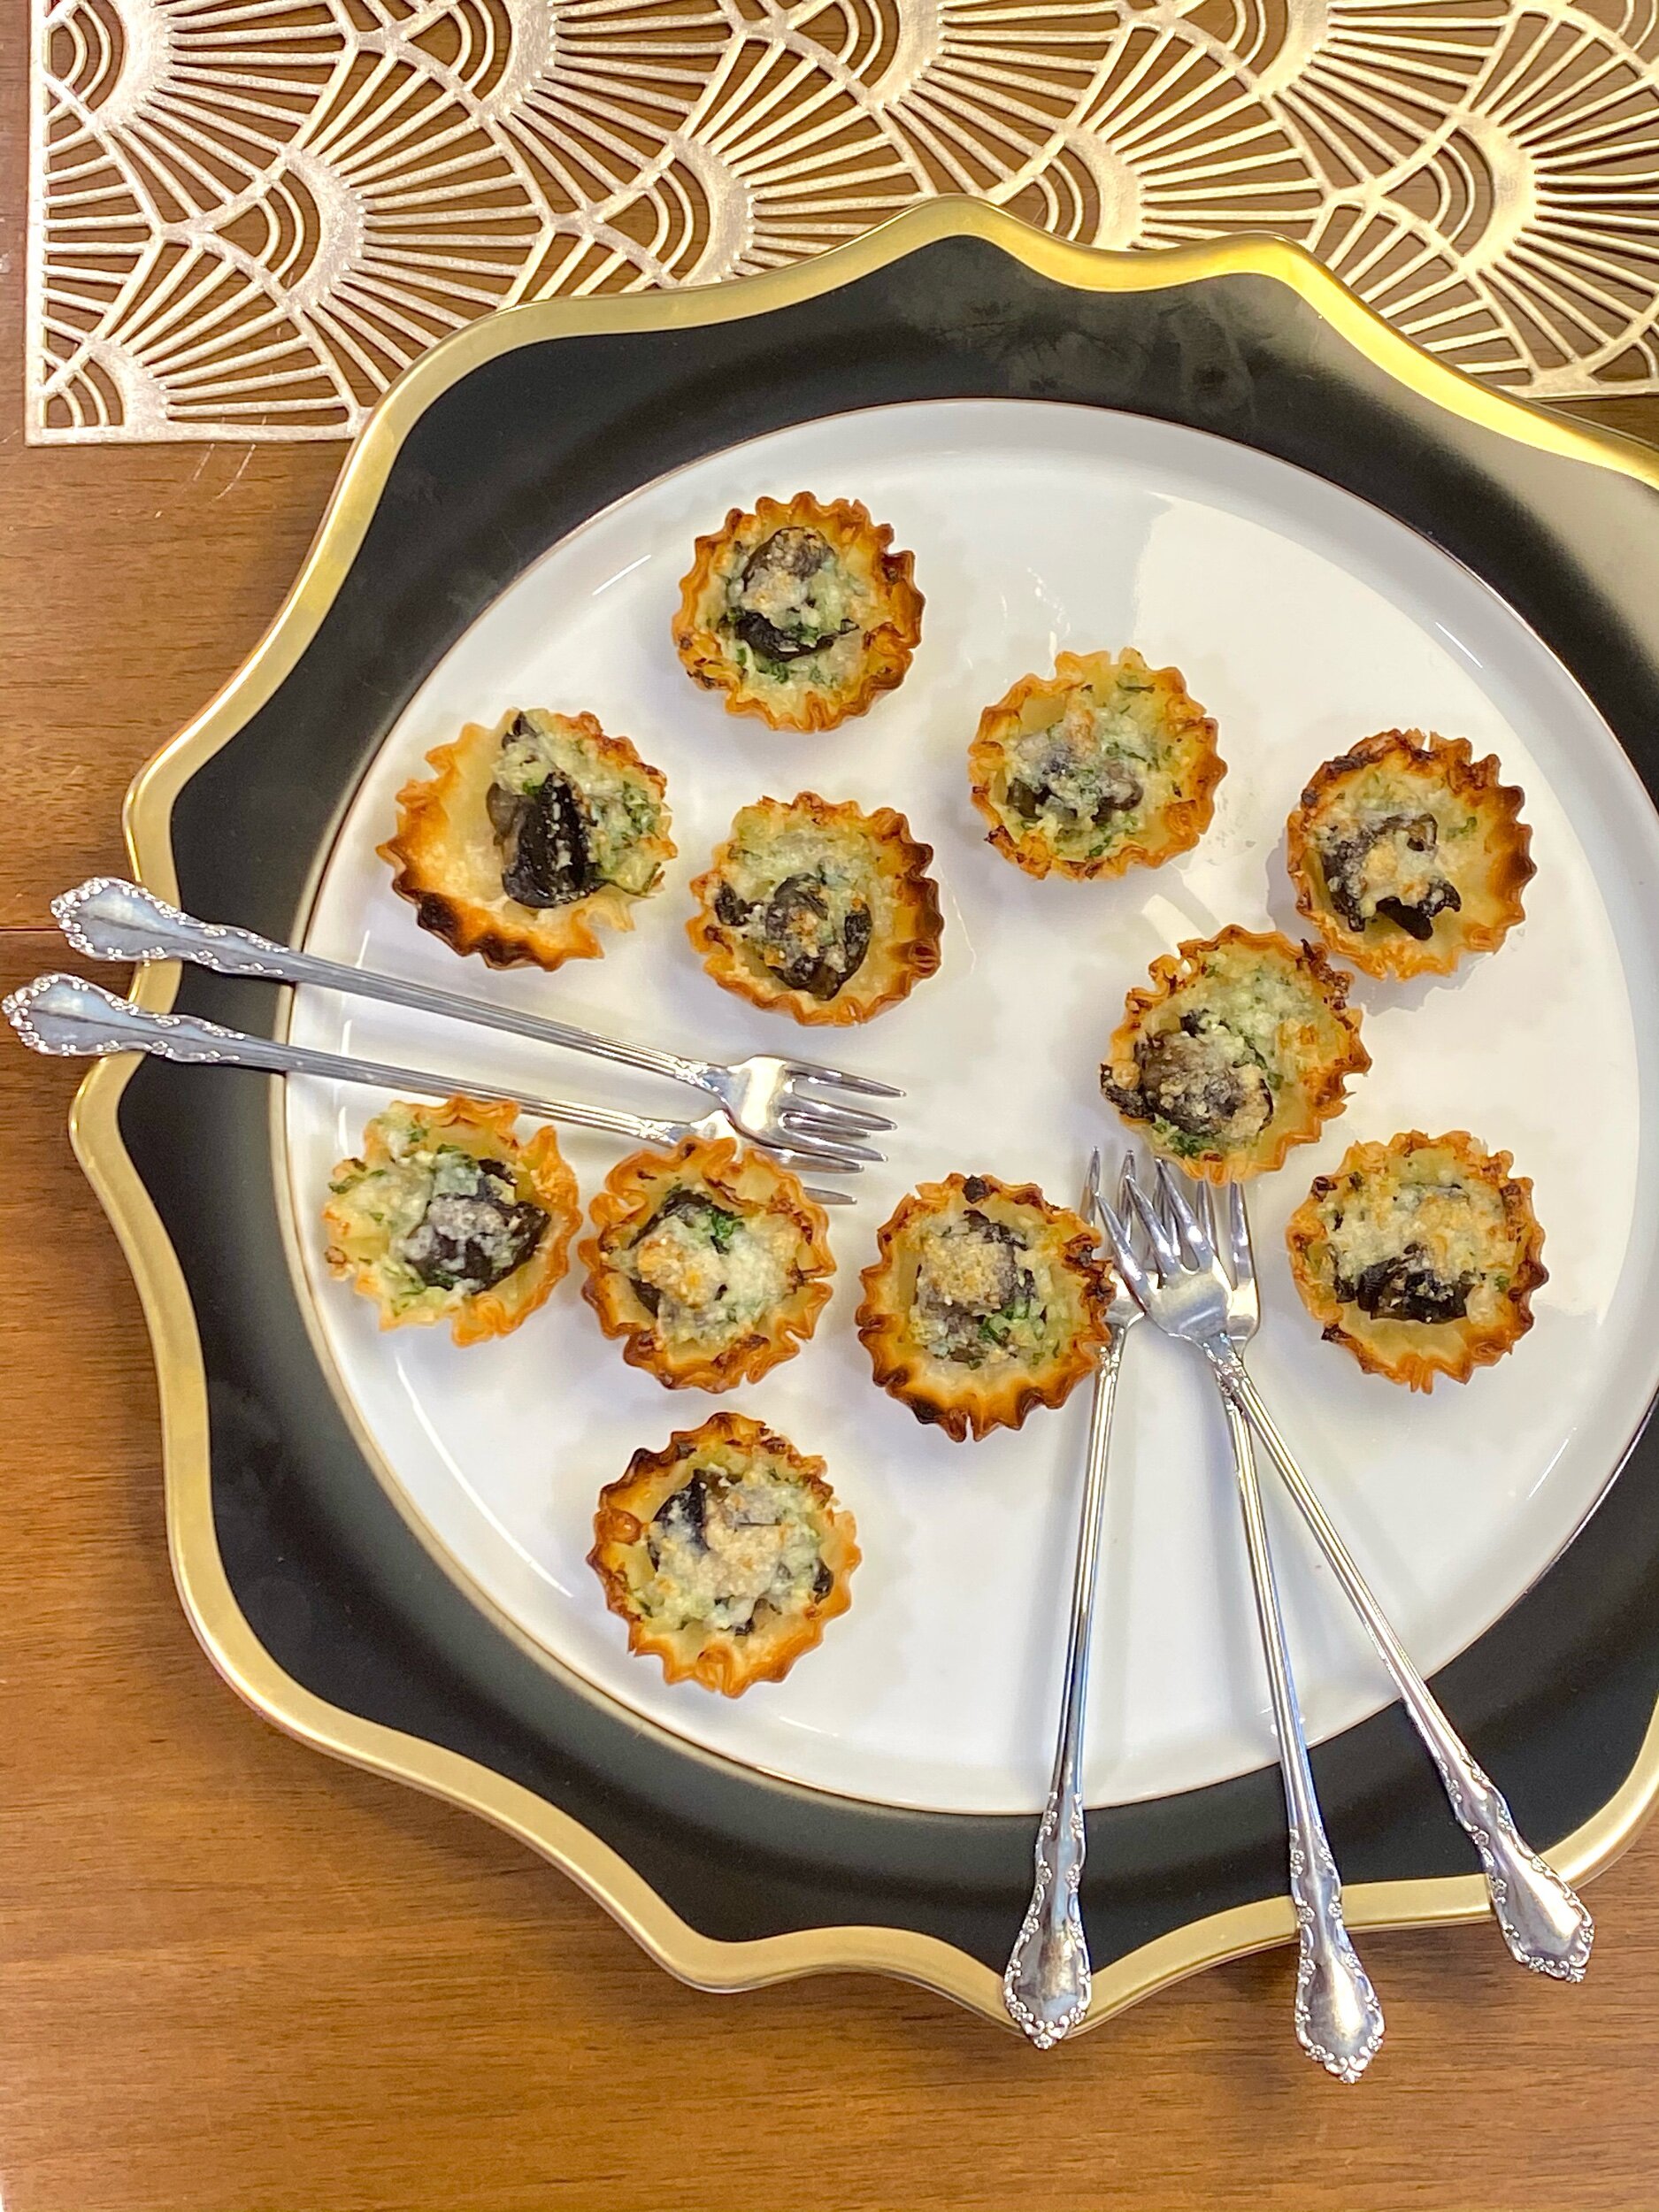
IMG_0551.jpeg

24 phyllo cups

1 can (24 count) escargot 

Butter mixture 

Parmesan 

Preheat oven to broil. Line the phyllo on a baking sheet. Place a snail on each and cover with a large dollop of the butter mixture (approximately 1/2 tablespoon). Lightly sprinkle with Parmesan cheese and broil for a few minutes until Golden and bubbly. 

Santa Snack Board

December 5, 2020 Andrea LeTard
IMG_0607.jpeg

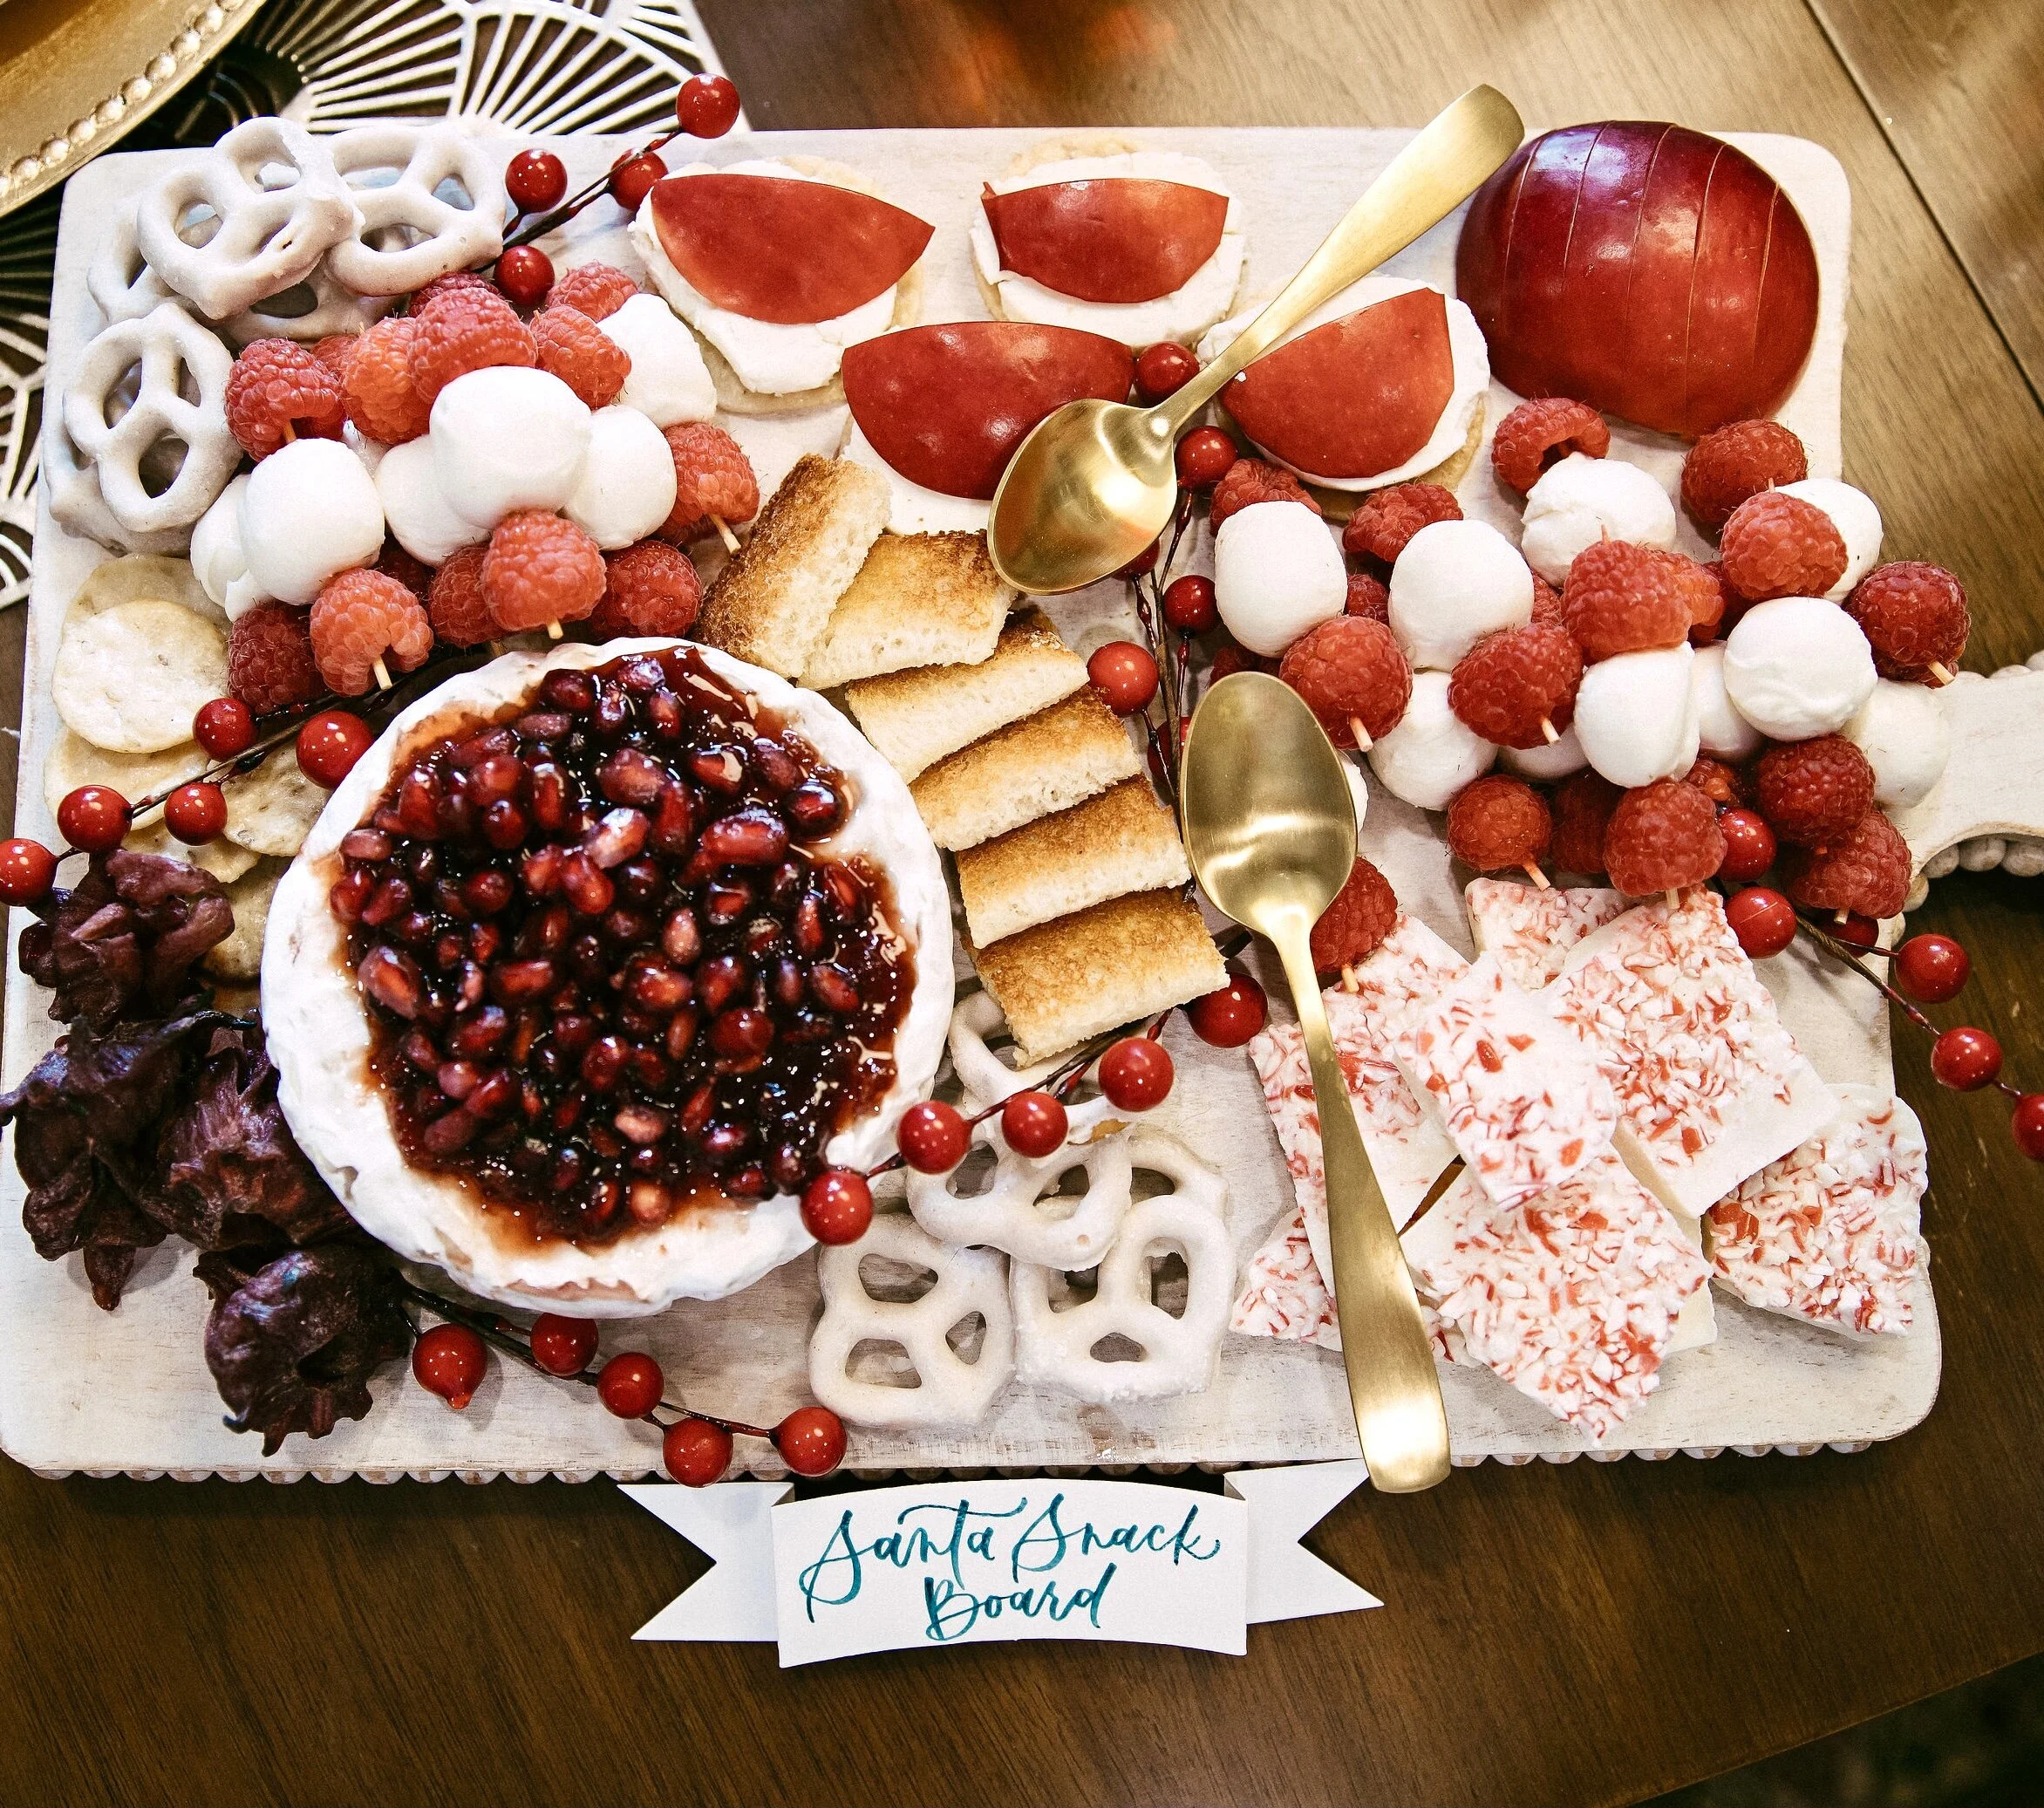
For the holidays, I love creating food so fun and beautiful, it can replace decor. This Santa snack board is a perfect example of just that - it’s adorable, fun, and oh so yummy! I created this for a gals holiday gathering and it was such a hit and was photographed so much, it could very well have celebrity status. I think you all need this at your holiday party this year - it’s a food Instagram dream. Make sure you tag @andreas_cooktales!

1 Brie wheel

2 tablespoons cherry or strawberry preserves

1/4 cup pomegranate seeds

1 container mozzarella balls

1 container raspberries 

Toothpicks 

4 ounces goat cheese - softened 

Crostini or crackers 

1 red apple - sliced 

Honey, for drizzling 

Peppermint Bark

White yogurt pretzels

Dried or marinated hibiscus flowers

*Anything else red or white you can find

*You can make this board as big or small as you’d like, that’s why very few measurements are given in this recipe. Get creative, have fun!

Start by placing the Brie wheel on the board, spread the preserves on top, sprinkle with the pomegranate seeds. Skewer the mozzarella balls and raspberries on toothpicks and place on the board in two different places. Spread goat cheese on crostini or crackers. Top each with an apple slice and drizzle with honey. Place on the board. Using the peppermint bark, yogurt pretzels, hibiscus flowers, leftover apple slices, leftover crostini and/or crackers, and any other treats you picked out, fill in the empty spaces on the board. Garnish with holly or any red decor you have. 

Sweet Potato Fig Bake with Brown Butter Bourbon Glaze

November 26, 2020 Andrea LeTard
IMG_9963.jpeg

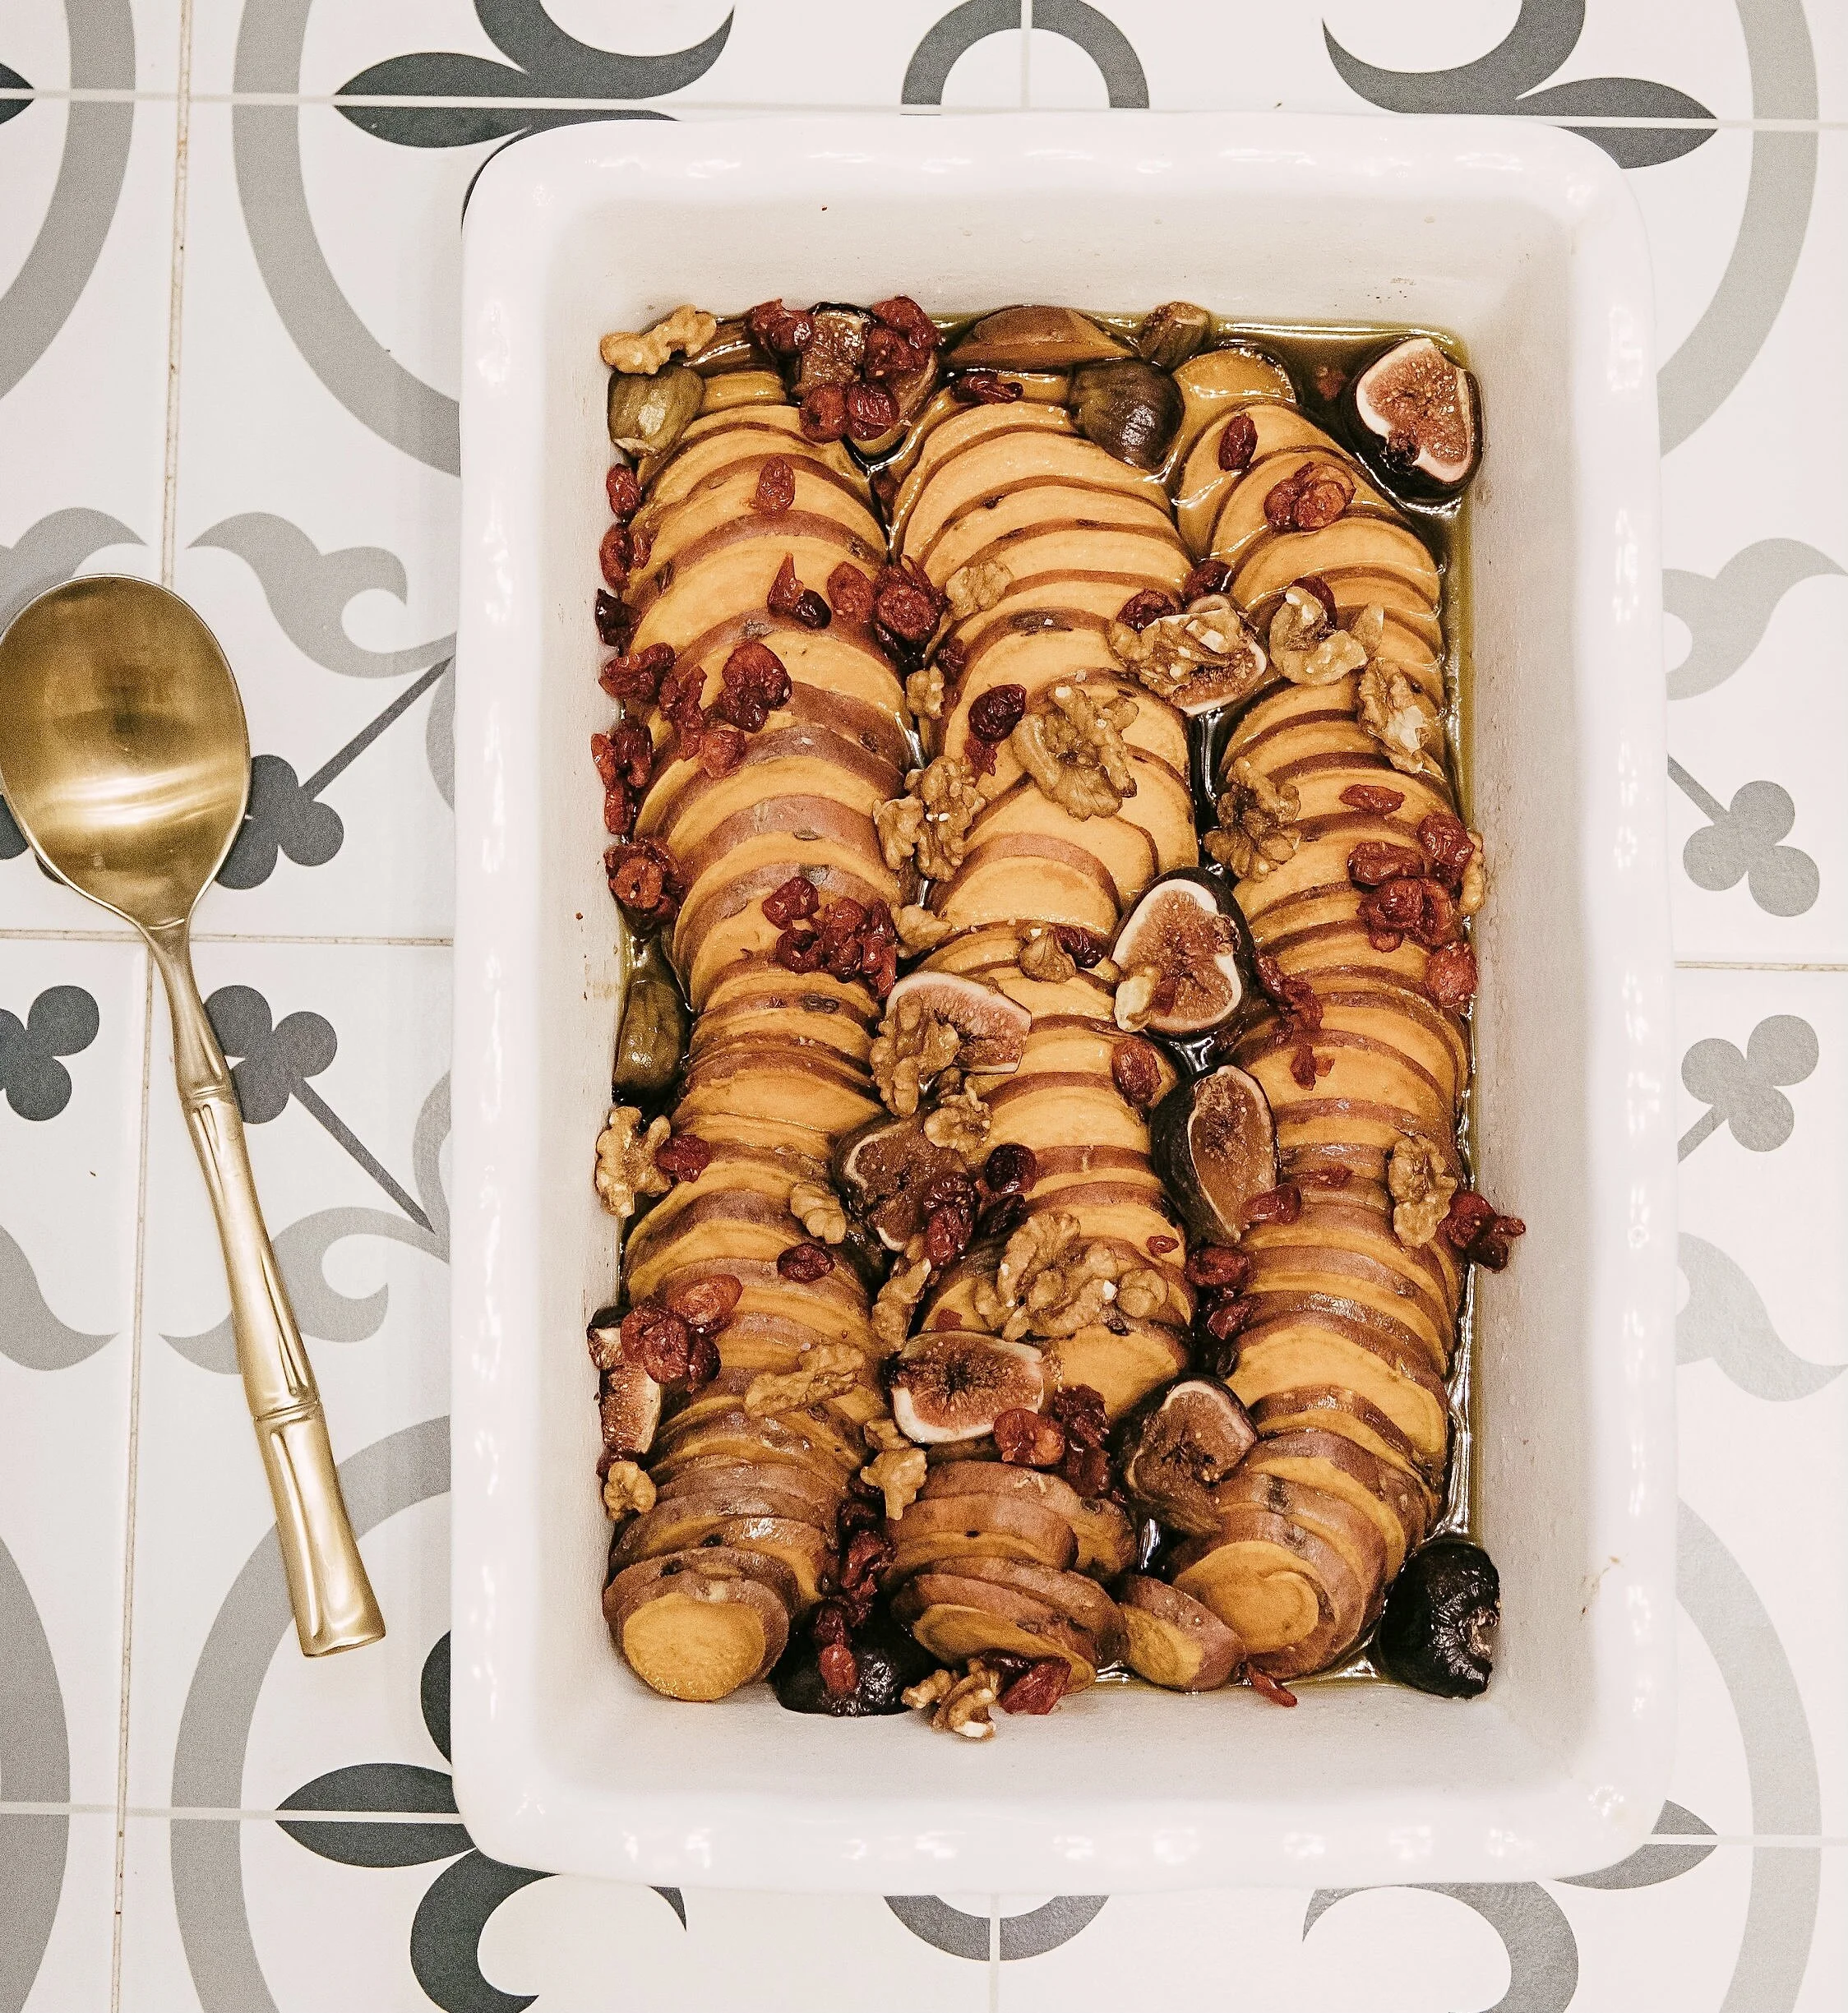
Better than sweet potato casserole and baked with a twist! The brown butter bourbon glaze on these sweet potatoes are a game changer and the figs give it a little something extra.

3 pounds (about 6) sweet potatoes - sliced thin (about 1/4 inch thick), ends removed 

Kosher salt and freshly cracked pepper 

1 stick salted butter 

1 cup brown sugar

1/2 cup bourbon 

4-5 fresh figs - quartered 

1/2 cup walnuts - roughly chopped 

1/4 cup cranberries 

Heat oven to 350 degrees. Bring a large pot of water to a boil. When water is boiling, add sweet potatoes and boil for about 6 to 8 minutes or until potatoes are slightly tender - a fork should be able to go through them but not easily. Drain the potatoes, line them in a 9x13 baking dish, and sprinkle with 1 teaspoon salt and 1/2 teaspoon pepper. Heat a sauté pan over medium heat, add the butter, and let it sit without touching. When the color is golden and the smell is toasty, stir in the brown sugar, bourbon, and a dash of salt. Bring to a boil and let simmer until slightly thickened. Pour the mixture over the sweet potatoes the top with figs, dried cranberries, and walnuts. Cover with foil and bake for 20 to 25 minutes or until potatoes are cooked through. Serve warm. 

Sweet Potato Cranberry Cookies

November 24, 2020 Andrea LeTard
IMG_0225.jpeg

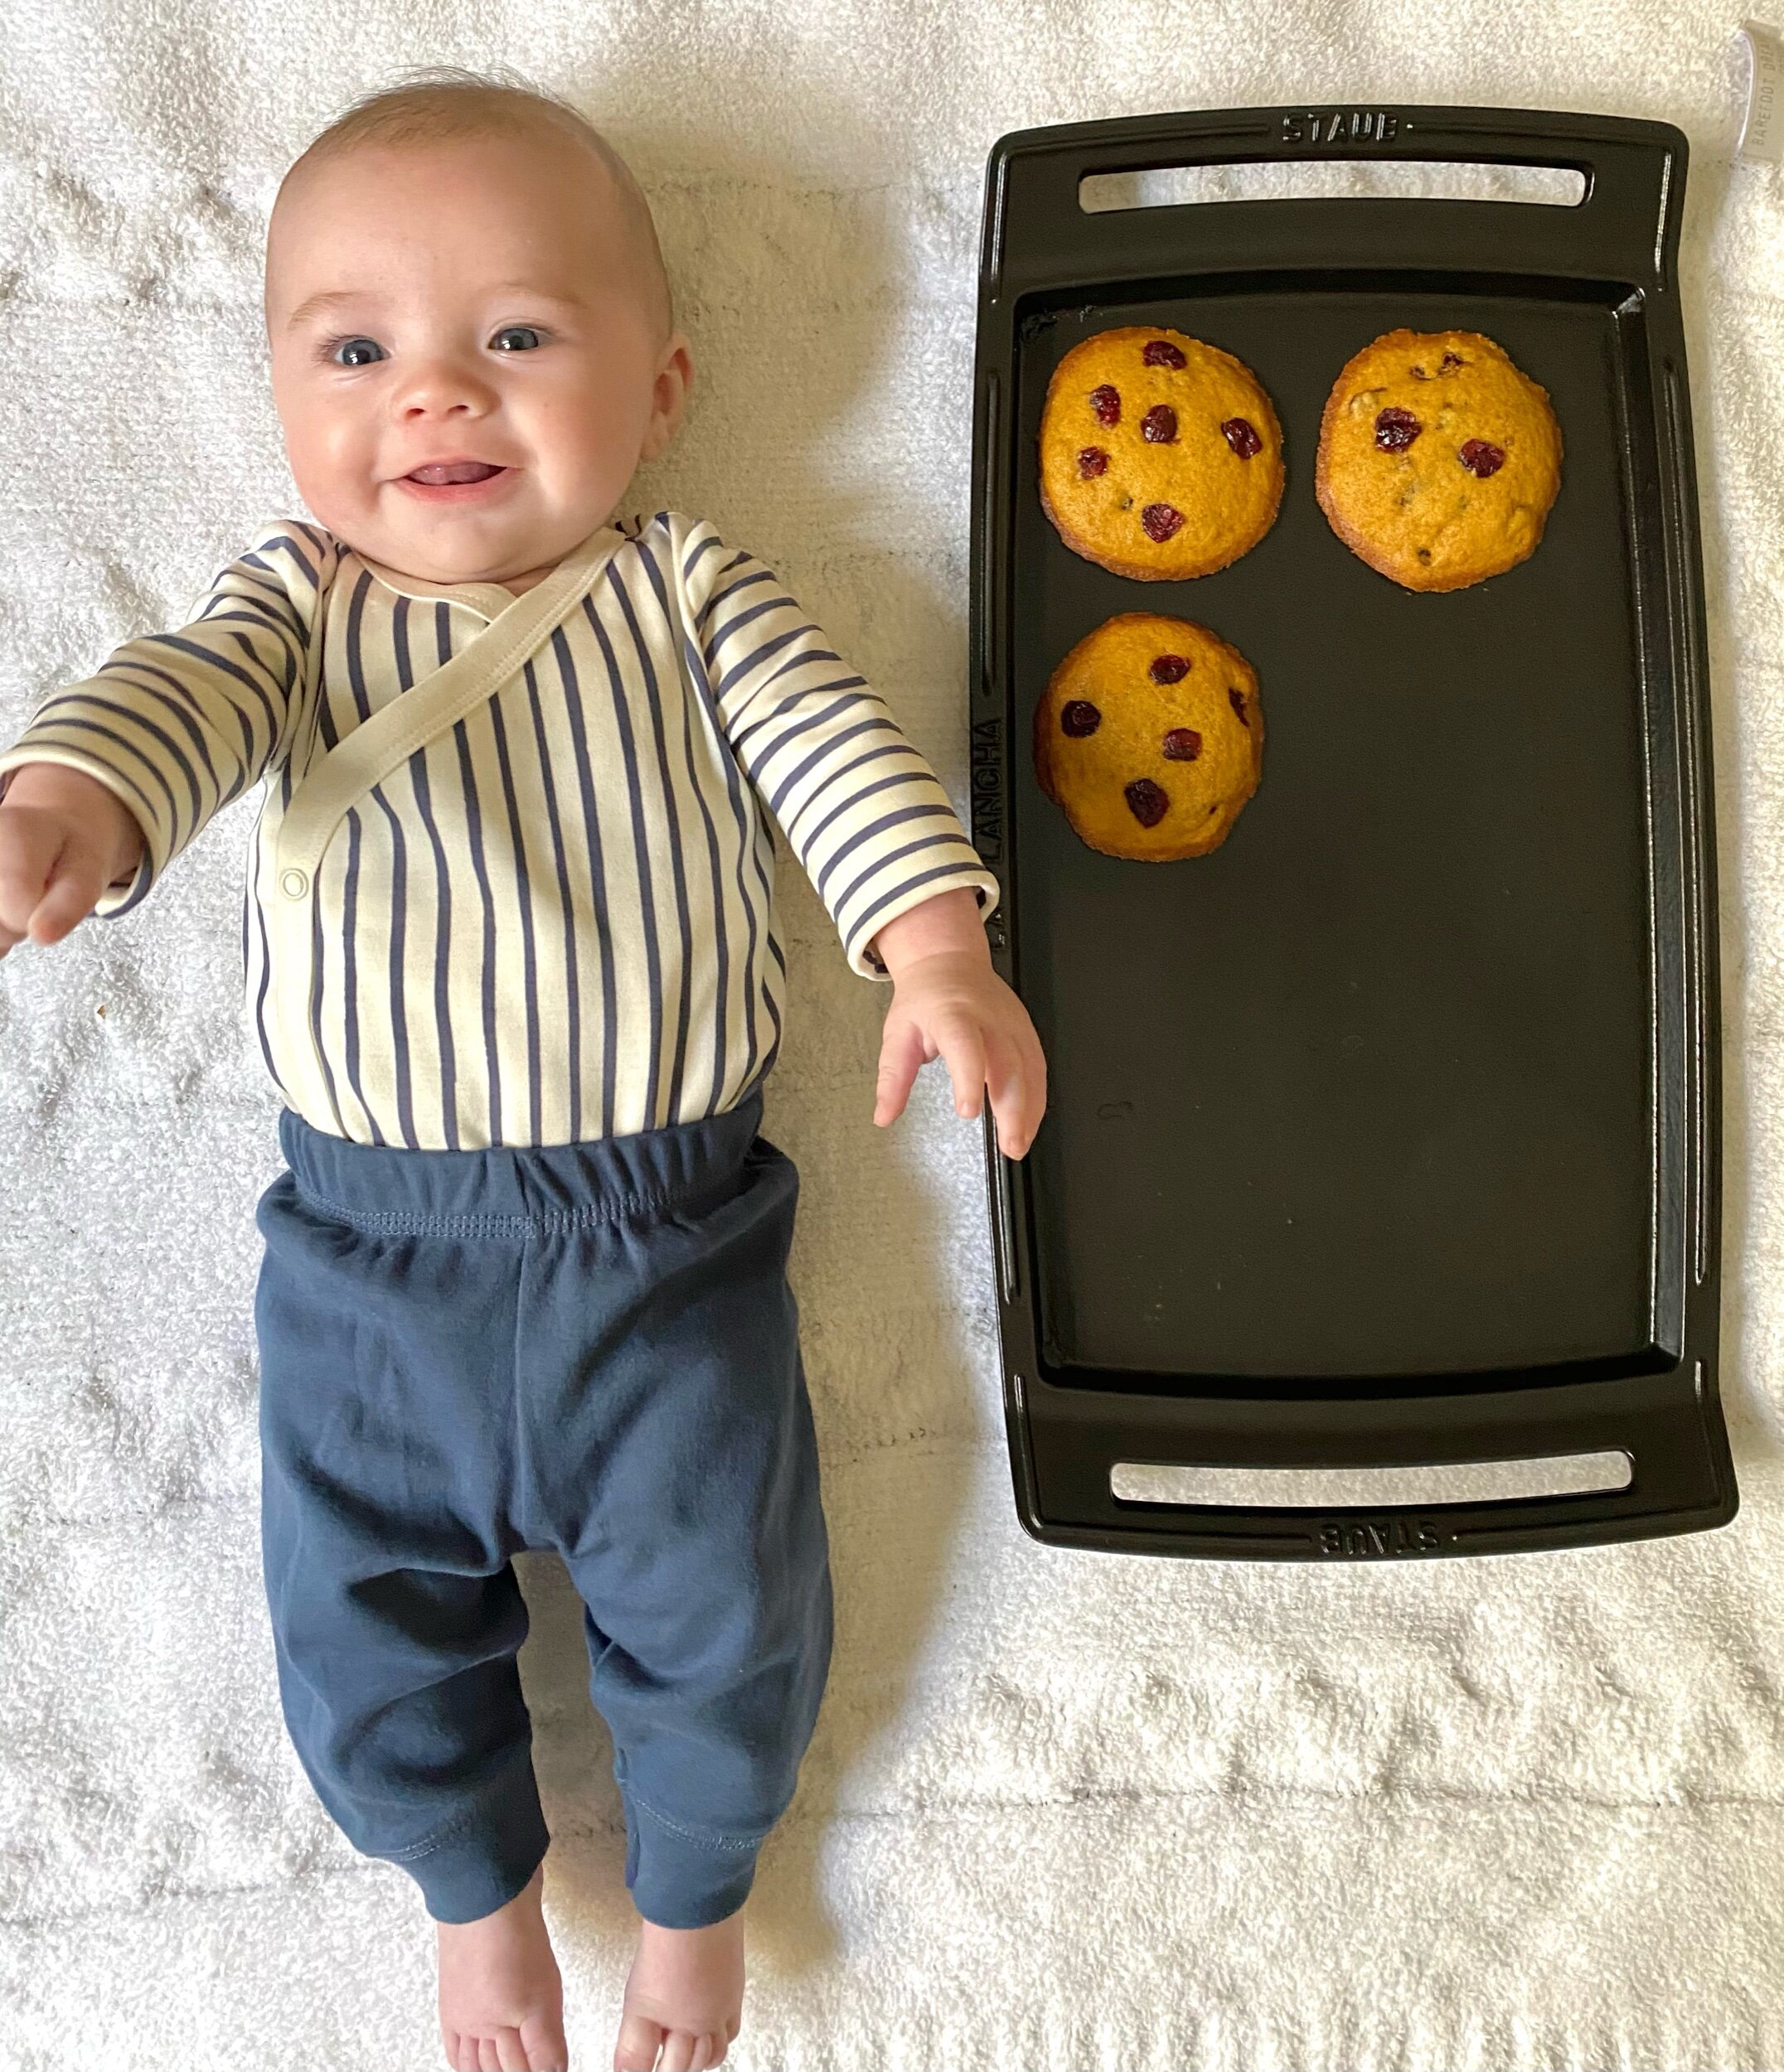
Xav turned 3 months the month of Thanksgiving so I thought for his monthly cookie, why not combine the two most traditional Turkey Day flavors: sweet potato and cranberry?! These cookies are chewy on the inside, crispy on the outside and bursting with the most delicious fall flavors. He’s getting so big so fast!

1/2 stick room temperature salted butter 

3/4 cup granulated sugar

1 egg

1 teaspoon pure vanilla extract 

1/2 cup sweet potato purée 

1 cup all-purpose flour

1/2 teaspoon baking soda 

1 teaspoon cinnamon 

1/2 teaspoon salt

1/2 teaspoon ground ginger

1/4 teaspoon nutmeg 

1 /2 cup dried cranberries

Heat oven to 350 degrees. In a stand mixer, cream together the butter and sugar until light and fluffy. Add the egg, vanilla, and sweet potato purée. Beat together on medium-high until smooth. In a mixing bowl, whisk together the flour, baking soda, cinnamon, salt, ginger, and nutmeg. Add half the dry mixture to the stand mixer and beat together. Then add the other half and beat together until completely combined. Add the cranberries and do one final mix on low. Using a cookie scoop, space out 2 tablespoon dough balls onto a parchment lined cookie sheet. Bake for 15 to 18 minutes or until cookies are cooked through and crispy on the edges. 

Candy Corn Cake Mix Cookies

November 24, 2020 Andrea LeTard
IMG_8735.jpeg
IMG_8726.jpeg

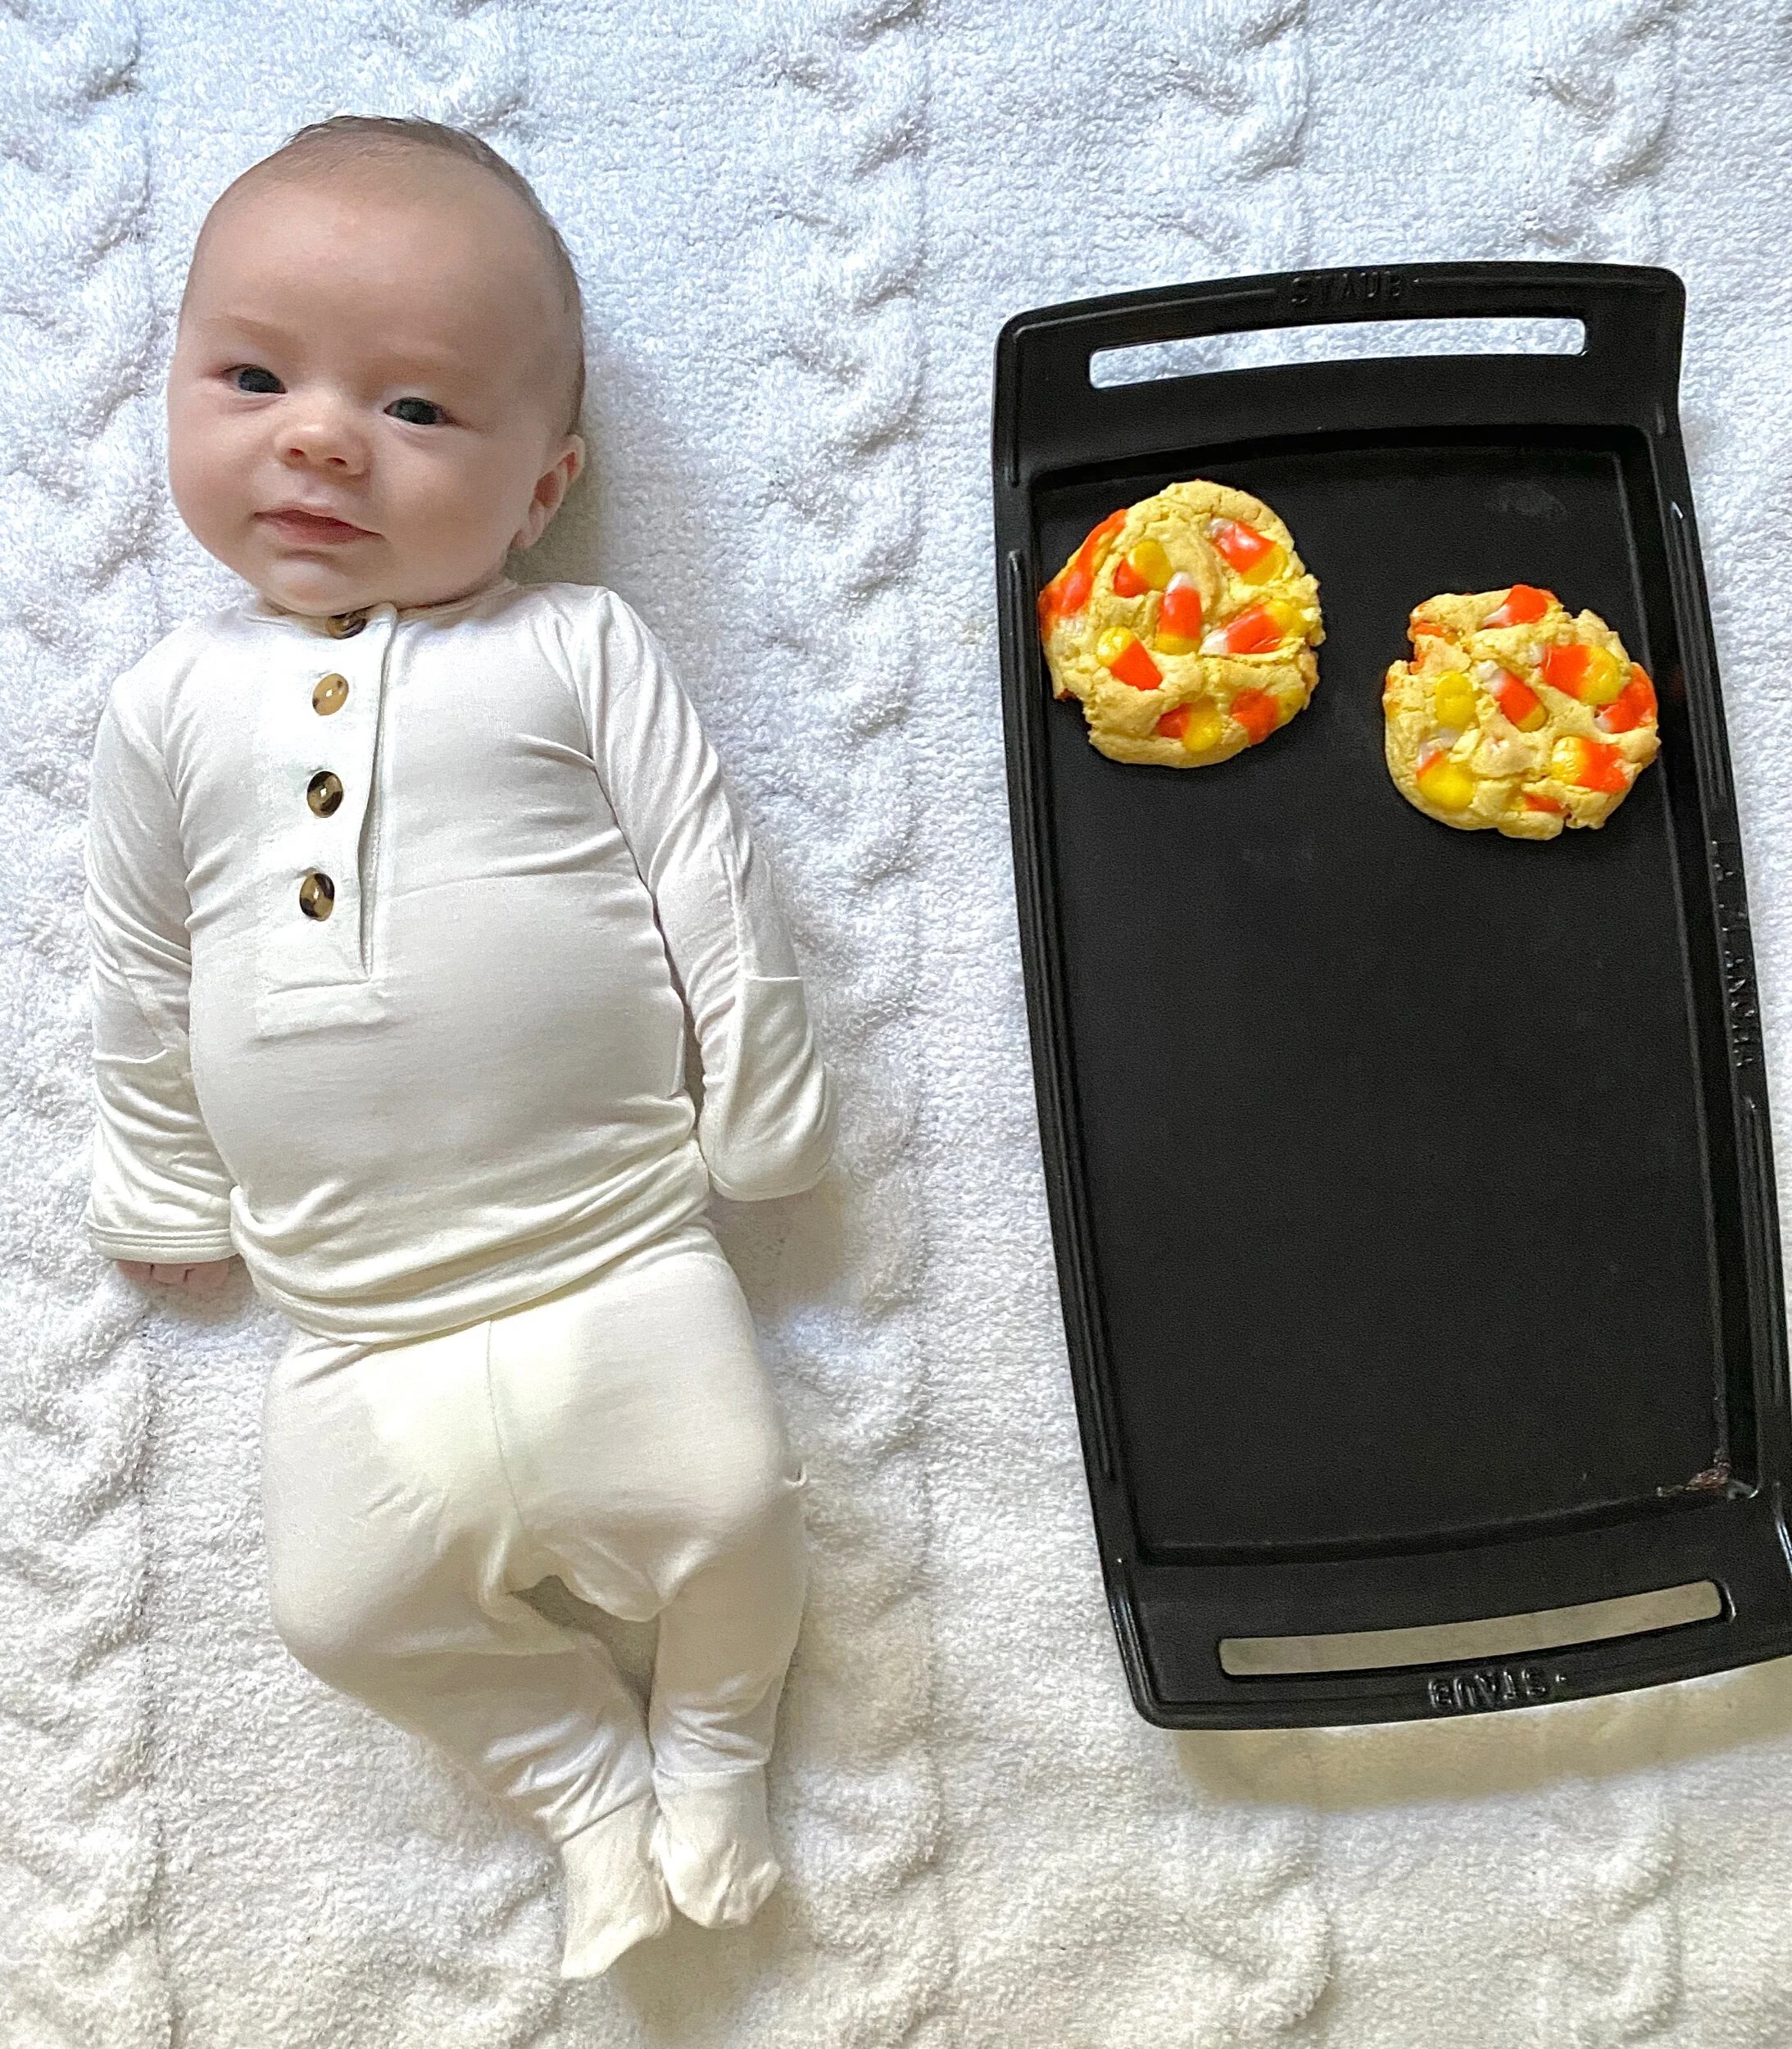
For Xav’s 2 month birthday, we celebrated Halloween - as we do the entire month of October - with these easy candy corn cookies. Using the traditional recipe for “cake mix cookies,” we added candy corn for a fun trick or treat twist! 

1 box vanilla cake mix

2 eggs 

1/2 cup vegetable oil 

3/4 cup candy corn 

Preheat oven to 350 degrees. In a large mixing bowl or in your stand mixer with paddle attachment, mix together the cake mix, eggs, oil, and candy corn on low speed until combined. On a parchment lined cookie sheet, scoop (2 tablespoon scoops) 2 inches apart. Bake for about 10 minutes. 

Parmesan & Crispy Herb Rutabaga

November 23, 2020 Andrea LeTard
IMG_7246.jpeg

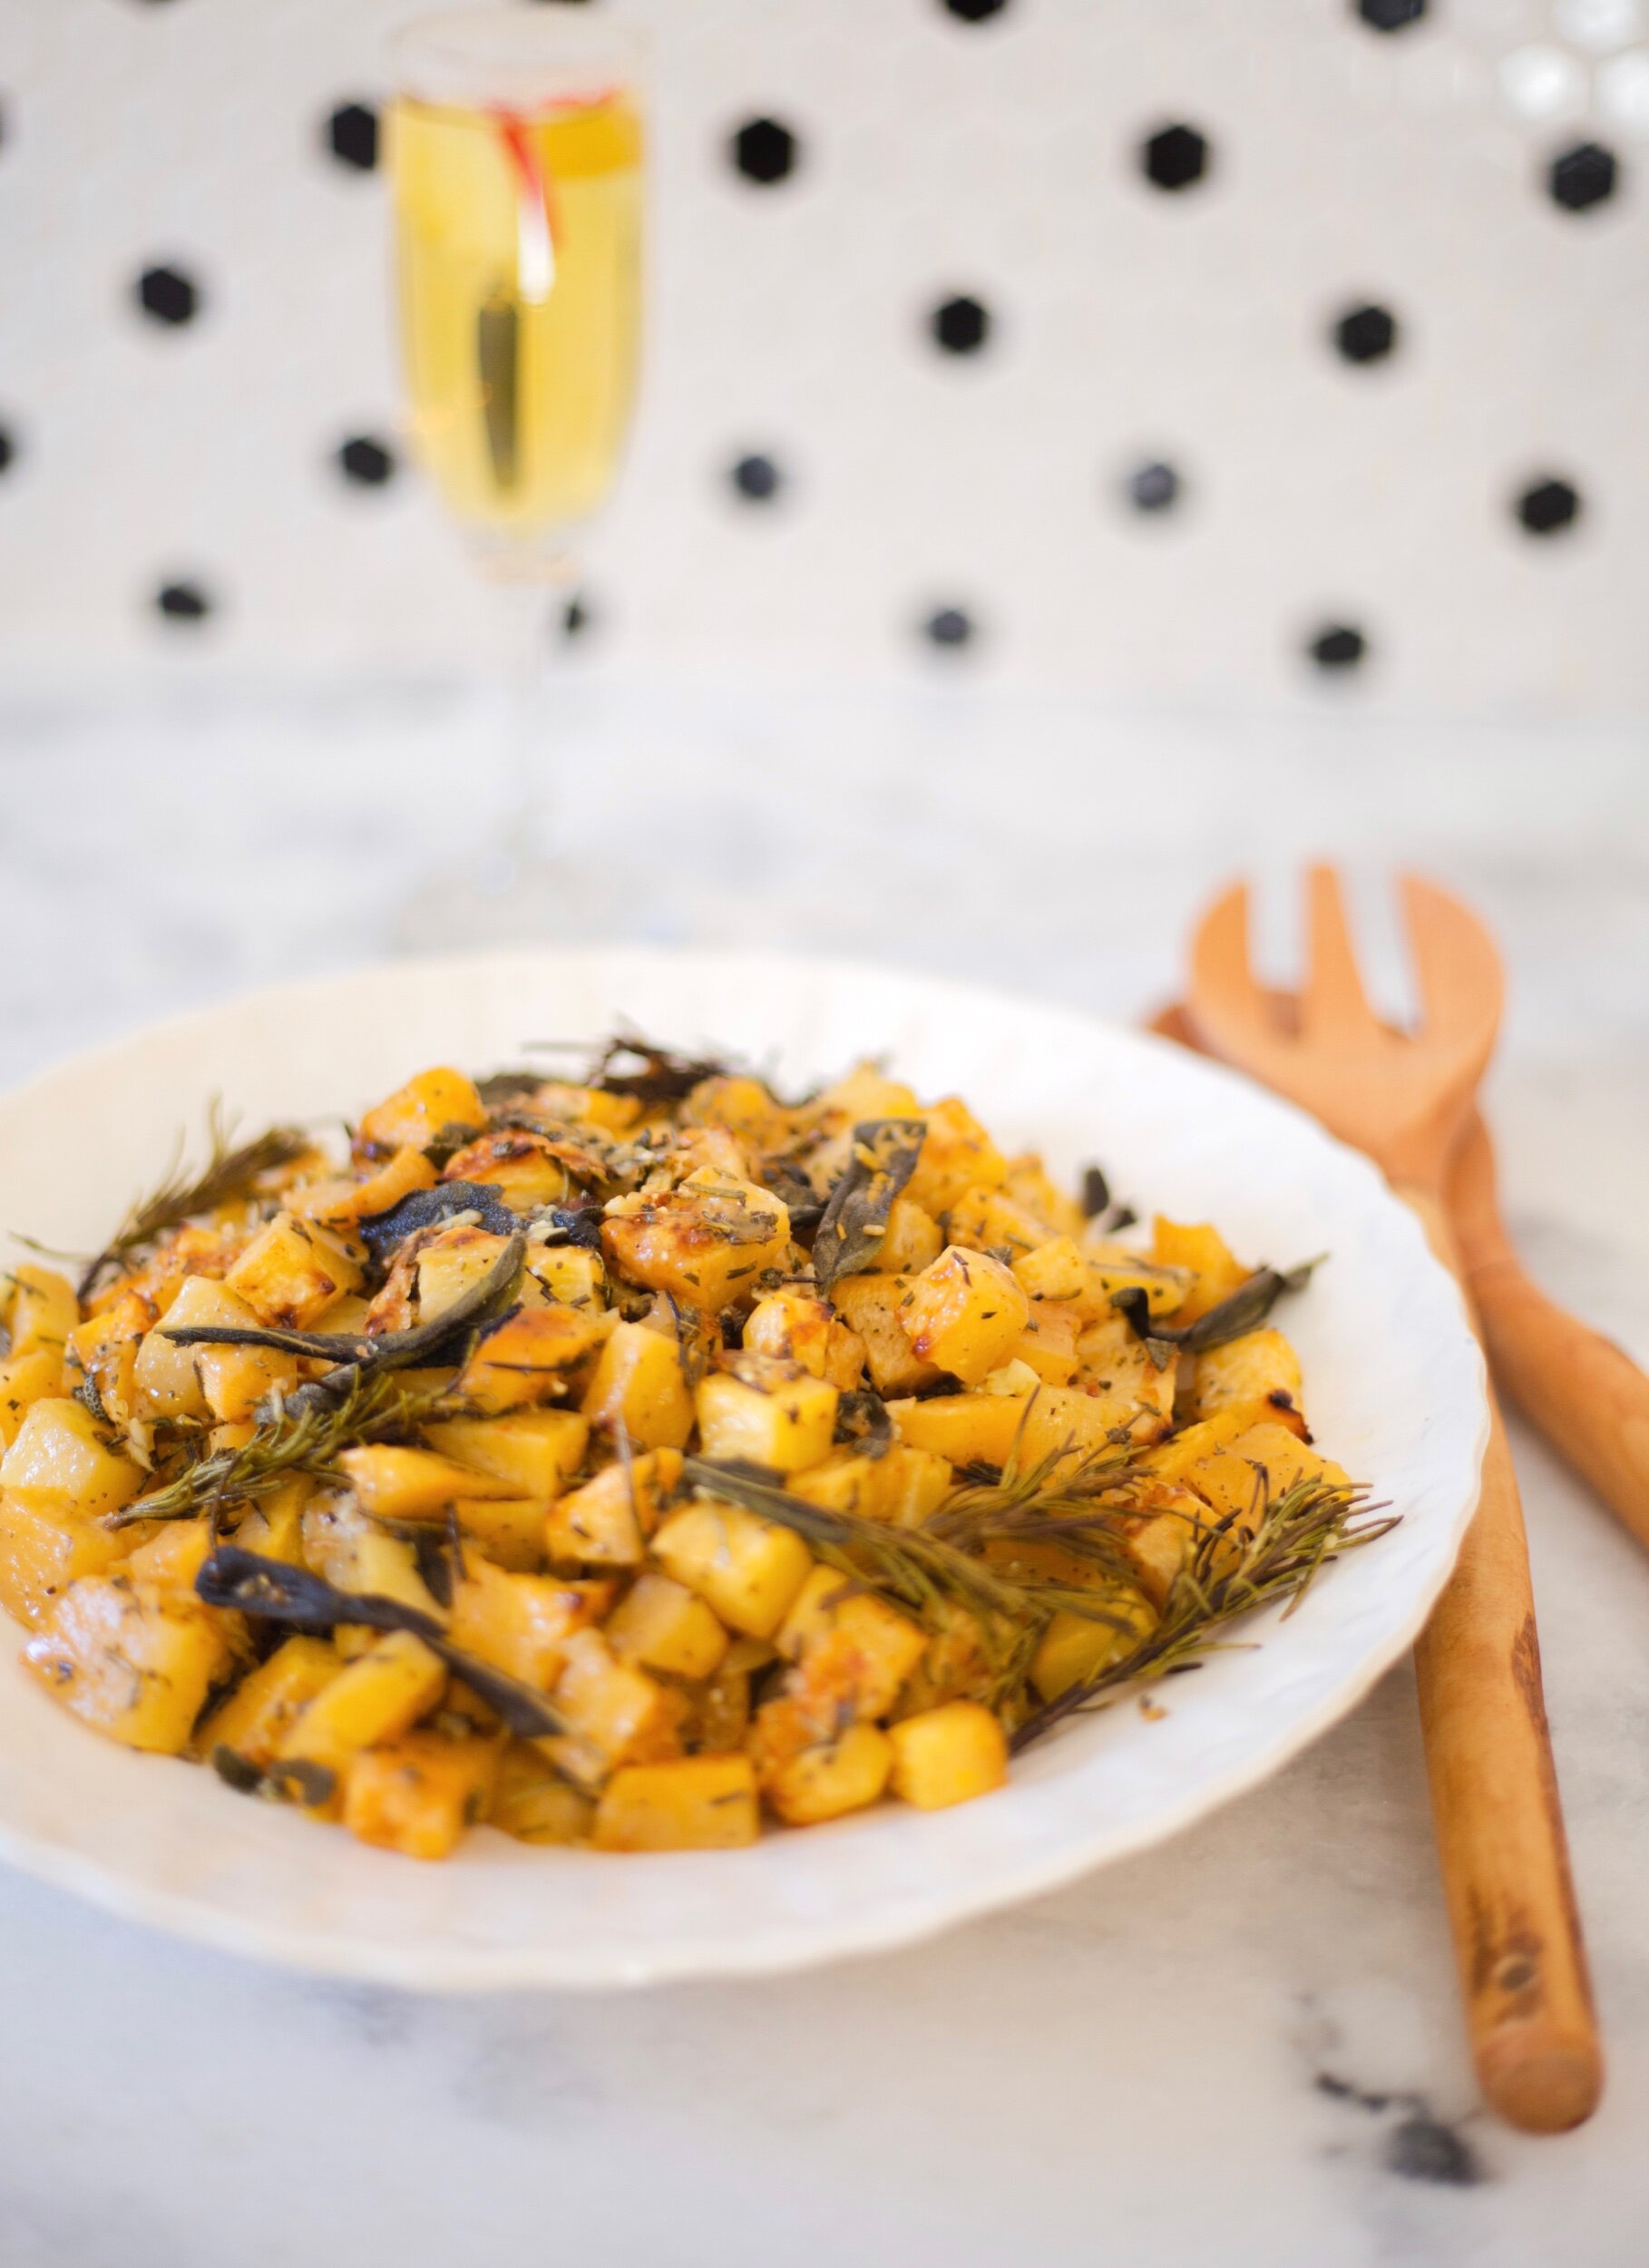
If you’ve never cooked or eaten rutabaga before - think potato. This not so ordinary, yet easy to find vegetable is prepared in a similar way to roasted potatoes with a little fall twist using crispy sage and rosemary. This simple side will brighten up your table and knock everyone’s socks off with how delicious!

6 to 8 servings 

2 large rutabaga 

3 tablespoons olive oil 

2 tablespoons minced fresh rosemary, plus a few stems

1 tablespoon minced fresh sage, plus a few stems

2 teaspoons kosher salt

1 teaspoon freshly cracked pepper 

1 cup grated Parmesan cheese 

Preheat your oven to 400 degrees. Using a sharp knife, cut the ends off the rutabaga then “peel” it using the knife. The skin is quite tough so a knife works better than a peeler. Cut it into 1/2 inch cubes. 

On a large baking sheet lined with parchment paper, toss together the cubed rutabaga, olive oil, rosemary, sage, salt, and pepper. Roast for about 15 to 20 minutes or until softened. Sprinkle the Parmesan over the top and roast another 8 to 10 minutes or until golden and crispy. Serve in a large bowl with crispy herb stems on top. 

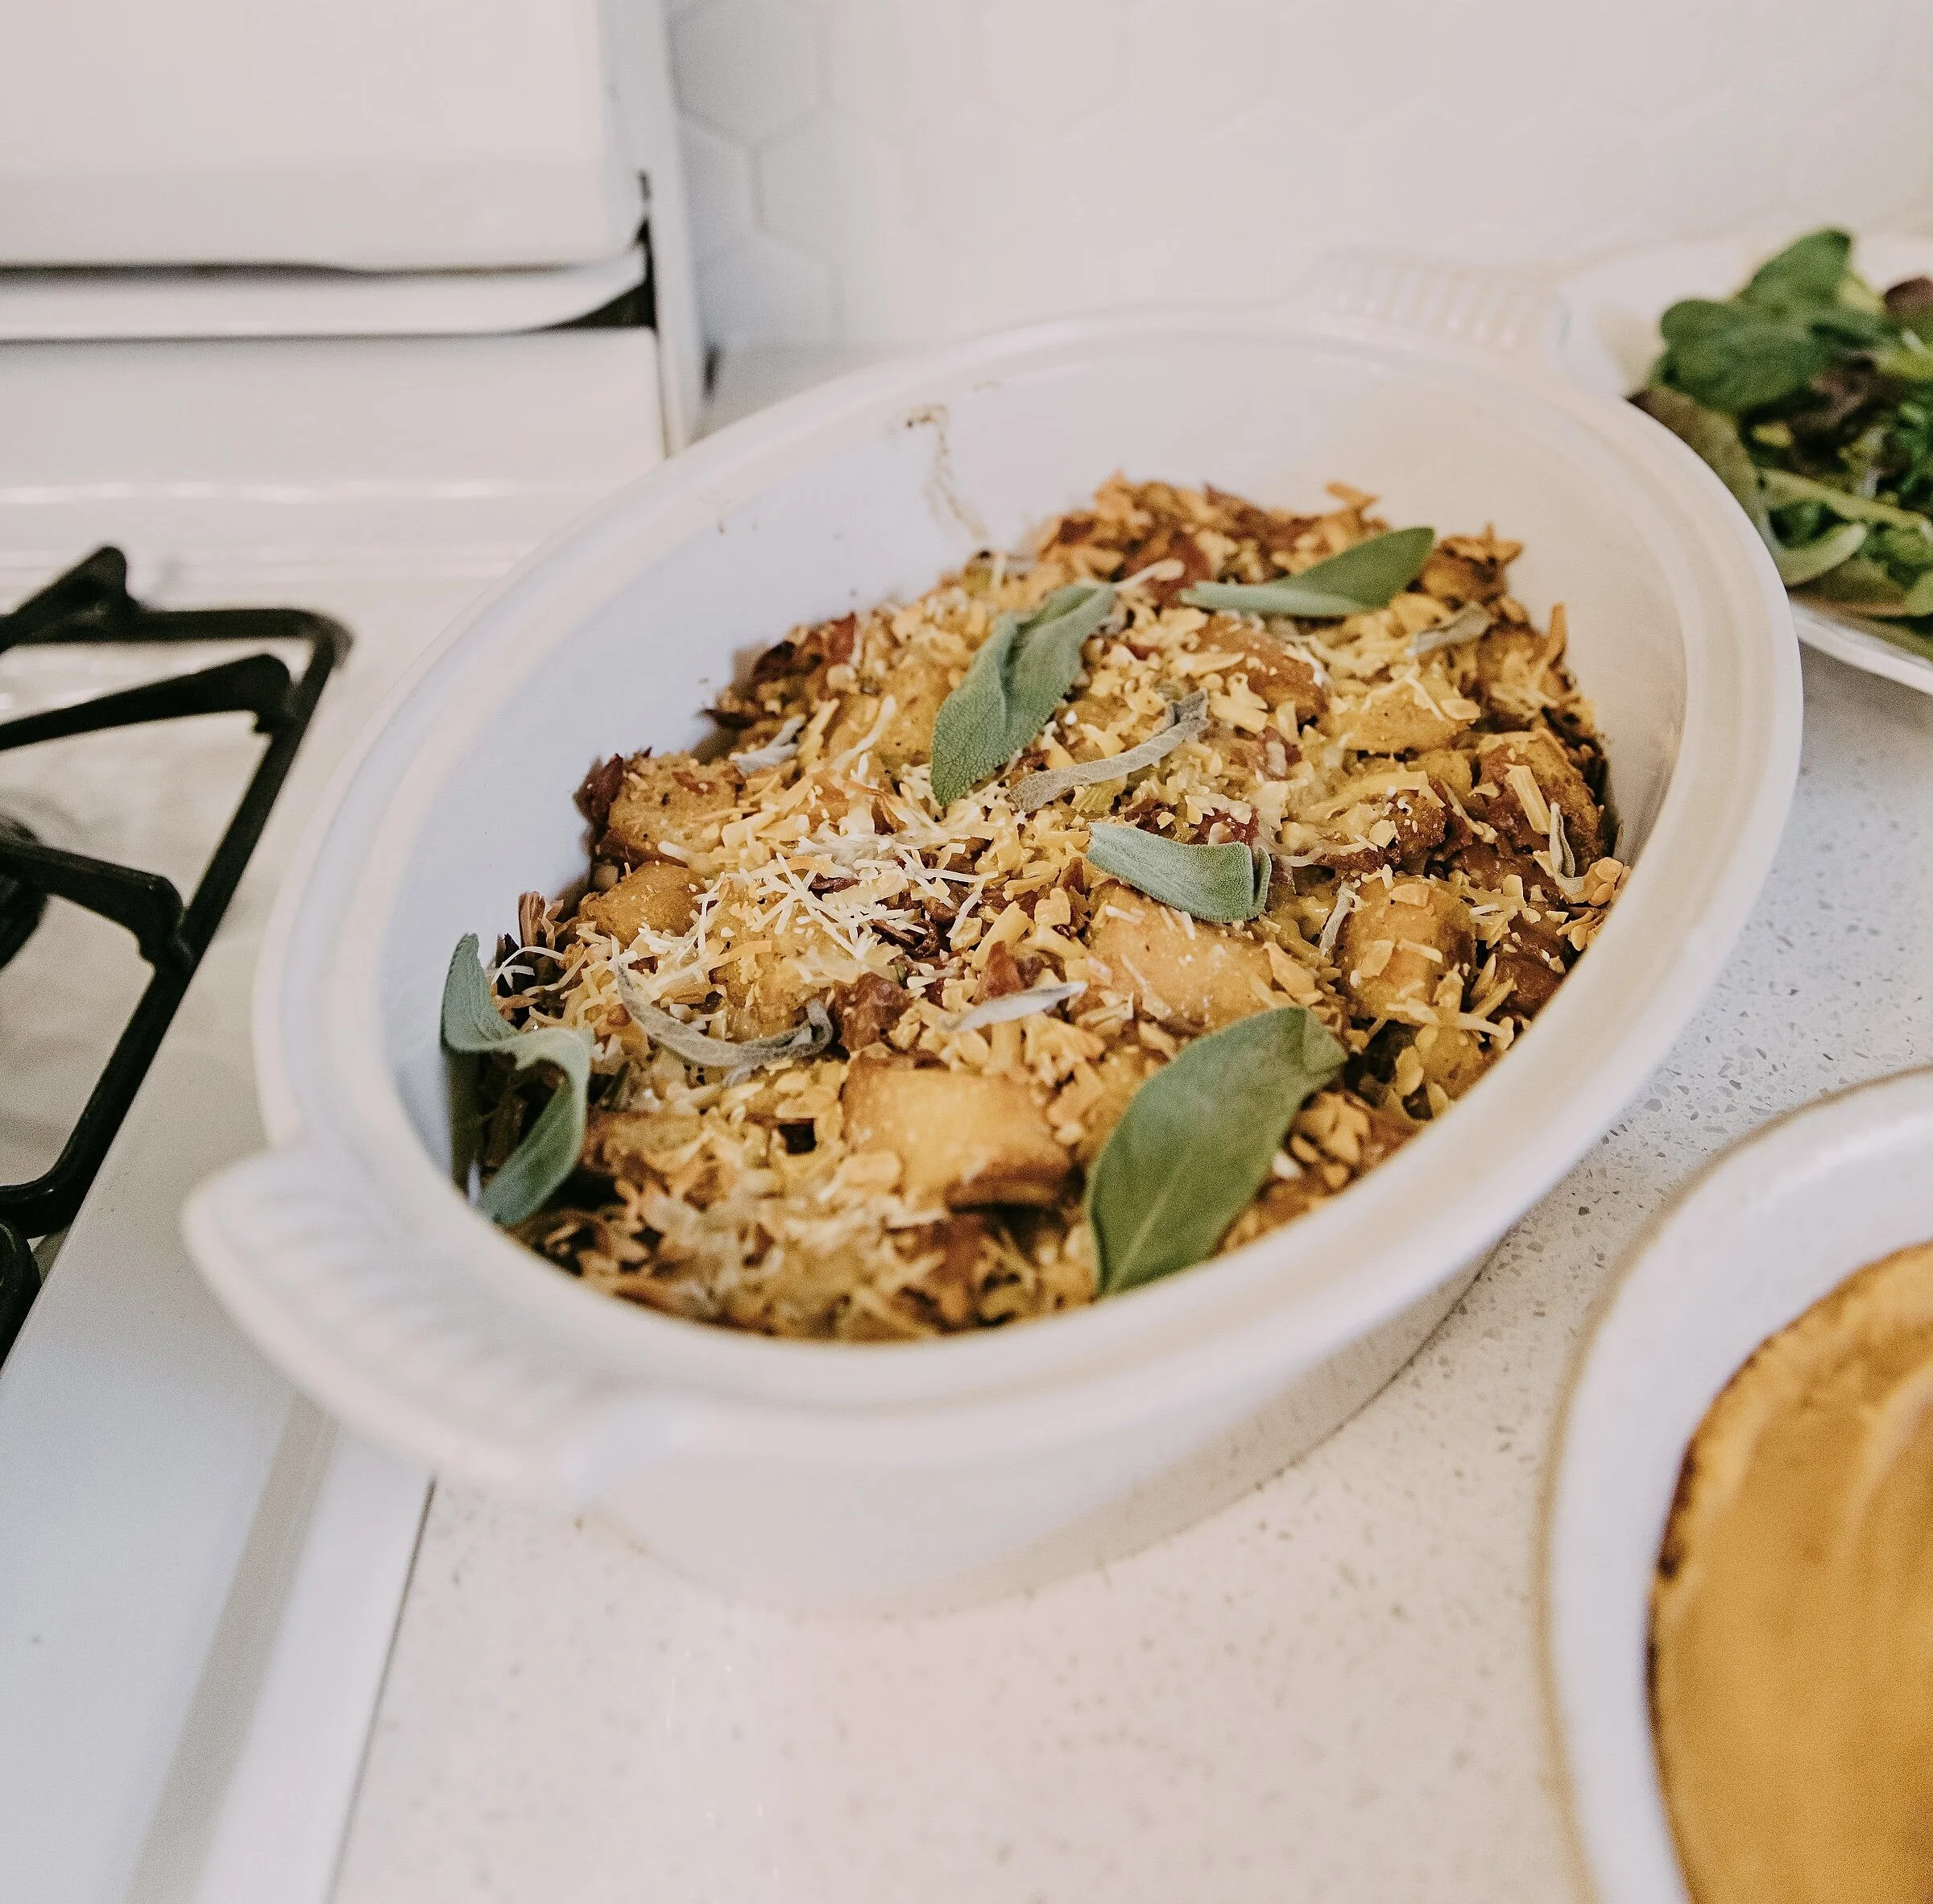
Crispy Charcuterie & Smoked Gouda Thanksgiving Stuffing

November 22, 2020 Andrea LeTard
IMG_9967.jpeg
IMG_9965.jpeg

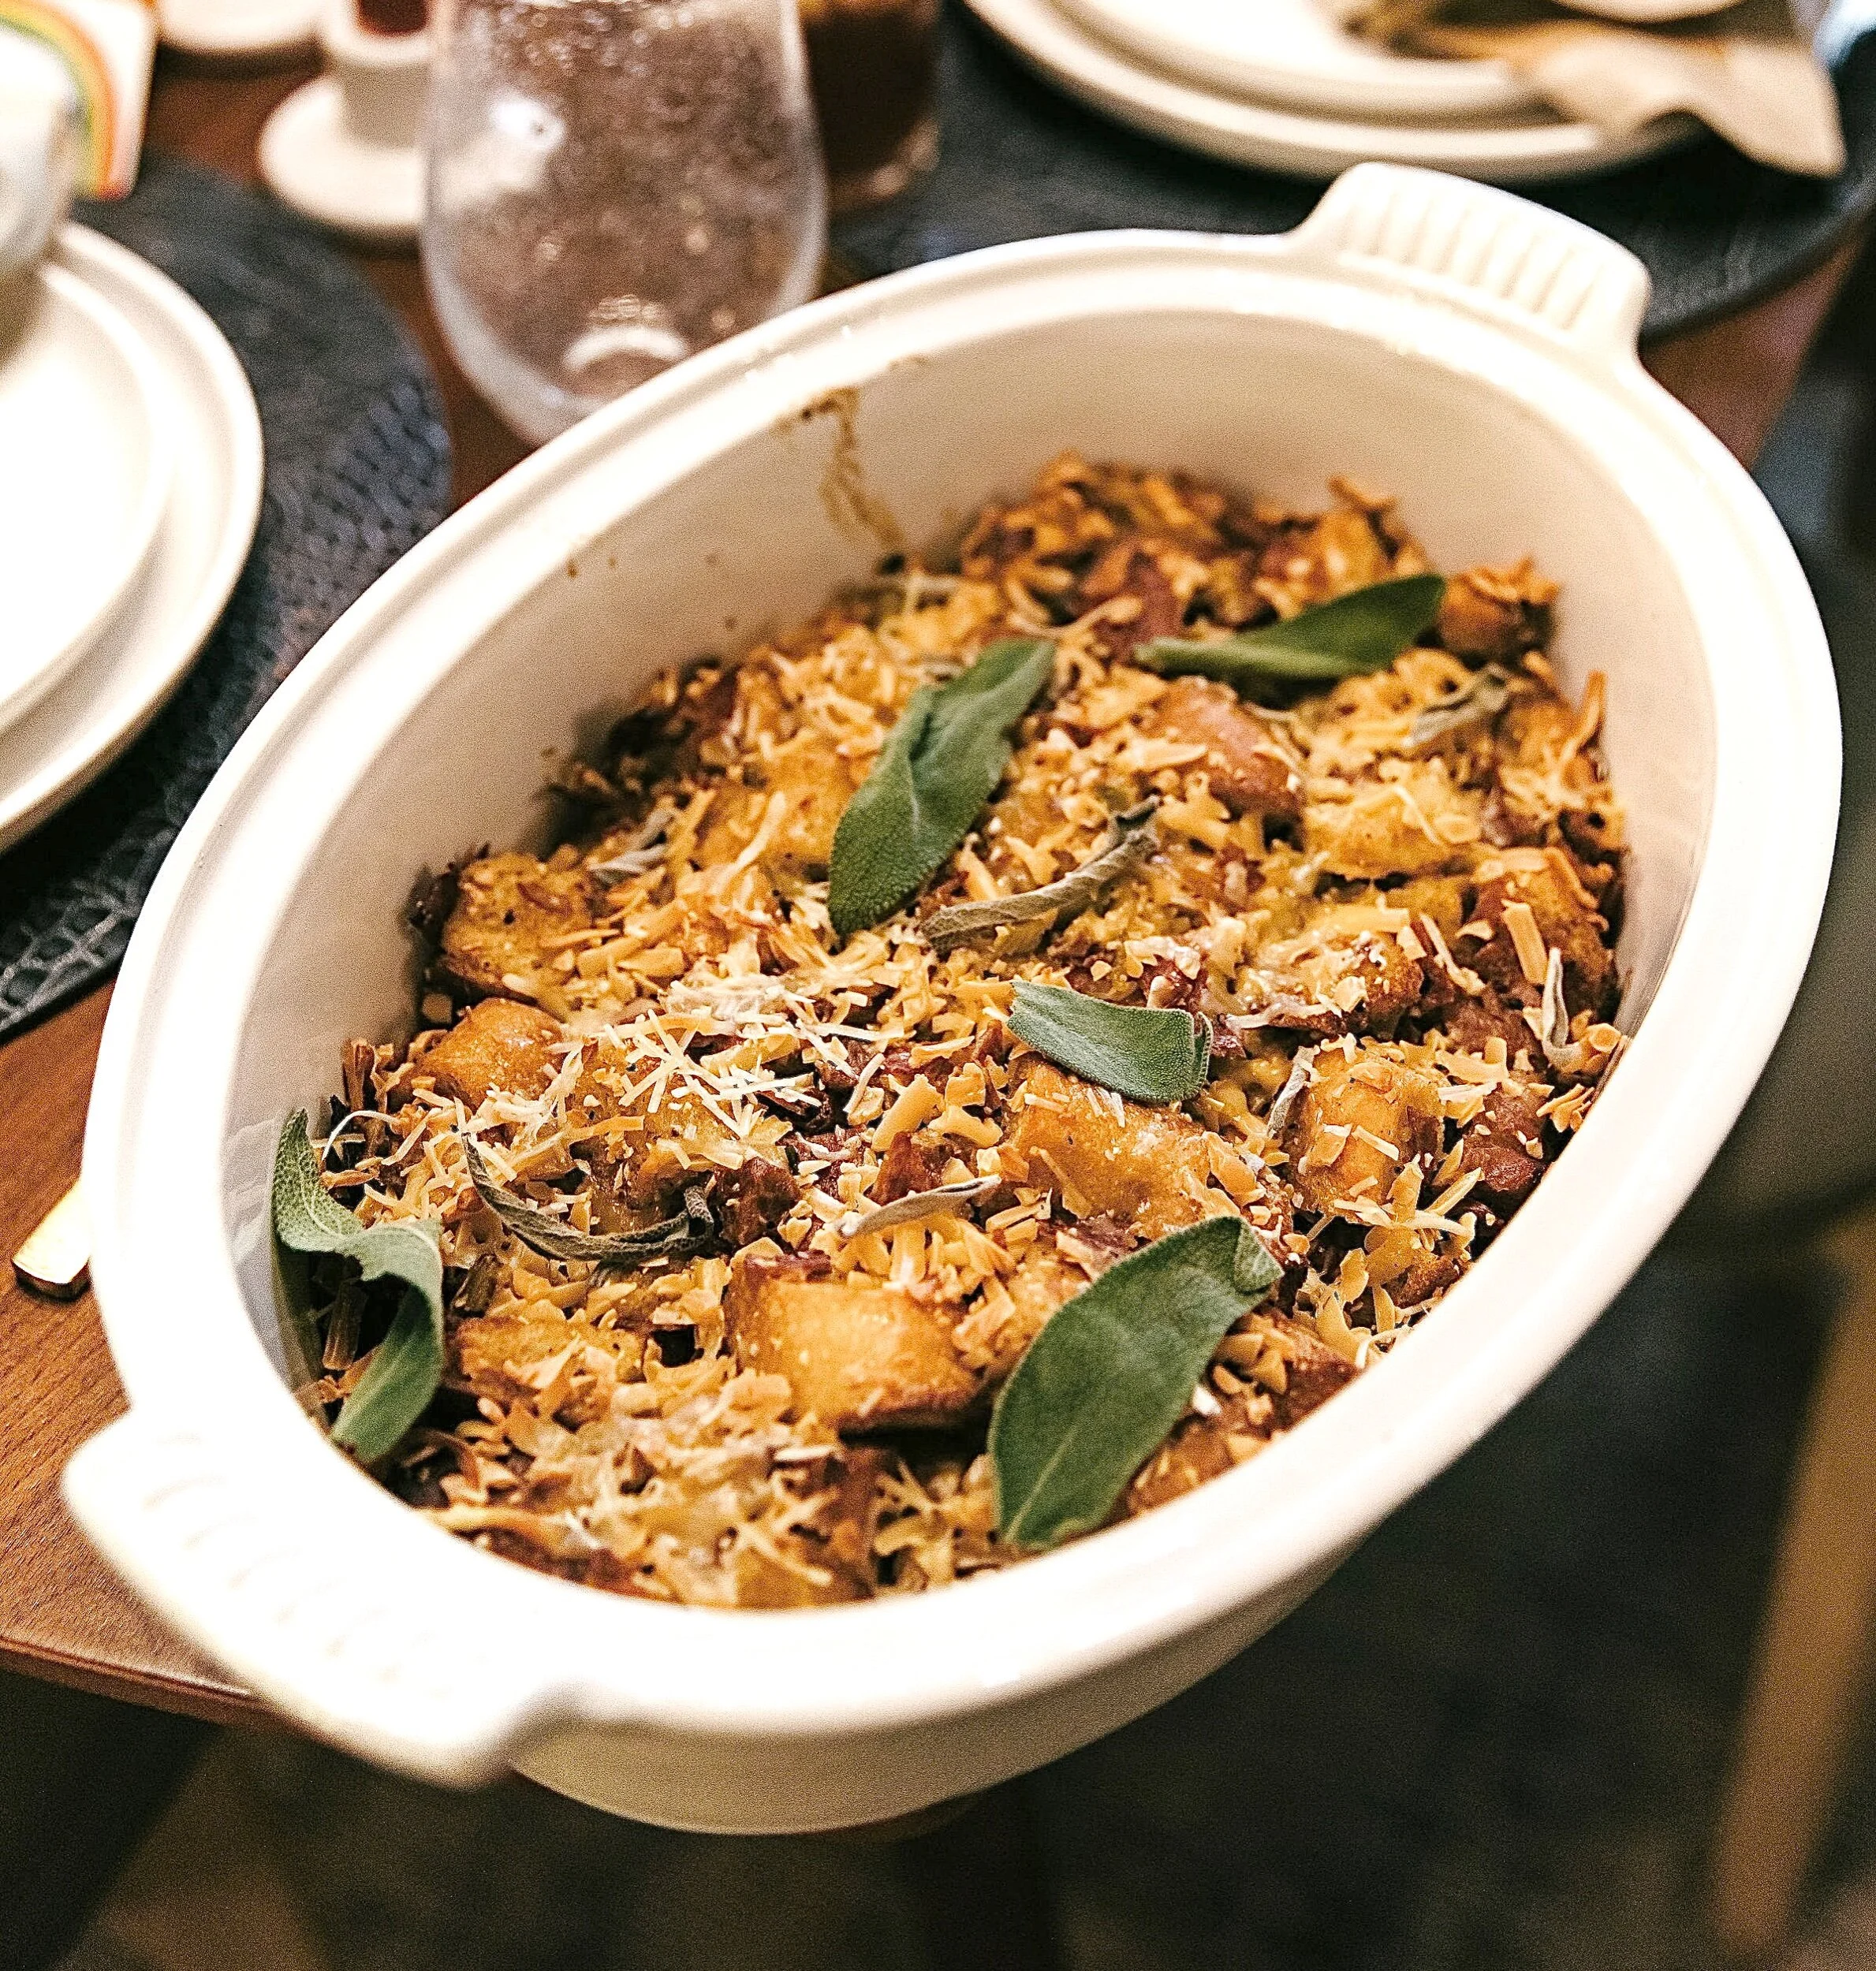
I know, I know - charcuterie is supposed to be cold cuts of meat, served cold but trust me - these types of meats are also next-level delicious when crispy. I’ve been crisping up everything from prosciutto to salami since I can remember to crumble over dishes (think bacon but just different types of charcuterie style meats) and it always takes a dish from good to great. This is a fun twist on a traditional Thanksgiving stuffing that I think you and your family will love!

1 loaf rustic bread - cubed 

2 tablespoons olive oil

4 ounces prosciutto - chopped 

4 ounces salami - chopped 

4 ounces soppressata - chopped 

1 stick salted butter

1 onion - chopped

3 celery stalks - sliced 

Kosher salt and cracked pepper 

6 eggs

2-3 cups chicken or veggie stock 

2 cups grated smoked Gouda

Sage leaves, for garnish (optional)

Preheat oven to 350 degrees. On a large sheet pan, toss together the bread cubes and olive oil. Bake bread for about 5 minutes or until just crispy on the top but still soft on the inside. Heat a large sauté pan over medium high heat. Add the prosciutto, salami, and soppressata to the pan and cook until crispy on all sides. Set aside on a paper towel lined plate. Turn the heat down to medium low and add the butter to the pan. When melted, add the onion and celery with one teaspoon of salt and pepper. Sauté until soft and translucent. 

In an extra large bowl, whisk together the eggs, 2 cups of the stock, and 1 cup of the Gouda. To the egg mixture, add the bread cubes, crispy meat, and veggies. Stir everything together until combined. If the mixture seems dry, add the other cup of stock and stir together until the bread soaks up the liquid. Pour into a greased 8x12 baking pan and top with the remaining cheese and sage leaves if desired. Bake for 25 to 30 minutes or until golden on top and cooked through. Serve warm. 

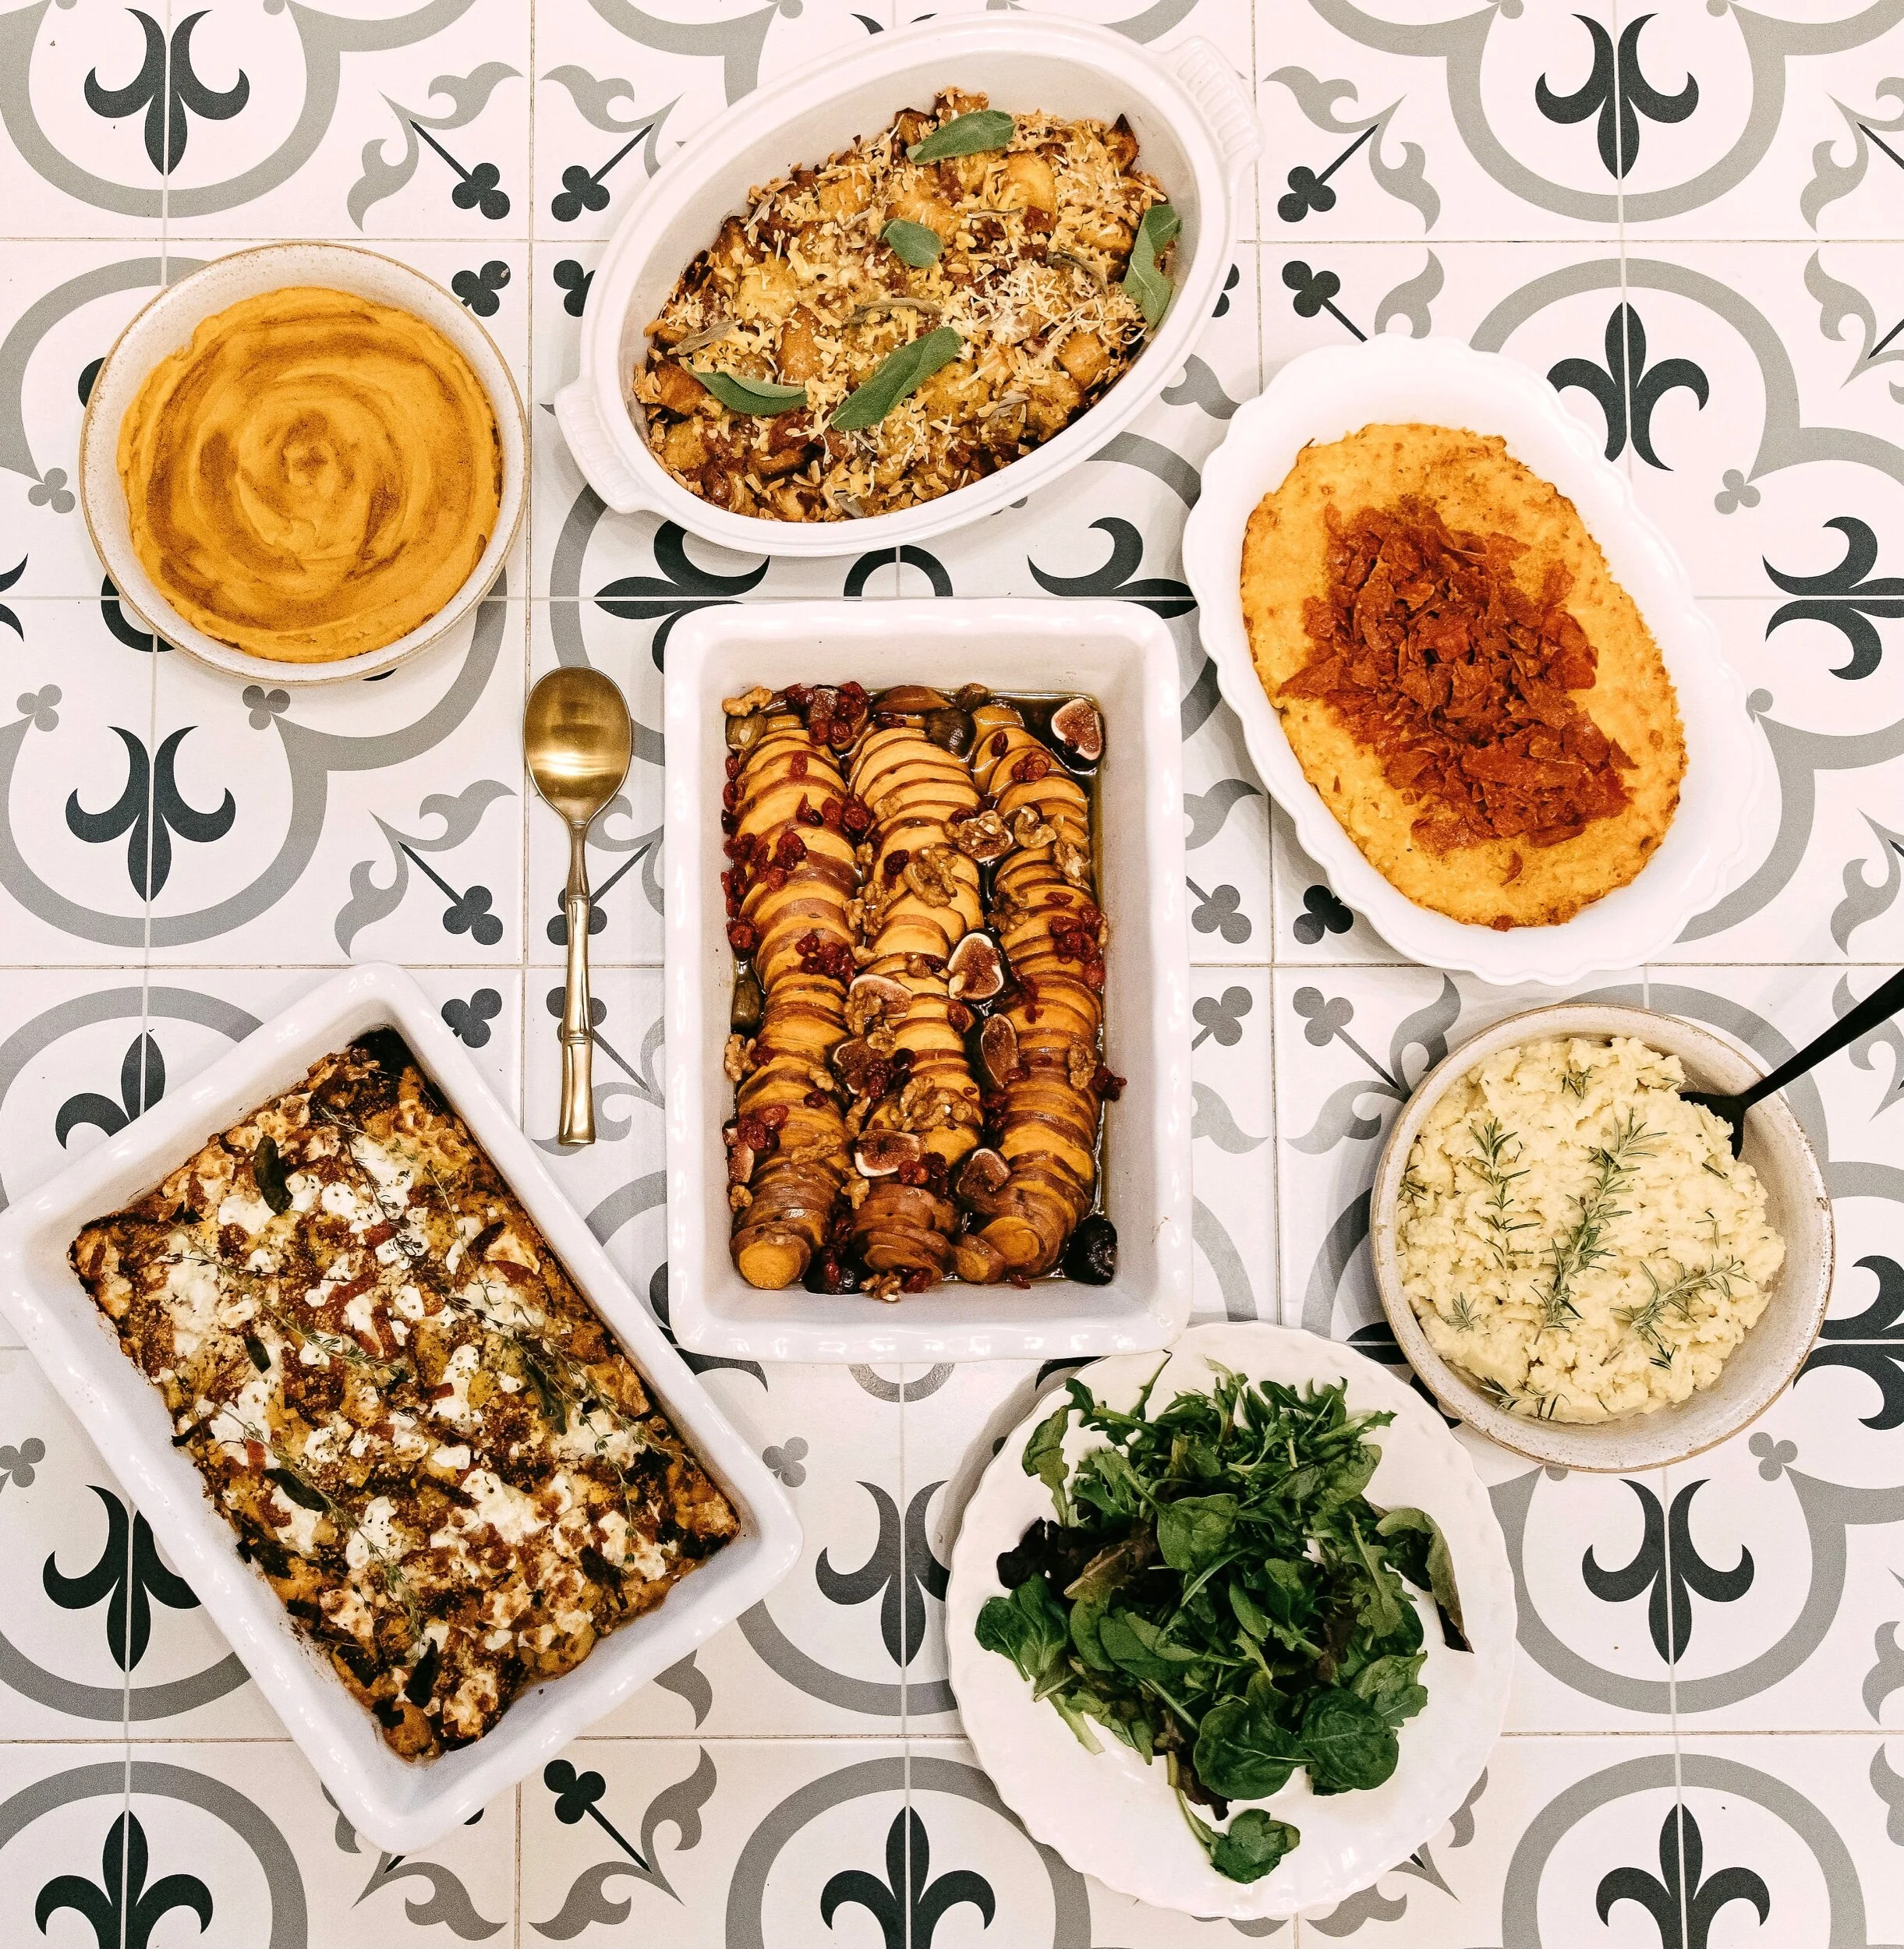
The Only Thanksgiving Sides You Need On Your Table this Year

November 21, 2020 Andrea LeTard
IMG_9966.jpeg

Let’s be real, Thanksgiving is simply not Thanksgiving without an array of fabulous sides. Most of y’all know already, I’m not terribly keen on traditional Thanksgiving food. I’ll be honest, I find most of it barf-worthy, but I LOVE good fall focused sides! Every year when I recipe test for Thanksgiving, it’s all about the sides and putting a modern spin on somewhat traditional Thanksgiving food. Here you’ll find a list of fun, beautiful, and most delicious sides! 

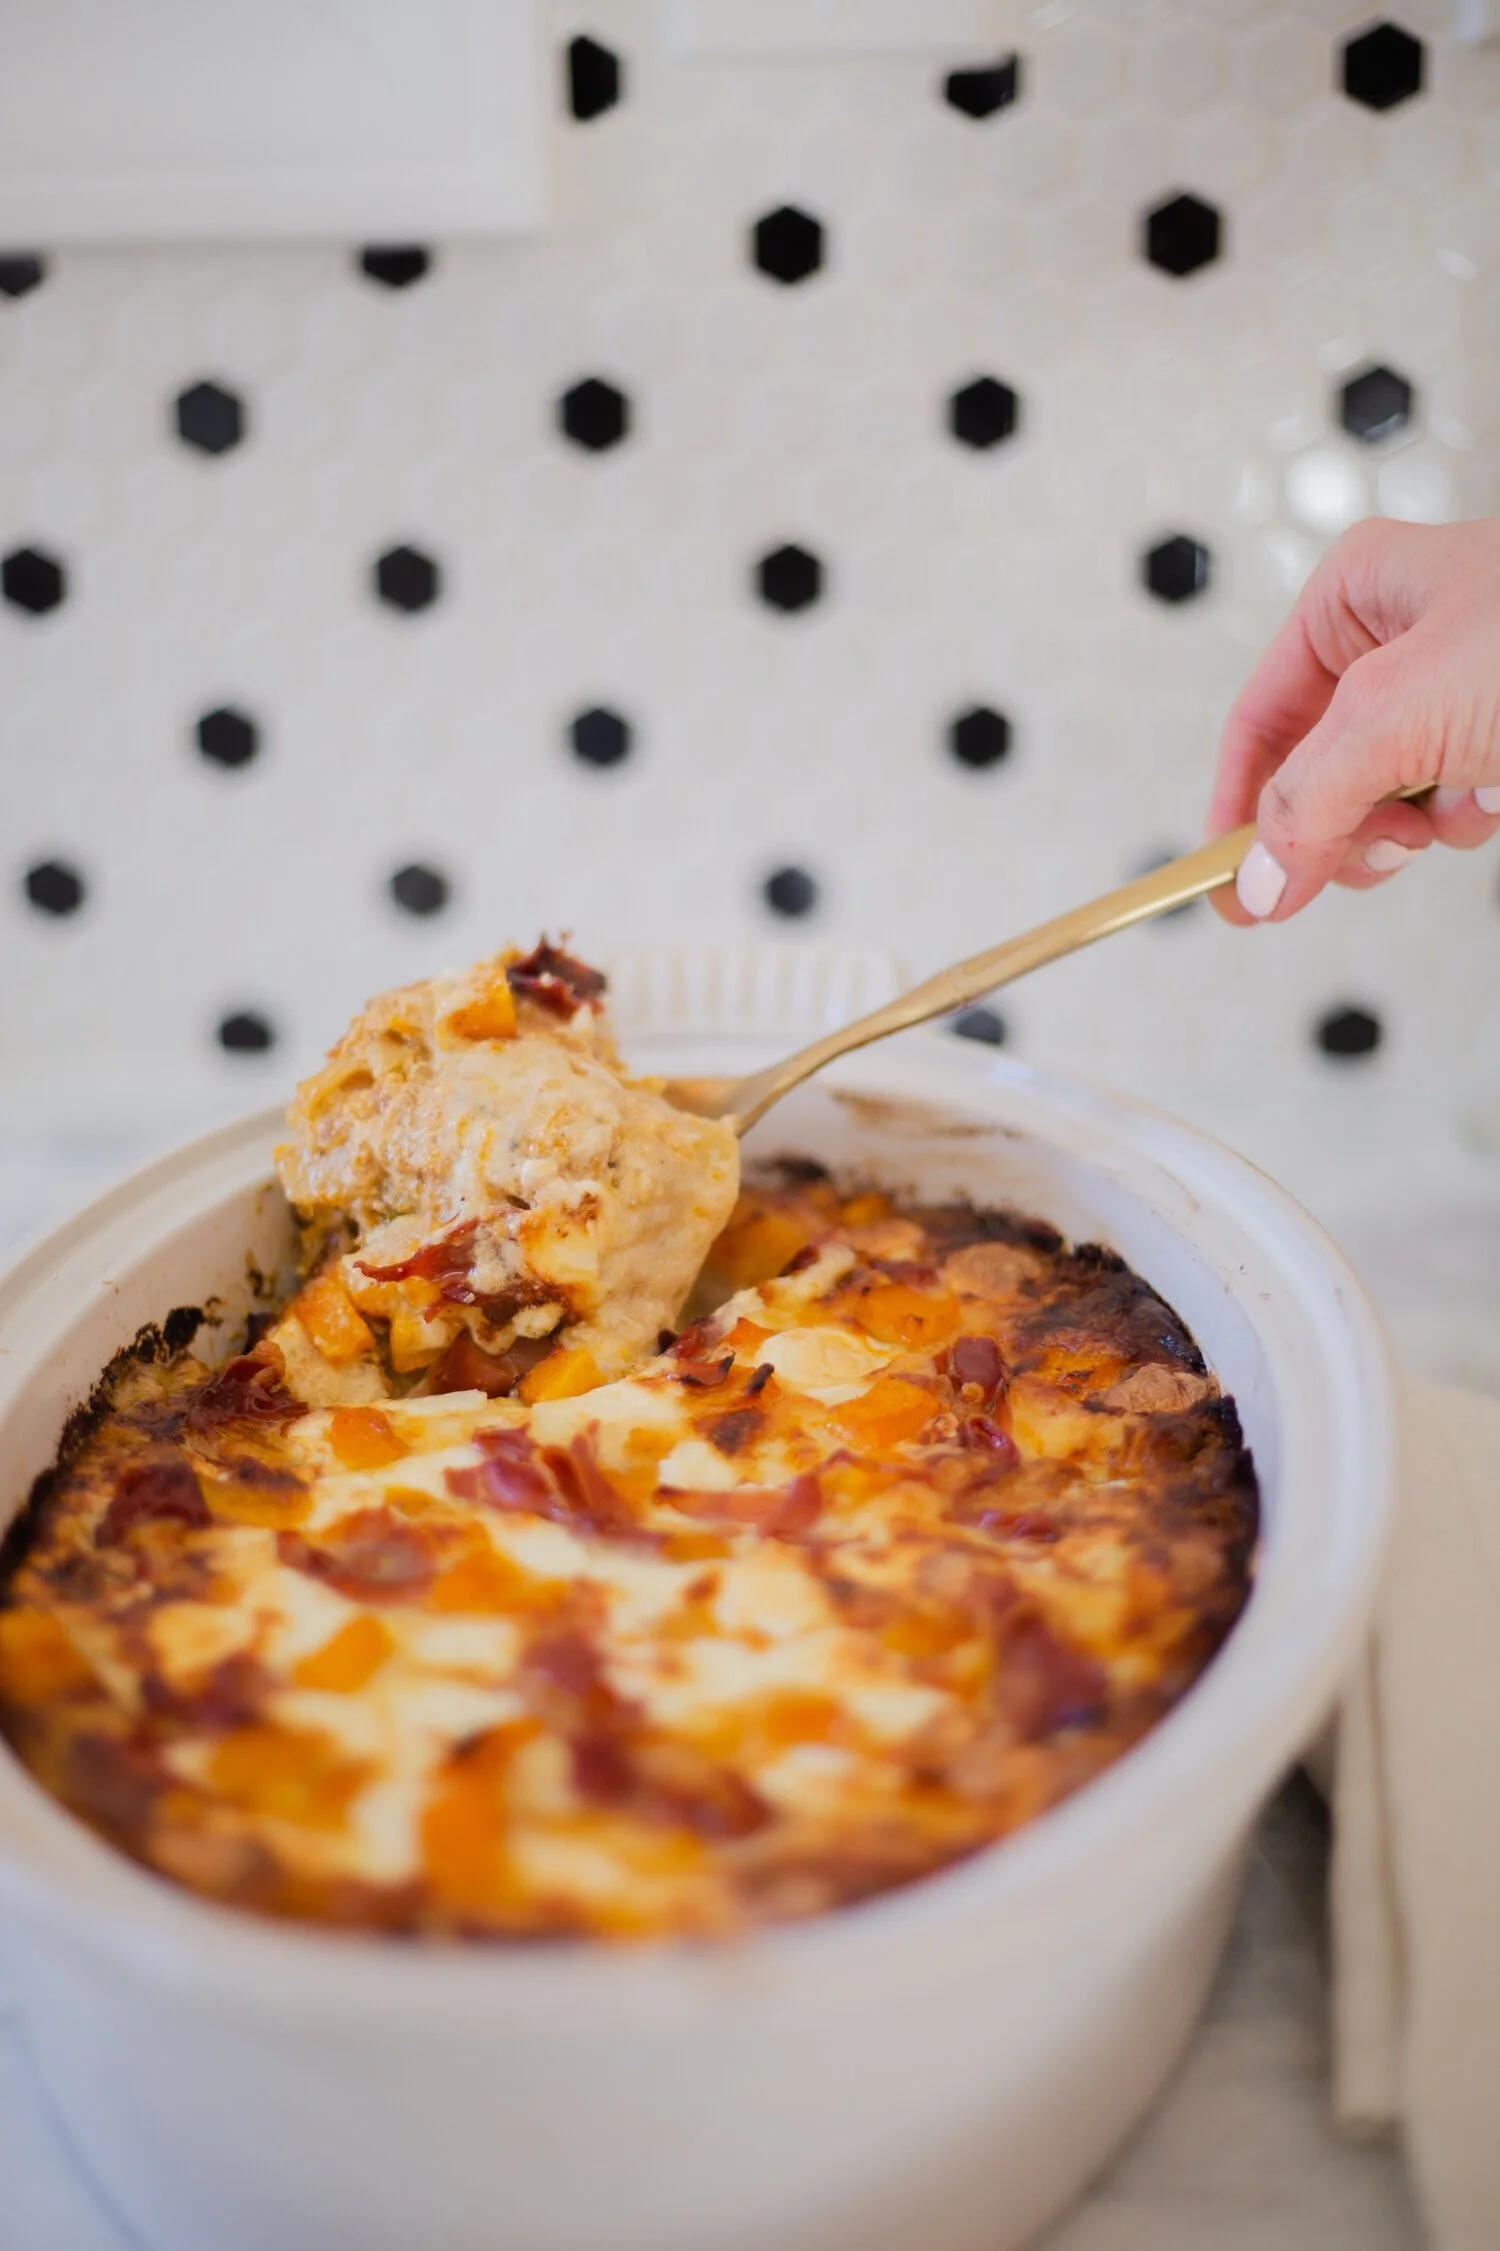
Crispy Prosciutto & Caramelized Onion Butternut Squash Lasagna 

IMG_9455.jpeg

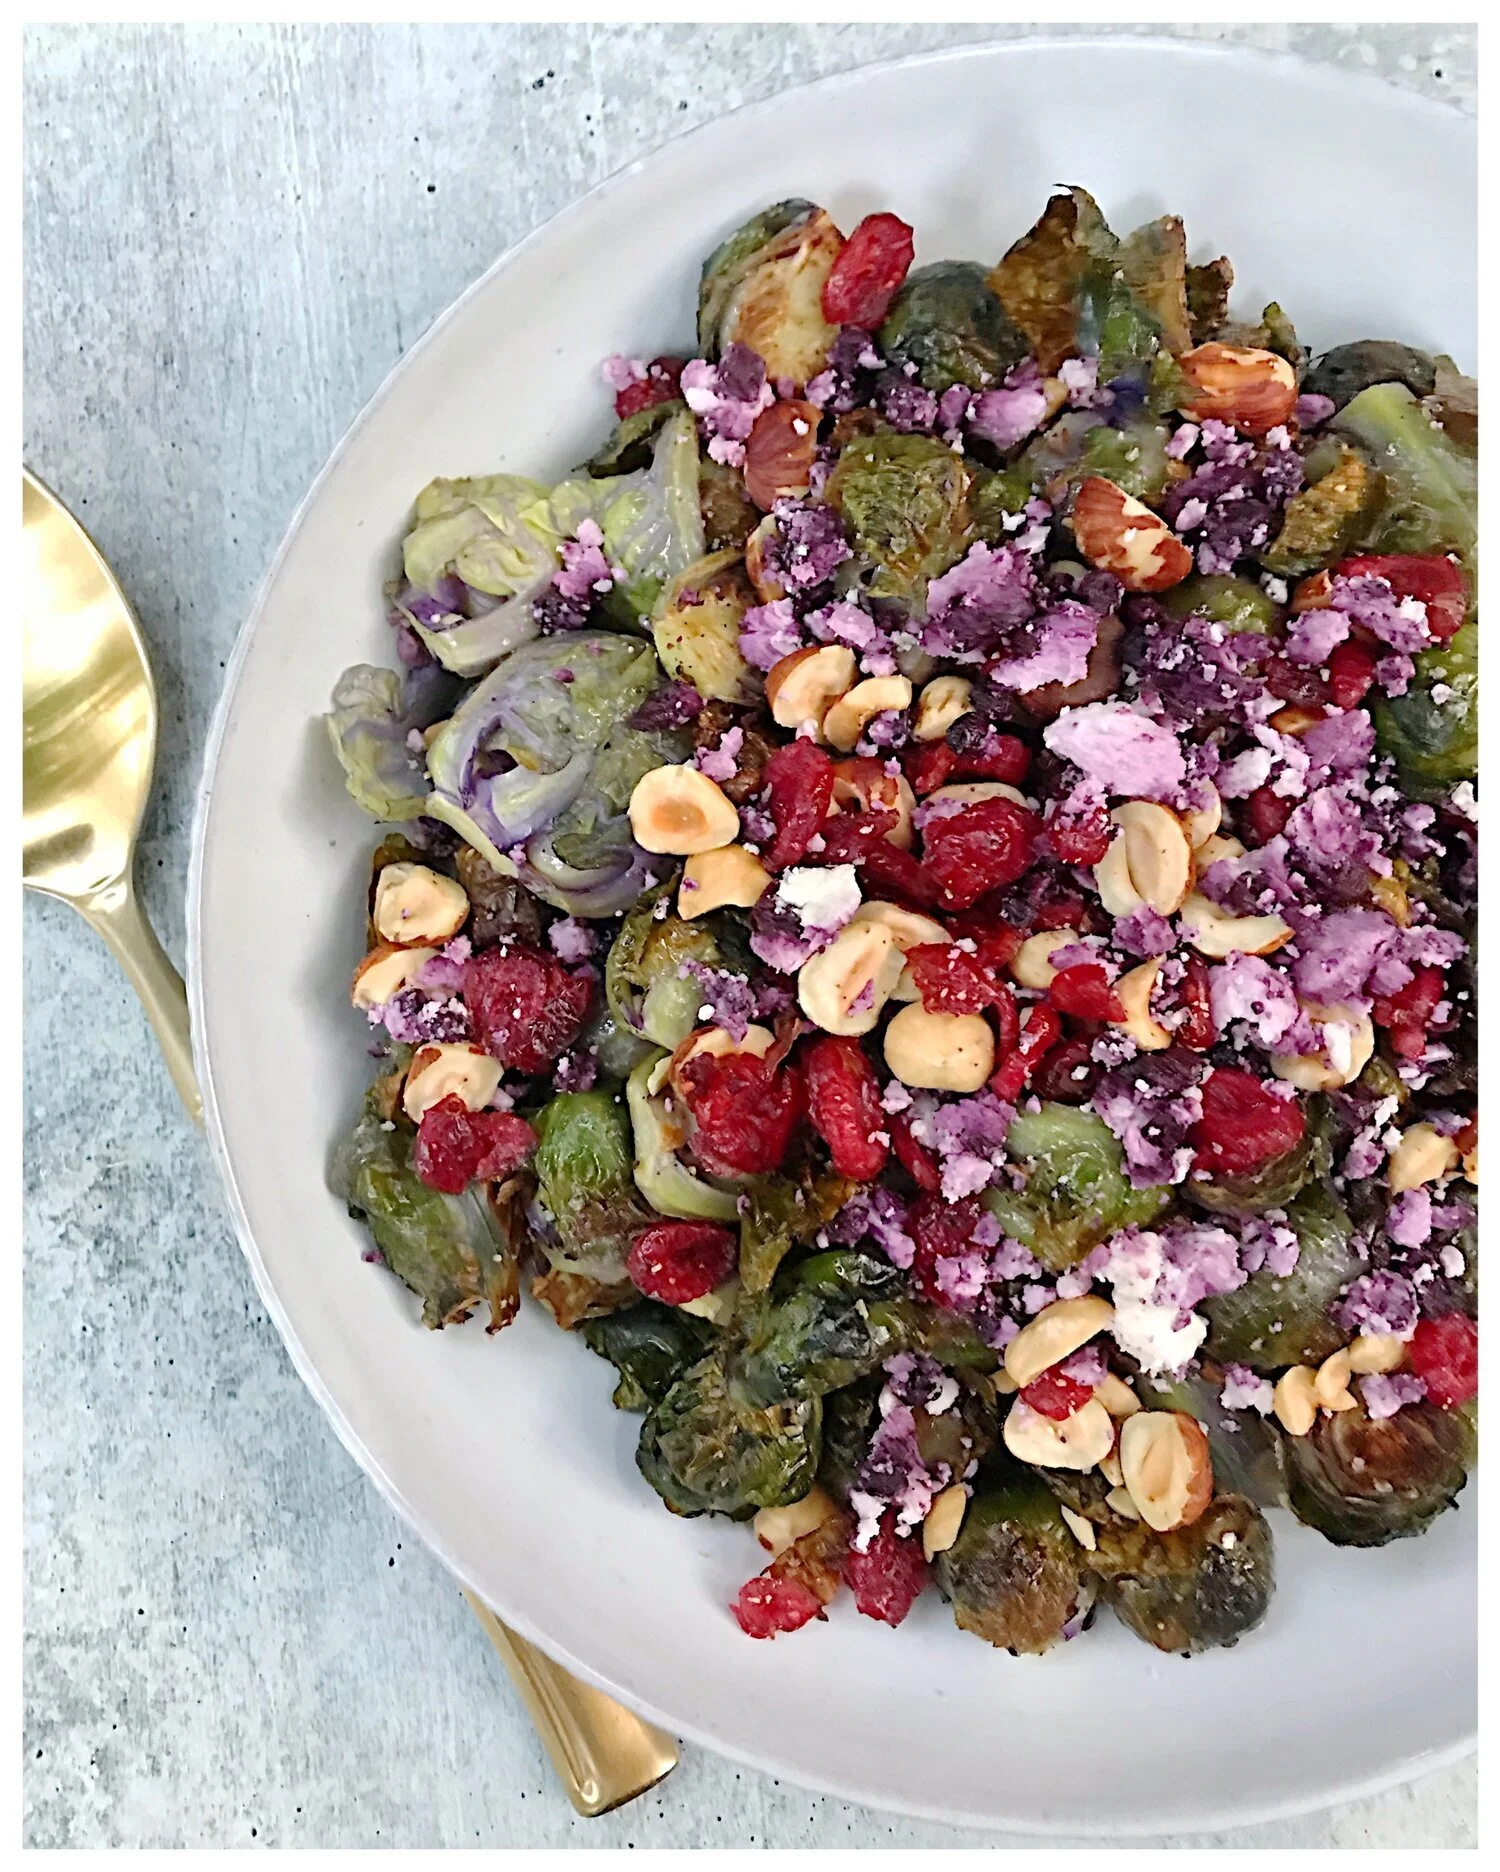
Crispy Brussels Sprouts with Berry Goat Cheese and Toasted Hazelnuts

IMG_9618.jpeg

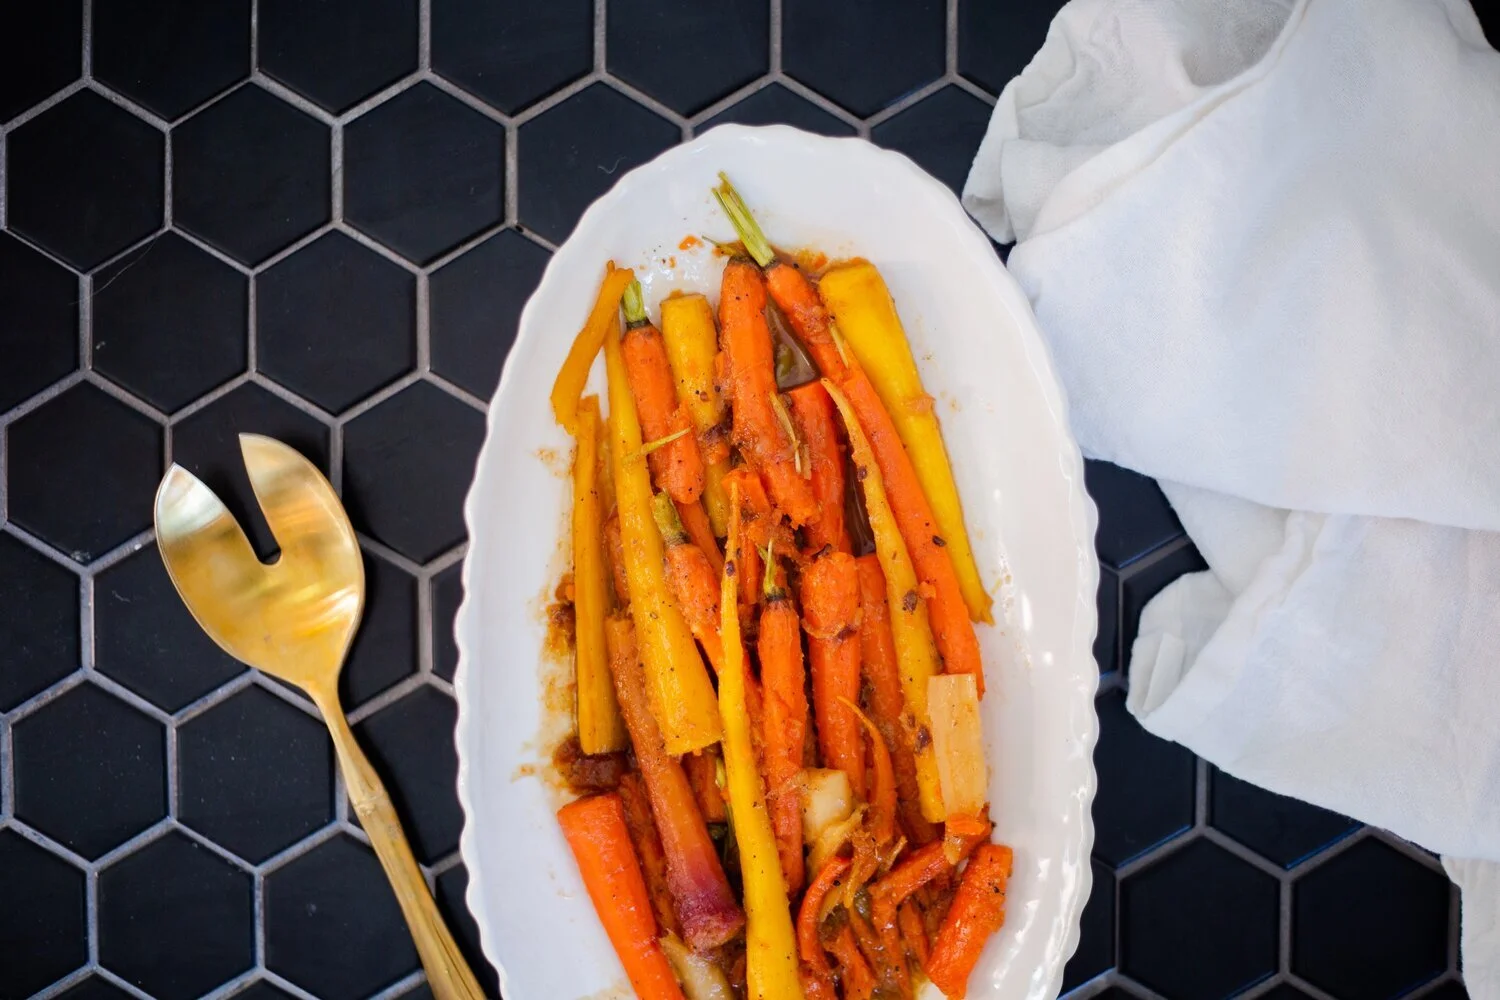
Whisky Pepper Jelly Glazed Carrots 

IMG_0074.jpeg

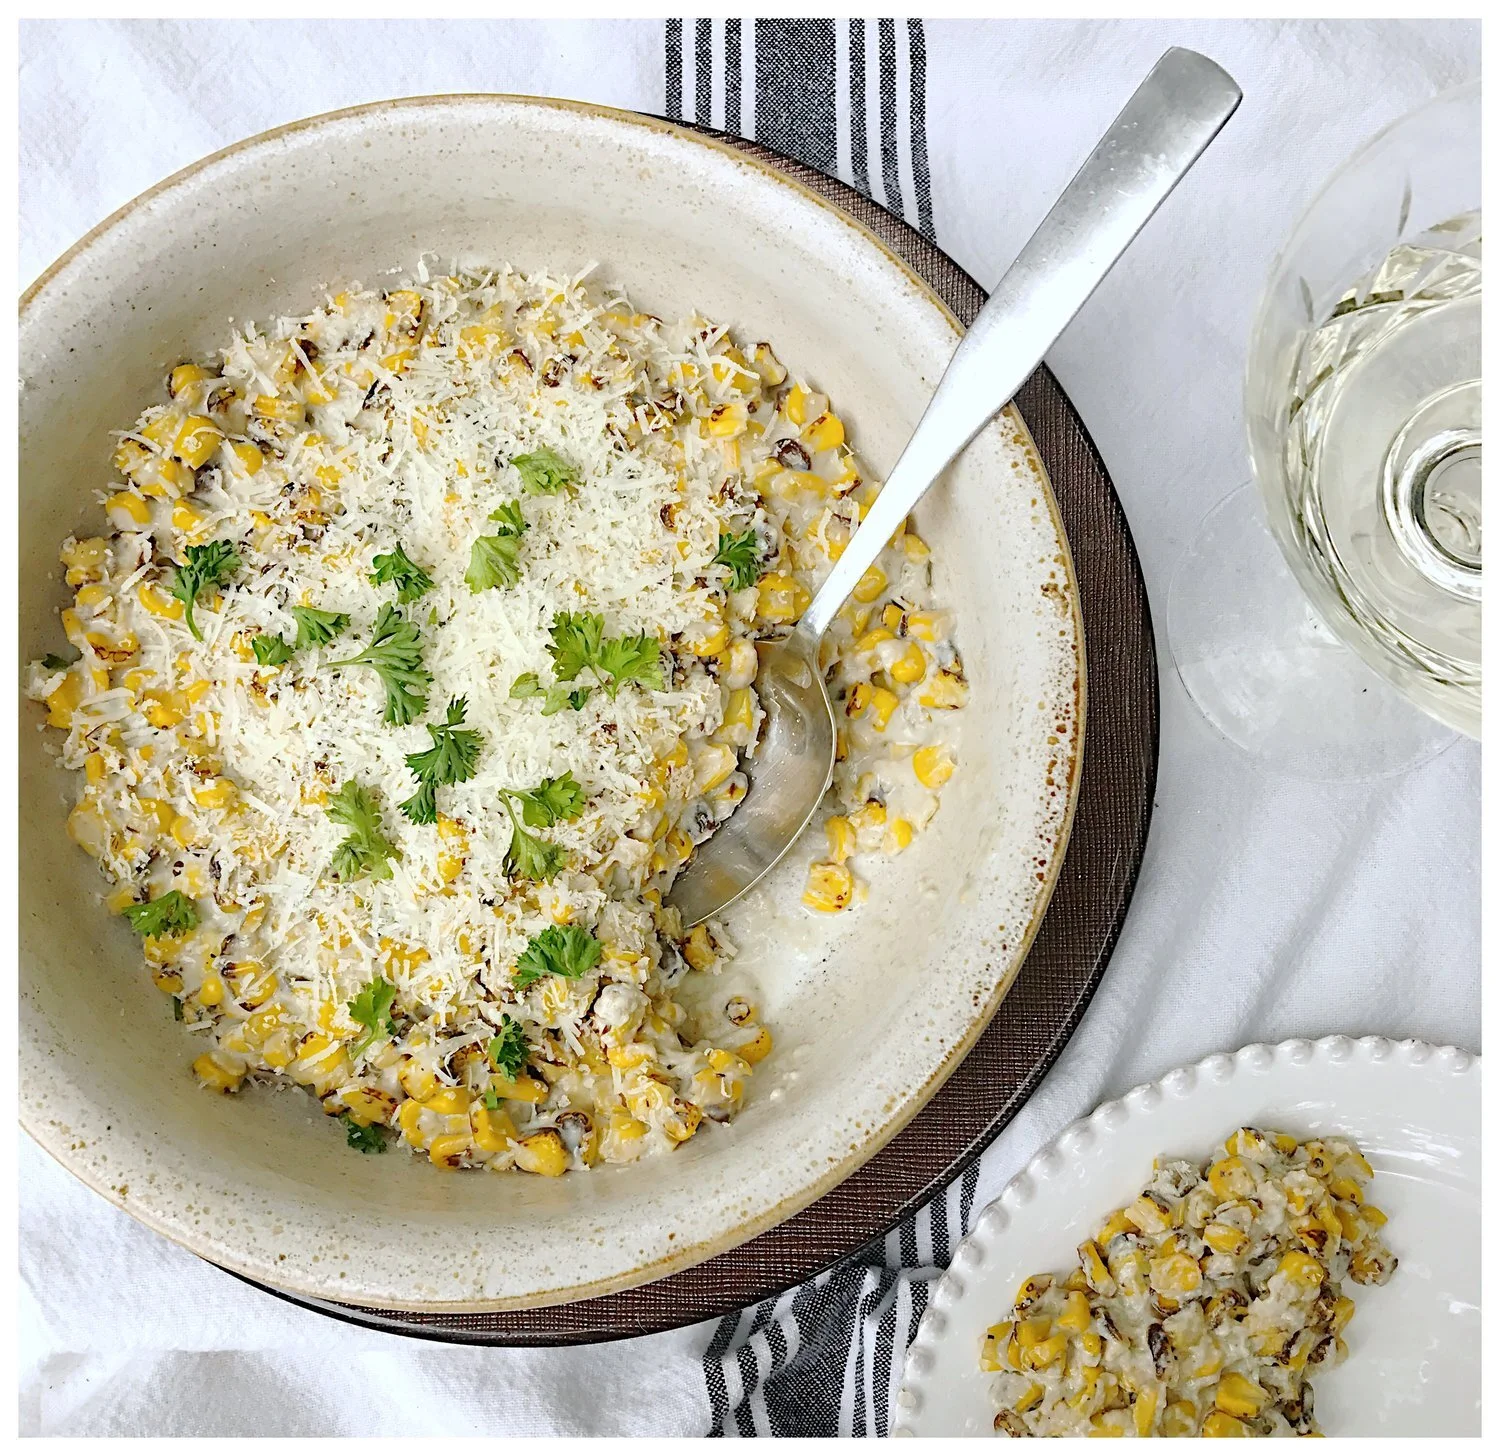
Roasted Maple Creamed Corn 

IMG_9725.jpeg

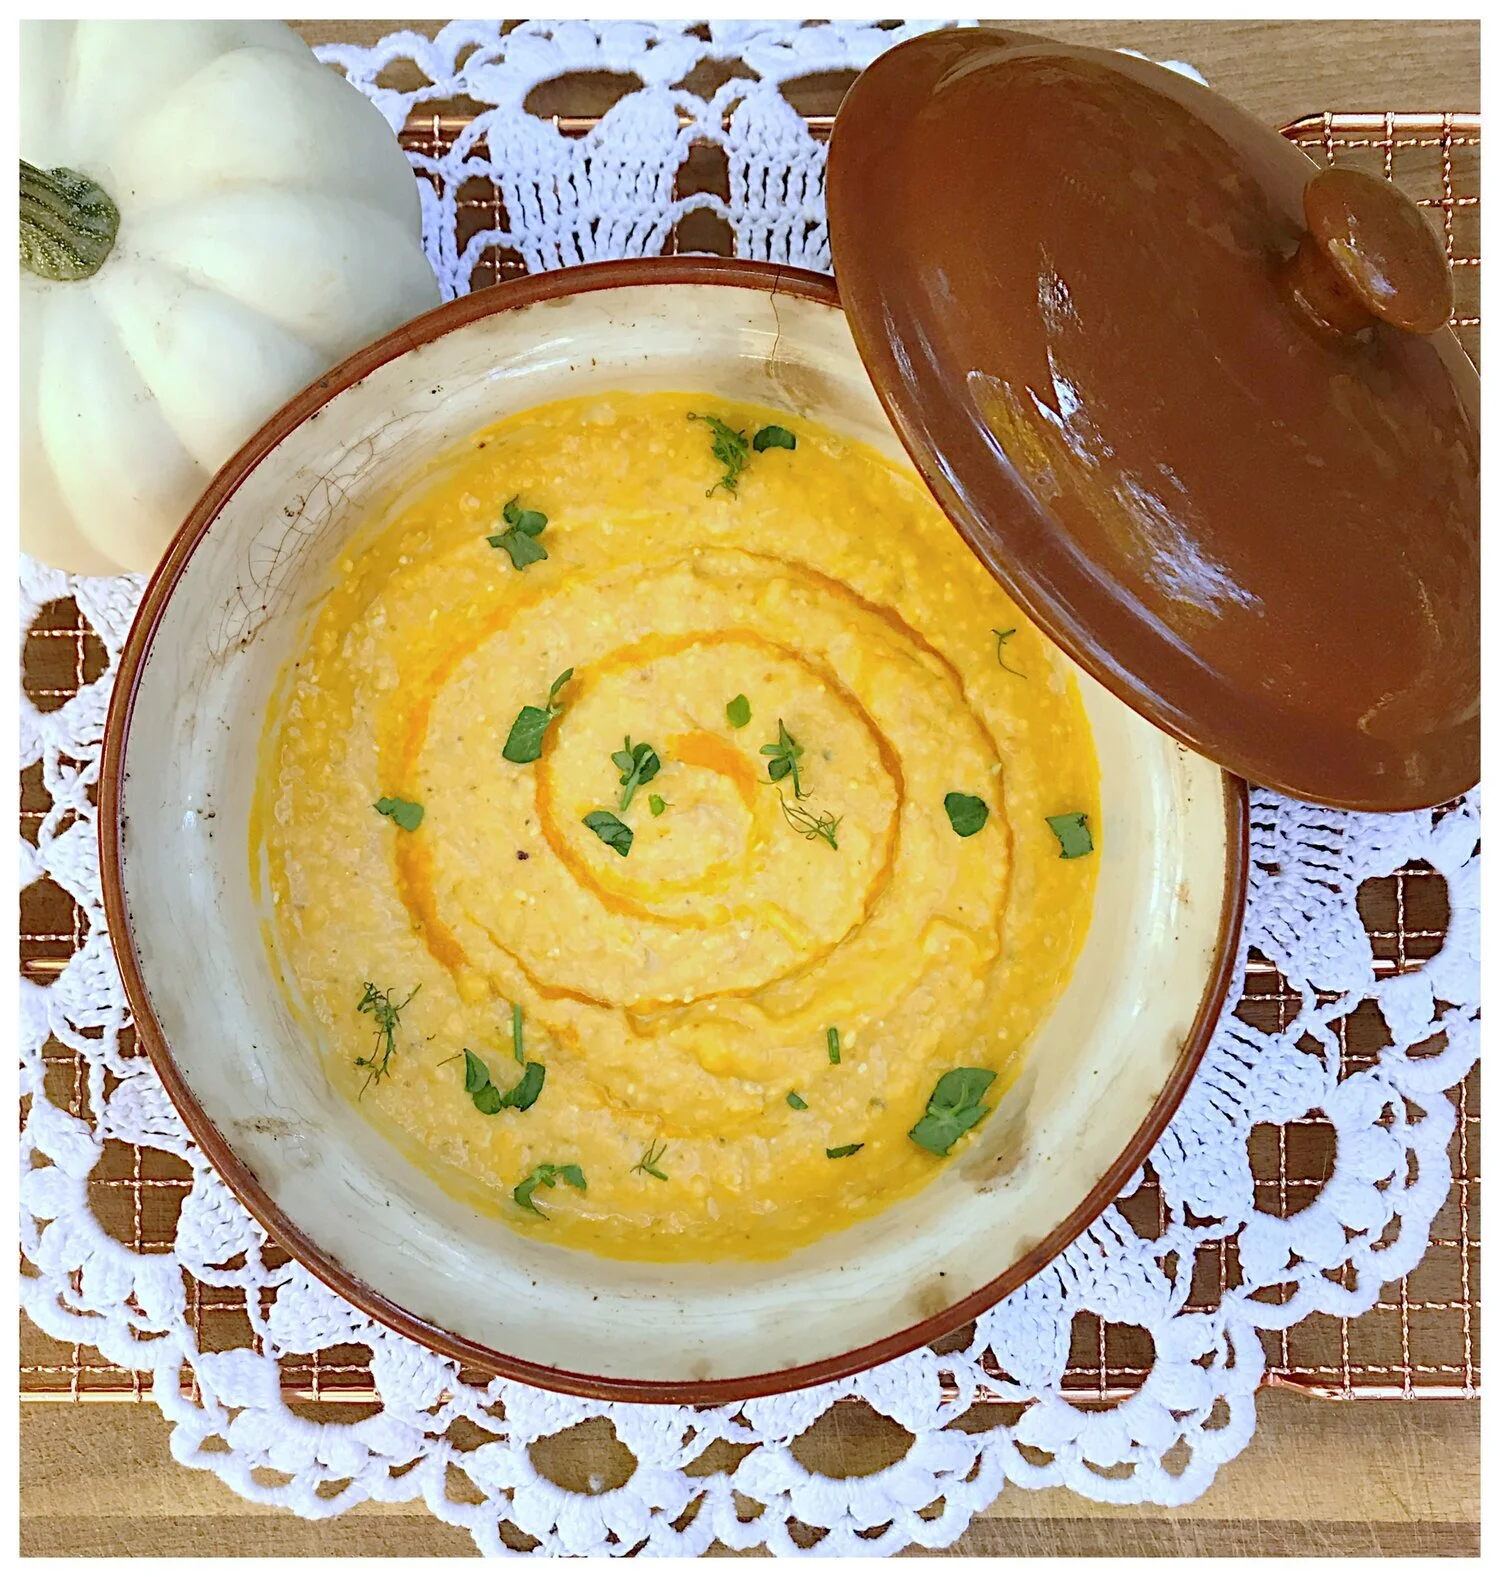
Pumpkin Mascarpone Grits

IMG_9714.jpeg

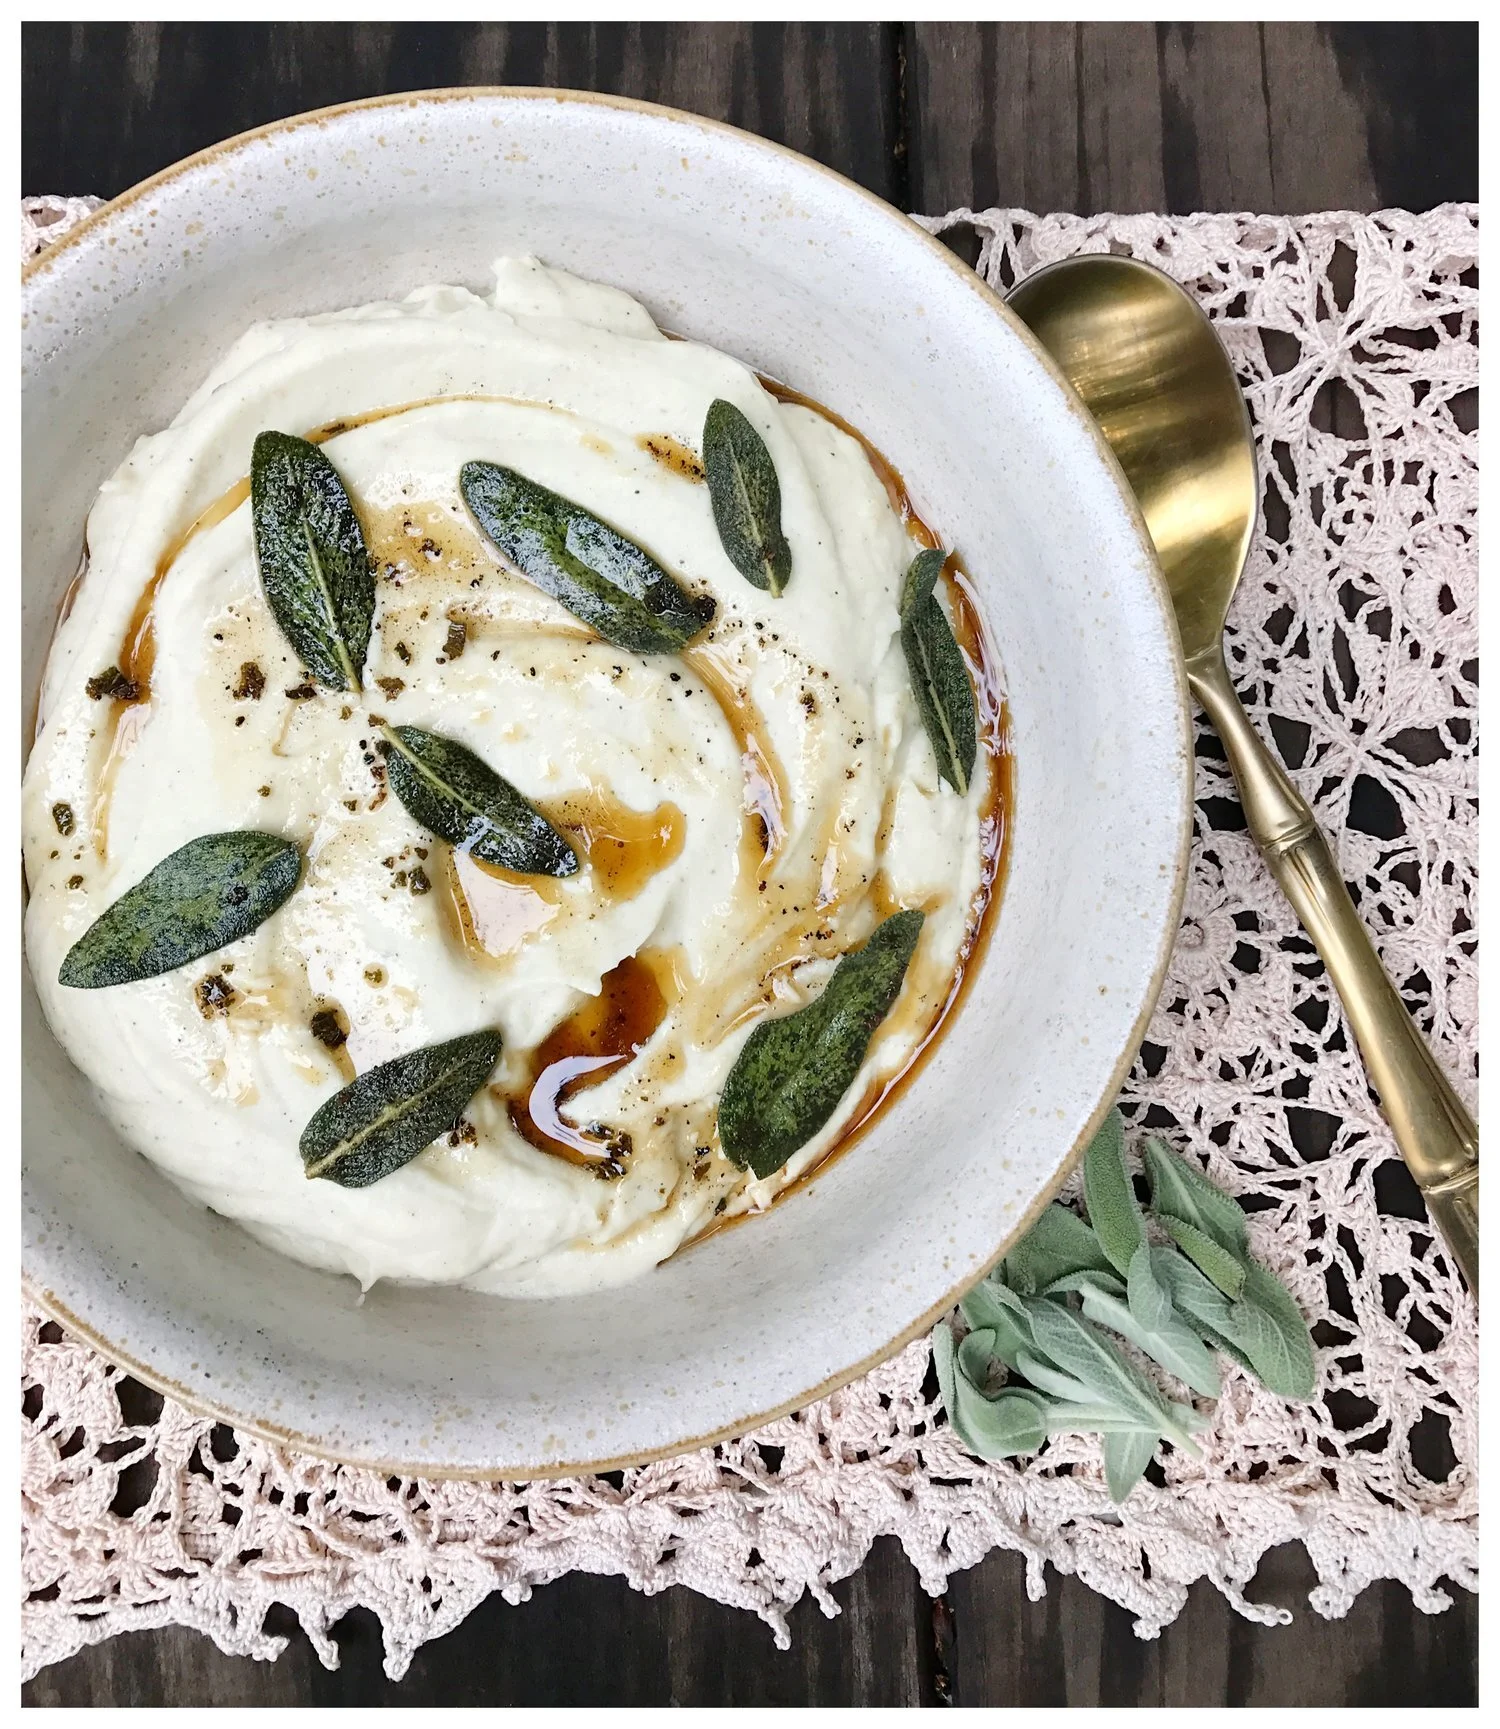
Brown Butter Crispy Sage Cauliflower Mash

IMG_9881.jpeg

Baked Macaroni & Cheese with Pork Crunchies 

IMG_0078.jpeg

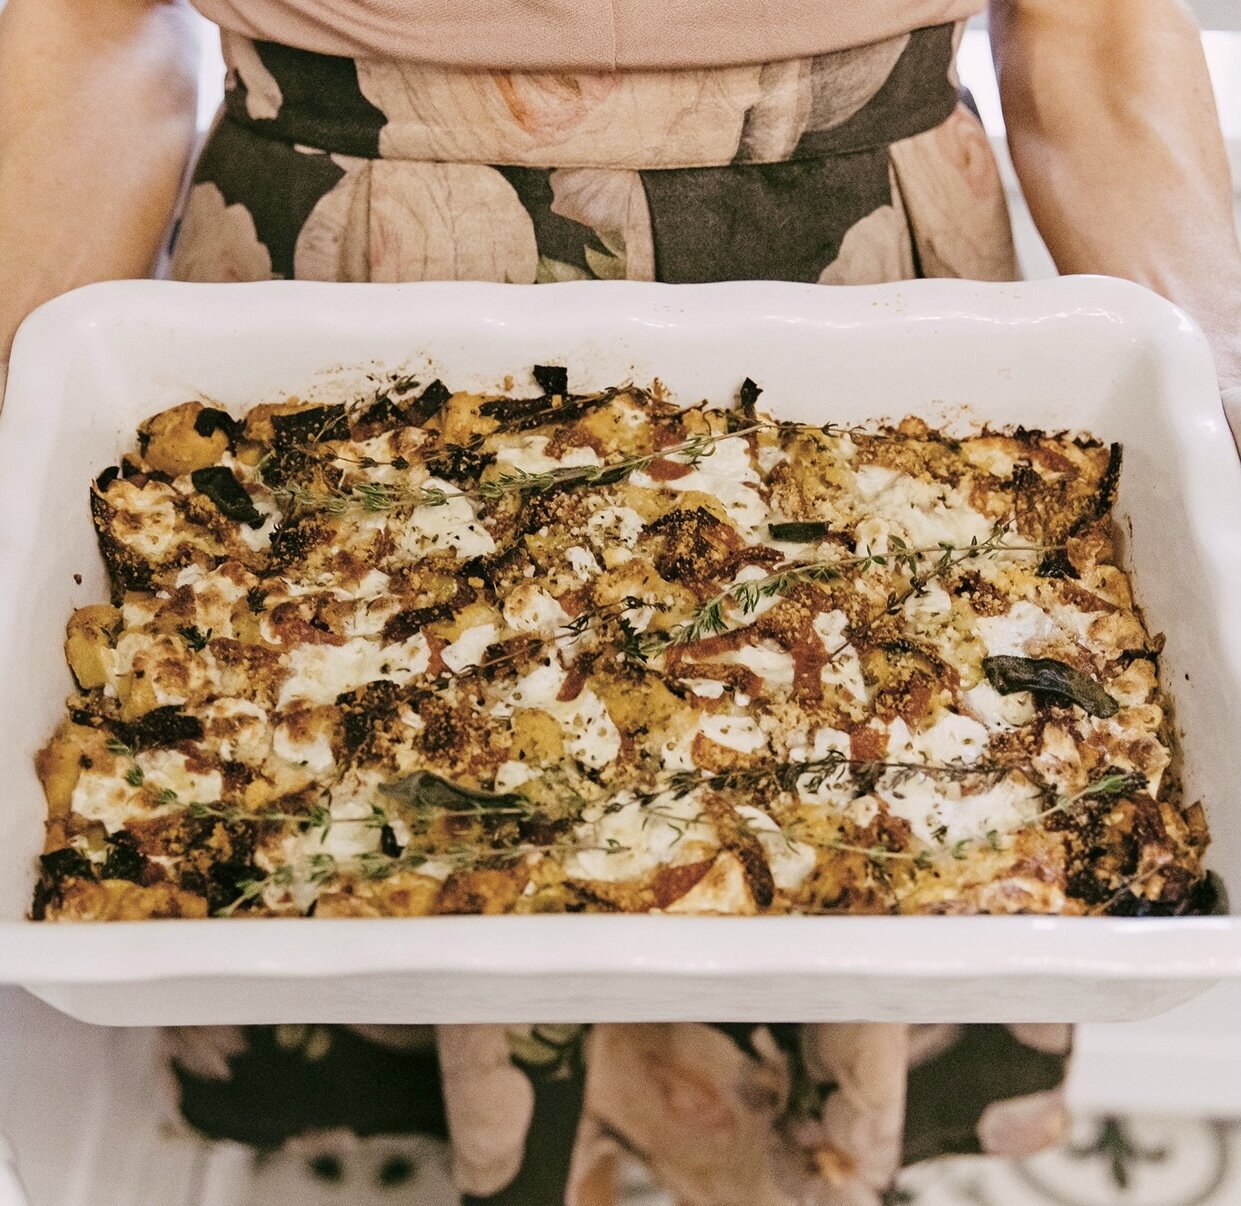
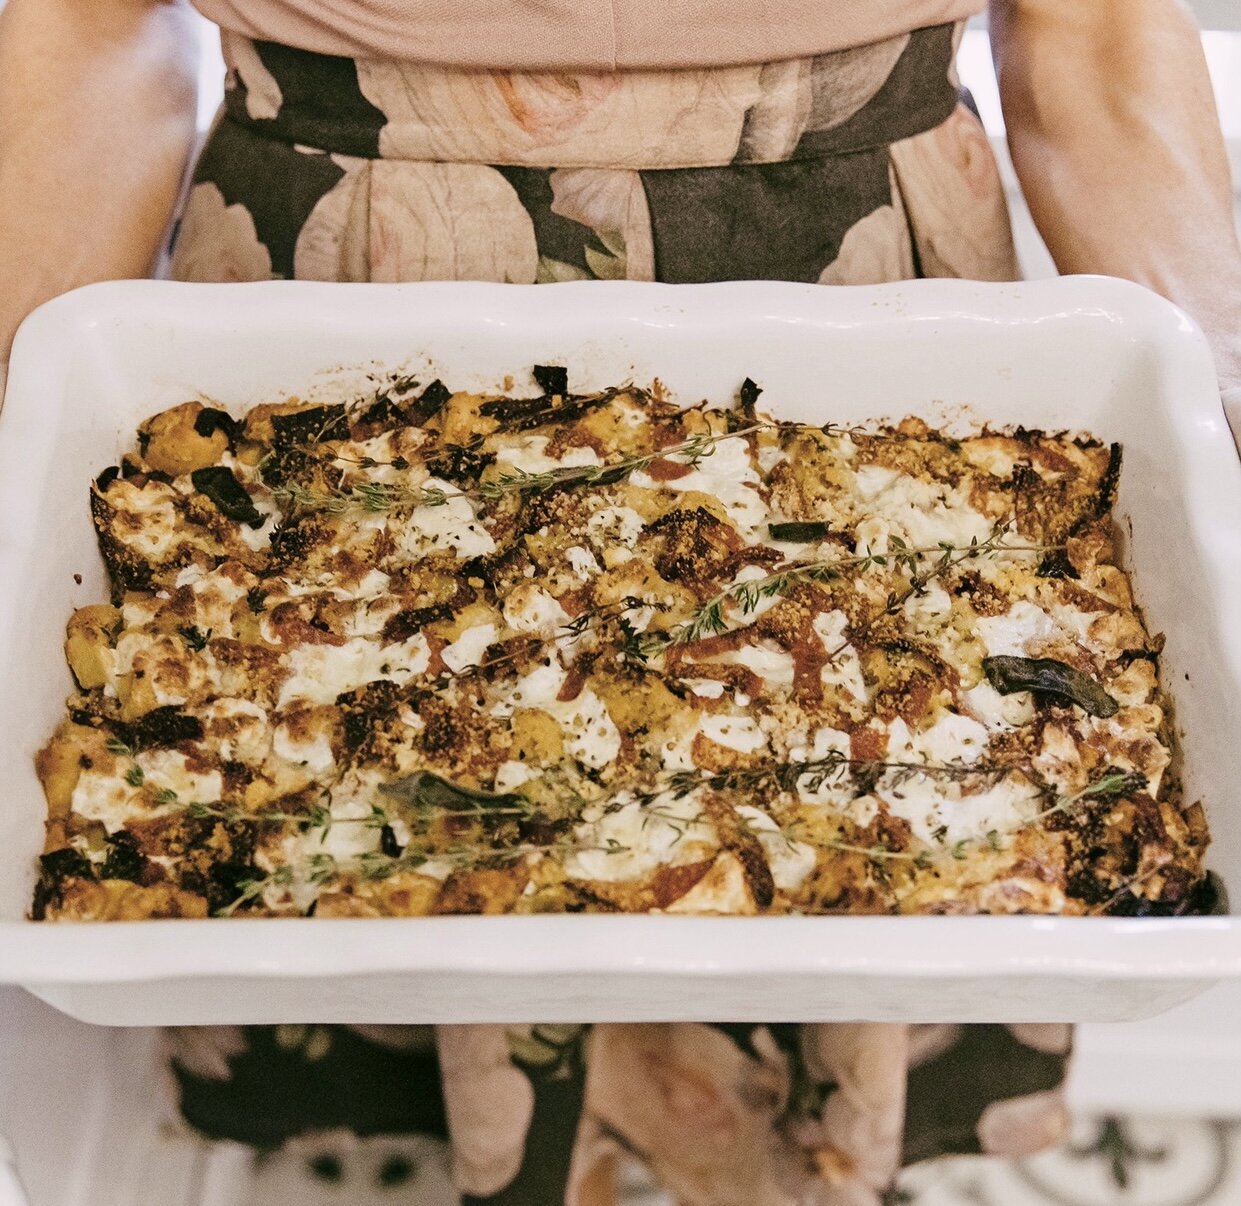
Pizza Stuffing with Fall Herbs

IMG_0030.jpeg
In Holiday

Pizza Stuffing with Fall Herbs

November 20, 2020 Andrea LeTard
IMG_0030.jpeg

This is the perfect recipe for those at the table who don’t absolutely love traditional Thanksgiving food. Kids will be the number one fan of this one too. I personally think pizza (in some form) should always be on the table when eating the biggest meal of the year!

1 pound focaccia bread or artisan pizza dough - cubed 

1/4 cup olive oil

1 pound fresh mozzarella - cubed 

8 to 10 ounces pepperoni - sliced into strips

1/4 cup pepperoncini- minced 

1/4 cup sun dried tomatoes- minced 

2 tablespoons minced fresh parsley

1 tablespoon minced fresh sage

1 tablespoon minced fresh thyme

6 eggs

2 cups chicken or veggie stock 

1 tablespoon Italian seasoning 

1 1/2 teaspoons kosher salt

1/2 teaspoon freshly cracked pepper 

1 cup shredded Parmesan 

Preheat oven to 350 degrees. In a large bowl, add the bread cubes and coat with olive oil. Add 3/4 of the mozzarella cubes, 3/4 of the pepperoni, pepperoncini, sun dried tomatoes, parsley, sage, and thyme. In a separate bowl, whisk together the eggs, stock, Italian seasoning, salt, pepper, and half of the Parmesan. Add the egg mixture to the bread mixture and stir together until the bread is coated. Pour into a greased 8x12 baking pan. Top with the remaining mozzarella, pepperoni, and Parmesan. Bake for 20 to 30 minutes or until golden and bubbly. Garnish with thyme sprigs if desired. 

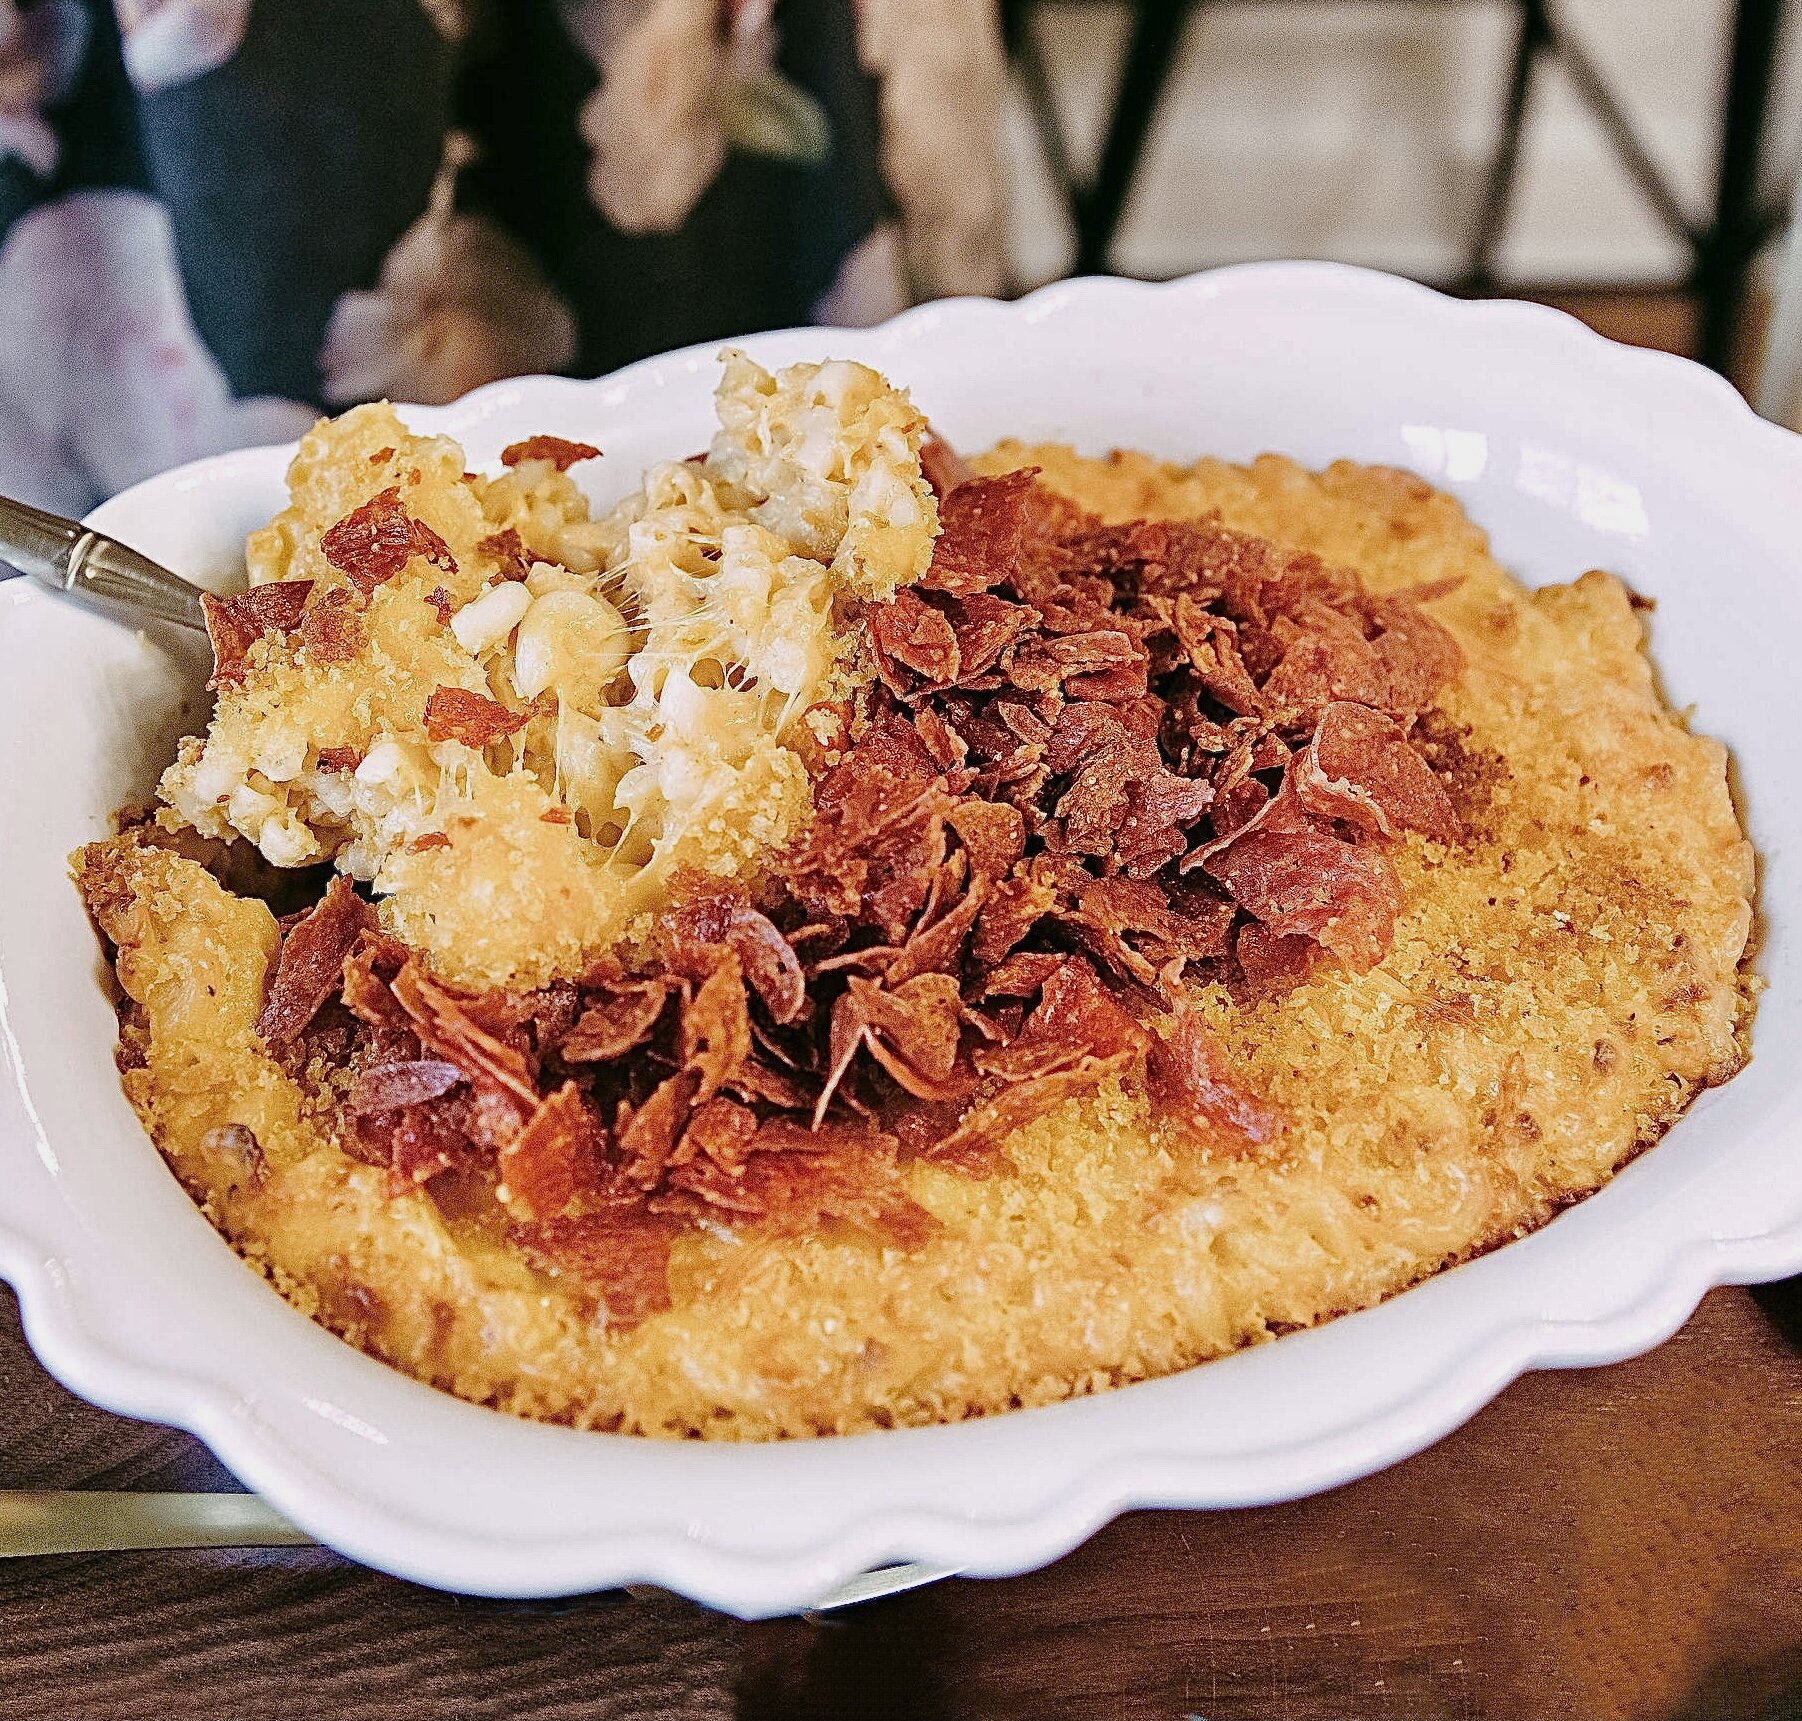
Baked Macaroni & Cheese with Pork Crunchies

November 16, 2020 Andrea LeTard
image.jpeg

This delicious side dish is a twist on one of the most popular pasta dishes from my cookbook. Pork crunchies are the star of this dish, giving a crunchy, meaty element to the creamy cheddar mac and cheese. What’s a pork crunchy, you may ask? Imagine a pepperoni pizza when it comes out of the oven and the sides of the pepperoni are crispy. You fry salami and pepperoni exactly like bacon, and that makes a pork crunchy! This dish is beyond any other side for Thanksgiving you’ve ever had, I promise. 

1 pound dried elbow pasta 

1 stick unsalted butter

1/2 cup flour 

3 cups whole milk 

1 teaspoon kosher salt

1/2 teaspoon fresh cracked pepper

2 1/2 teaspoons garlic powder

1 teaspoon paprika 

5 cups sharp cheddar, divided 

3 ounces thinly sliced salami

3 ounces thinly sliced pepperoni 

1 cup panko crumbs 

Preheat oven to 325 degrees. Boil pasta in salty water for about 6 minutes or until al dente. Drain and set aside. In a large saucepan or pot, melt the butter over low heat then whisk in the flour for about one minute. Slowly add the milk, continuing to whisk. Bring to a slight boil then simmer until sauce is thick enough to coat the back of a spoon, whisking occasionally. With a silicone spoon, stir in the salt, pepper, garlic powder, paprika, and 2 cups of the cheese until melted. Take off the heat and add the pasta and 2 more cups of the cheese. Stir together until we’ll combined then transfer to a greased (3 quart) baking dish. Set aside. 

In a sauté pan over medium heat, add the salami and pepperoni and fry it like bacon until very crispy. Transfer to a paper towel lined plate. Take the pan off the heat and let slightly cool. Add the panko crumbs, tossing them in the leftover meat fat. Top the prepared mac and cheese with the panko crumbs and the remaining cup of cheese. Bake for 12 to 15 minutes or until cheese is bubbly and panko is golden. Top with the “pork crunchies.”

*make ahead tip: the entire first paragraph of this dish can be made a day or two ahead, just cover baking dish and refrigerate then do the last step the day of.

A Halloween Cocktail Tribute to Alice Cooper

November 2, 2020 Andrea LeTard
IMGL0203.jpg
image4.jpeg

Feed My Frankenstein 

IMG_8235.jpeg

Sugar rim:

1/2 cup sugar

A few drops red food coloring 

Simple syrup:

1/2 cup sugar

1/2 cup water

Handful arugula

2 sprigs mint 

Drink:

2 ounces vodka

1.5 ounces green chartreuse 

1 ounce mint arugula simple syrup

Lemon

Red Sugar

Cherries, for garnish 

Make the sugar rim by mixing together the sugar and food coloring on a plate. Sit and let dry for at least 1 hour. Make the syrup by bringing the sugar, water, arugula, and mint to a boil. Blend the syrup mixture together in a blender then strain out the herbs. Refrigerate until ready to use. To a cocktail shaker filled with ice, add the vodka, chartreuse, syrup, a squeeze of lemon, and shake together. Rub the rim of a cocktail glass with a lemon wedge or dip in lemon juice then dip in the sugar mixture. Pour in the drink mixture and add a skewer of cherries to garnish. 

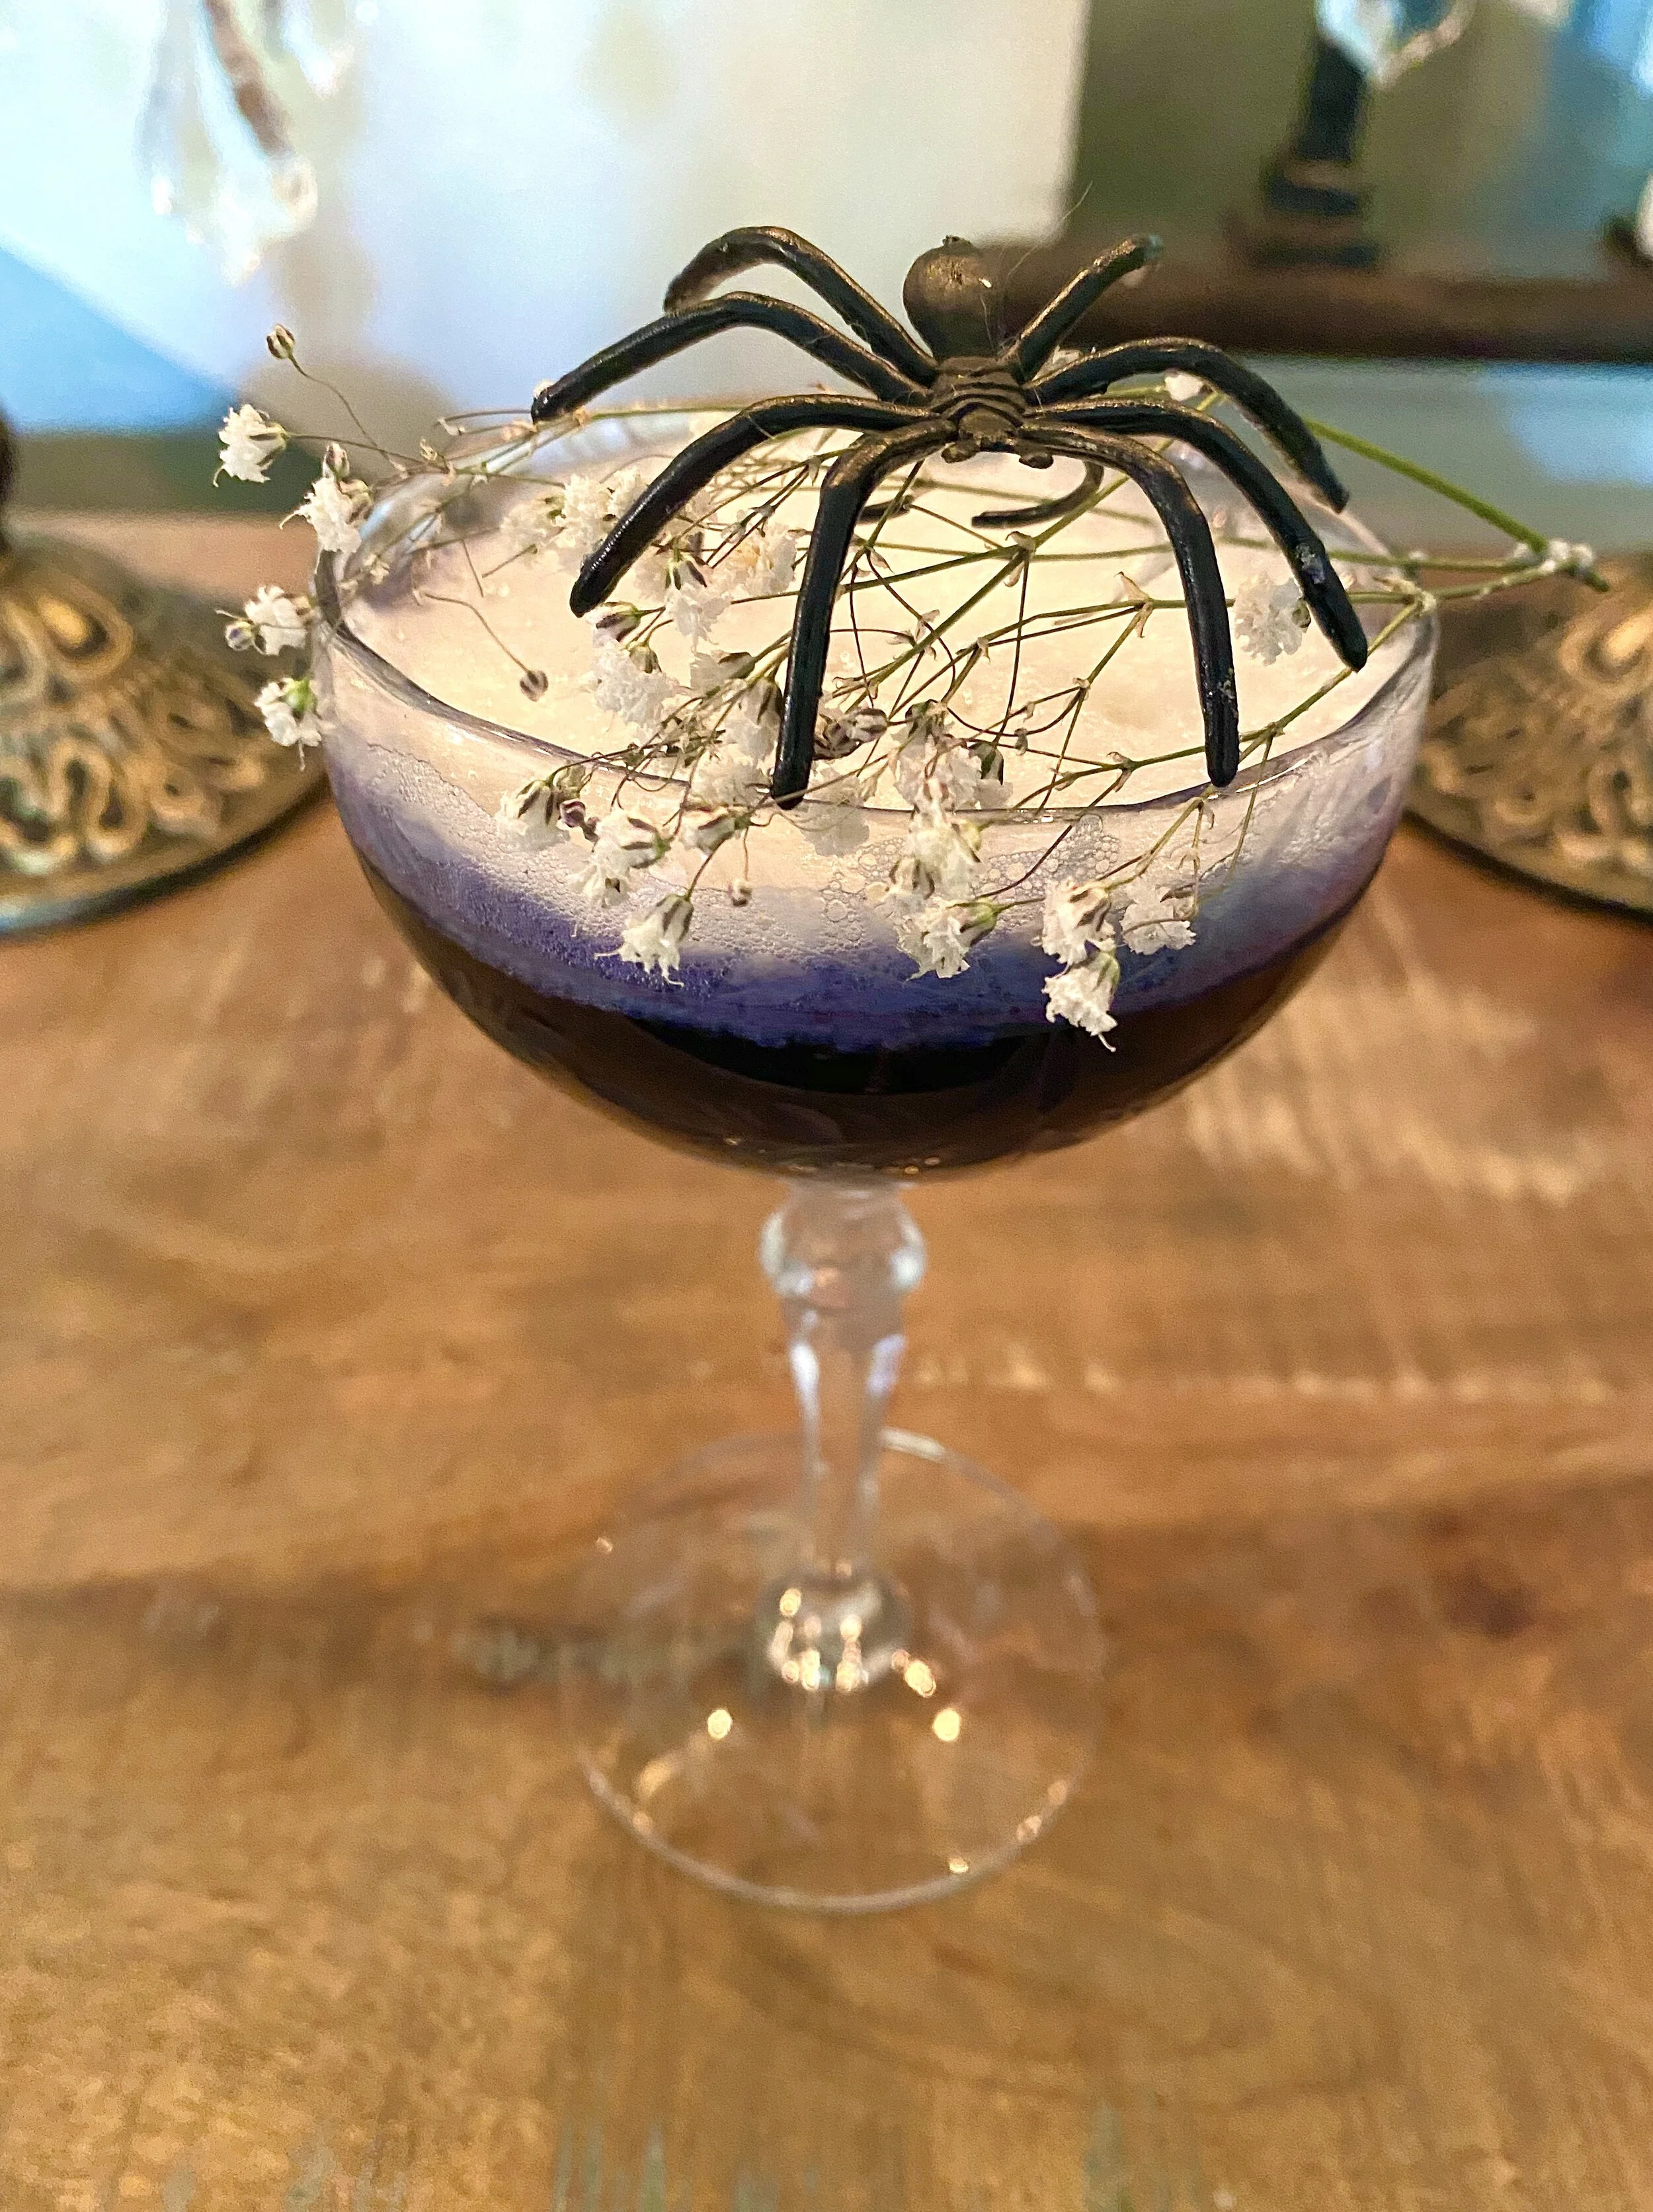
Pledge Allegiance to the Black Widow

image3.jpeg

Simple syrup:

1/2 cup sugar

1/2 cup water

1/2 teaspoon vanilla bean seeds or 1 teaspoon vanilla bean paste 

Drink:

2 ounces black vodka - cold

1.5 ounce creme de cacao - cold

1 egg white

1 ounce simple syrup 

Baby’s breath sprig, for garnish

Plastic spider, for garnish 

Make the simple syrup by bringing the sugar, water, and vanilla to a boil. Refrigerate until ready to serve. To a cocktail glass, add the vodka and creme de cacao. In a cocktail shaker, shake together the egg white and simple syrup vigorously for 30 seconds or until foamy and thick. Top the drink with the foam and garnish with baby’s breath and spider. 

Lips Better Than Poison 

IMG_8206.jpeg

Autumn Spiced ice cubes:

1/4 cup sugar

2 cups water 

2 cinnamon sticks

10 whole cloves 

Drink:

2 cubes autumn spiced ice 

2 ounces gin

2 ounces Campari 

2 ounces vermouth 

Make the ice by bringing the sugar, water, cinnamon sticks, and cloves to a boil. Let sit to steep and cool for at least 30 minutes. Take out the cinnamon sticks and pour the liquid and cloves evenly into an ice tray. Freeze until ready to use. To a fancy cocktail glass, add the spiced ice cubes, gin, Campari, and vermouth. Stir together and enjoy. 

Welcome to my Nightmare

image0.jpeg

2 tablespoons strawberry jelly or jam 

1/4 cup pomegranate juice 

2 ounces bourbon or spiced rum

1 ounce elderflower liquor

1/2 small orange - juiced 

Dried hibiscus flower, for garnish 

In a cocktail shaker filled with ice, shake together the strawberry jam, pomegranate juice, bourbon or rum, elderflower liquor, and orange juice. Strain in a cocktail glass - add ice if desired. Garnish with a dried hibiscus flower. 

Feed My Frankenstein

October 23, 2020 Andrea LeTard
Adjustments.jpeg
Adjustments.jpeg

My Alice Cooper Halloween Cocktail tribute - 4 cocktails named after Alive Cooper “Halloweenish” songs. Feed my Frankenstein is a boozy drink that focuses on the herbaceous and pungent French spirit, Green Chartreuse. A arugula-mint simple syrup is used to round out the strong drink with a slight leafy sweetness.

Sugar rim:

1/2 cup sugar

A few drops red food coloring 

Simple syrup:

1/2 cup sugar

1/2 cup water

Handful arugula

2 sprigs mint 

Drink:

2 ounces vodka

1.5 ounces green chartreuse 

1 ounce mint arugula simple syrup

Lemon

Red Sugar

Cherries, for garnish 

Make the sugar rim by mixing together the sugar and food coloring on a plate. Sit and let dry for at least 1 hour. Make the syrup by bringing the sugar, water, arugula, and mint to a boil. Blend the syrup mixture together in a blender then strain out the herbs. Refrigerate until ready to use. To a cocktail shaker filled with ice, add the vodka, chartreuse, syrup, a squeeze of lemon, and shake together. Rub the rim of a cocktail glass with a lemon wedge or dip in lemon juice then dip in the sugar mixture. Pour in the drink mixture and add a skewer of cherries to garnish. 

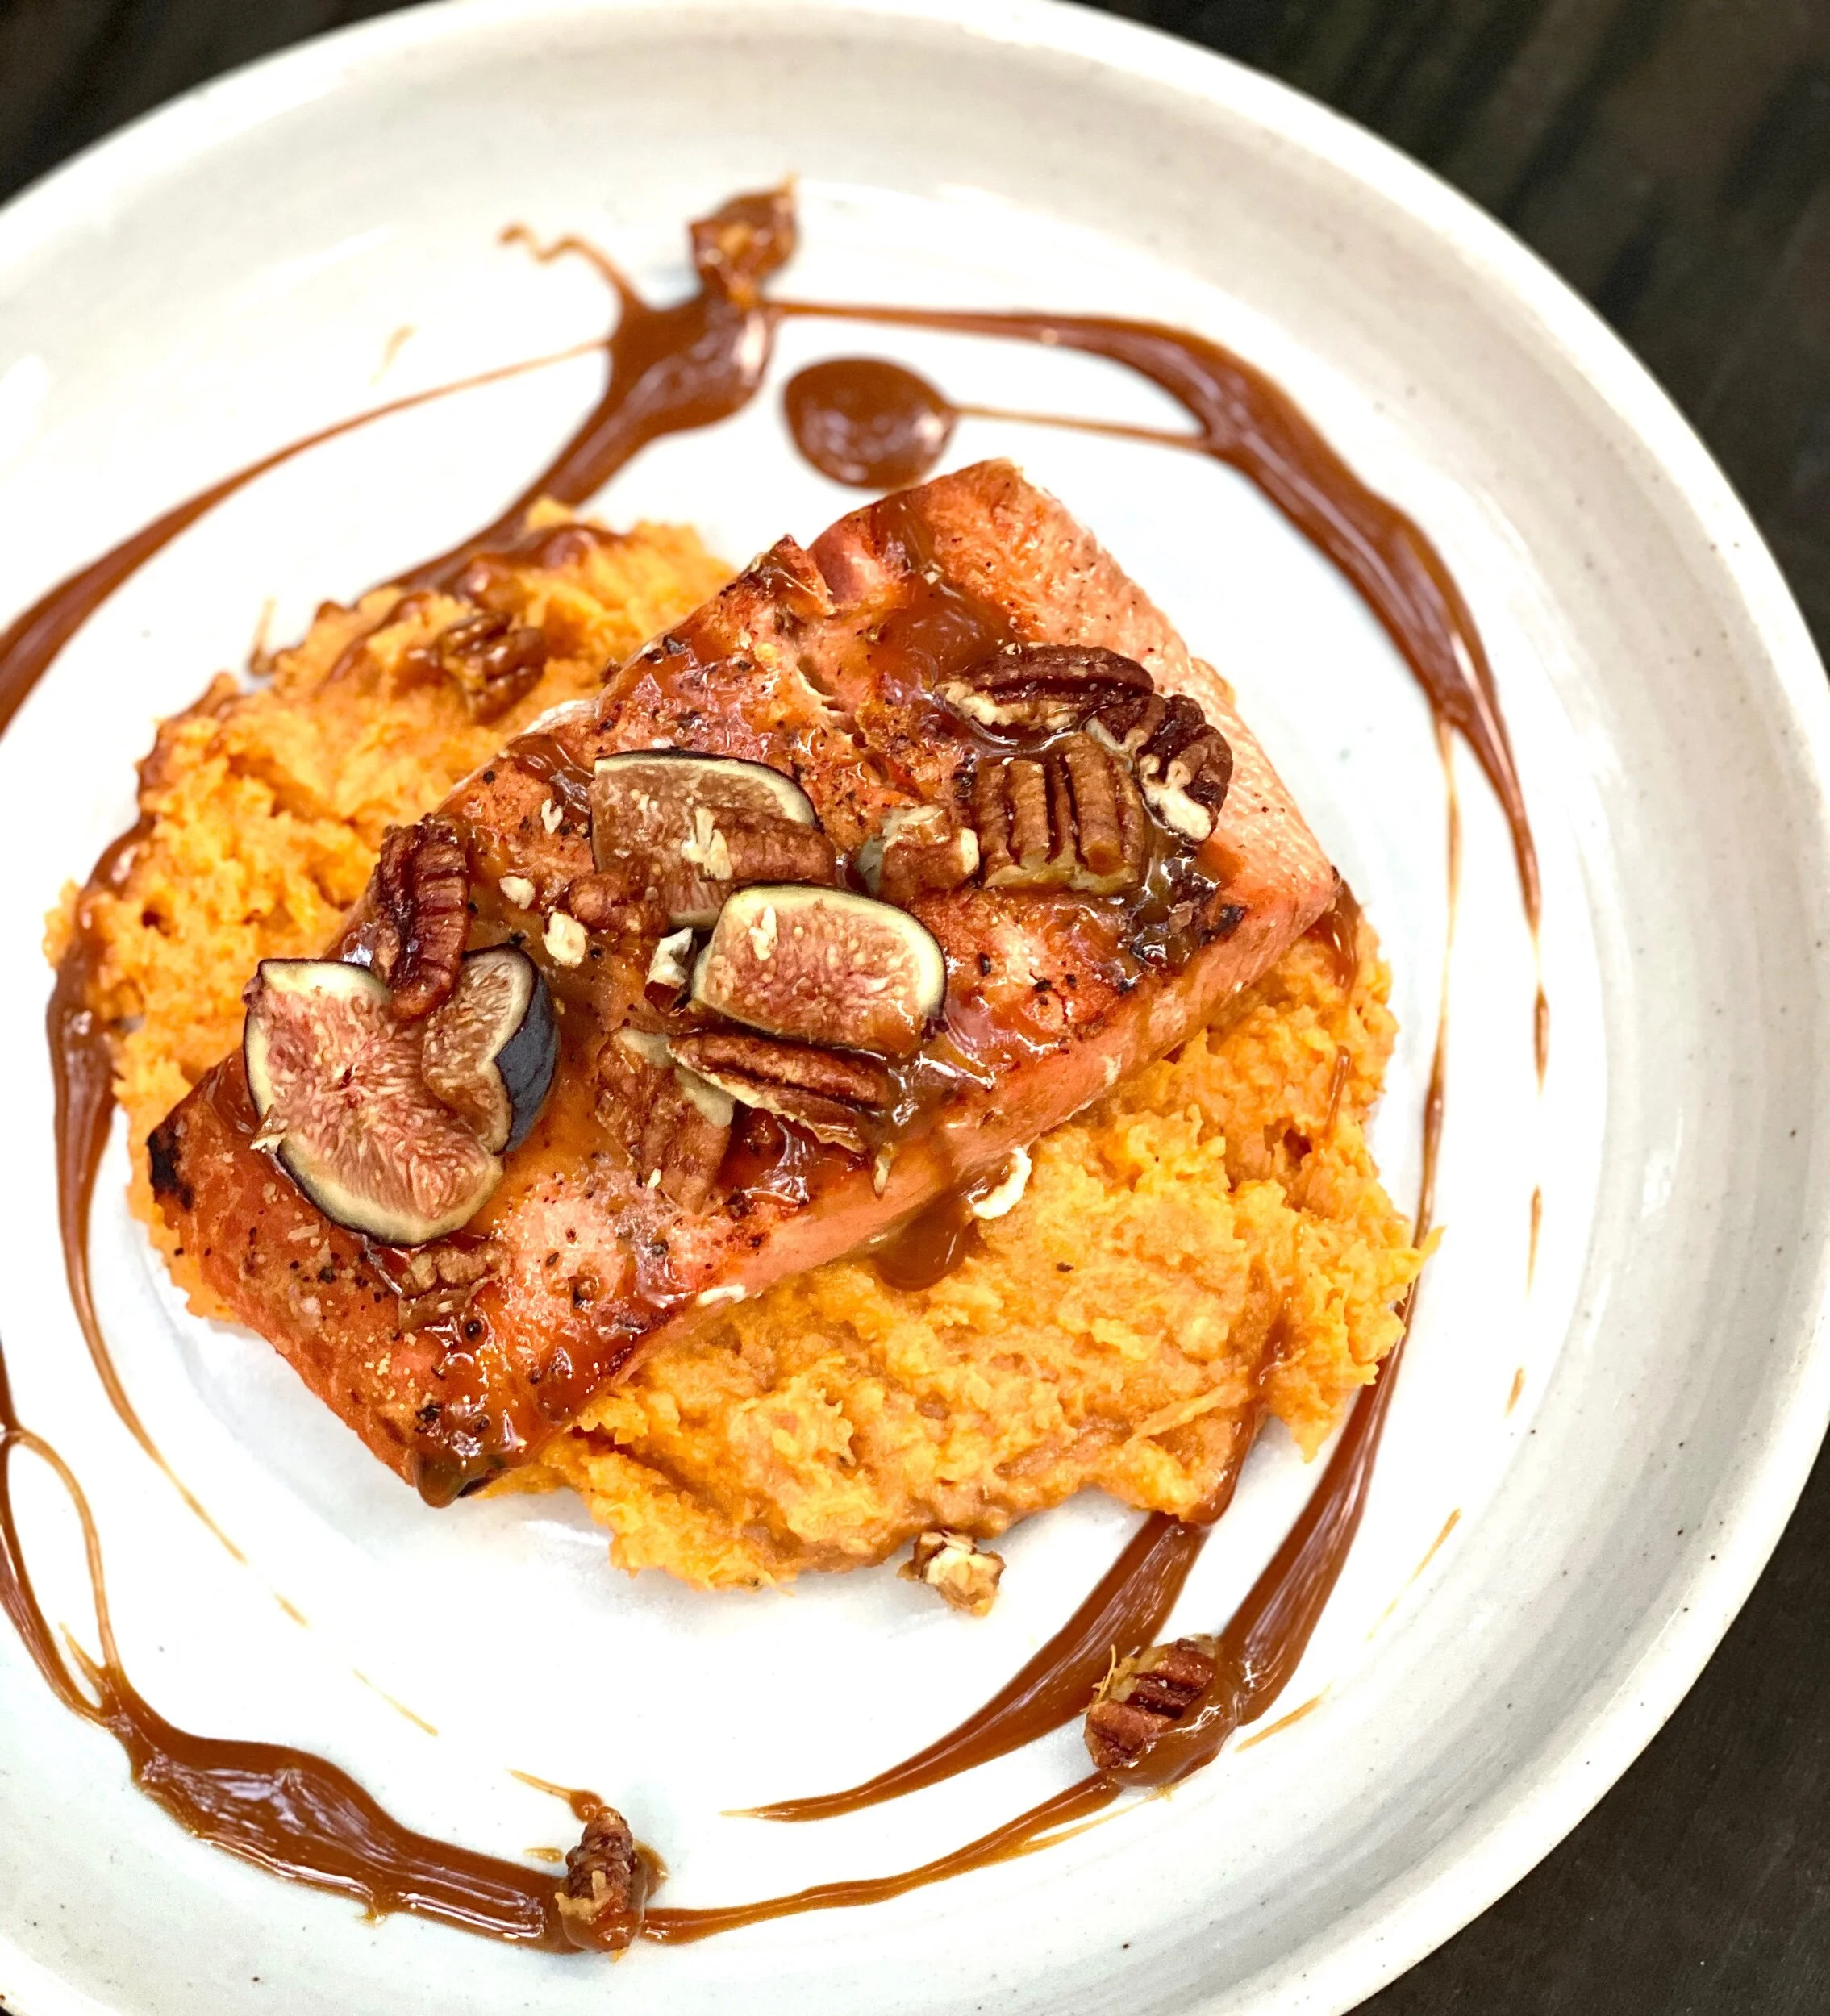
Caramel Salmon over Smashed Sweet Potato with Fig & Candied Pecans

October 15, 2020 Andrea LeTard
Adjustments.jpeg
Adjustments.jpeg

I know what you’re thinking, this dish came straight from a 5 star restaurant... hehe :) Well, it didn’t unless the Cooktales kitchen has credentials I’m unaware of. And here’s the best part: with very few ingredients and in under 30 minutes, you can make this same restaurant style dish in your kitchen! Sweet, savory, and oh so fall... there’s really nothing like it. It hugs you in the best autumn way without it being a pot of soup or casserole dish. Yes, it looks restaurant quality but it also tastes that way too! 

4 servings 

2 large sweet potatoes - peeled and cubed 

Kosher salt and pepper 

4 tablespoons butter

2 tablespoons maple syrup 

1/4 to 1/2 cup milk of your choice

2 tablespoons olive oil 

4 salmon filets - skin removed 

1/4 cup store-bought caramel sauce

5 fresh figs - quartered 

1/2 cup candied pecans - chopped 

Bring a pot of water to a boil. Add the cubed sweet potatoes and boil until tender when poked with a fork - about 15 to 20 minutes. Drain and transfer to a bowl.  Add 1 teaspoon salt, 1/2 teaspoon pepper, butter, and maple syrup. Using a fork or potato masher, smash all the ingredients together, slowly adding milk until desired consistency is reached. Taste and add more salt if needed. Set aside until ready to serve. *May be reheated in the microwave.

Heat a sauté pan over high heat with the olive oil in the bottom. Sprinkle salt and pepper on both sides of the salmon. Sear for about 3 to 4 minutes on each side or until golden, crusted, and cooked through. Plate salmon over the sweet potato with a drizzle of caramel, figs, and pecans. 

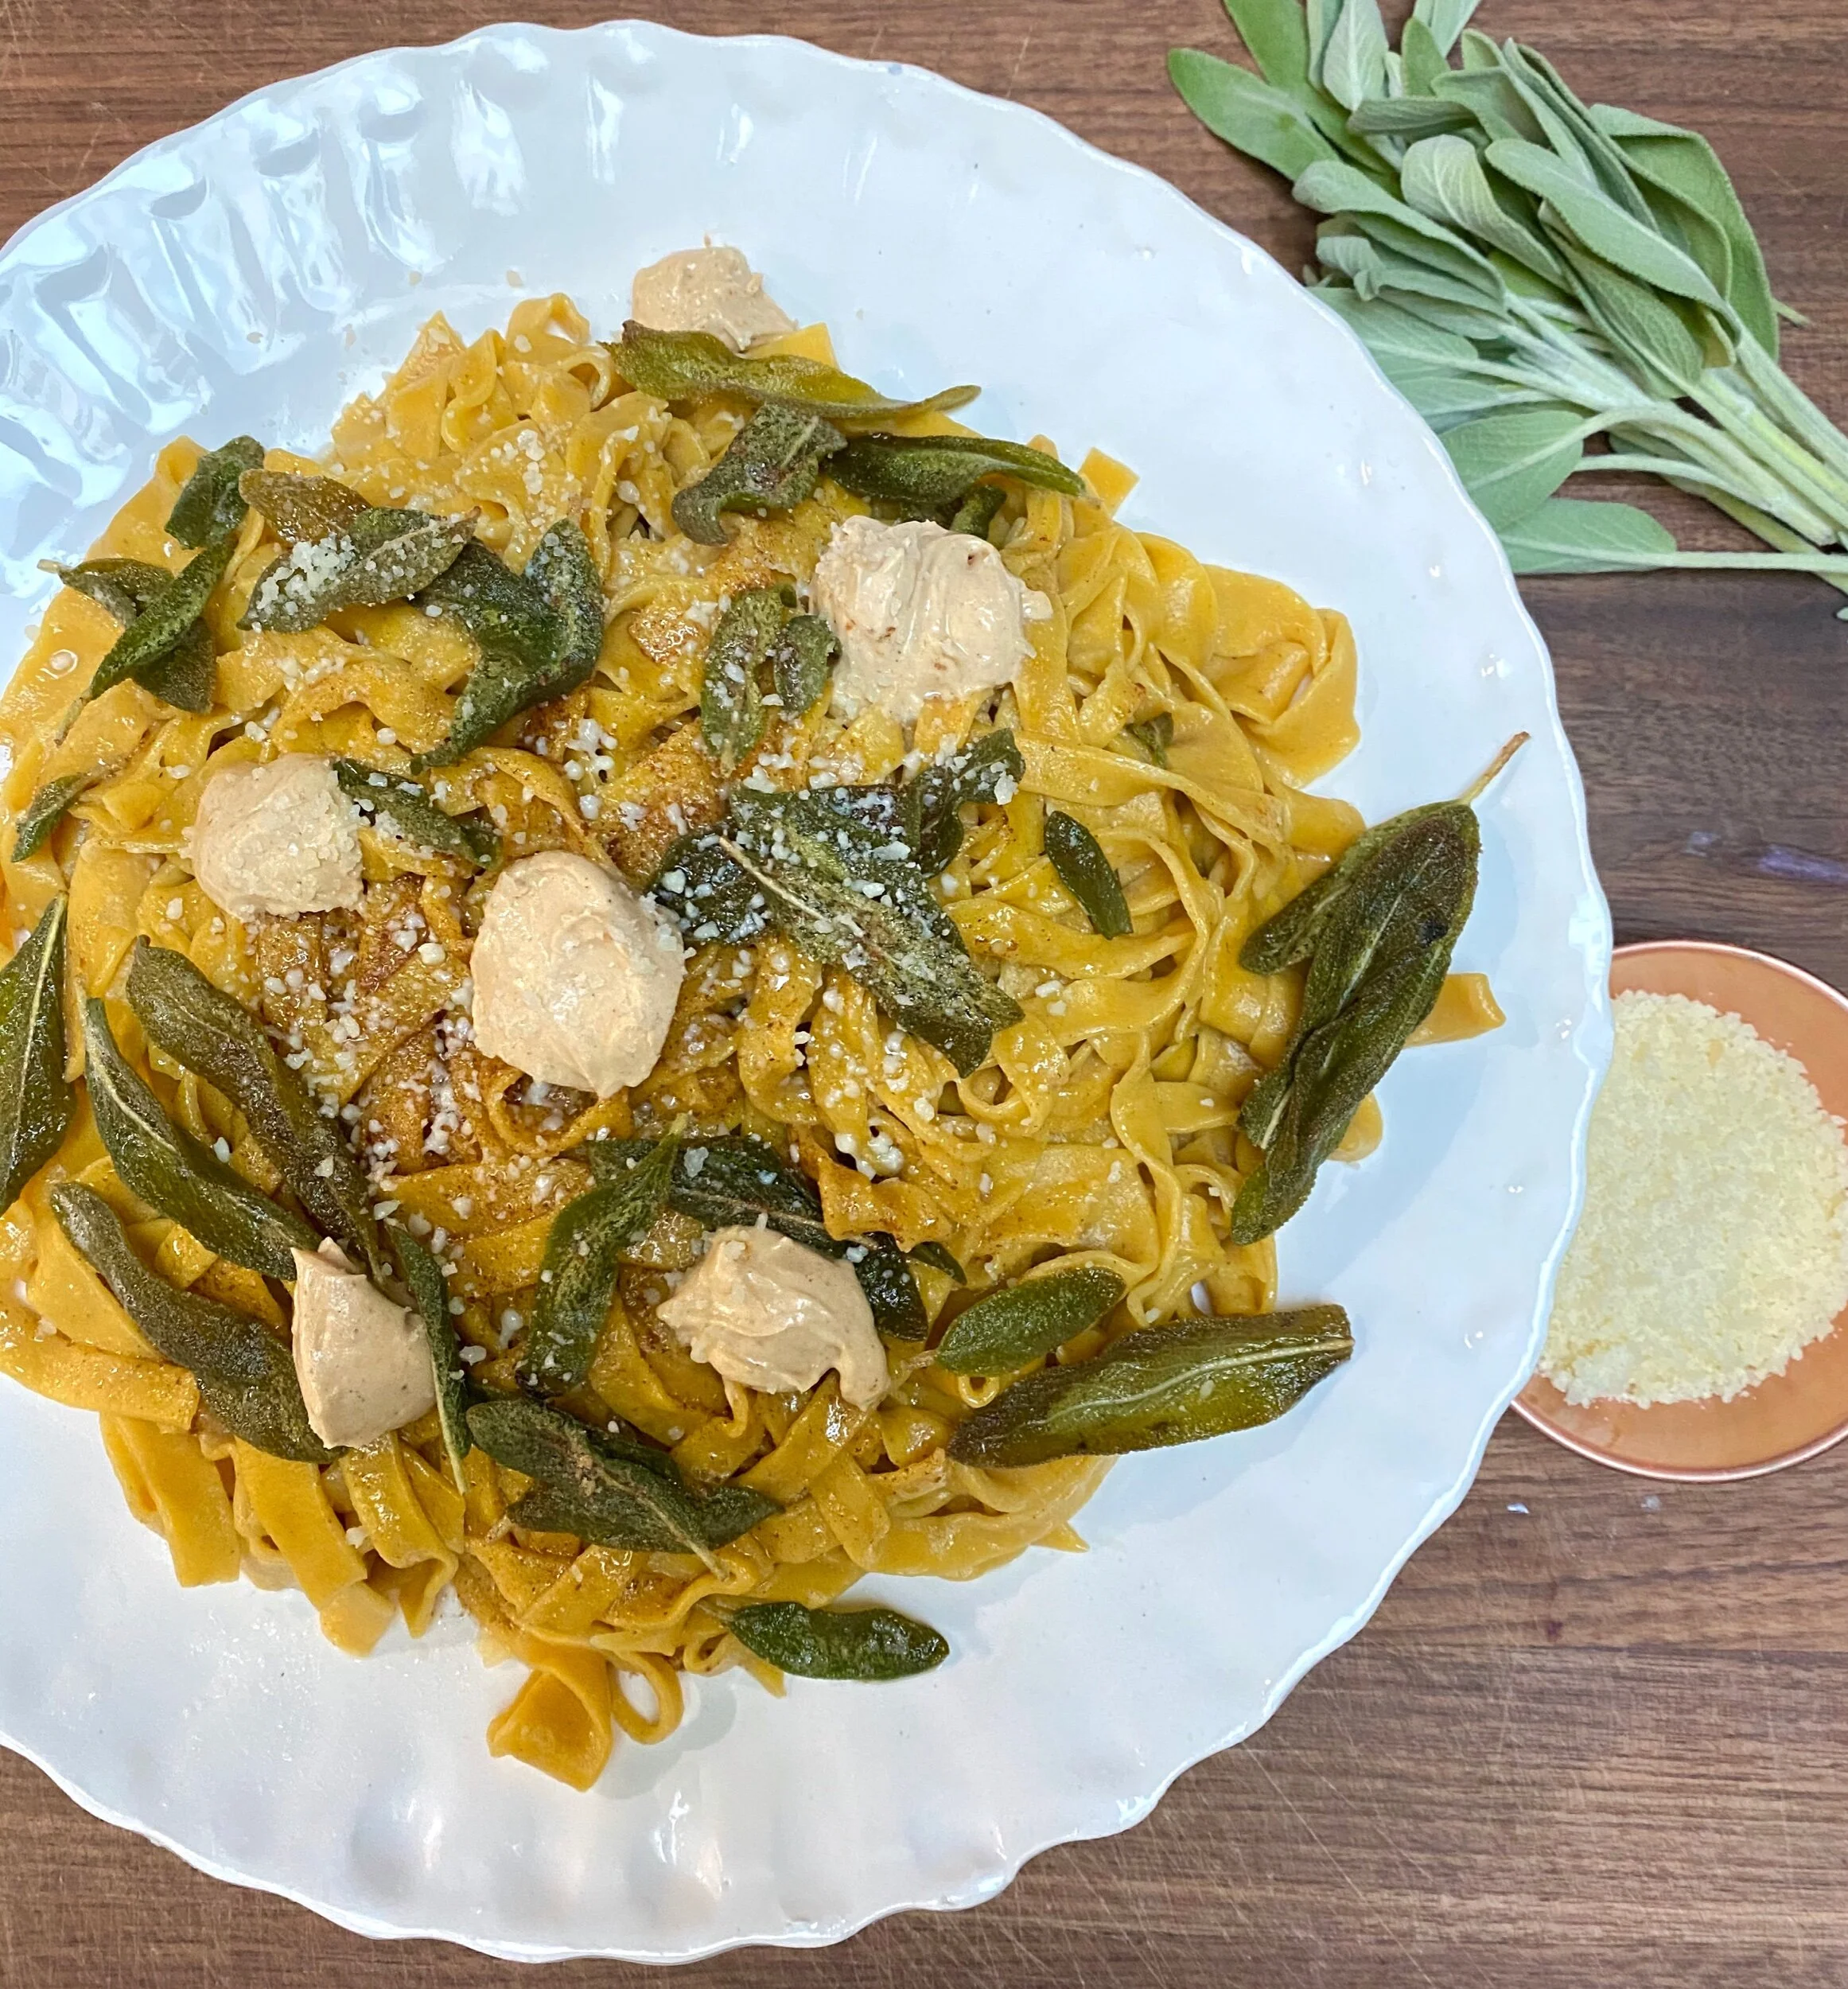
Pumpkin Fettuccine with Sage Brown Butter and Maple Whipped Goat Cheese

October 10, 2020 Andrea LeTard
Adjustments.jpeg

Pasta is always a good idea when it comes to comfort dishes. But in October, it’s the best cozy dish ever paired with pumpkin and brown butter. A maple whipped goat cheese takes it to a whole other level! 

Pasta:

2 1/2 cups all-purpose flour 

1/4 cup pumpkin purée

2 large eggs 

1/4 teaspoon kosher salt

Dish:

6 tablespoons salted butter

Large handful sage leaves 

1/2 cup shredded Parmesan 

Kosher salt 

4 ounces goat cheese - room temperature 

2 tablespoons maple syrup 

In the bowl of a food processor, add the flour, pumpkin purée, eggs, and salt. Pulse until the mixture comes together into a dough ball. If it’s too dry, add a little water, pulsing in between until it comes together. Place dough on a heavily floured surface and knead until smooth. The dough should feel firm and not sticky. Form into a ball, wrap in plastic, and let rest in the fridge for 30 minutes. Cut into fourths and flatten each piece out into a rectangular shape. Roll out to 1/8 inch in thickness using a pasta roller or rolling pin. Using a pizza cutter or fettuccine pasta attachment, cut dough into strips approximately the size and length of typical fettuccine - you may have to cut each section in half if too long. Set aside until ready to boil. 

Make sauce by heating a sauté pan over medium heat. When hot, add butter and let brown. When it gets golden and starts to smell toasty, add the sage leaves and let cook for one minute or until butter is brown. Take off the heat and set aside until ready to serve. Make the whipped goat cheese with an electric mixer, whipping together the cheese and maple syrup until smooth - you can also do this by hand with a whisk or silicone spatula if you wish. Set aside. 

Bring a pot of salted water to a boil. Boil pasta for 2 minutes or until noodles float to the top and are tender and cooked through. Transfer them to the butter mixture, adding a little pasta water and all of the Parmesan, and toss together until coated and creamy. Taste and add salt to preference. Serve dolloped with the whipped goat cheese. 

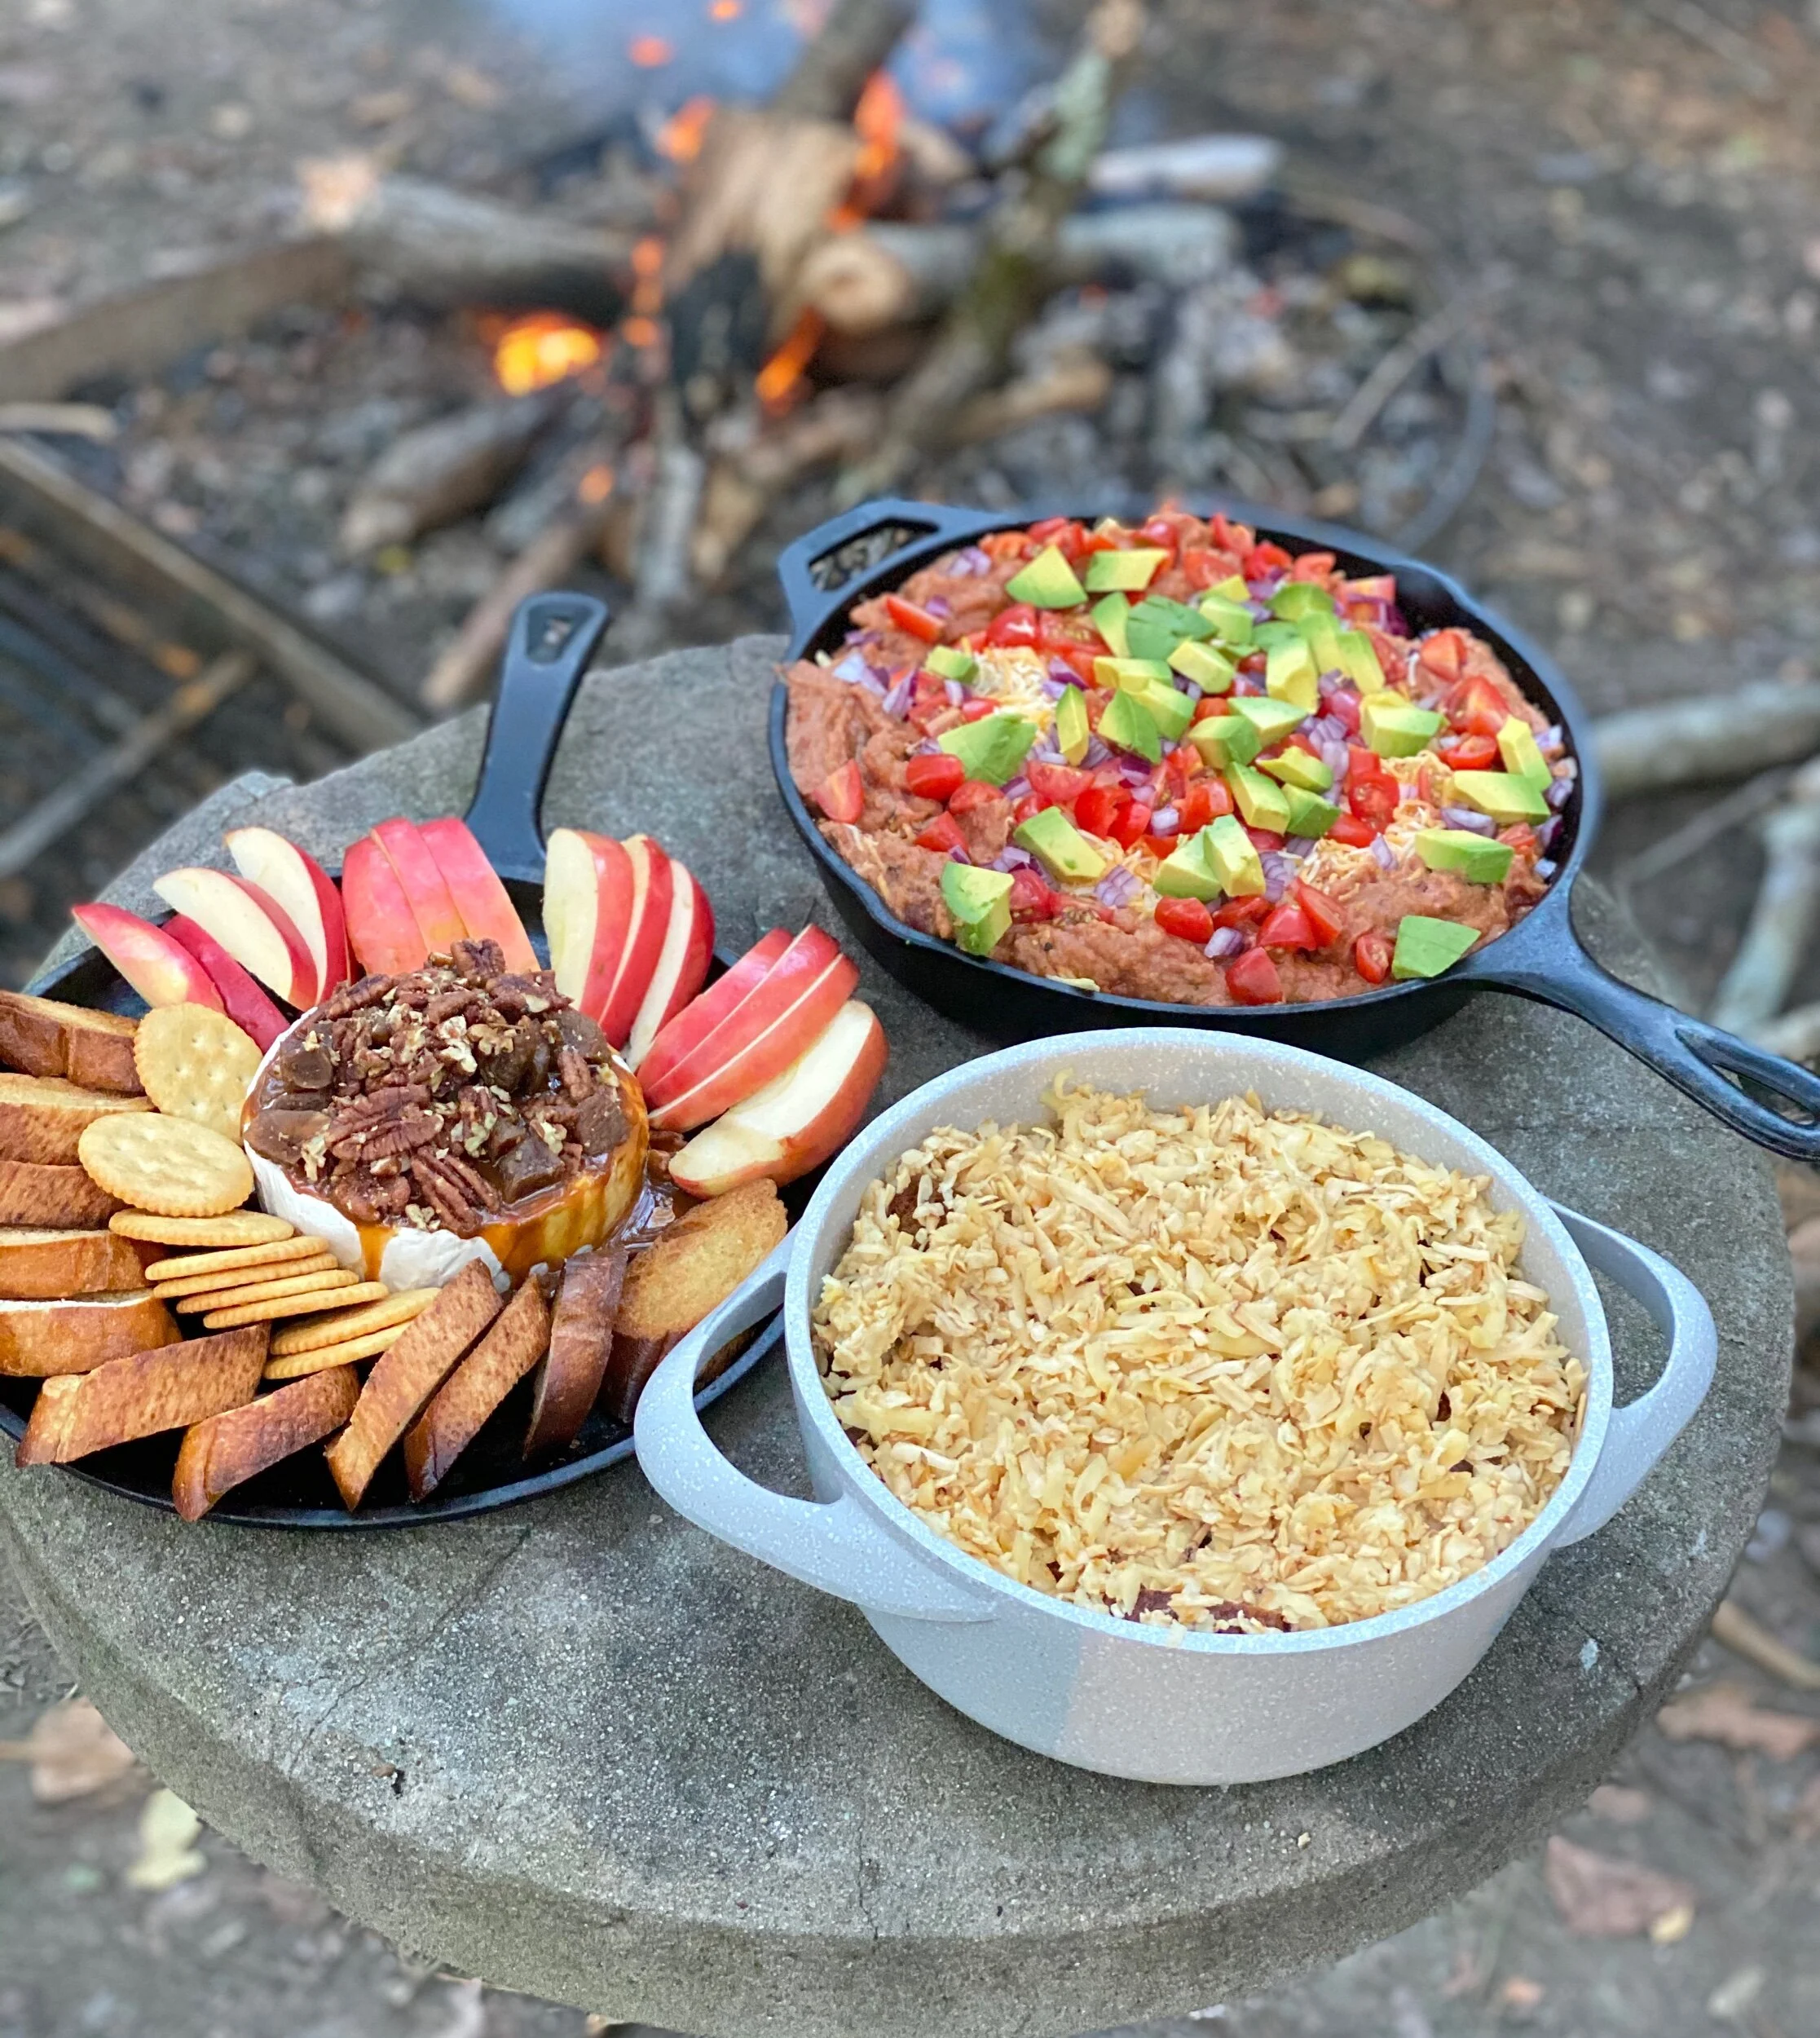
3 Fabulous Prep Ahead Campfire Recipes

October 7, 2020 Andrea LeTard
Adjustments.jpeg
Adjustments.jpeg
Adjustments.jpeg

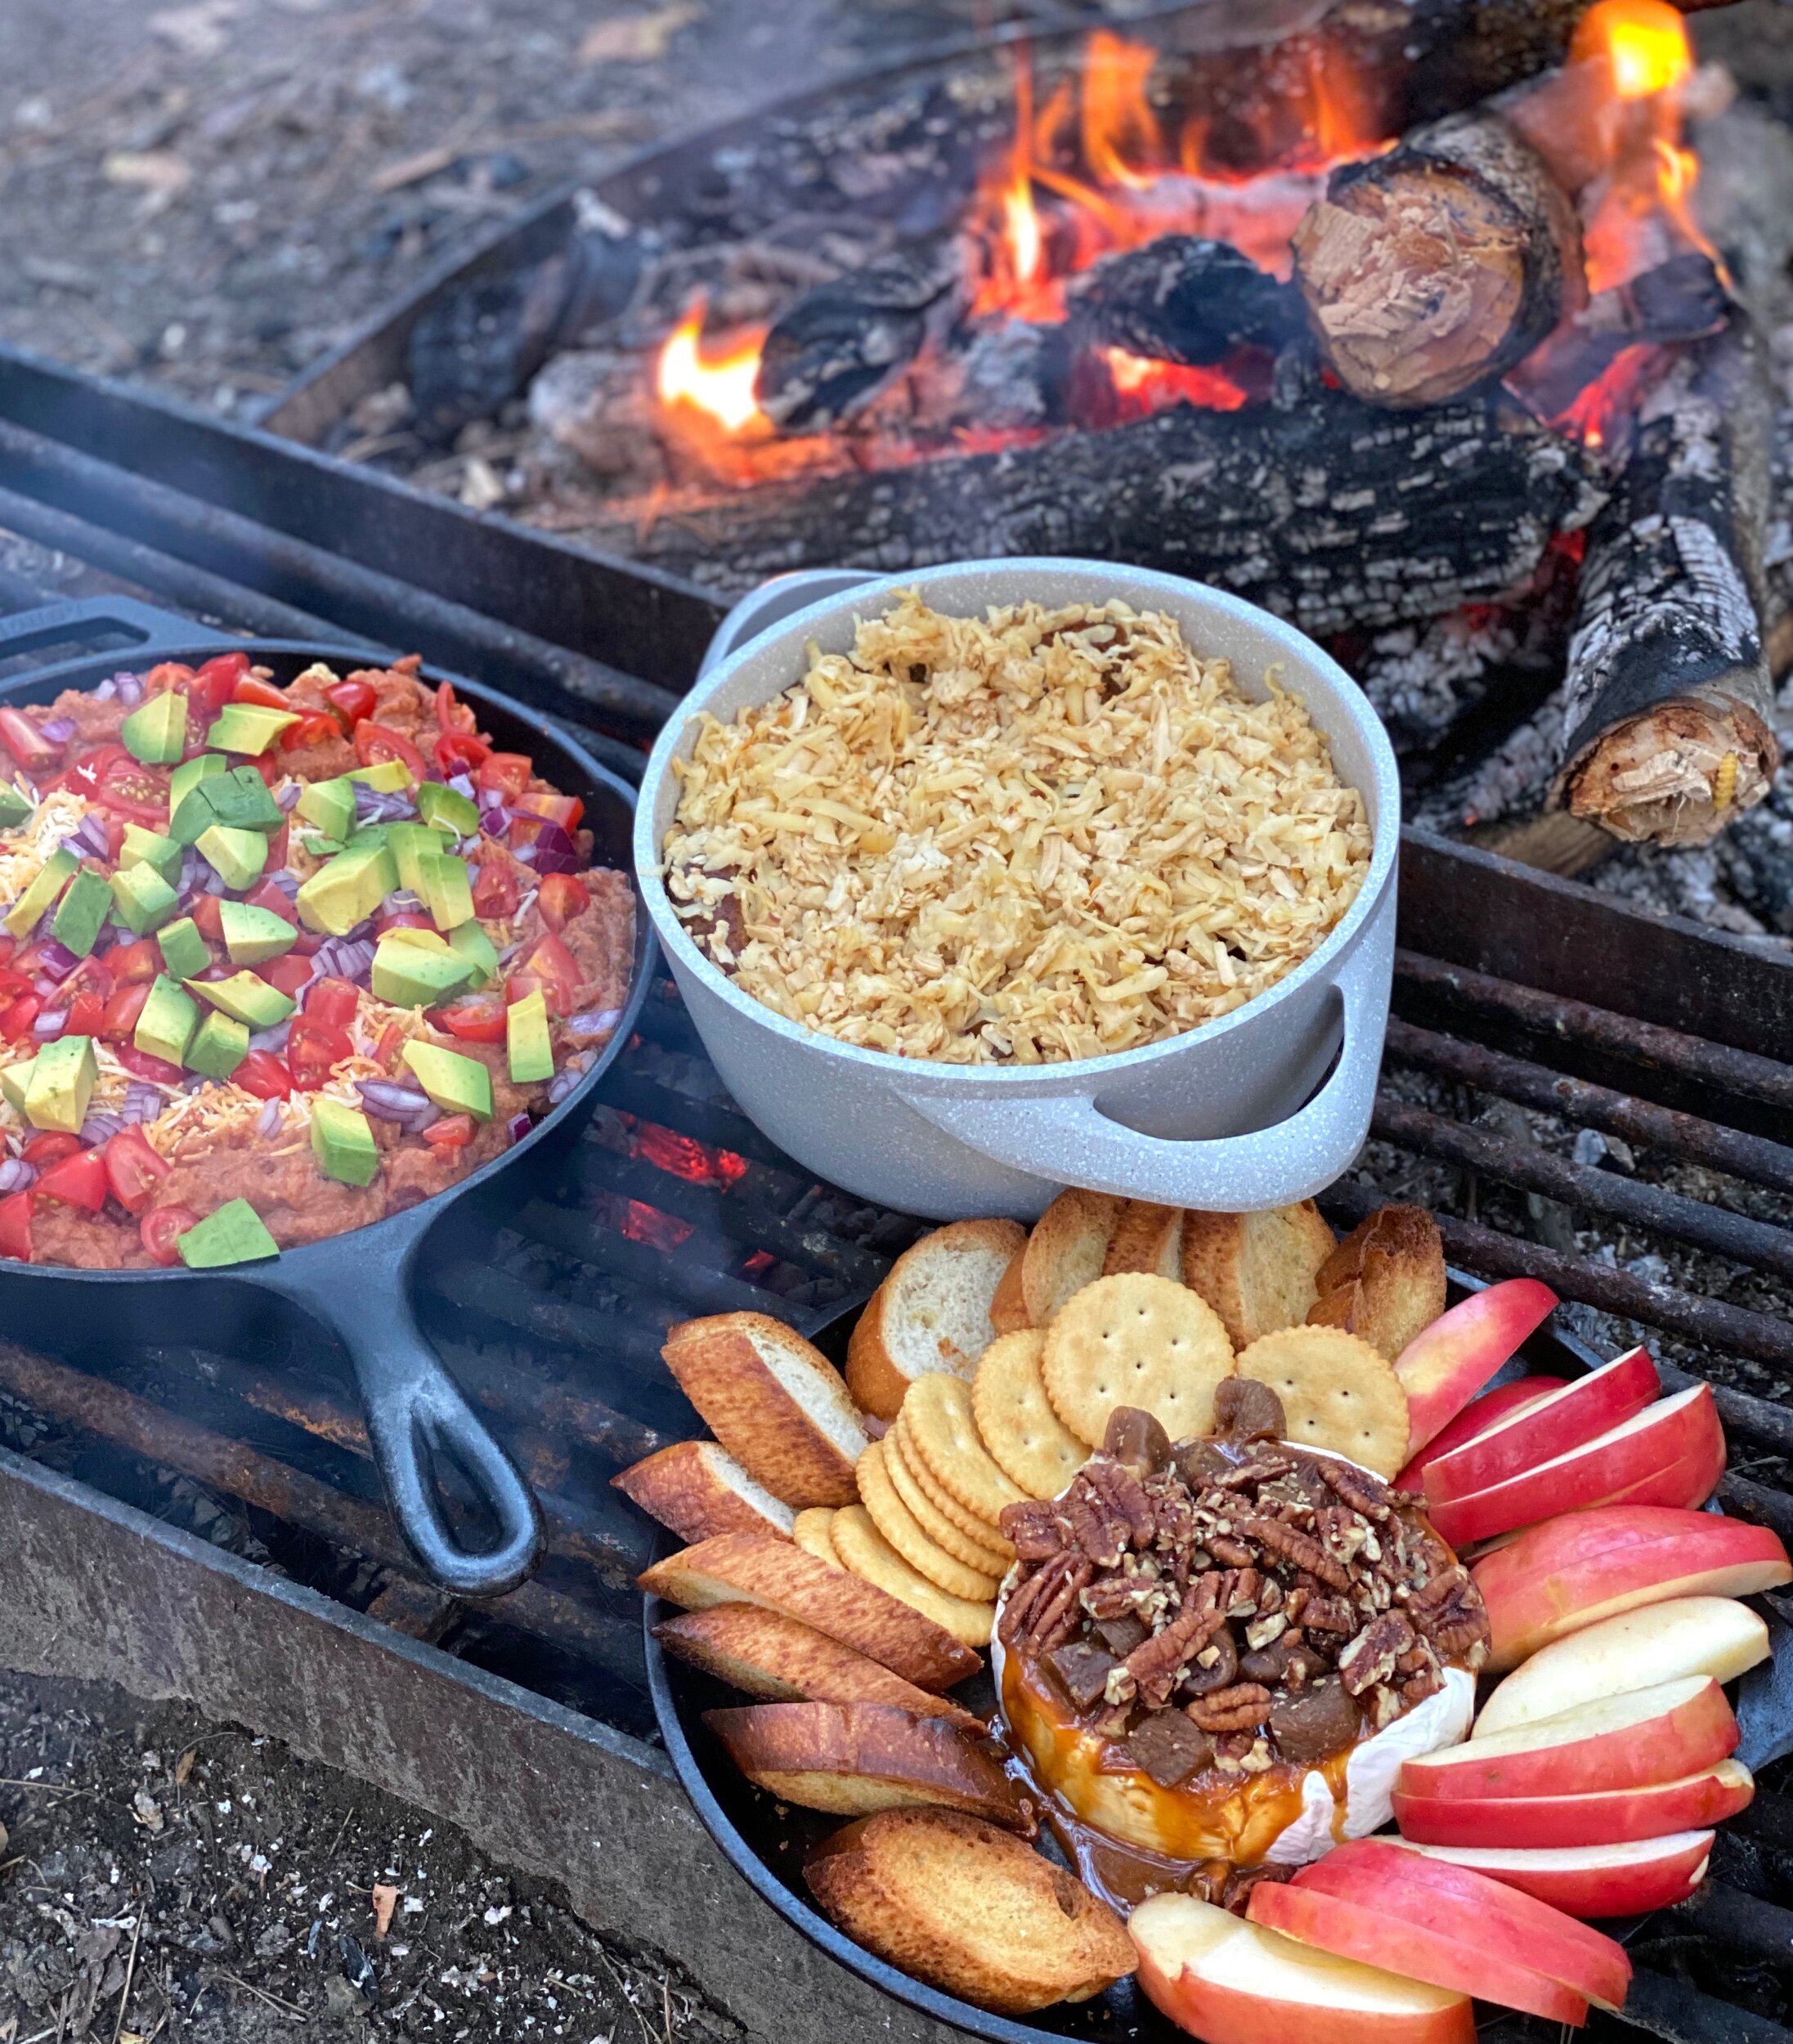
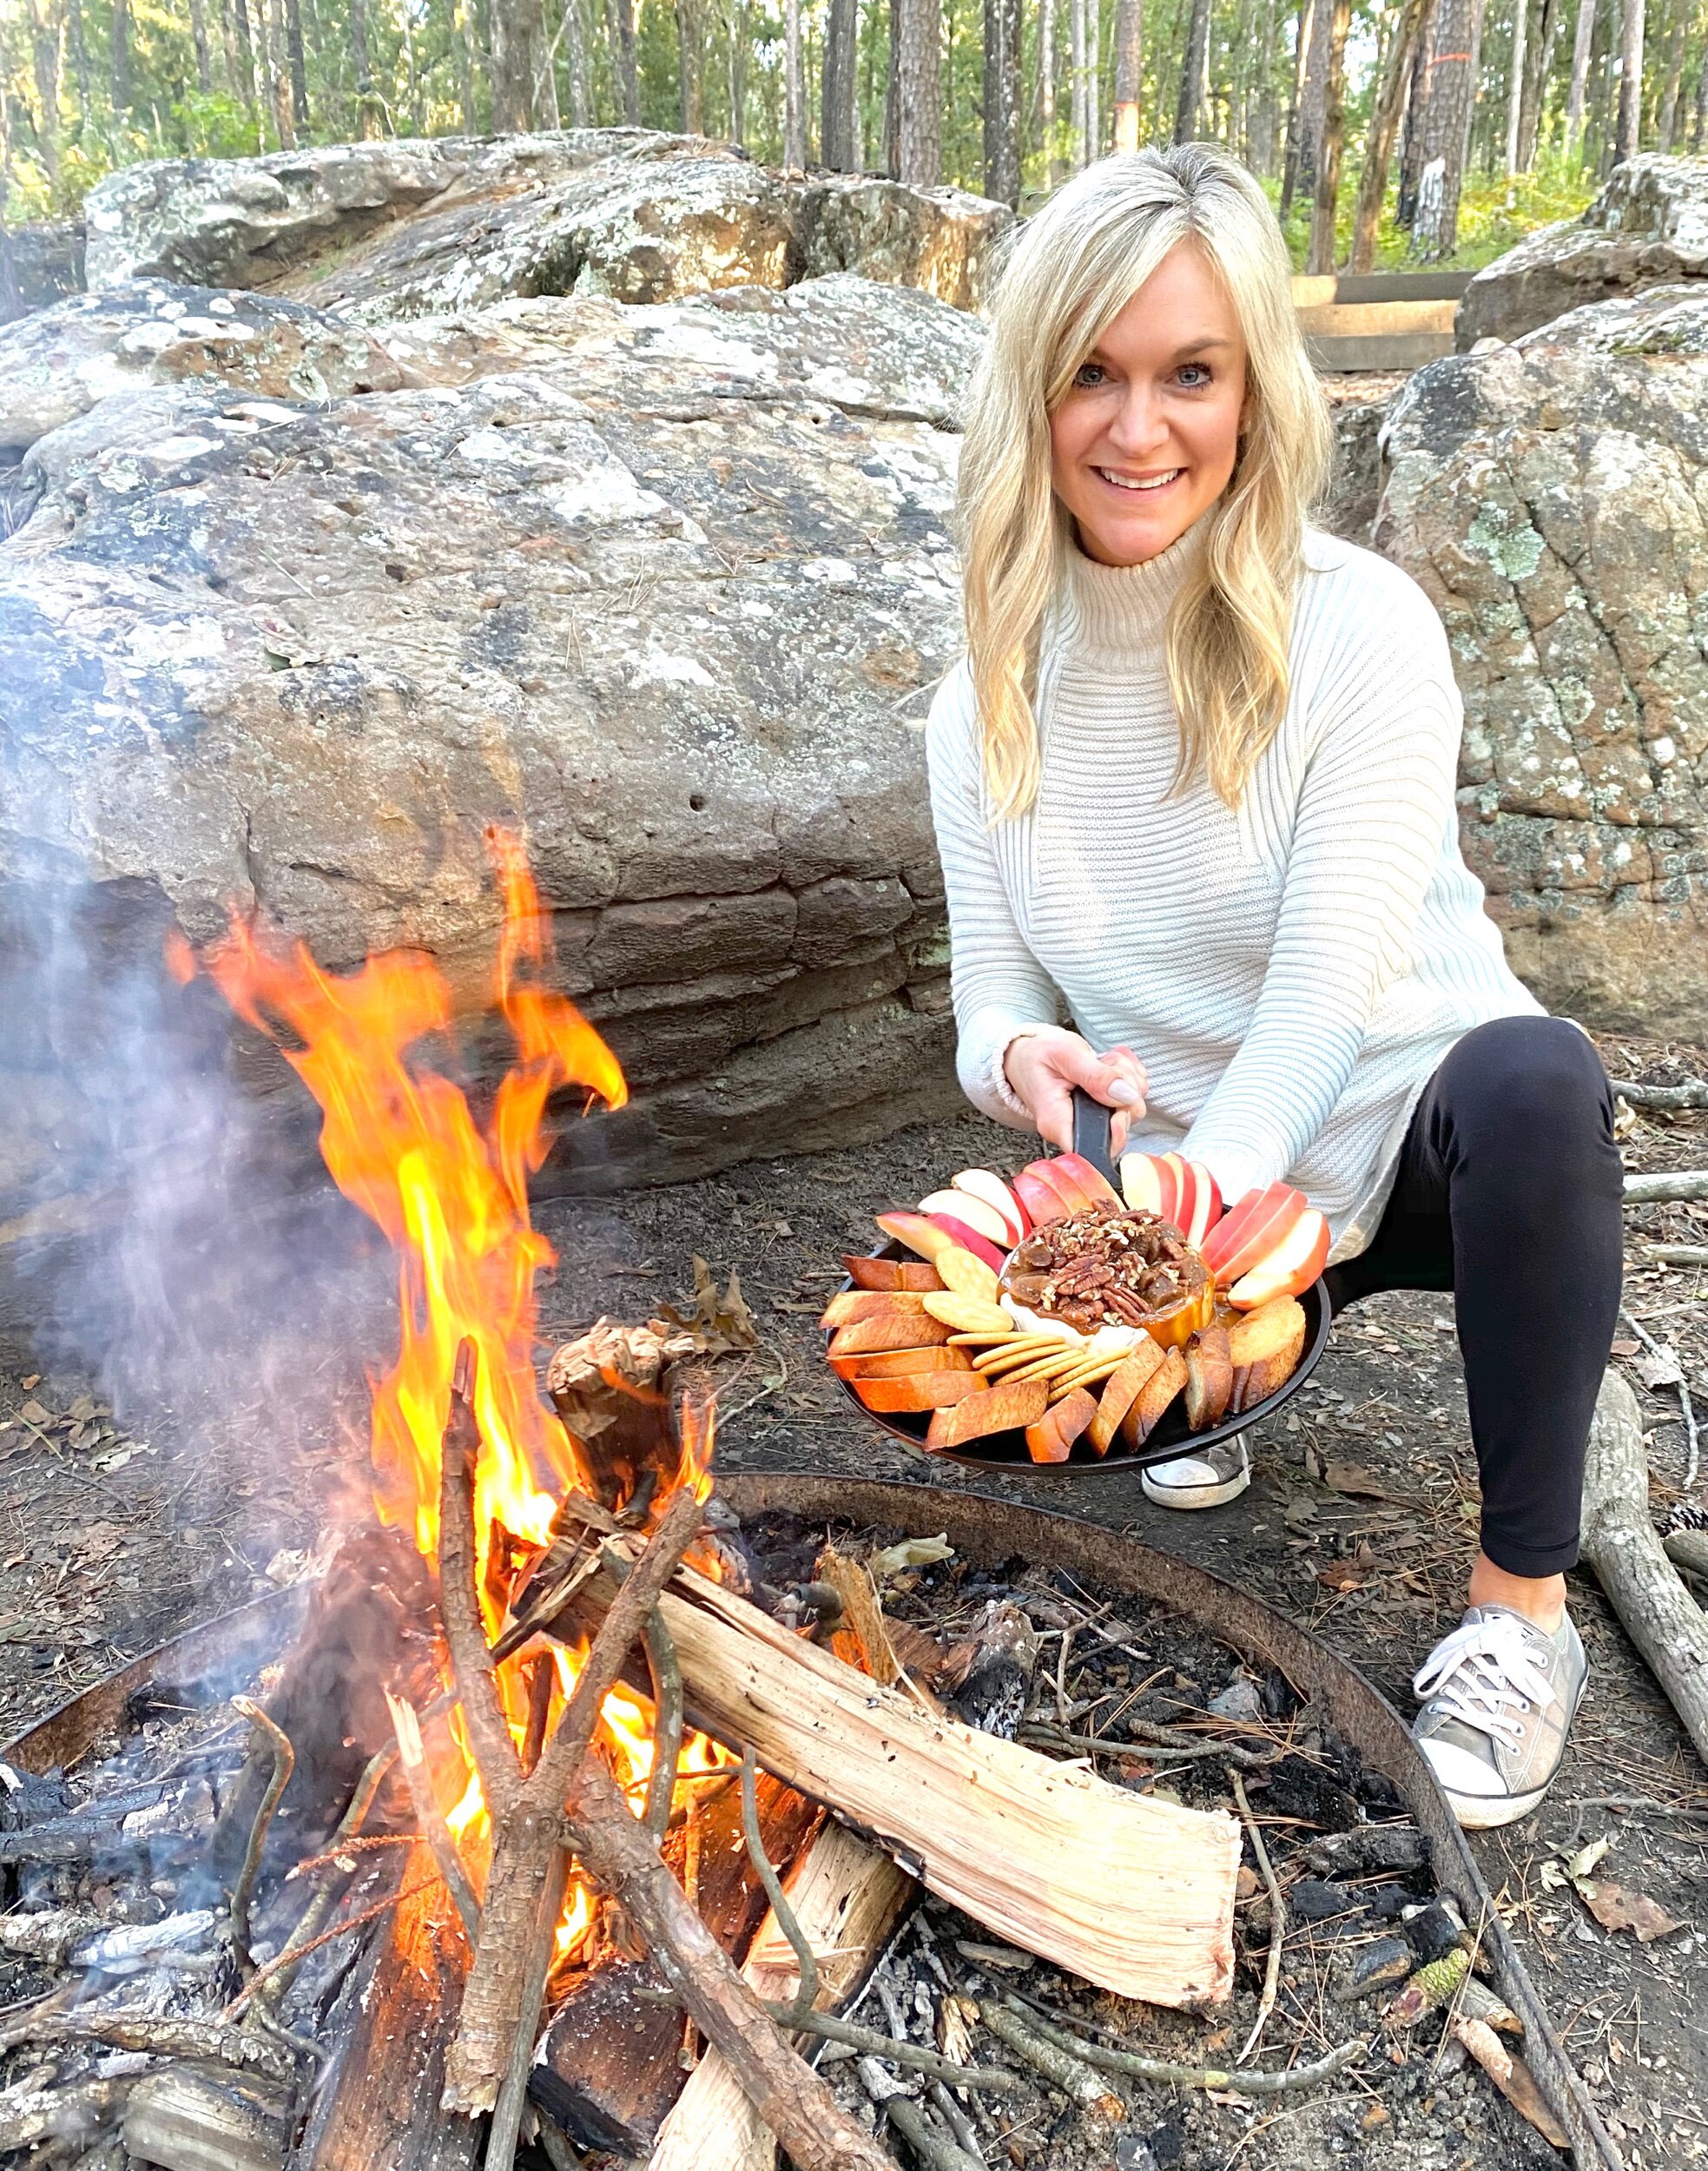
Go from camping to glamping - all with food! While I’m all about a traditional hot dog and s’mores menu, I love to add a few fancier items as appetizers or starters. These nachos and Brie are a perfect snack pre-dinner, and when the sun sets the French onion soup will warm you right up! Try to save room for hot dogs and s’mores if you can - we did by spacing every course out and eating from about 5pm to 1am... haha. This is THE perfect camping menu and oh so easy! *You can find video guides and extra details on my Instagram page (@andreas_cooktales) under Campfire Food. 

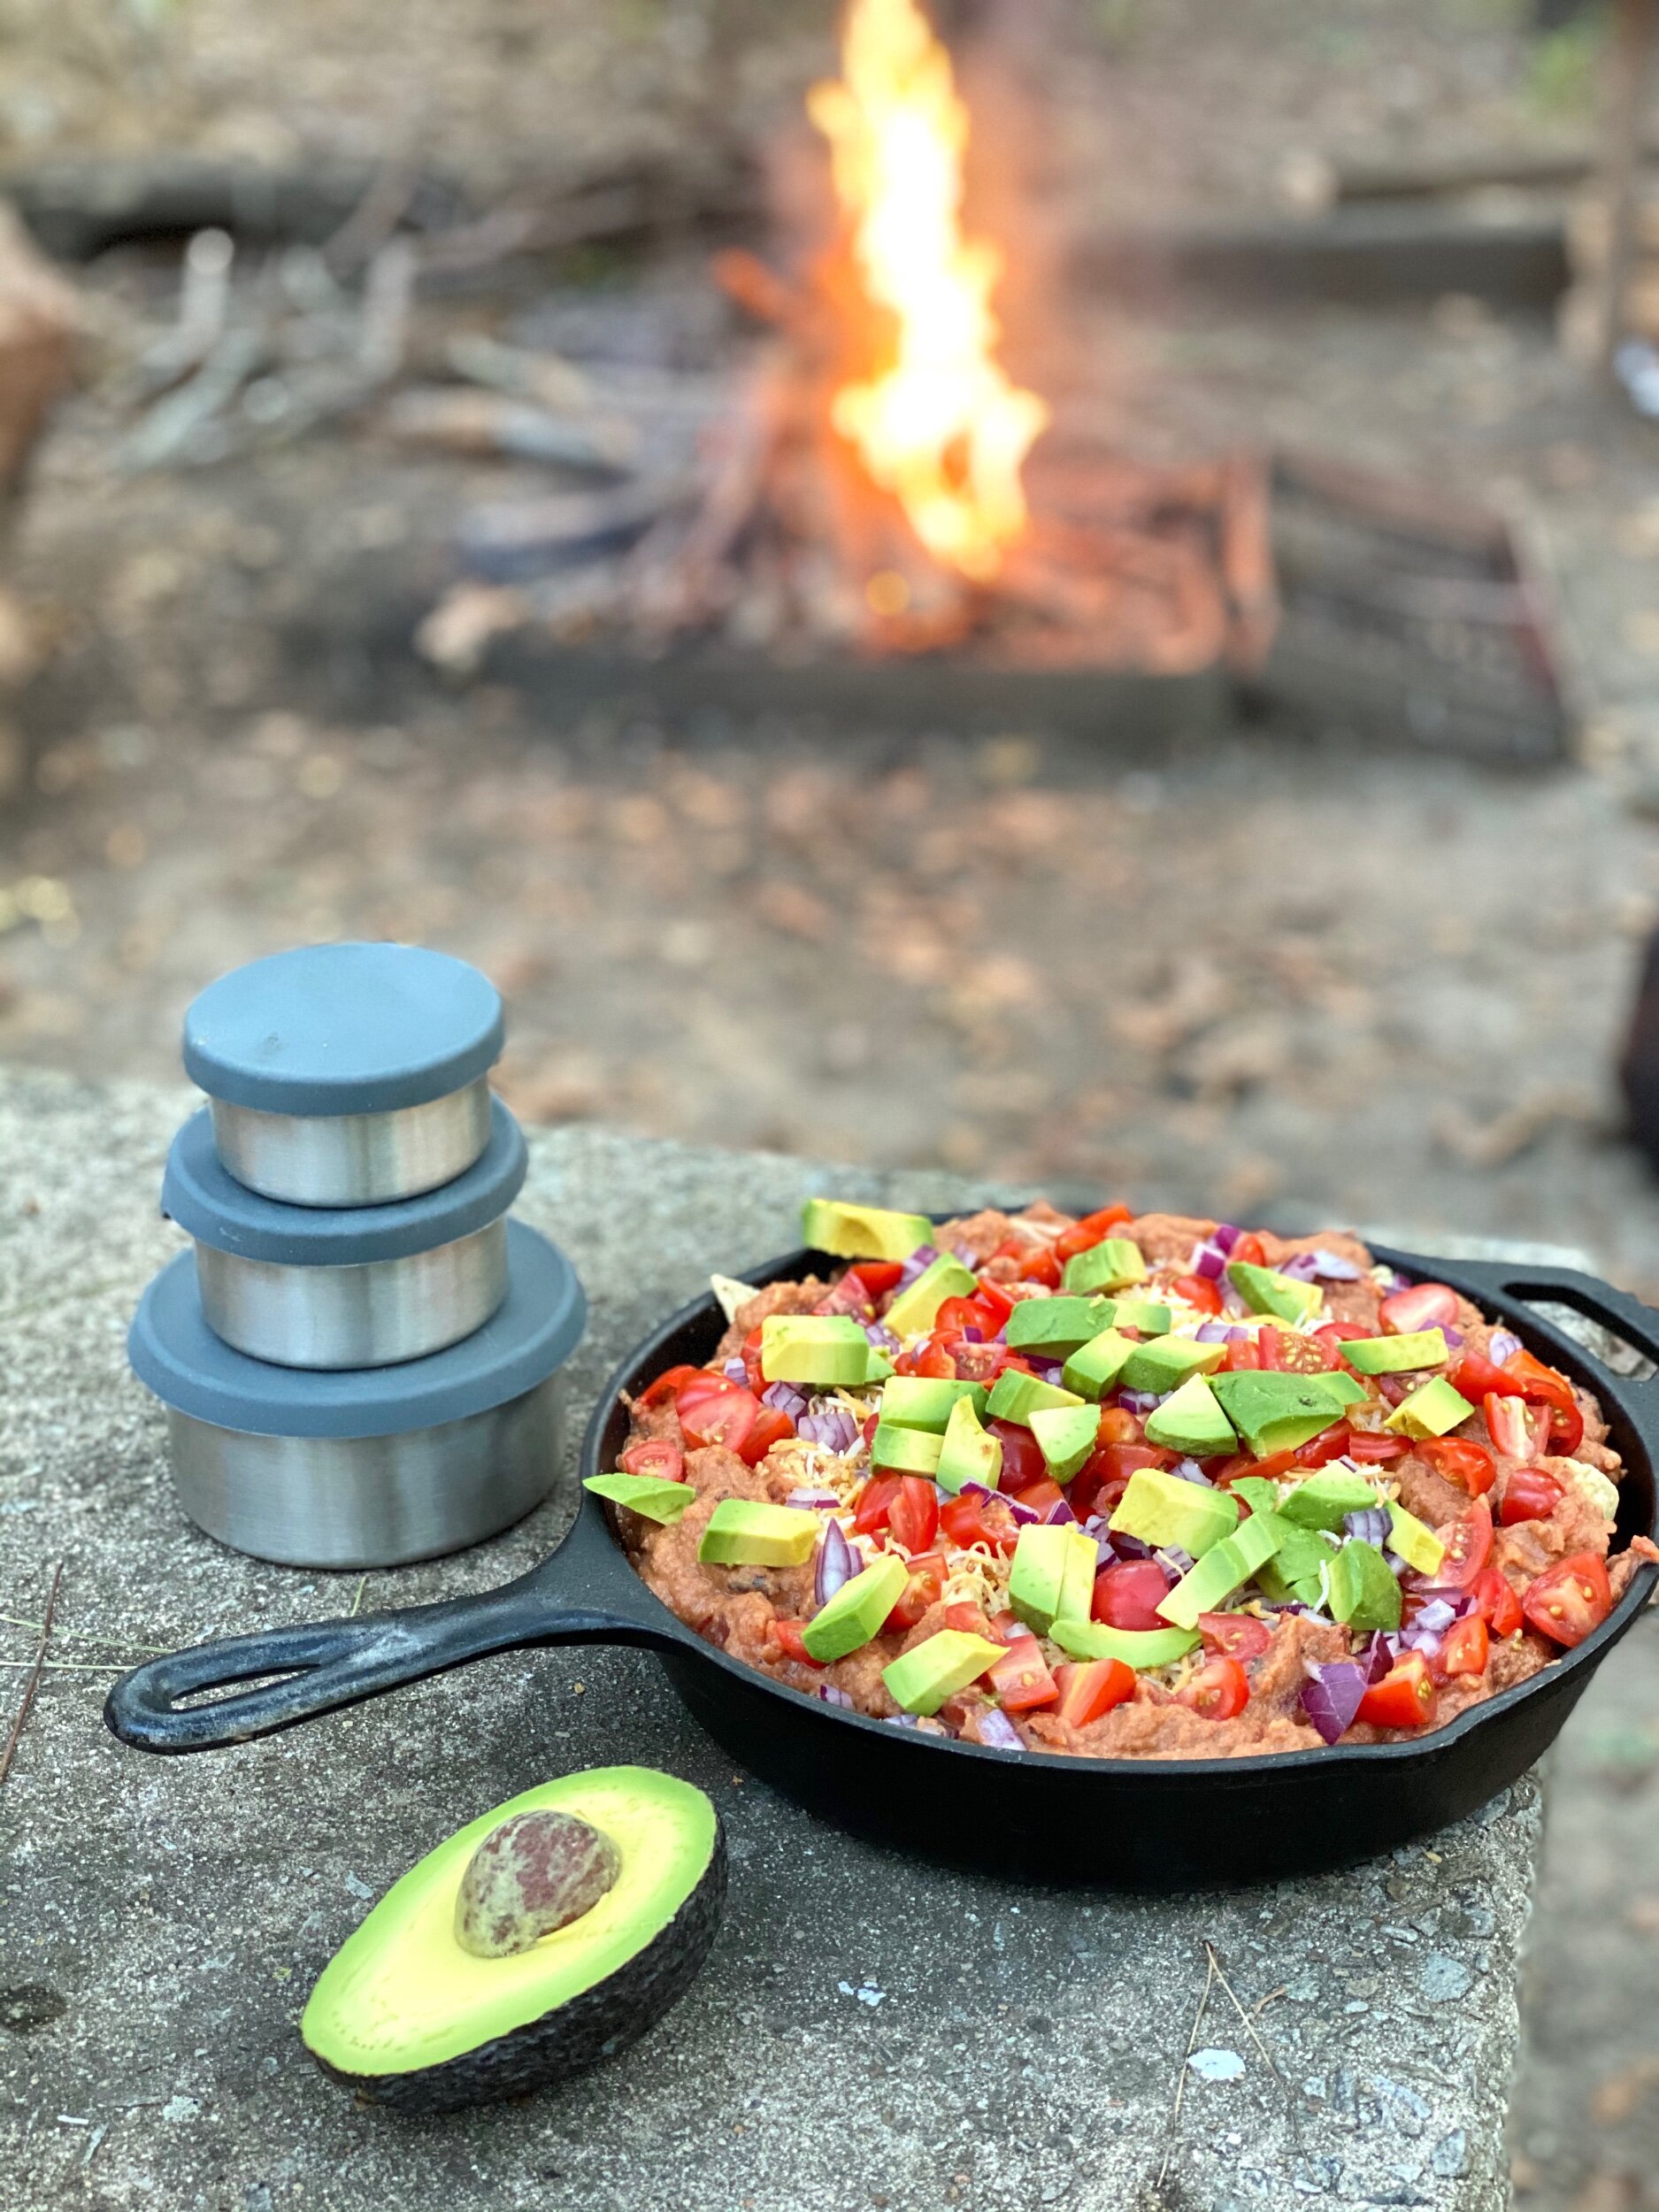
Campfire Nachos with Taco Bean Salsa 

Adjustments.jpeg

Prep ahead: Bean Dip + place all toppings in disposable containers 

1 can refried beans

1 can fire roasted tomatoes (or jar of your favorite salsa)

1 packet taco seasoning 

1 bag tortilla chips 

1 pound shredded Mexican blend cheese 

1/4 red onion - chopped

1 Roma tomato - chopped

1 avocado - cubed 

Home: Mix together beans, tomatoes, and taco seasoning then transfer to a disposable container. Prep all toppings and place in disposable containers. Store everything in a cooler bag - this will all sit just fine for a day. 

Campsite: On a cast iron skillet, layer the chips, bean dip, and cheese. Top with the red onion, tomato, and avocado. Cook over the campfire until cheese starts to melt and beans are warm. Serve with extra chips 

If cooking at home: Preheat oven to 375 degrees. Layer the chips, bean dip, and cheese and cook in the oven for about 8 to 10 minutes or until cheese is melted. Top with onion, tomato, avocado. Serve with extra chips. 

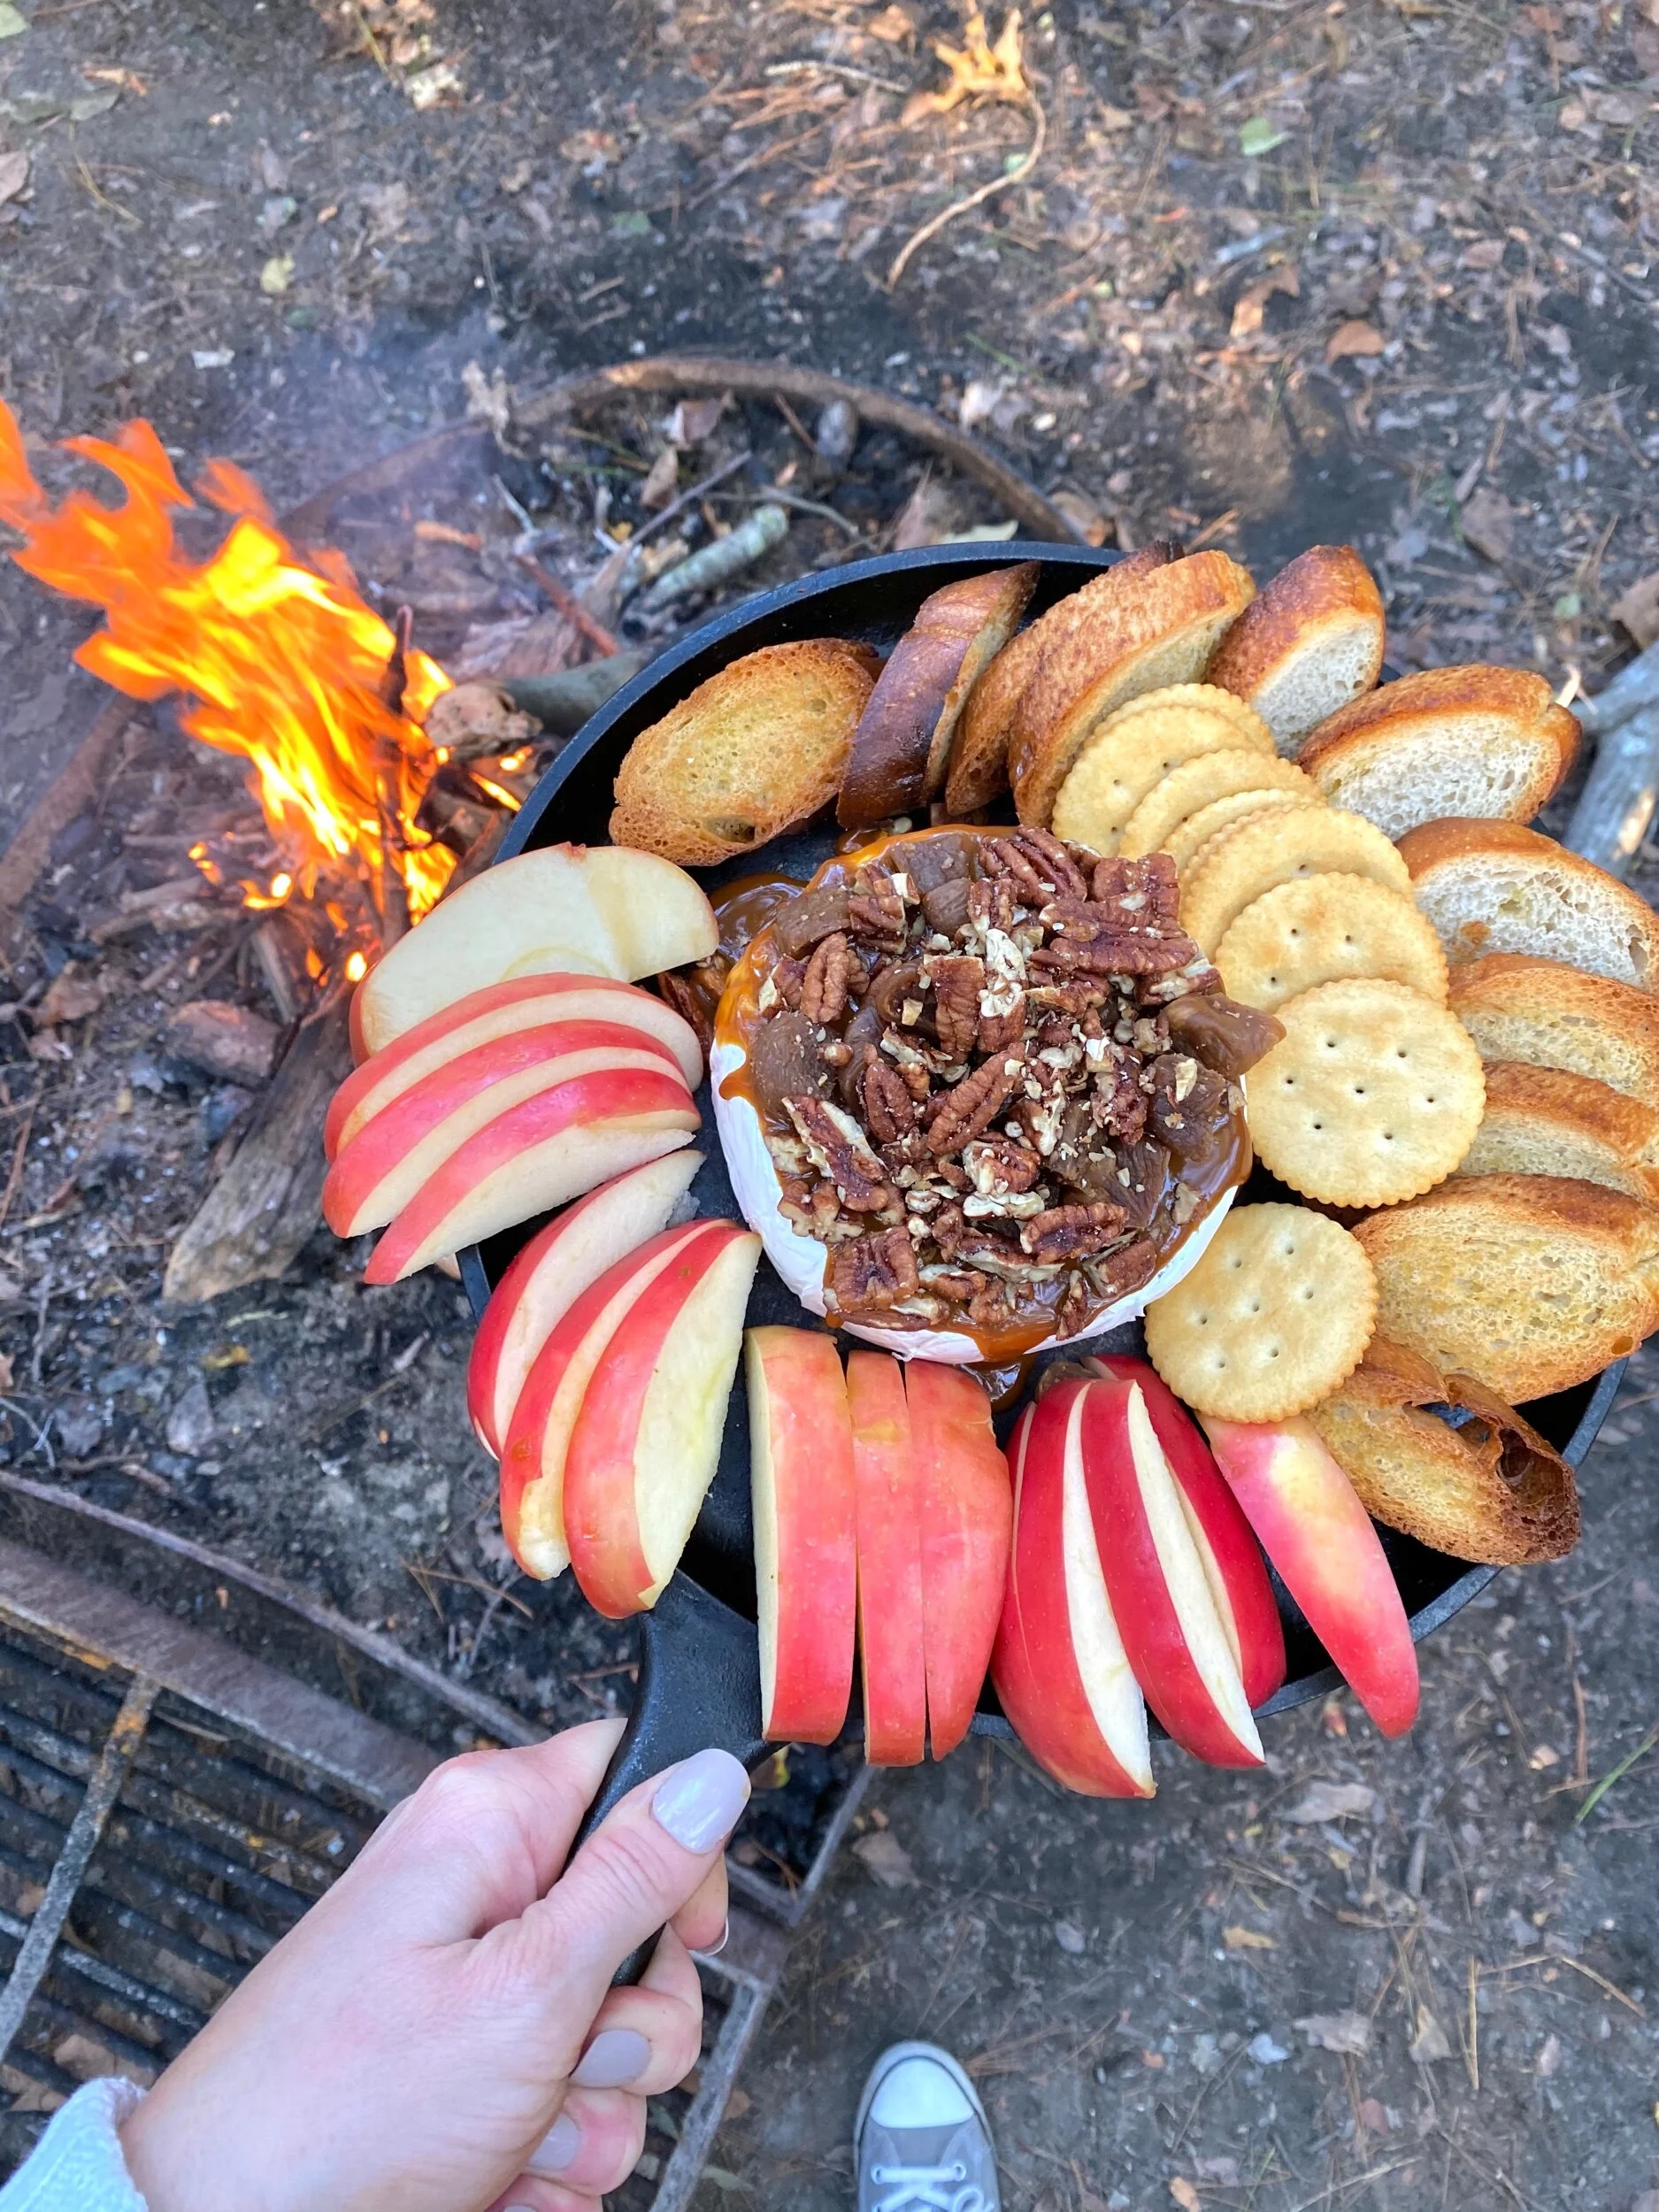
Campfire Baked Brie with Caramel Fig Pecan Sauce 

Adjustments.jpeg

Prep ahead: Chop figs and pecans + place everything in containers. 

1 round wheel Brie cheese 

1/4 cup store bought caramel sauce 

4 to 5 dried figs - chopped

1/4 cup candied pecans - chopped 

Apple slices, for serving 

Crostini, for serving 

Crackers, for serving 

Home: Place all ingredients separately in containers. 

Campsite: On a cast iron skillet, add the Brie and top with the caramel sauce, figs, and pecans. Place over the campfire until Brie is warmed through and starts to melt. Serve with apples, crostini, and/or crackers. 

If cooking at home: Preheat oven to 350 degrees. Follow the same directions and cook in the oven for about 5 minutes or until cheese starts to melt but wheel doesn’t burst open. Serve the same. 

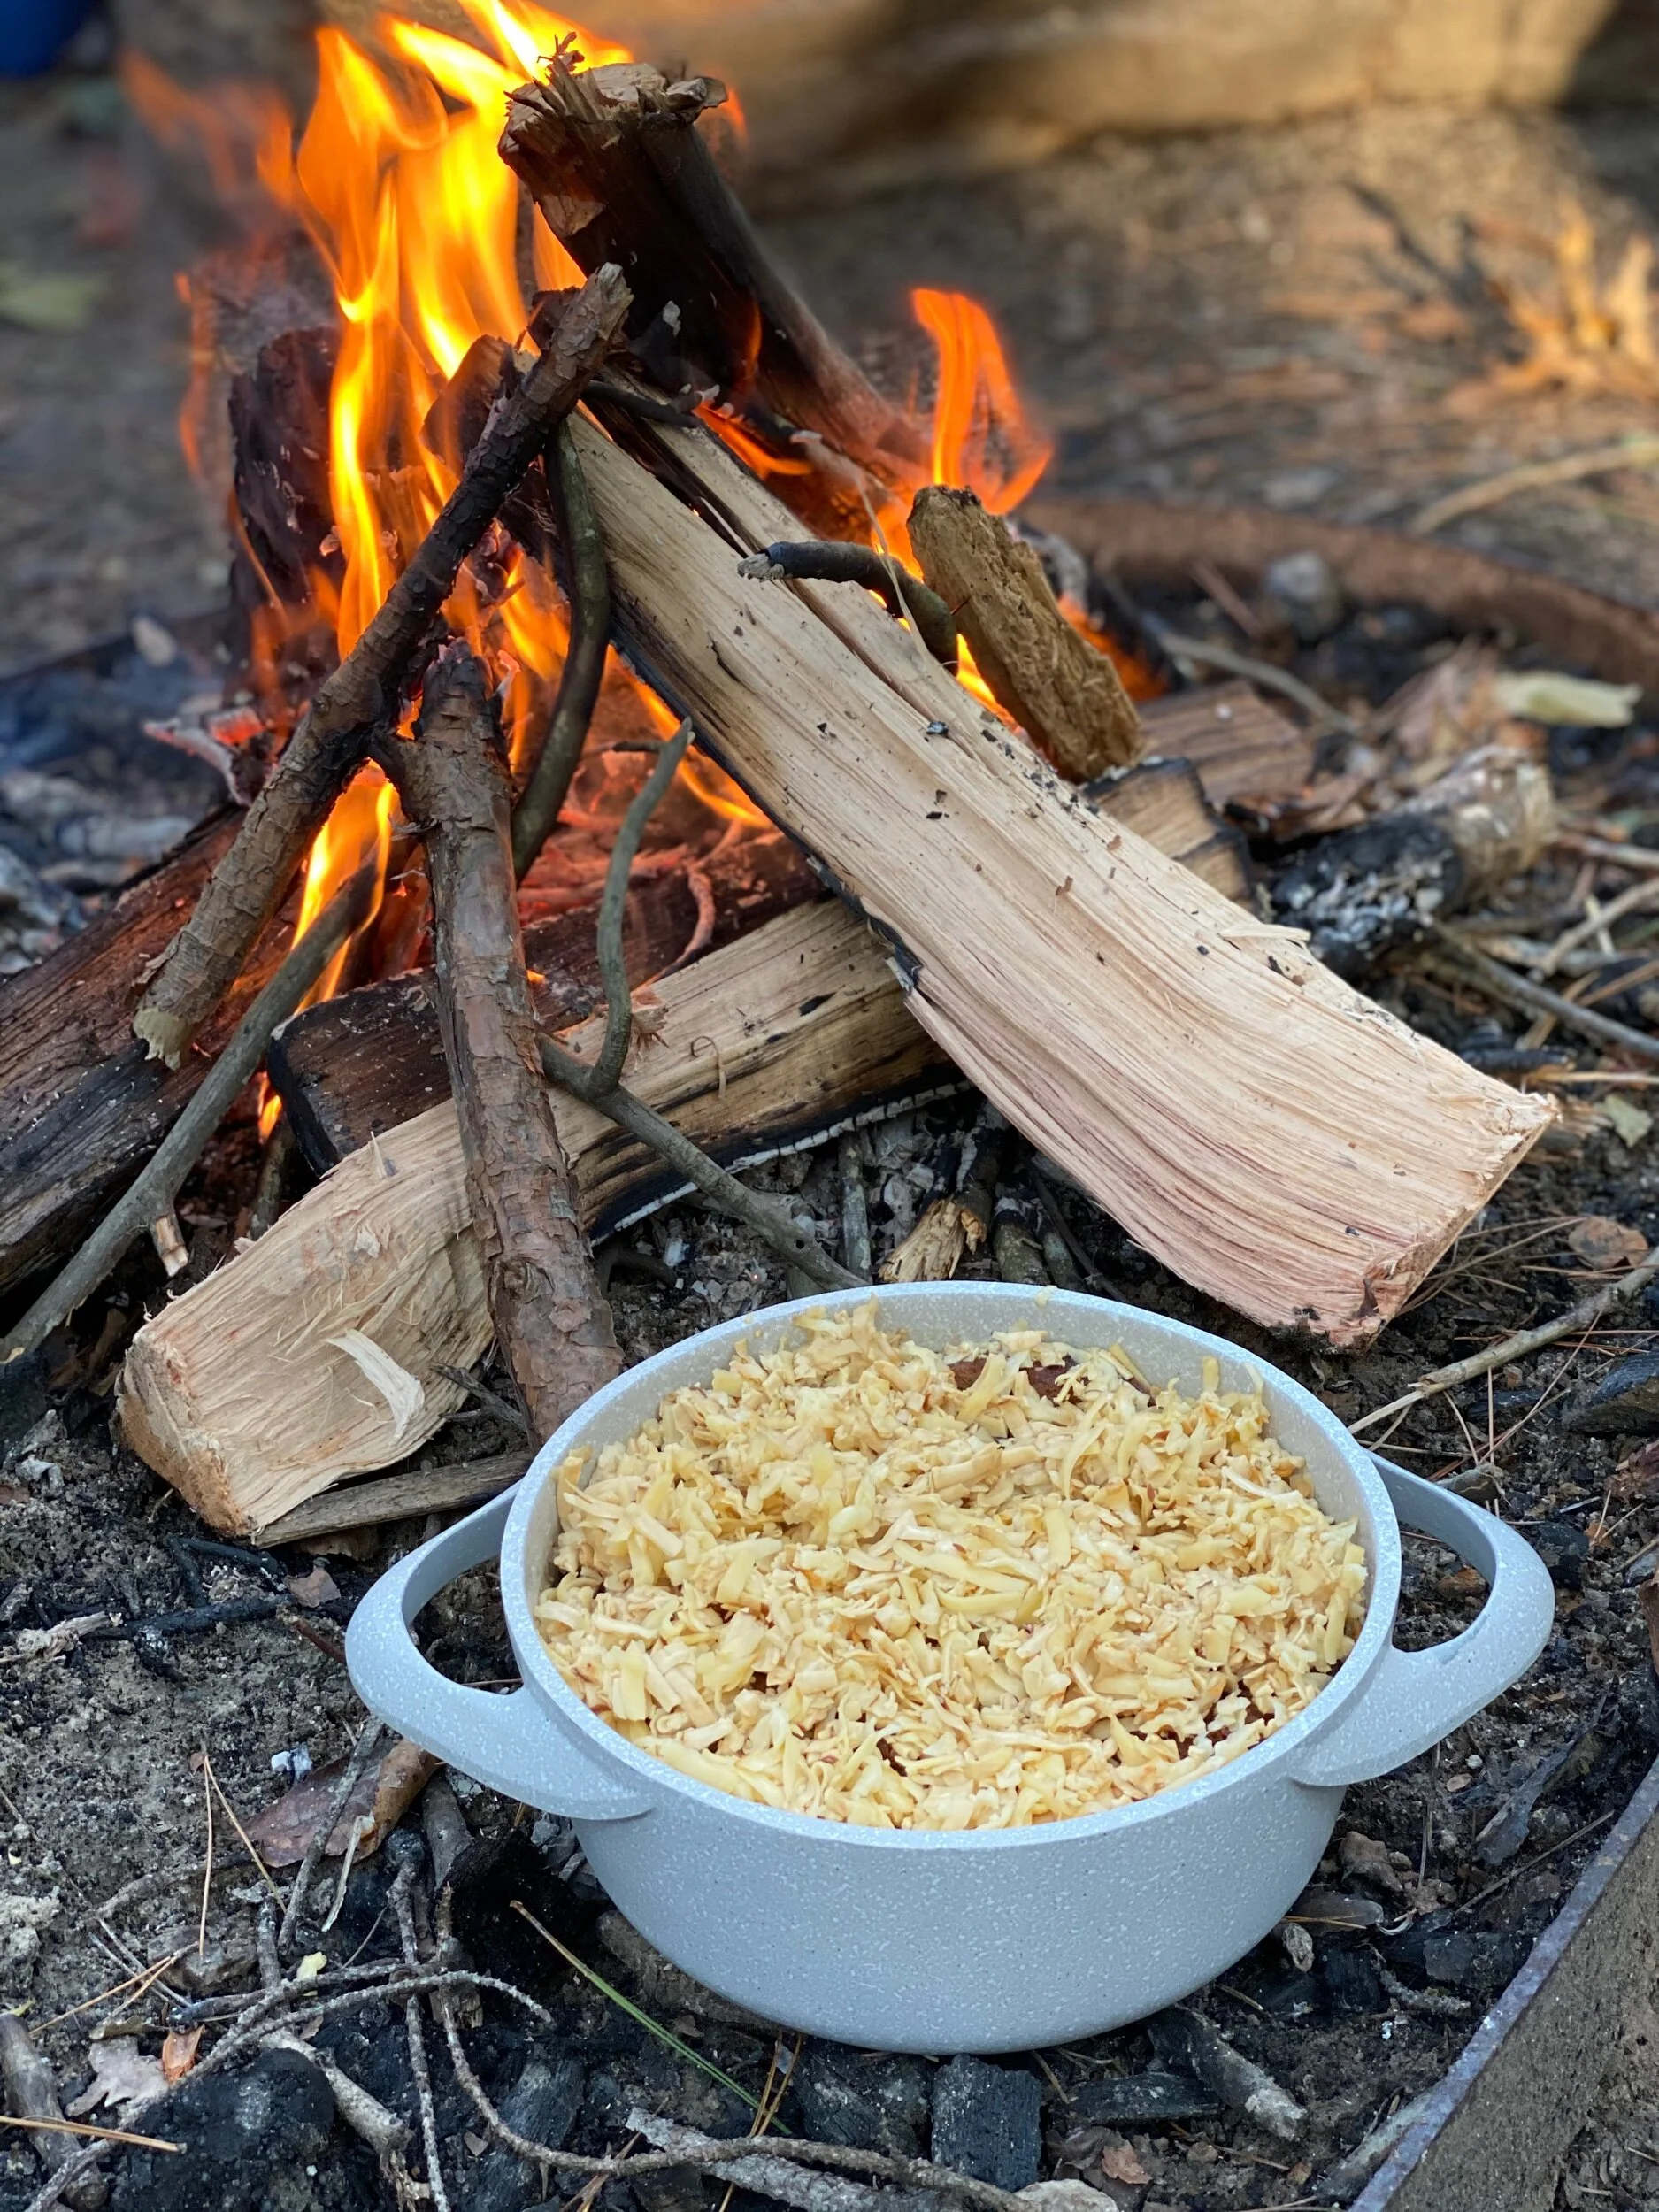
Campfire Smoked Gouda French Onion Soup 

Adjustments.jpeg

Prep ahead: Onion mixture/base + toast baguette + grate cheese 

10 to 12 baguette slices drizzled with olive oil

4 tablespoons butter 

1 tablespoon olive oil

4 sweet yellow onions - thinly sliced 

Kosher salt and freshly cracked pepper 

1 tablespoon dried Italian seasoning 

1 tablespoon balsamic vinegar

1/4 cup dry sherry

32 ounces beef broth 

3 to 4 cups grated smoked Gouda or smoky melting cheese (you can make cheese smoky by adding a few drops of liquid smoke and tossing together)

Home: Preheat oven to 400 degrees. Toast baguette slices for 6 to 8 minutes or until golden. Transfer to a container. Heat a pot over medium-low heat. Add the butter and olive oil until melted. Add the onions, about 1 1/2 teaspoons of salt, 1 teaspoon pepper, Italian seasoning, and balsamic vinegar. Cook for about 15 to 20 minutes or until onions are caramelized. Deglaze with the sherry and let liquid reduce by half. Transfer mixture to a container. Pack the onion mix, bread, broth, and cheese in a cooler bag - it will all sit fine for about a day. 

Campsite: To a soup pot, add the onions, broth, and top with toasted bread and cheese. Sit directly over the fire until bubbly and cheese starts to melt. 

If making at home: Preheat oven to broil. Make the onion mixture and add the broth. Top with toasted bread and cheese and broil until cheese is melted. 

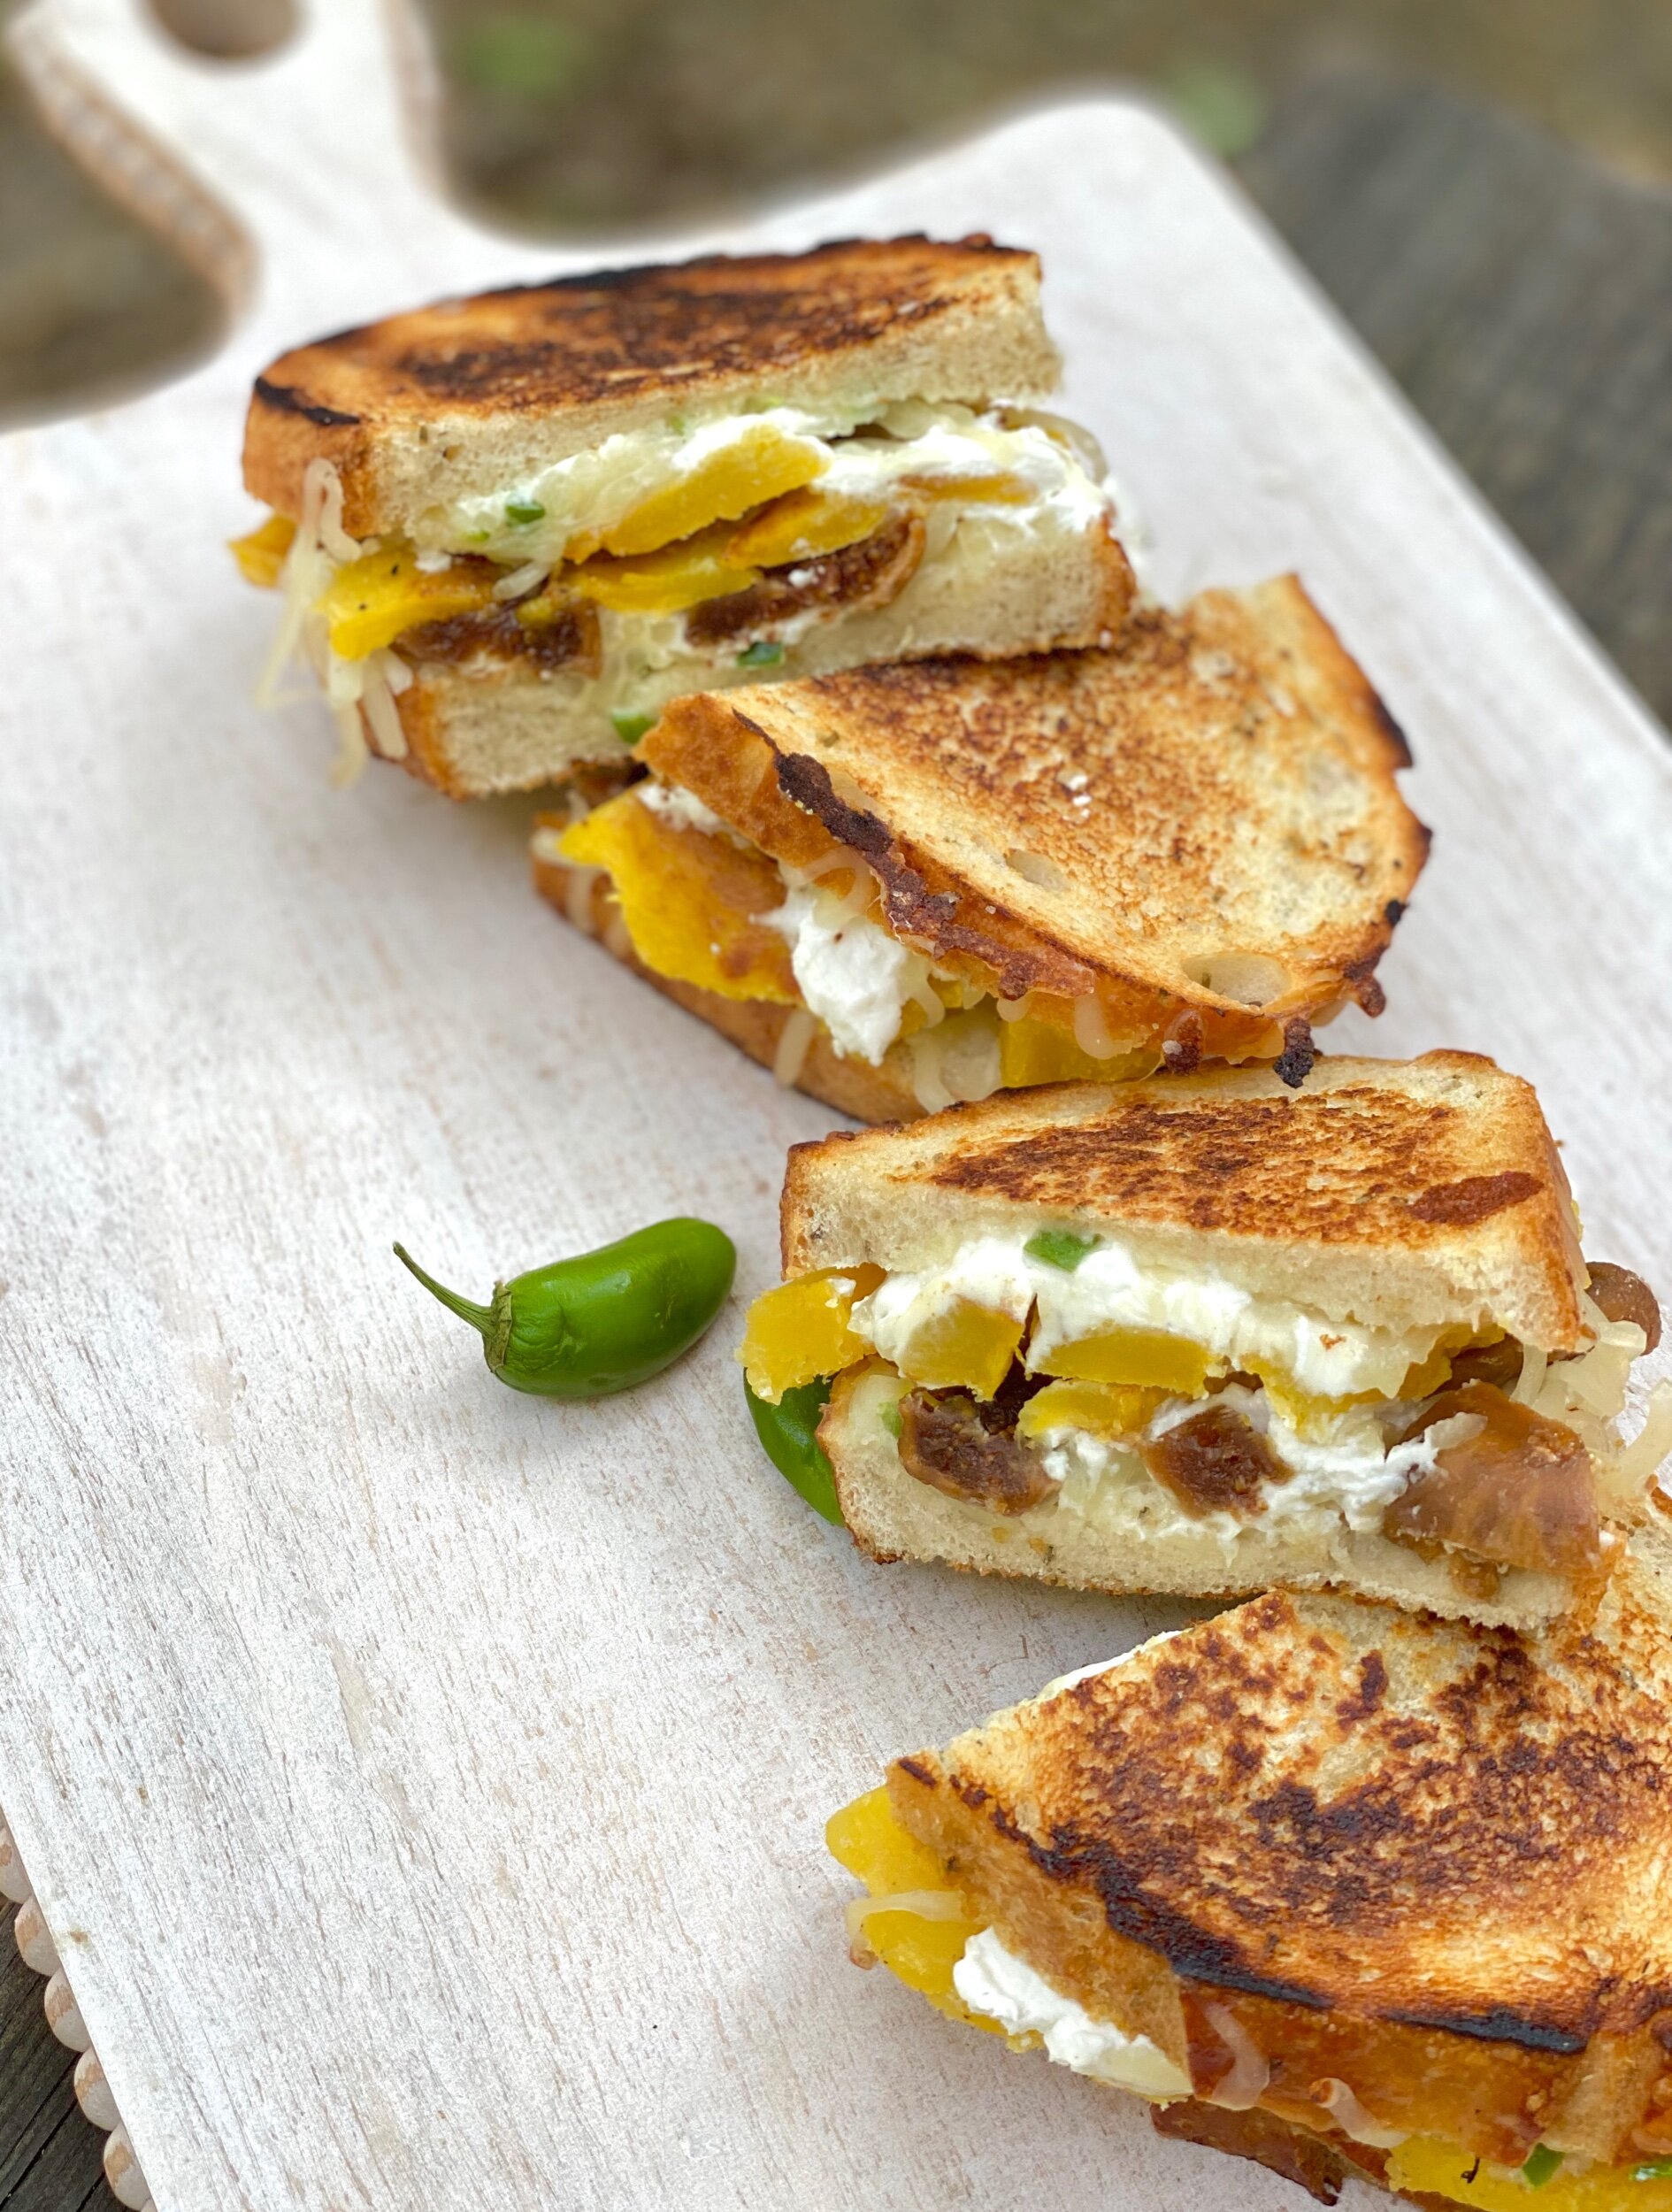
Roasted Squash & Golden Fig Grilled Cheese with Honey Jalapeño Aioli

September 21, 2020 Andrea LeTard
Adjustments.jpeg

Years ago we were in Pisa, Italy and I had the most simple, delicious sandwich of my life: fig, honey, and mortadella on baguette. For lunch today, I did a fridge clean out and came up with a vegetarian version of the same sandwich. And I died. This sandwich is everything on earth. I’m telling you, you MUST make this for lunch once day! It has the flavors of fall is a little sweet and a little savory with a little kick from the jalapeño aioli. Every element of this sandwich just works so beautifully together... it’ll be the best thing you eat all week!  
2 servings 

1 delicata squash - halved, seeded, sliced 

1 tablespoon olive oil 

Kosher salt and pepper 

1 tablespoon mayonnaise 

1 tablespoon honey

1 tablespoon minced jalapeño 

4 slices bread of your choice

1/2 cup shredded mozzarella 

2 ounces crumbled goat cheese 

4 dried golden figs - sliced 

Cooking spray or butter 

Preheat oven to 400 degrees. On a sheet pan, toss sliced squash with the olive oil and a heavy dash of salt and pepper. Roast for 10 to 15 minutes or until soft and golden. In a small bowl, mix together the mayonnaise, honey, and jalapeño. Evenly spread mayo over each slice of bread then the evenly top with mozzarella and goat cheese on all slices. On one side of each sandwich, add the figs and on the other side of each sandwich, add the cooked squash. Close the sandwich. Heat a cast iron or sauté pan over medium heat. Spray the bottom and place the sandwiches on the pan. Cook each side until golden and cheese is melted. Slice in half to serve. 

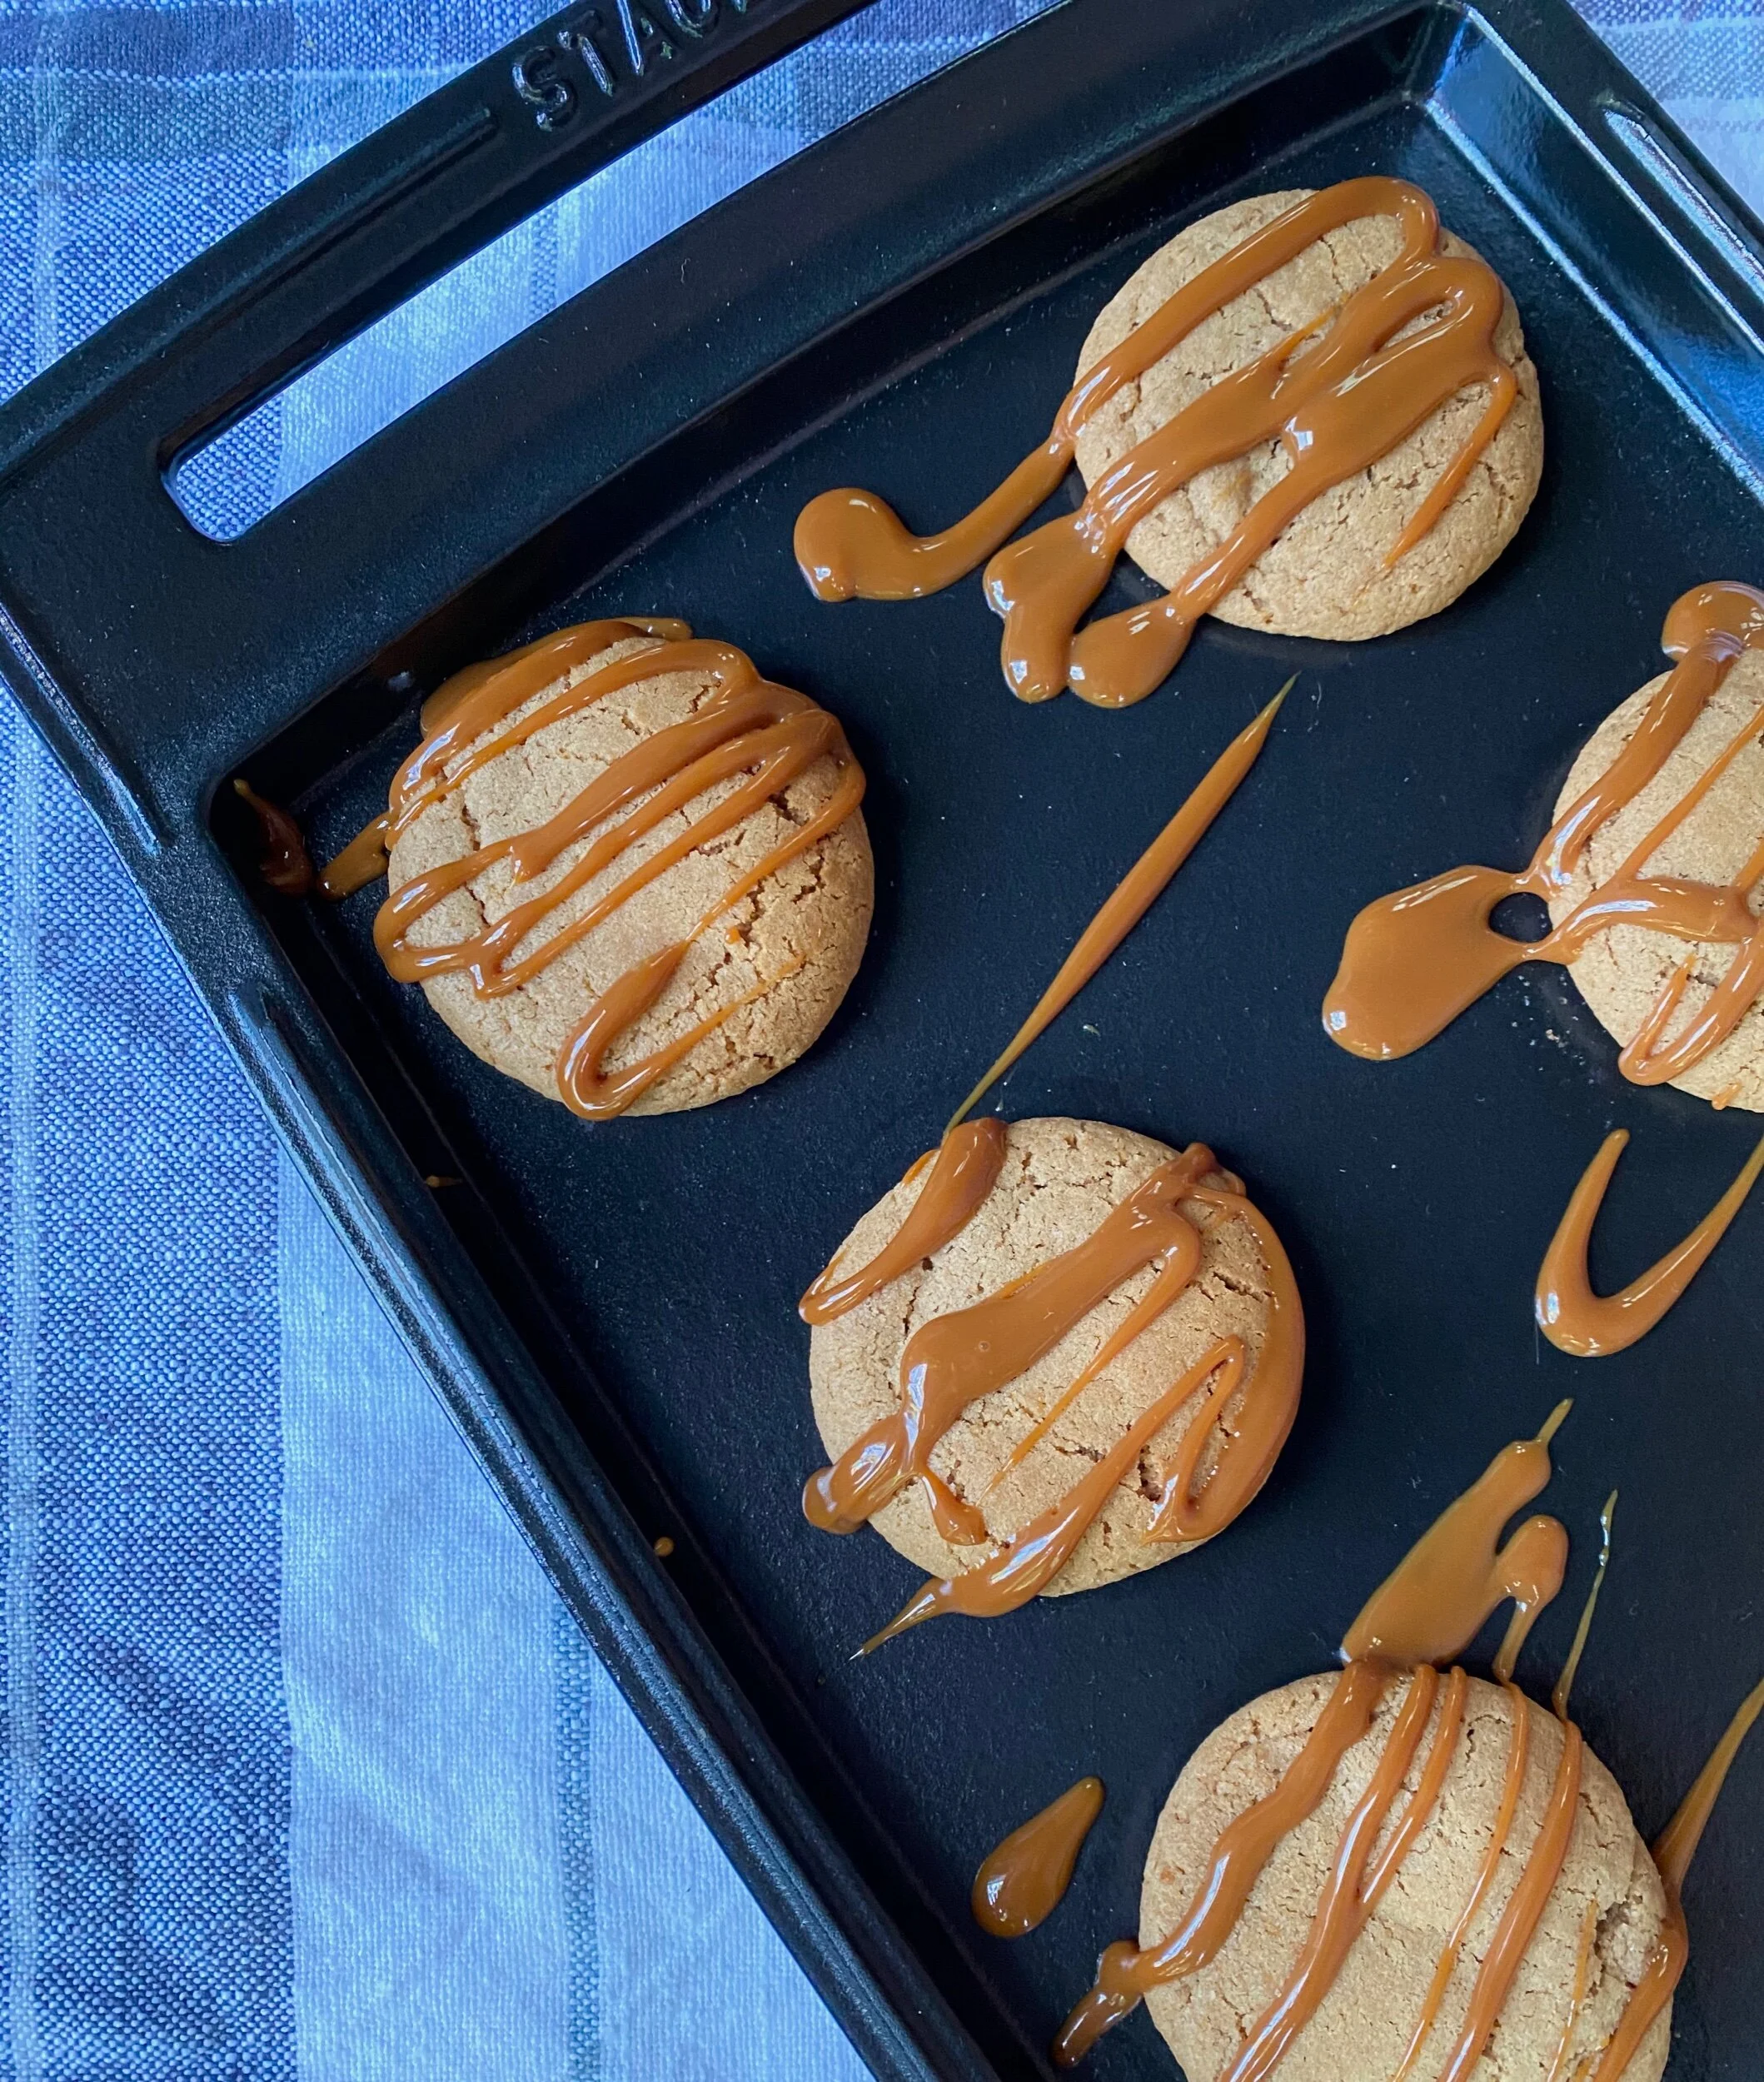
Brown Butter Caramel Apple Cider Cookies

September 20, 2020 Andrea LeTard
Adjustments.jpeg

Xavier turned one month old on September 19! I knew I wanted to do some sort of milestone pictures to see how much he grows each month, and I ran across this beautiful Staub cookie sheet at Williams Sonoma so I thought, why not make a seasonal cookie recipe to go along with each picture? I love how the cookie sheet serves as a frame of reference for how much he grows each month. Plus, it gives us an excuse to make a seasonal batch of cookies! Nothing says the start of fall like apple cider and caramel. These cookies have the texture of a sugar cookie but all the flavors of fall and a little caramel drizzle to make them extra special.

Adjustments.jpeg

1 stick salted butter

1/2 cup sugar

1 egg

1/2 teaspoon vanilla extract

1/4 cup caramel or dulce de leche, plus more for drizzling

1 1/2 cups all-purpose flour

1 1/2 tablespoon apple cider drink mix or mulling spice mix

1/2 teaspoon baking soda

1/2 teaspoon cinnamon

1/2 teaspoon salt

1/4 teaspoon baking powder

Preheat oven to 350 degrees. Set a shallow sauté pan over medium heat. When hot, add butter and let sit until brown and toasty. When melted and browned, turn heat off and transfer pan to the fridge to let cool - about 15 to 30 minutes or until butter is slightly hardened. Once cool, scoop butter into a stand mixer and add the sugar. Using the paddle attachment, beat together until light and fluffy. Add the egg, vanilla, caramel, and beat together again until combined.

In a medium bowl, whisk together the flour, apple cider/spice mix, baking soda, cinnamon, salt, and baking powder. Slowly add the dry mix to the wet mix and beat together until combined. Using a cookie scoop or tablespoon, roll dough into balls and space out on a cookie sheet. Bake for 8 to 10 minutes or until golden. If desired, drizzle with more caramel or dulce de leche when cooled.

← Newer Posts Older Posts →

MEET ANDREA

Hey y'all! Welcome to Andrea’s Cooktales. I’m a believer that the best stories are shared and the fondest memories are made in the kitchen, at the dinner table, and surrounded by food. This blog is about storytelling from the kitchen and the dinner table.  (Read more...)

No results found

RECENT POSTS

Featured
IMG_1207.jpg
October 18, 2026
The Perfect Halloween Dinner Party Menu
October 18, 2026
Read more →
October 18, 2026
cozy fall recipes.jpg
September 22, 2026
12 Cozy Fall Recipes to Make All Season
September 22, 2026
Read more →
September 22, 2026
halloween chili.jpg
September 15, 2026
The “Halloween Chili” that Wins Chili Cook Offs
September 15, 2026
Read more →
September 15, 2026
Five Star Menu.jpg
September 10, 2026
A “Five Star Weekend” Girls’ Night: The Complete Nantucket-Inspired Menu
September 10, 2026
Read more →
September 10, 2026
IMG_5362.jpeg
September 3, 2026
7 Cozy Soups to Make During the Summer-to-Fall Transition
September 3, 2026
Read more →
September 3, 2026
IMG_1079.jpg
March 1, 2024
Better Than a Steakhouse Filet Mignon
March 1, 2024
Read more →
March 1, 2024
IMG_1267.jpg
March 1, 2024
Raspberry Rose Brie Bread
March 1, 2024
Read more →
March 1, 2024
IMG_2041.jpg
March 1, 2024
Best Breakfast Burrito in Existence
March 1, 2024
Read more →
March 1, 2024
IMG_2037.jpg
March 1, 2024
Campari Spritz
March 1, 2024
Read more →
March 1, 2024
IMG_2034.jpg
March 1, 2024
Truffle Seafood Pot Pies
March 1, 2024
Read more →
March 1, 2024

ARCHIVES

Archive
  • October 2026 1
  • September 2026 4
  • March 2024 5
  • February 2024 1
  • November 2023 6
  • September 2023 12
  • August 2023 6
  • September 2022 1
  • February 2021 2
  • December 2020 8
  • November 2020 9
  • October 2020 4
  • September 2020 6
  • August 2020 7
  • July 2020 3
  • May 2020 2
  • February 2020 5
  • January 2020 3
  • December 2019 3
  • November 2019 4
  • October 2019 8
  • September 2019 4
  • August 2019 2
  • July 2019 6
  • May 2019 3
  • April 2019 5
  • March 2019 2
  • February 2019 2
  • December 2018 6
  • November 2018 7
  • October 2018 5
  • July 2018 1
  • June 2018 3
  • April 2018 1
  • February 2018 2
  • January 2018 10
  • November 2017 1
  • October 2017 2
  • September 2017 2
  • August 2017 1
  • July 2017 1
  • June 2017 3
  • May 2017 1
  • March 2017 4
  • February 2017 1
  • January 2017 2
  • December 2016 4
  • November 2016 7
  • October 2016 3
  • September 2016 5
  • August 2016 2
  • July 2016 4
  • June 2016 2
  • May 2016 9
  • April 2016 7
  • March 2016 7
  • February 2016 18
  • January 2016 8
  • December 2015 10
  • November 2015 14
  • October 2015 14
  • September 2015 13
  • August 2015 5
  • July 2015 6
  • June 2015 5
  • May 2015 6
  • April 2015 5
  • March 2015 6
  • February 2015 3
  • December 2014 3
  • October 2014 7
  • September 2014 6
  • August 2014 6
  • July 2014 7
  • June 2014 6
  • May 2014 6

CATEGORIES

  • TRAVEL TALES
  • LIFESTYLE POSTS
  • RECIPES
  • ANDREA'S COOKTALES
  • QUICK BITES
  • TV APPEARANCES
  • WHAT DO YOU DO WITH THAT
Summary Block
This block is invalid. Please check the block settings and try again.
Featured
Aenean eu leo Quam
Aenean eu leo Quam

Quisque iaculis facilisis lacinia. Mauris euismod pellentesque tellus sit amet mollis.

Read more →

BLOG     |     VIDEOS     |      SERVICES    |       RECIPE INDEX    |      PRIVACY

Copyright Andrea's Cooktales 2016-2017 | Design by Oh Simple Joys Design Studio