• Cookbook
  • About
  • Video
  • Recipes
  • Travel
  • Inspiration
  • Services
  • Contact
Menu

Andrea's Cooktales

Street Address
City, State, Zip
Phone Number
A STORY BEHIND EVERY RECIPE

A STORY BEHIND EVERY RECIPE

Andrea's Cooktales

  • Cookbook
  • About
  • Video
  • Recipes
  • Travel
  • Inspiration
  • Services
  • Contact

Santa Snack Board

December 5, 2020 Andrea LeTard
IMG_0607.jpeg

For the holidays, I love creating food so fun and beautiful, it can replace decor. This Santa snack board is a perfect example of just that - it’s adorable, fun, and oh so yummy! I created this for a gals holiday gathering and it was such a hit and was photographed so much, it could very well have celebrity status. I think you all need this at your holiday party this year - it’s a food Instagram dream. Make sure you tag @andreas_cooktales!

1 Brie wheel

2 tablespoons cherry or strawberry preserves

1/4 cup pomegranate seeds

1 container mozzarella balls

1 container raspberries 

Toothpicks 

4 ounces goat cheese - softened 

Crostini or crackers 

1 red apple - sliced 

Honey, for drizzling 

Peppermint Bark

White yogurt pretzels

Dried or marinated hibiscus flowers

*Anything else red or white you can find

*You can make this board as big or small as you’d like, that’s why very few measurements are given in this recipe. Get creative, have fun!

Start by placing the Brie wheel on the board, spread the preserves on top, sprinkle with the pomegranate seeds. Skewer the mozzarella balls and raspberries on toothpicks and place on the board in two different places. Spread goat cheese on crostini or crackers. Top each with an apple slice and drizzle with honey. Place on the board. Using the peppermint bark, yogurt pretzels, hibiscus flowers, leftover apple slices, leftover crostini and/or crackers, and any other treats you picked out, fill in the empty spaces on the board. Garnish with holly or any red decor you have. 

Sweet Potato Fig Bake with Brown Butter Bourbon Glaze

November 26, 2020 Andrea LeTard
IMG_9963.jpeg

Better than sweet potato casserole and baked with a twist! The brown butter bourbon glaze on these sweet potatoes are a game changer and the figs give it a little something extra.

3 pounds (about 6) sweet potatoes - sliced thin (about 1/4 inch thick), ends removed 

Kosher salt and freshly cracked pepper 

1 stick salted butter 

1 cup brown sugar

1/2 cup bourbon 

4-5 fresh figs - quartered 

1/2 cup walnuts - roughly chopped 

1/4 cup cranberries 

Heat oven to 350 degrees. Bring a large pot of water to a boil. When water is boiling, add sweet potatoes and boil for about 6 to 8 minutes or until potatoes are slightly tender - a fork should be able to go through them but not easily. Drain the potatoes, line them in a 9x13 baking dish, and sprinkle with 1 teaspoon salt and 1/2 teaspoon pepper. Heat a sauté pan over medium heat, add the butter, and let it sit without touching. When the color is golden and the smell is toasty, stir in the brown sugar, bourbon, and a dash of salt. Bring to a boil and let simmer until slightly thickened. Pour the mixture over the sweet potatoes the top with figs, dried cranberries, and walnuts. Cover with foil and bake for 20 to 25 minutes or until potatoes are cooked through. Serve warm. 

Sweet Potato Cranberry Cookies

November 24, 2020 Andrea LeTard
IMG_0225.jpeg

Xav turned 3 months the month of Thanksgiving so I thought for his monthly cookie, why not combine the two most traditional Turkey Day flavors: sweet potato and cranberry?! These cookies are chewy on the inside, crispy on the outside and bursting with the most delicious fall flavors. He’s getting so big so fast!

1/2 stick room temperature salted butter 

3/4 cup granulated sugar

1 egg

1 teaspoon pure vanilla extract 

1/2 cup sweet potato purée 

1 cup all-purpose flour

1/2 teaspoon baking soda 

1 teaspoon cinnamon 

1/2 teaspoon salt

1/2 teaspoon ground ginger

1/4 teaspoon nutmeg 

1 /2 cup dried cranberries

Heat oven to 350 degrees. In a stand mixer, cream together the butter and sugar until light and fluffy. Add the egg, vanilla, and sweet potato purée. Beat together on medium-high until smooth. In a mixing bowl, whisk together the flour, baking soda, cinnamon, salt, ginger, and nutmeg. Add half the dry mixture to the stand mixer and beat together. Then add the other half and beat together until completely combined. Add the cranberries and do one final mix on low. Using a cookie scoop, space out 2 tablespoon dough balls onto a parchment lined cookie sheet. Bake for 15 to 18 minutes or until cookies are cooked through and crispy on the edges. 

Candy Corn Cake Mix Cookies

November 24, 2020 Andrea LeTard
IMG_8735.jpeg
IMG_8726.jpeg

For Xav’s 2 month birthday, we celebrated Halloween - as we do the entire month of October - with these easy candy corn cookies. Using the traditional recipe for “cake mix cookies,” we added candy corn for a fun trick or treat twist! 

1 box vanilla cake mix

2 eggs 

1/2 cup vegetable oil 

3/4 cup candy corn 

Preheat oven to 350 degrees. In a large mixing bowl or in your stand mixer with paddle attachment, mix together the cake mix, eggs, oil, and candy corn on low speed until combined. On a parchment lined cookie sheet, scoop (2 tablespoon scoops) 2 inches apart. Bake for about 10 minutes. 

Parmesan & Crispy Herb Rutabaga

November 23, 2020 Andrea LeTard
IMG_7246.jpeg

If you’ve never cooked or eaten rutabaga before - think potato. This not so ordinary, yet easy to find vegetable is prepared in a similar way to roasted potatoes with a little fall twist using crispy sage and rosemary. This simple side will brighten up your table and knock everyone’s socks off with how delicious!

6 to 8 servings 

2 large rutabaga 

3 tablespoons olive oil 

2 tablespoons minced fresh rosemary, plus a few stems

1 tablespoon minced fresh sage, plus a few stems

2 teaspoons kosher salt

1 teaspoon freshly cracked pepper 

1 cup grated Parmesan cheese 

Preheat your oven to 400 degrees. Using a sharp knife, cut the ends off the rutabaga then “peel” it using the knife. The skin is quite tough so a knife works better than a peeler. Cut it into 1/2 inch cubes. 

On a large baking sheet lined with parchment paper, toss together the cubed rutabaga, olive oil, rosemary, sage, salt, and pepper. Roast for about 15 to 20 minutes or until softened. Sprinkle the Parmesan over the top and roast another 8 to 10 minutes or until golden and crispy. Serve in a large bowl with crispy herb stems on top. 

Crispy Charcuterie & Smoked Gouda Thanksgiving Stuffing

November 22, 2020 Andrea LeTard
IMG_9967.jpeg
IMG_9965.jpeg

I know, I know - charcuterie is supposed to be cold cuts of meat, served cold but trust me - these types of meats are also next-level delicious when crispy. I’ve been crisping up everything from prosciutto to salami since I can remember to crumble over dishes (think bacon but just different types of charcuterie style meats) and it always takes a dish from good to great. This is a fun twist on a traditional Thanksgiving stuffing that I think you and your family will love!

1 loaf rustic bread - cubed 

2 tablespoons olive oil

4 ounces prosciutto - chopped 

4 ounces salami - chopped 

4 ounces soppressata - chopped 

1 stick salted butter

1 onion - chopped

3 celery stalks - sliced 

Kosher salt and cracked pepper 

6 eggs

2-3 cups chicken or veggie stock 

2 cups grated smoked Gouda

Sage leaves, for garnish (optional)

Preheat oven to 350 degrees. On a large sheet pan, toss together the bread cubes and olive oil. Bake bread for about 5 minutes or until just crispy on the top but still soft on the inside. Heat a large sauté pan over medium high heat. Add the prosciutto, salami, and soppressata to the pan and cook until crispy on all sides. Set aside on a paper towel lined plate. Turn the heat down to medium low and add the butter to the pan. When melted, add the onion and celery with one teaspoon of salt and pepper. Sauté until soft and translucent. 

In an extra large bowl, whisk together the eggs, 2 cups of the stock, and 1 cup of the Gouda. To the egg mixture, add the bread cubes, crispy meat, and veggies. Stir everything together until combined. If the mixture seems dry, add the other cup of stock and stir together until the bread soaks up the liquid. Pour into a greased 8x12 baking pan and top with the remaining cheese and sage leaves if desired. Bake for 25 to 30 minutes or until golden on top and cooked through. Serve warm. 

The Only Thanksgiving Sides You Need On Your Table this Year

November 21, 2020 Andrea LeTard
IMG_9966.jpeg

Let’s be real, Thanksgiving is simply not Thanksgiving without an array of fabulous sides. Most of y’all know already, I’m not terribly keen on traditional Thanksgiving food. I’ll be honest, I find most of it barf-worthy, but I LOVE good fall focused sides! Every year when I recipe test for Thanksgiving, it’s all about the sides and putting a modern spin on somewhat traditional Thanksgiving food. Here you’ll find a list of fun, beautiful, and most delicious sides! 

Crispy Prosciutto & Caramelized Onion Butternut Squash Lasagna 

IMG_9455.jpeg

Crispy Brussels Sprouts with Berry Goat Cheese and Toasted Hazelnuts

IMG_9618.jpeg

Whisky Pepper Jelly Glazed Carrots 

IMG_0074.jpeg

Roasted Maple Creamed Corn 

IMG_9725.jpeg

Pumpkin Mascarpone Grits

IMG_9714.jpeg

Brown Butter Crispy Sage Cauliflower Mash

IMG_9881.jpeg

Baked Macaroni & Cheese with Pork Crunchies 

IMG_0078.jpeg

Pizza Stuffing with Fall Herbs

IMG_0030.jpeg
In Holiday

Pizza Stuffing with Fall Herbs

November 20, 2020 Andrea LeTard
IMG_0030.jpeg

This is the perfect recipe for those at the table who don’t absolutely love traditional Thanksgiving food. Kids will be the number one fan of this one too. I personally think pizza (in some form) should always be on the table when eating the biggest meal of the year!

1 pound focaccia bread or artisan pizza dough - cubed 

1/4 cup olive oil

1 pound fresh mozzarella - cubed 

8 to 10 ounces pepperoni - sliced into strips

1/4 cup pepperoncini- minced 

1/4 cup sun dried tomatoes- minced 

2 tablespoons minced fresh parsley

1 tablespoon minced fresh sage

1 tablespoon minced fresh thyme

6 eggs

2 cups chicken or veggie stock 

1 tablespoon Italian seasoning 

1 1/2 teaspoons kosher salt

1/2 teaspoon freshly cracked pepper 

1 cup shredded Parmesan 

Preheat oven to 350 degrees. In a large bowl, add the bread cubes and coat with olive oil. Add 3/4 of the mozzarella cubes, 3/4 of the pepperoni, pepperoncini, sun dried tomatoes, parsley, sage, and thyme. In a separate bowl, whisk together the eggs, stock, Italian seasoning, salt, pepper, and half of the Parmesan. Add the egg mixture to the bread mixture and stir together until the bread is coated. Pour into a greased 8x12 baking pan. Top with the remaining mozzarella, pepperoni, and Parmesan. Bake for 20 to 30 minutes or until golden and bubbly. Garnish with thyme sprigs if desired. 

Baked Macaroni & Cheese with Pork Crunchies

November 16, 2020 Andrea LeTard
image.jpeg

This delicious side dish is a twist on one of the most popular pasta dishes from my cookbook. Pork crunchies are the star of this dish, giving a crunchy, meaty element to the creamy cheddar mac and cheese. What’s a pork crunchy, you may ask? Imagine a pepperoni pizza when it comes out of the oven and the sides of the pepperoni are crispy. You fry salami and pepperoni exactly like bacon, and that makes a pork crunchy! This dish is beyond any other side for Thanksgiving you’ve ever had, I promise. 

1 pound dried elbow pasta 

1 stick unsalted butter

1/2 cup flour 

3 cups whole milk 

1 teaspoon kosher salt

1/2 teaspoon fresh cracked pepper

2 1/2 teaspoons garlic powder

1 teaspoon paprika 

5 cups sharp cheddar, divided 

3 ounces thinly sliced salami

3 ounces thinly sliced pepperoni 

1 cup panko crumbs 

Preheat oven to 325 degrees. Boil pasta in salty water for about 6 minutes or until al dente. Drain and set aside. In a large saucepan or pot, melt the butter over low heat then whisk in the flour for about one minute. Slowly add the milk, continuing to whisk. Bring to a slight boil then simmer until sauce is thick enough to coat the back of a spoon, whisking occasionally. With a silicone spoon, stir in the salt, pepper, garlic powder, paprika, and 2 cups of the cheese until melted. Take off the heat and add the pasta and 2 more cups of the cheese. Stir together until we’ll combined then transfer to a greased (3 quart) baking dish. Set aside. 

In a sauté pan over medium heat, add the salami and pepperoni and fry it like bacon until very crispy. Transfer to a paper towel lined plate. Take the pan off the heat and let slightly cool. Add the panko crumbs, tossing them in the leftover meat fat. Top the prepared mac and cheese with the panko crumbs and the remaining cup of cheese. Bake for 12 to 15 minutes or until cheese is bubbly and panko is golden. Top with the “pork crunchies.”

*make ahead tip: the entire first paragraph of this dish can be made a day or two ahead, just cover baking dish and refrigerate then do the last step the day of.

A Halloween Cocktail Tribute to Alice Cooper

November 2, 2020 Andrea LeTard
IMGL0203.jpg
image4.jpeg

Feed My Frankenstein 

IMG_8235.jpeg

Sugar rim:

1/2 cup sugar

A few drops red food coloring 

Simple syrup:

1/2 cup sugar

1/2 cup water

Handful arugula

2 sprigs mint 

Drink:

2 ounces vodka

1.5 ounces green chartreuse 

1 ounce mint arugula simple syrup

Lemon

Red Sugar

Cherries, for garnish 

Make the sugar rim by mixing together the sugar and food coloring on a plate. Sit and let dry for at least 1 hour. Make the syrup by bringing the sugar, water, arugula, and mint to a boil. Blend the syrup mixture together in a blender then strain out the herbs. Refrigerate until ready to use. To a cocktail shaker filled with ice, add the vodka, chartreuse, syrup, a squeeze of lemon, and shake together. Rub the rim of a cocktail glass with a lemon wedge or dip in lemon juice then dip in the sugar mixture. Pour in the drink mixture and add a skewer of cherries to garnish. 

Pledge Allegiance to the Black Widow

image3.jpeg

Simple syrup:

1/2 cup sugar

1/2 cup water

1/2 teaspoon vanilla bean seeds or 1 teaspoon vanilla bean paste 

Drink:

2 ounces black vodka - cold

1.5 ounce creme de cacao - cold

1 egg white

1 ounce simple syrup 

Baby’s breath sprig, for garnish

Plastic spider, for garnish 

Make the simple syrup by bringing the sugar, water, and vanilla to a boil. Refrigerate until ready to serve. To a cocktail glass, add the vodka and creme de cacao. In a cocktail shaker, shake together the egg white and simple syrup vigorously for 30 seconds or until foamy and thick. Top the drink with the foam and garnish with baby’s breath and spider. 

Lips Better Than Poison 

IMG_8206.jpeg

Autumn Spiced ice cubes:

1/4 cup sugar

2 cups water 

2 cinnamon sticks

10 whole cloves 

Drink:

2 cubes autumn spiced ice 

2 ounces gin

2 ounces Campari 

2 ounces vermouth 

Make the ice by bringing the sugar, water, cinnamon sticks, and cloves to a boil. Let sit to steep and cool for at least 30 minutes. Take out the cinnamon sticks and pour the liquid and cloves evenly into an ice tray. Freeze until ready to use. To a fancy cocktail glass, add the spiced ice cubes, gin, Campari, and vermouth. Stir together and enjoy. 

Welcome to my Nightmare

image0.jpeg

2 tablespoons strawberry jelly or jam 

1/4 cup pomegranate juice 

2 ounces bourbon or spiced rum

1 ounce elderflower liquor

1/2 small orange - juiced 

Dried hibiscus flower, for garnish 

In a cocktail shaker filled with ice, shake together the strawberry jam, pomegranate juice, bourbon or rum, elderflower liquor, and orange juice. Strain in a cocktail glass - add ice if desired. Garnish with a dried hibiscus flower. 

Feed My Frankenstein

October 23, 2020 Andrea LeTard
Adjustments.jpeg
Adjustments.jpeg

My Alice Cooper Halloween Cocktail tribute - 4 cocktails named after Alive Cooper “Halloweenish” songs. Feed my Frankenstein is a boozy drink that focuses on the herbaceous and pungent French spirit, Green Chartreuse. A arugula-mint simple syrup is used to round out the strong drink with a slight leafy sweetness.

Sugar rim:

1/2 cup sugar

A few drops red food coloring 

Simple syrup:

1/2 cup sugar

1/2 cup water

Handful arugula

2 sprigs mint 

Drink:

2 ounces vodka

1.5 ounces green chartreuse 

1 ounce mint arugula simple syrup

Lemon

Red Sugar

Cherries, for garnish 

Make the sugar rim by mixing together the sugar and food coloring on a plate. Sit and let dry for at least 1 hour. Make the syrup by bringing the sugar, water, arugula, and mint to a boil. Blend the syrup mixture together in a blender then strain out the herbs. Refrigerate until ready to use. To a cocktail shaker filled with ice, add the vodka, chartreuse, syrup, a squeeze of lemon, and shake together. Rub the rim of a cocktail glass with a lemon wedge or dip in lemon juice then dip in the sugar mixture. Pour in the drink mixture and add a skewer of cherries to garnish. 

Caramel Salmon over Smashed Sweet Potato with Fig & Candied Pecans

October 15, 2020 Andrea LeTard
Adjustments.jpeg
Adjustments.jpeg

I know what you’re thinking, this dish came straight from a 5 star restaurant... hehe :) Well, it didn’t unless the Cooktales kitchen has credentials I’m unaware of. And here’s the best part: with very few ingredients and in under 30 minutes, you can make this same restaurant style dish in your kitchen! Sweet, savory, and oh so fall... there’s really nothing like it. It hugs you in the best autumn way without it being a pot of soup or casserole dish. Yes, it looks restaurant quality but it also tastes that way too! 

4 servings 

2 large sweet potatoes - peeled and cubed 

Kosher salt and pepper 

4 tablespoons butter

2 tablespoons maple syrup 

1/4 to 1/2 cup milk of your choice

2 tablespoons olive oil 

4 salmon filets - skin removed 

1/4 cup store-bought caramel sauce

5 fresh figs - quartered 

1/2 cup candied pecans - chopped 

Bring a pot of water to a boil. Add the cubed sweet potatoes and boil until tender when poked with a fork - about 15 to 20 minutes. Drain and transfer to a bowl.  Add 1 teaspoon salt, 1/2 teaspoon pepper, butter, and maple syrup. Using a fork or potato masher, smash all the ingredients together, slowly adding milk until desired consistency is reached. Taste and add more salt if needed. Set aside until ready to serve. *May be reheated in the microwave.

Heat a sauté pan over high heat with the olive oil in the bottom. Sprinkle salt and pepper on both sides of the salmon. Sear for about 3 to 4 minutes on each side or until golden, crusted, and cooked through. Plate salmon over the sweet potato with a drizzle of caramel, figs, and pecans. 

Pumpkin Fettuccine with Sage Brown Butter and Maple Whipped Goat Cheese

October 10, 2020 Andrea LeTard
Adjustments.jpeg

Pasta is always a good idea when it comes to comfort dishes. But in October, it’s the best cozy dish ever paired with pumpkin and brown butter. A maple whipped goat cheese takes it to a whole other level! 

Pasta:

2 1/2 cups all-purpose flour 

1/4 cup pumpkin purée

2 large eggs 

1/4 teaspoon kosher salt

Dish:

6 tablespoons salted butter

Large handful sage leaves 

1/2 cup shredded Parmesan 

Kosher salt 

4 ounces goat cheese - room temperature 

2 tablespoons maple syrup 

In the bowl of a food processor, add the flour, pumpkin purée, eggs, and salt. Pulse until the mixture comes together into a dough ball. If it’s too dry, add a little water, pulsing in between until it comes together. Place dough on a heavily floured surface and knead until smooth. The dough should feel firm and not sticky. Form into a ball, wrap in plastic, and let rest in the fridge for 30 minutes. Cut into fourths and flatten each piece out into a rectangular shape. Roll out to 1/8 inch in thickness using a pasta roller or rolling pin. Using a pizza cutter or fettuccine pasta attachment, cut dough into strips approximately the size and length of typical fettuccine - you may have to cut each section in half if too long. Set aside until ready to boil. 

Make sauce by heating a sauté pan over medium heat. When hot, add butter and let brown. When it gets golden and starts to smell toasty, add the sage leaves and let cook for one minute or until butter is brown. Take off the heat and set aside until ready to serve. Make the whipped goat cheese with an electric mixer, whipping together the cheese and maple syrup until smooth - you can also do this by hand with a whisk or silicone spatula if you wish. Set aside. 

Bring a pot of salted water to a boil. Boil pasta for 2 minutes or until noodles float to the top and are tender and cooked through. Transfer them to the butter mixture, adding a little pasta water and all of the Parmesan, and toss together until coated and creamy. Taste and add salt to preference. Serve dolloped with the whipped goat cheese. 

3 Fabulous Prep Ahead Campfire Recipes

October 7, 2020 Andrea LeTard
Adjustments.jpeg
Adjustments.jpeg
Adjustments.jpeg

Go from camping to glamping - all with food! While I’m all about a traditional hot dog and s’mores menu, I love to add a few fancier items as appetizers or starters. These nachos and Brie are a perfect snack pre-dinner, and when the sun sets the French onion soup will warm you right up! Try to save room for hot dogs and s’mores if you can - we did by spacing every course out and eating from about 5pm to 1am... haha. This is THE perfect camping menu and oh so easy! *You can find video guides and extra details on my Instagram page (@andreas_cooktales) under Campfire Food. 

Campfire Nachos with Taco Bean Salsa 

Adjustments.jpeg

Prep ahead: Bean Dip + place all toppings in disposable containers 

1 can refried beans

1 can fire roasted tomatoes (or jar of your favorite salsa)

1 packet taco seasoning 

1 bag tortilla chips 

1 pound shredded Mexican blend cheese 

1/4 red onion - chopped

1 Roma tomato - chopped

1 avocado - cubed 

Home: Mix together beans, tomatoes, and taco seasoning then transfer to a disposable container. Prep all toppings and place in disposable containers. Store everything in a cooler bag - this will all sit just fine for a day. 

Campsite: On a cast iron skillet, layer the chips, bean dip, and cheese. Top with the red onion, tomato, and avocado. Cook over the campfire until cheese starts to melt and beans are warm. Serve with extra chips 

If cooking at home: Preheat oven to 375 degrees. Layer the chips, bean dip, and cheese and cook in the oven for about 8 to 10 minutes or until cheese is melted. Top with onion, tomato, avocado. Serve with extra chips. 

Campfire Baked Brie with Caramel Fig Pecan Sauce 

Adjustments.jpeg

Prep ahead: Chop figs and pecans + place everything in containers. 

1 round wheel Brie cheese 

1/4 cup store bought caramel sauce 

4 to 5 dried figs - chopped

1/4 cup candied pecans - chopped 

Apple slices, for serving 

Crostini, for serving 

Crackers, for serving 

Home: Place all ingredients separately in containers. 

Campsite: On a cast iron skillet, add the Brie and top with the caramel sauce, figs, and pecans. Place over the campfire until Brie is warmed through and starts to melt. Serve with apples, crostini, and/or crackers. 

If cooking at home: Preheat oven to 350 degrees. Follow the same directions and cook in the oven for about 5 minutes or until cheese starts to melt but wheel doesn’t burst open. Serve the same. 

Campfire Smoked Gouda French Onion Soup 

Adjustments.jpeg

Prep ahead: Onion mixture/base + toast baguette + grate cheese 

10 to 12 baguette slices drizzled with olive oil

4 tablespoons butter 

1 tablespoon olive oil

4 sweet yellow onions - thinly sliced 

Kosher salt and freshly cracked pepper 

1 tablespoon dried Italian seasoning 

1 tablespoon balsamic vinegar

1/4 cup dry sherry

32 ounces beef broth 

3 to 4 cups grated smoked Gouda or smoky melting cheese (you can make cheese smoky by adding a few drops of liquid smoke and tossing together)

Home: Preheat oven to 400 degrees. Toast baguette slices for 6 to 8 minutes or until golden. Transfer to a container. Heat a pot over medium-low heat. Add the butter and olive oil until melted. Add the onions, about 1 1/2 teaspoons of salt, 1 teaspoon pepper, Italian seasoning, and balsamic vinegar. Cook for about 15 to 20 minutes or until onions are caramelized. Deglaze with the sherry and let liquid reduce by half. Transfer mixture to a container. Pack the onion mix, bread, broth, and cheese in a cooler bag - it will all sit fine for about a day. 

Campsite: To a soup pot, add the onions, broth, and top with toasted bread and cheese. Sit directly over the fire until bubbly and cheese starts to melt. 

If making at home: Preheat oven to broil. Make the onion mixture and add the broth. Top with toasted bread and cheese and broil until cheese is melted. 

Roasted Squash & Golden Fig Grilled Cheese with Honey Jalapeño Aioli

September 21, 2020 Andrea LeTard
Adjustments.jpeg

Years ago we were in Pisa, Italy and I had the most simple, delicious sandwich of my life: fig, honey, and mortadella on baguette. For lunch today, I did a fridge clean out and came up with a vegetarian version of the same sandwich. And I died. This sandwich is everything on earth. I’m telling you, you MUST make this for lunch once day! It has the flavors of fall is a little sweet and a little savory with a little kick from the jalapeño aioli. Every element of this sandwich just works so beautifully together... it’ll be the best thing you eat all week!  

2 servings 

1 delicata squash - halved, seeded, sliced 

1 tablespoon olive oil 

Kosher salt and pepper 

1 tablespoon mayonnaise 

1 tablespoon honey

1 tablespoon minced jalapeño 

4 slices bread of your choice

1/2 cup shredded mozzarella 

2 ounces crumbled goat cheese 

4 dried golden figs - sliced 

Cooking spray or butter 

Preheat oven to 400 degrees. On a sheet pan, toss sliced squash with the olive oil and a heavy dash of salt and pepper. Roast for 10 to 15 minutes or until soft and golden. In a small bowl, mix together the mayonnaise, honey, and jalapeño. Evenly spread mayo over each slice of bread then the evenly top with mozzarella and goat cheese on all slices. On one side of each sandwich, add the figs and on the other side of each sandwich, add the cooked squash. Close the sandwich. Heat a cast iron or sauté pan over medium heat. Spray the bottom and place the sandwiches on the pan. Cook each side until golden and cheese is melted. Slice in half to serve. 

Brown Butter Caramel Apple Cider Cookies

September 20, 2020 Andrea LeTard
Adjustments.jpeg

Xavier turned one month old on September 19! I knew I wanted to do some sort of milestone pictures to see how much he grows each month, and I ran across this beautiful Staub cookie sheet at Williams Sonoma so I thought, why not make a seasonal cookie recipe to go along with each picture? I love how the cookie sheet serves as a frame of reference for how much he grows each month. Plus, it gives us an excuse to make a seasonal batch of cookies! Nothing says the start of fall like apple cider and caramel. These cookies have the texture of a sugar cookie but all the flavors of fall and a little caramel drizzle to make them extra special.

Adjustments.jpeg

1 stick salted butter

1/2 cup sugar

1 egg

1/2 teaspoon vanilla extract

1/4 cup caramel or dulce de leche, plus more for drizzling

1 1/2 cups all-purpose flour

1 1/2 tablespoon apple cider drink mix or mulling spice mix

1/2 teaspoon baking soda

1/2 teaspoon cinnamon

1/2 teaspoon salt

1/4 teaspoon baking powder

Preheat oven to 350 degrees. Set a shallow sauté pan over medium heat. When hot, add butter and let sit until brown and toasty. When melted and browned, turn heat off and transfer pan to the fridge to let cool - about 15 to 30 minutes or until butter is slightly hardened. Once cool, scoop butter into a stand mixer and add the sugar. Using the paddle attachment, beat together until light and fluffy. Add the egg, vanilla, caramel, and beat together again until combined.

In a medium bowl, whisk together the flour, apple cider/spice mix, baking soda, cinnamon, salt, and baking powder. Slowly add the dry mix to the wet mix and beat together until combined. Using a cookie scoop or tablespoon, roll dough into balls and space out on a cookie sheet. Bake for 8 to 10 minutes or until golden. If desired, drizzle with more caramel or dulce de leche when cooled.

Xavier’s Birth Story

September 17, 2020 Andrea LeTard
Adjustments.jpeg

It’s been quite some time since I posted a personal story on my blog, but Xavier’s birth story is a big exception as I knew I would want to write it down to never forget. I also felt the need to share – without scaring anyone – that not all birth stories are the same. I didn’t have any sort of birth plan. While I think it’s fine to have one, I know now more than ever that many parts of it are most likely going to be axed – not intentionally, but I quickly learned as things progress with labor and delivery you have no choice but to be open to change. So while I didn’t have an actual birth plan, in my head it looked something like this:

-       Don’t have a C-section

-       Let things happen naturally (water breaks, contractions start, go to the hospital)

-       Don’t have C-section

-       Get an epidural or any modern medicine offered to be pain-free

-       Don’t have a C-section

-       Don’t have a C-section

-       Whatever happens, unless someone is about to die, don’t have a C-section

I think you can read the opening of this blog post and not call this a spoiler alert: I had a C-section. 7 hours of pushing, pure and utter determination to not have a one, and I still had one. And guess who asked for it? ME. Would I eventually had to have one anyway? Yes, most likely and 7 hours of pushing + an epidural that wore off + many other imperfect steps leading up to that decision did me in. So yes, birth plan or not, a lot can change in the L&D process.

Adjustments.jpeg

PRE-BIRTH

You’ll never hear more people’s birth stories until you get pregnant. Everyone shares theirs and you want to hear them ALL to prepare yourself for what’s to come. I quickly learned the women in my family go into labor naturally and have their babies easily, quickly, and vaginally. Literally, I’ve never heard more consistent stories and they all sounded about like this: went into labor several weeks early, water broke spontaneously (just like in the movies), waited until contractions were close together to go to the hospital, showed up at the hospital, got an epidural, and a few hours later vaginally had a baby. This consistency was on both sides of my family and the women in my family are itty bitty tiny people. So, I thought this exact story was my destiny. Every time someone said to me, “You’re just so tiny, you’re probably going to have to have a C-section,” I argued, explaining that all the women in my family are little and have their babies naturally with no issues. And for the record, I still don’t think my petite size had anything to do with me having to have the C-section.

My prediction was baby would be born August 1 - exactly two weeks early. This date was special because it’s the anniversary of mine and Tres’ first date, and me and my brother were both born on the first day of the month (January 1st and November 1st) so I thought it was simply meant to be. Starting the last week of July, I did every old wives tale of “ways to go into labor” that existed. Every single day, I ate every type of food that’s supposed to trigger labor - from spicy foods and eggplant parmesan to dates and pineapple. I drank an abnormal amount of red raspberry leaf tea. I walked, squatted, curb-walked, and danced. I even went as far as going back to my college days of twerking club-style. August 1 rolled around and nothing. My mom predicted August 7 – it rolled around and nothing. My girlfriends and I decided the day must be August 13. Next year, August 13 is on a Friday and between my lucky number being 13 and my love of horror movies, we decided a Jason/camping themed first birthday party couldn’t be beat. Baby would definitely be born on the 13th – that day rolled around and nothing. Due date, August 15, rolled around – nothing. At this point, I was scheduled to be induced August 17 but just knew I would go into labor by then. I didn’t. So I came to terms with being induced the 17th and baby would be born the 18th. Tres and I joked about how much cooler it would be if he was born on the 19th. At the time we didn’t know he was a boy but knew if he was, his name would be Francis Xavier LeTard IV. Tres’ dad (the II) was born on September 19 and Tres (the III) was born on July 19. July, August, and September 19th birthdays from the II, III, IV. I remember Tres saying, “There’s no way you’ll be in labor that long. I wouldn’t wish that on you.” Well, guess whose birthday was August 19? Francis Xavier LeTard IV.

Adjustments.jpeg

LABOR & DELIVERY

We checked in Monday night, August 17. Bags packed ready to go – full of champagne for a celebratory toast and cheese and charcuterie platters to pair because I just knew this was going to be easy breezy once the induction process got started. I had full hair and makeup done, a cute post-birth outfit picked out because I was convinced I wasn’t going to break a sweat and planned to look fabulous when baby came into the world. Mama was going to rock this out and be pulled together when it was all over.

Before y’all think I’m certified crazy for thinking having a baby was going to be a breeze, I have to explain myself. I’ve had a kidney stone before. If you’ve ever had one, you know the pain and agony is unmeasurable. If you haven’t had one, Google: “is childbirth pain worse than a kidney stone?” I promise every article and story you read will say no. My mom had a kidney stone that took one of her kidneys – she told me she would choose childbirth over a kidney stone any day. I read multiple stories online from women who’ve had four and five kids and one kidney stone and say they would have many more kids again over one more kidney stone. If you look up “most painful medical conditions” you’ll consistently see kidney stone at the top of every list. Needless to say, I wasn’t one bit scared of childbirth. I had survived the most painful thing in existence and honestly thought my pain tolerance was high enough to easily handle childbirth (with an epidural of course, once it got unbearable). As this story goes on, you will continue to see a pattern – when it came to childbirth I was 100% an outlier every step of the way.

I’m going to outline the rest of this story in sections because I don’t want to get too long winded but want to briefly (as possible) sum up my experience in expecting each step to go simply and easily and the actual outcome being very complicated. I always took myself as an “easy patient.” Unfortunately, when it came to birthing my child, I was a very difficult patient. My body would not cooperate with literally anything. I just want to preface this story with the fact that I had THE best doctor who was extremely patient with me and THE best nurses (except for one who tried to ruin my life at the end when I was literally on the operating room table – I won’t discuss her because she doesn’t deserve discussing) who took the best care of me. I cannot say enough great things about the L&D floor at Baptist East Memphis. Though I had a hard time getting little Xav out into the world, they made my experience through all the craziness truly wonderful.

image.jpeg

Here’s little Xav’s birth story from start to finish:

I ended up not eating a real meal for almost 3 days – I don’t know how I missed the memo of not showing up for an induction hungry. My last meal was around 1pm Monday afternoon, and I thought once I checked in, I was going to be able to eat a small dinner. That was a big negative. No one told me, and I never read it anywhere. Because of that, my doctor allowed me to eat something small when I got there but not too much. I had a few bites from the cheese and charcuterie I packed, so that little idea ended up being clutch.

Regular contractions, no dilation – When the induction process began around 11pm, I was contracting regularly, about every 5 minutes, but I wasn’t dilating so the progression was pretty much at a standstill. The good news was, I was contracting but wasn’t feeling a thing. I kept telling Tres, my pain tolerance is high, so I shouldn’t have much of a problem. On Marco Polo with my girlfriends, I was literally bragging that I was so comfortable I didn’t even think I was going to need an epidural. I’ve never eaten words so badly – I double roll my eyes at myself looking back. At this point, the L&D process had started off fantastically, and I just knew it was all going to be smooth sailing. My doctor was in the hospital, I was loving my nurses, and everything was going perfectly. Tres and I slept a little on and off with hopes I would dilate and have baby the next morning.

Water wouldn’t break – On Tuesday morning through the afternoon there was still no progression. To pass the time, Tres and I played the labor and delivery rock playlist I created. Funny story, making that playlist was the first thing I did when I found out I was pregnant. I told Tres, we will need all the rock music we can get on that day. I called the playlist “August 15” and put so many songs on there it was over 24 hours of music, which I thought was entirely too much as “I would never be in labor that long.” Haha – what a joke that ended up being, I think we listened to the playlist twice. To get dilation moving along a little quicker, my doctor decided to break my water. It wouldn’t break, so he recommended going ahead with the epidural, so I couldn’t feel anything. I was scared to get my epidural too early, as I always heard it could wear off. Nowadays, there’s a button you can push that keeps the epidural going if you start to feel anything, so I was told that wouldn’t happen. Around 3pm, I got the epidural.

Adjustments.jpeg

Rare epidural complications, called a “wet tap” – I’ve always heard getting an epidural is uneventful and painless, so I was very nonchalant about the whole thing. I shouldn’t have been because in my case, it was horrific. Because I thought an epidural was one of the easiest parts of childbirth, I agreed to let the student assisting the anesthesiologist do mine. Apparently, my vertebrae were super close together and she couldn’t get the needle in my back. I was poked numerous times before the anesthesiologist took over, and even she had a difficult time getting it to go in properly. I now know this is called a “wet tap” and is extremely rare, happening in only .5 to 1% of patients. By the time my epidural was in and the tears stopped, that lovely makeup I worked so hard on was long gone with mascara Ozzy Osborne style all the way down my face to my neck. That was all she wrote on looking fabulous after childbirth. My nurse said in all her years she had never seen such a “traumatic epidural experience.” Those were her words.

Water STILL didn’t break – After the epidural nightmare, my water was broken – so we thought. In rare cases, the water doesn’t completely break and can seal back up. Of course, that happened to me. We discovered this when I still wasn’t dilating properly early into Wednesday morning around midnight. They had put a peanut ball between my legs to speed up dilation (looks like a workout ball but in the shape of a peanut). I kept having to switch sides for it to work, and when I switched positions my water broke – again. My nurse declared that must have been why I wasn’t dilating and now things would get moving. She was right, and she was so sweet, she stayed with me past her shift to help me start pushing.

Epidural wore off – I started pushing around 1am Wednesday morning with little progress. The nurse told me while baby was head down, he was also face up which makes it difficult to get through the birth canal. He was a bit sideways too and stuck on my pelvic bone as I pushed. I started vomiting around 5am, and I knew vomit during childbirth only meant one thing: my body could feel the pain. Strange enough I wasn’t feeling any pain at all, so I was very confused. I kept telling Tres, my legs aren’t numb anymore, I think my epidural is wearing off. But everyone kept telling me it wouldn’t wear off and to just push the button. Not long after that, the pain started, and I couldn’t stop vomiting. I kept pushing the epidural button that’s supposed to bring in more meds for pain relief but nothing was happening. The anesthesiologist tried to give me more, but nothing was working and the pain was getting more intense. It wasn’t long before I was feeling EVERYTHING. My contractions were right on top of each other and I felt every single one. It was bad, y’all. Bad. No, it was THE WORST. I kept telling myself this can’t be worse than my kidney stone, I can push through this, but I was losing hope. It was all back labor so everything I felt was the most intense. I was screaming, crying, and helpless for what felt like an eternity. Tres was a nervous wreck and didn’t know what to do for me. Looking back, I felt like I was in a cloud… like I wasn’t even on earth. It’s all such a blur. The epidural team came in several times with more meds and none of it was working. Finally, they turned me over to see what was going on and discovered the epidural catheter was no longer in my back. I was no longer getting any of the meds and hadn’t been for some time. Because of the difficulty they had putting it in, it had slipped out. The anesthesiologist said, we are going to have to re-do the epidural. Tres and I looked at each other in horror because the first experience getting it in was almost as bad as the contractions I was having. At this point though, I was in so much pain I was willing to do anything. But because of the position of baby, the nurses still weren’t sure I was going to be able to push him out so I said no to the epidural.

Adjustments.jpeg

C-section was inevitable and it happened – All the pain I was in and all I kept thinking was, you better keep pushing because you are NOT having a C-section. I had told Tres before we got to the hospital that no matter what happens - and if I’m not in my right mind - to remind me how bad I don’t want a C-section. Within the last hour all I remember was screaming, “Get me a C-section, get me a C-section” over and over again. Tres looked at me a few times, shook his head no and said, “You don’t want that, you can do this.” He said eventually, I looked at him and screamed, “STOP SAYING THAT.” Funny enough, in between contractions when I wasn’t in the most agonizing pain, I would snap out of it and say, “No, you’re right, I’m not having a C-section.” My doctor knew this about me and was so patient every step of the way. He let me continue to push as long as it was safe for me and baby and really let me decide what I wanted to do throughout the entire process. His final room visit, I’m guessing around 8am, he asked me what I wanted to do. All I remember is looking at him, then looking at Tres, then back at him and asking them, “What should I do?” I was so defeated. It literally brings tears to my eyes and breaks my heart even thinking back to it because anything BUT a C-section – that was all I said from the day I learned I was pregnant. My doctor said, “You’ve worked really hard, done everything you can do, let’s go have a baby.” Tres and I both asked one more time if he thought there was a possibility baby could be born vaginally and if it was worth it to keep trying. In so many words, he told us he didn’t think it would happen and could potentially get dangerous. I was still in so much pain, I just didn’t care anymore – I was ready to not hurt anymore and to meet him (or her), so I agreed and was wheeled back to the OR.

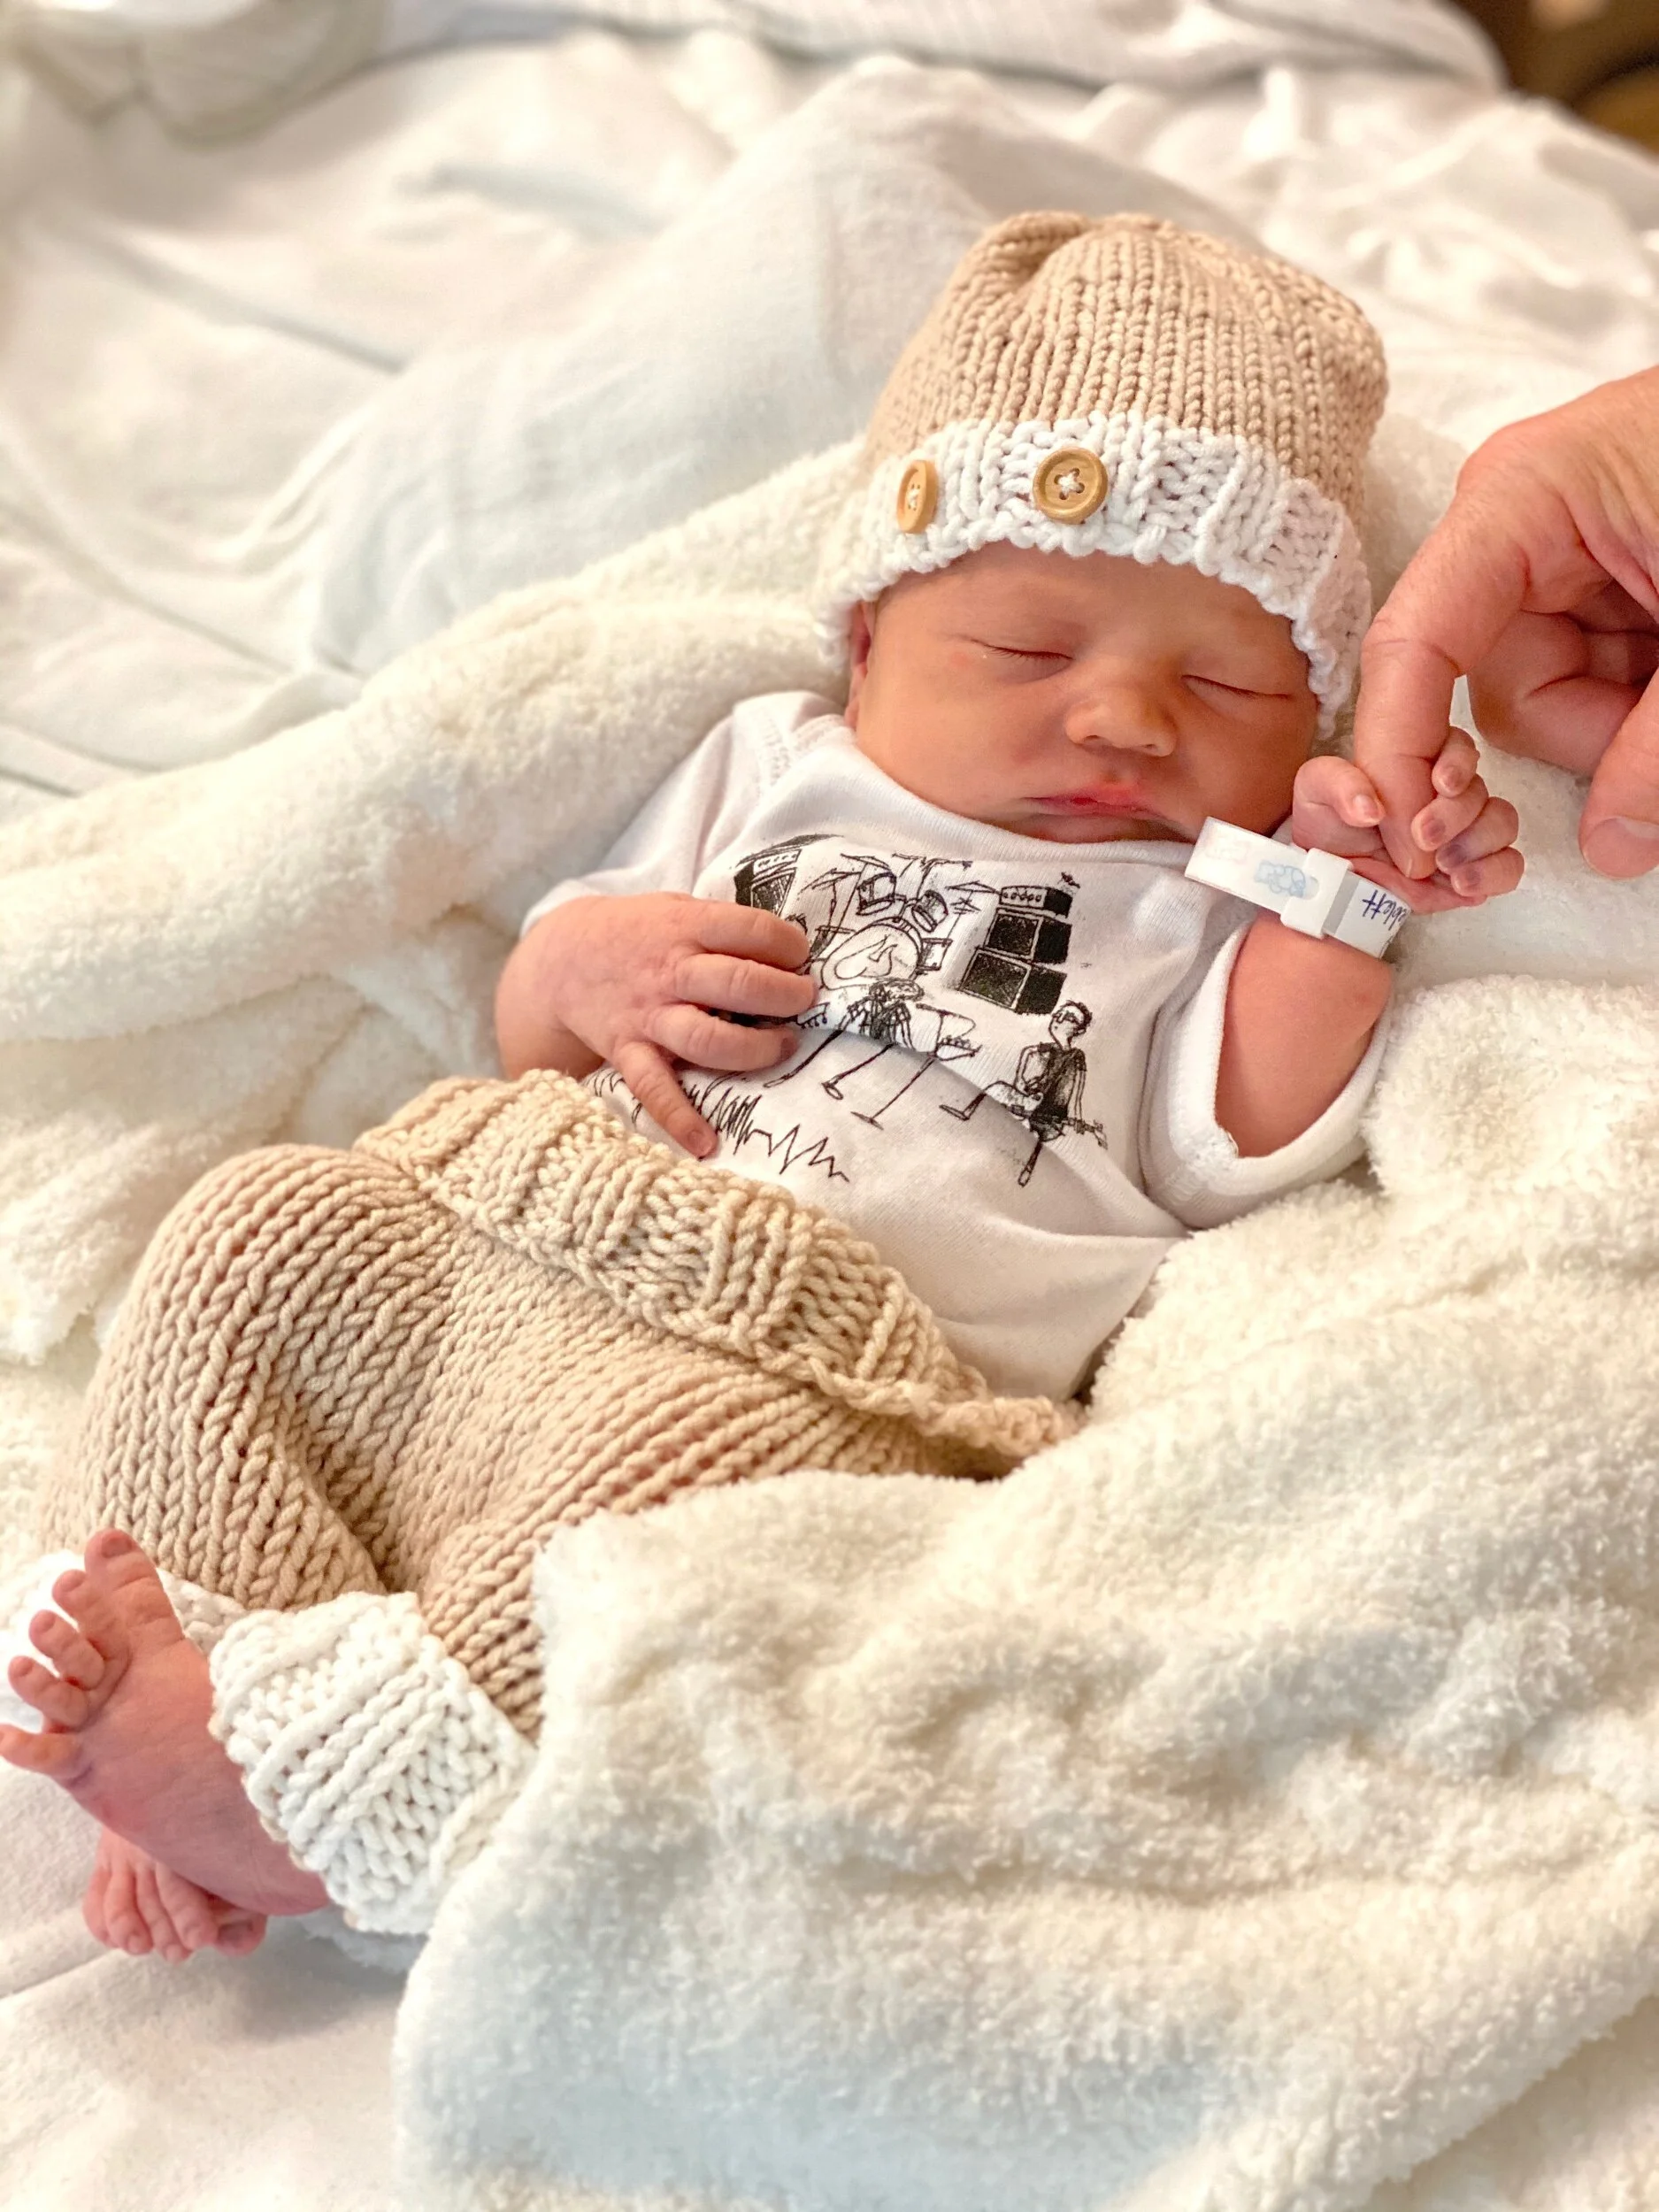
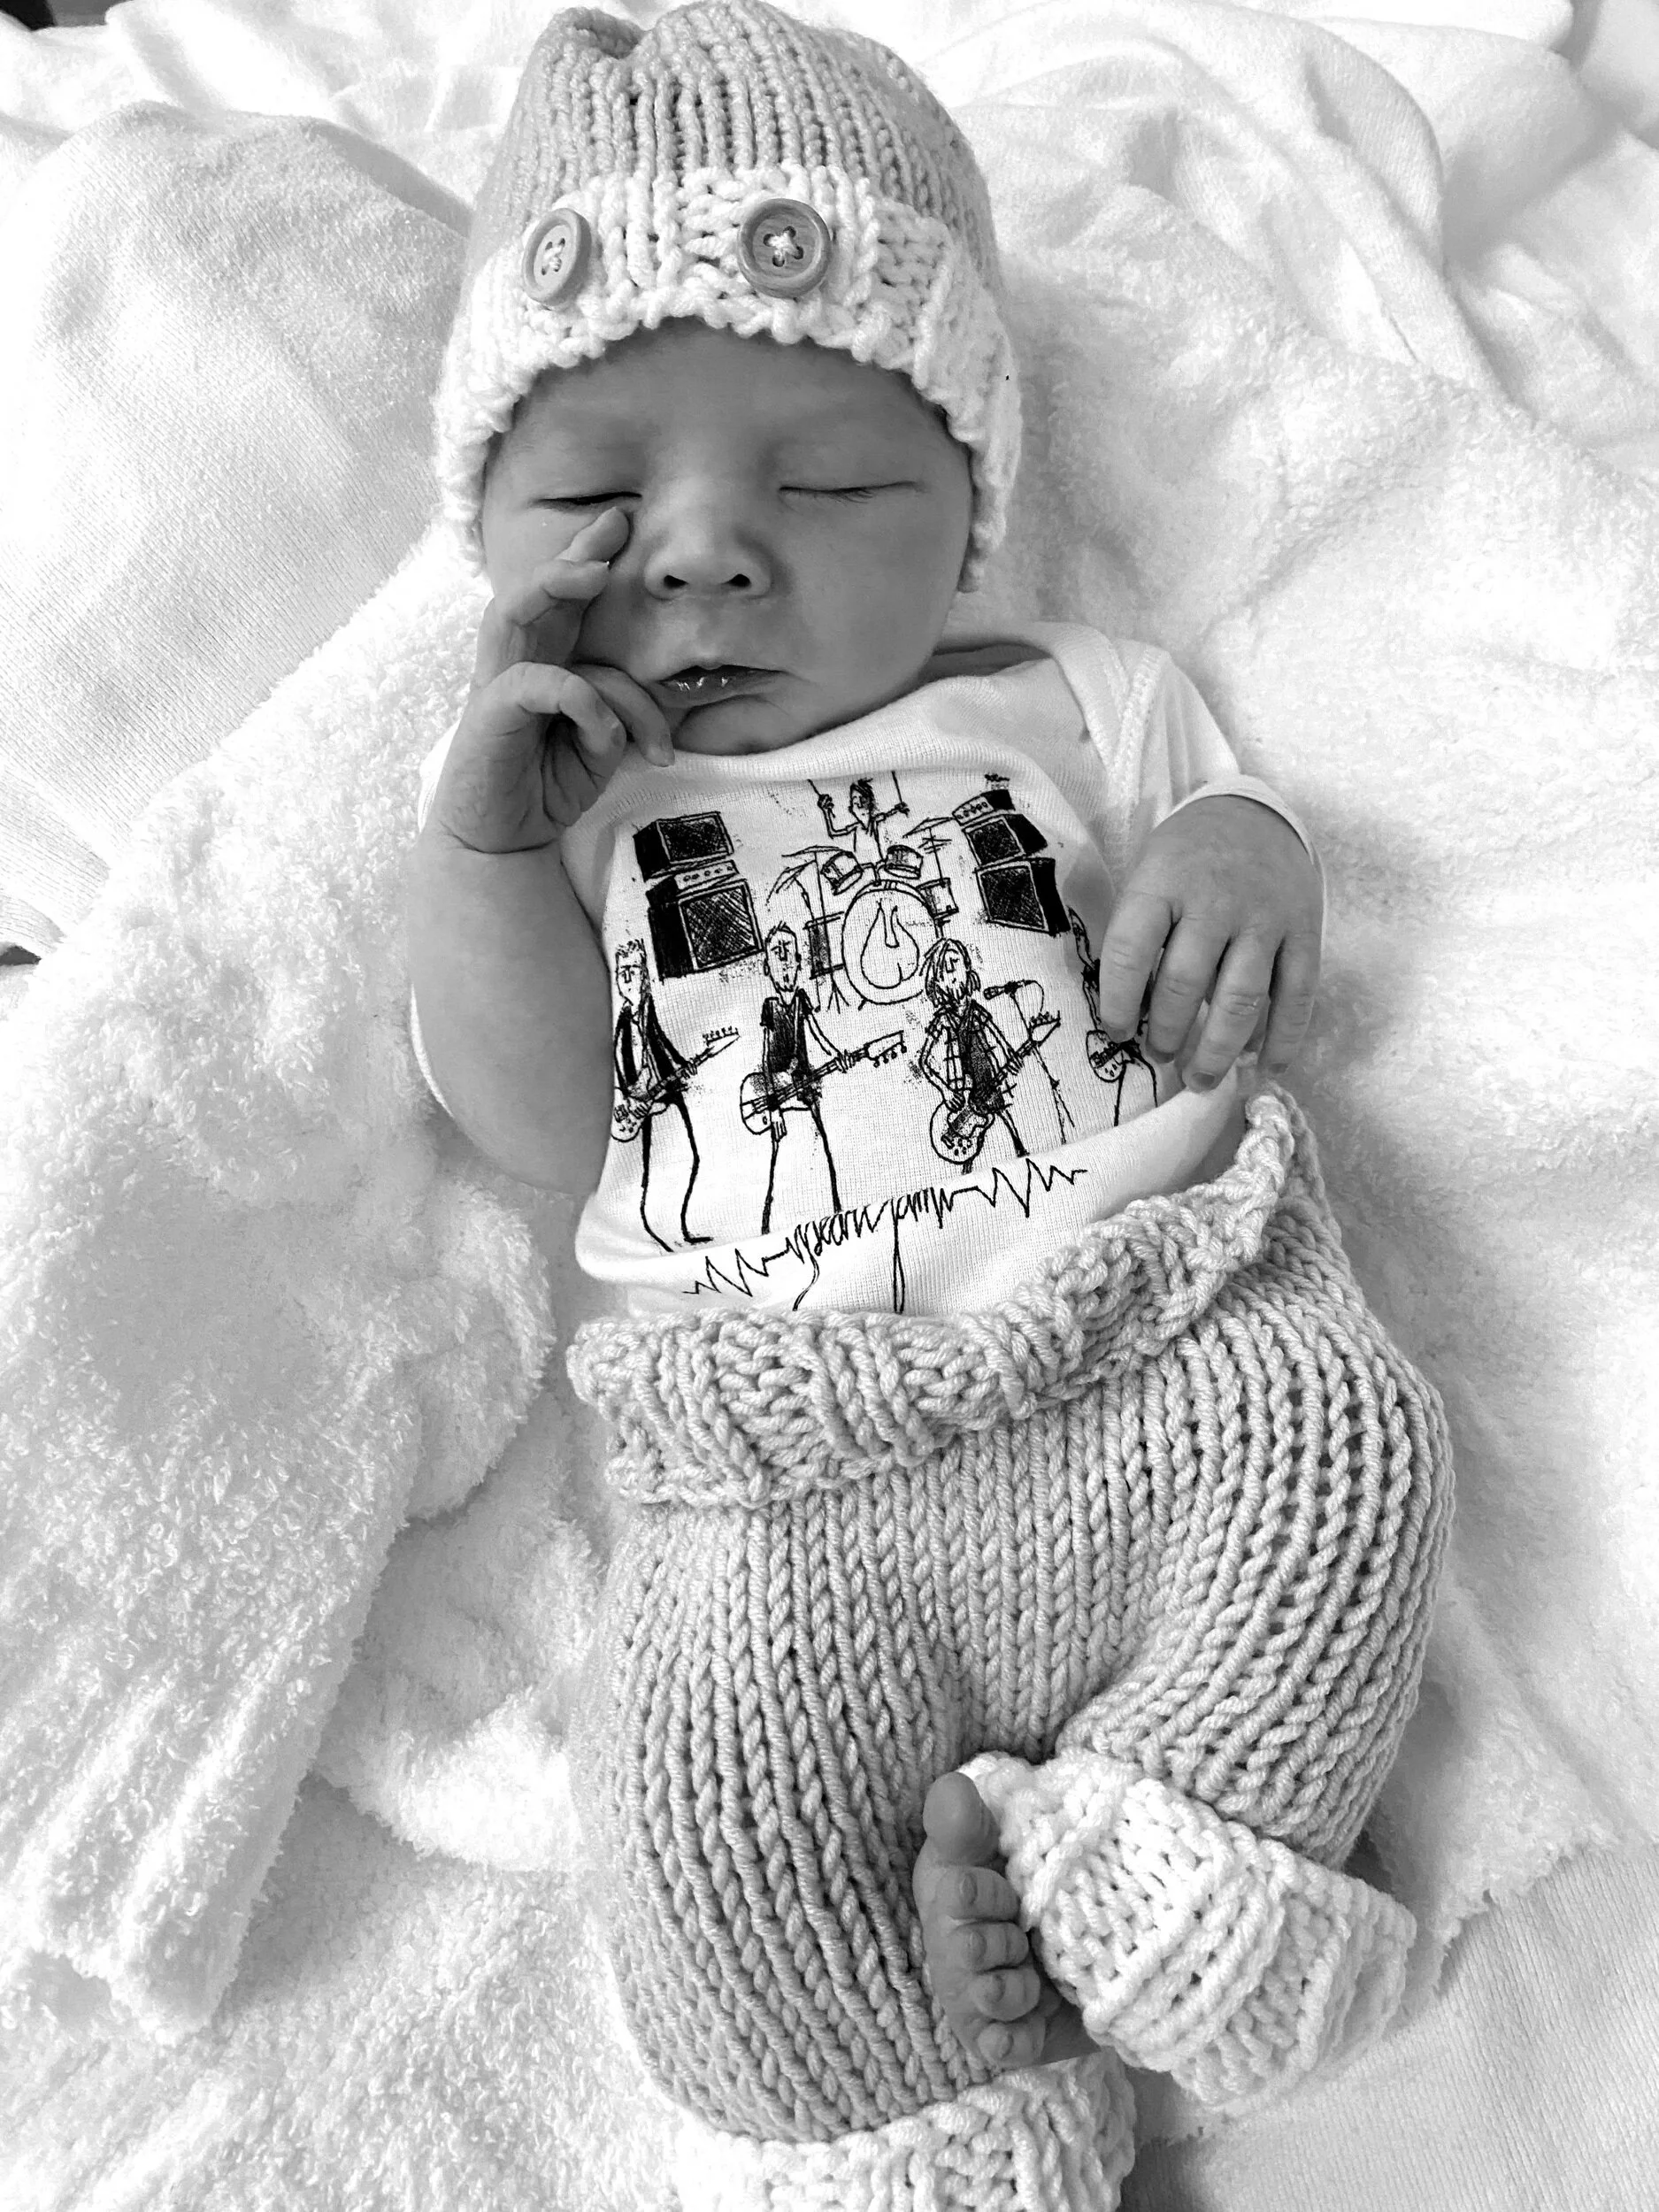
I never knew how quickly C-sections moved. I think I got back there around 9:00 and Xav was born at 9:28. Tres said he was a nervous wreck. He was so tired of seeing me in pain and it was upsetting him to the point of feeling sick, then they gave him scrubs and made him sit in a waiting area until they had me prepped (see picture above). He said he had no idea what was happening and was worried sick. They gave me a spinal tap for the section. I remember them prepping me and asking if I wanted Tres to be the one to announce boy or girl. I said yes of course then before I knew it Tres was with me, I felt a lot of pressure and pulling at my belly, then I heard, “It’s a boy.” Immediately after that I heard my doc say, “a head full of hair and a cone head from all the pushing” then he was lifted up and all I saw was a bunch of hair on the cutest little cone head! He literally looked like movie Coneheads but with a head of hair - haha! Francis Xavier LeTard IV – born on August 19, 7 pounds 5 ounces, 19.5 inches – the most handsome little bebe I have ever and will ever see. We have video of this and nothing makes me happier than hearing Tres say, “It’s a boy.” It will never get old and be cherished forever.

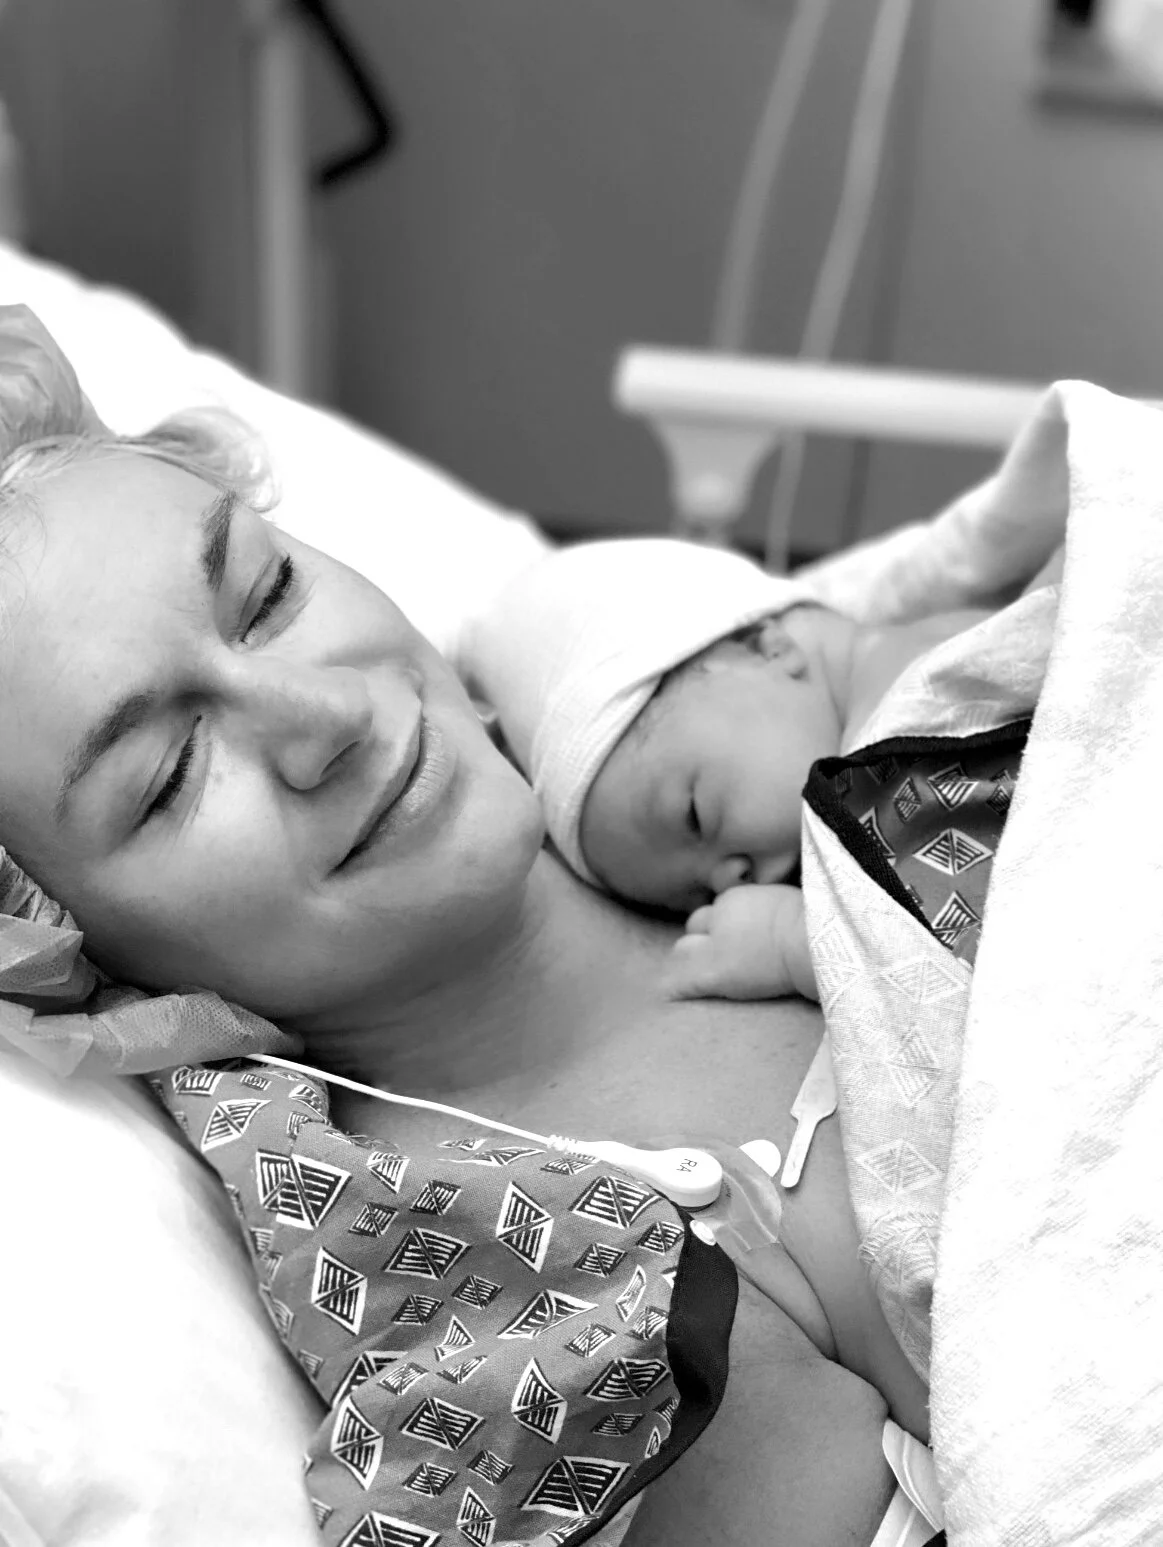
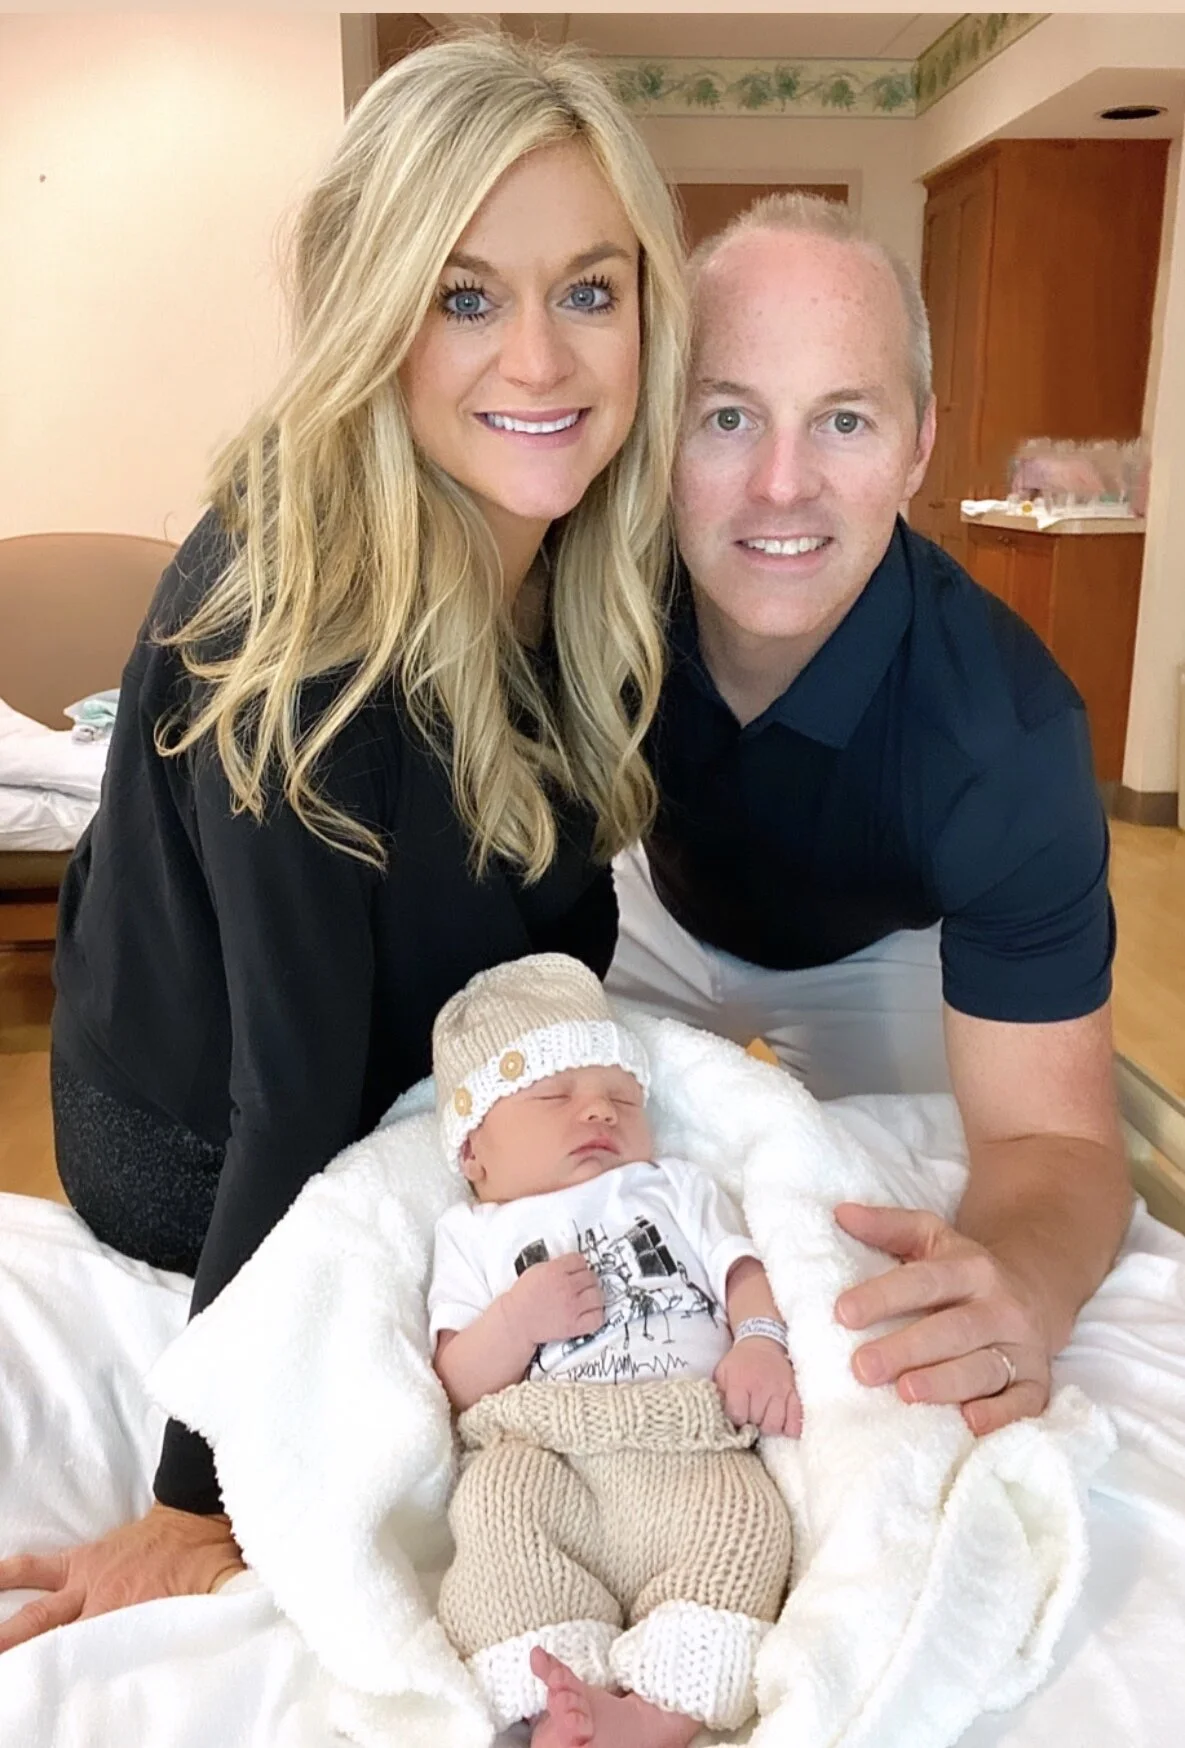
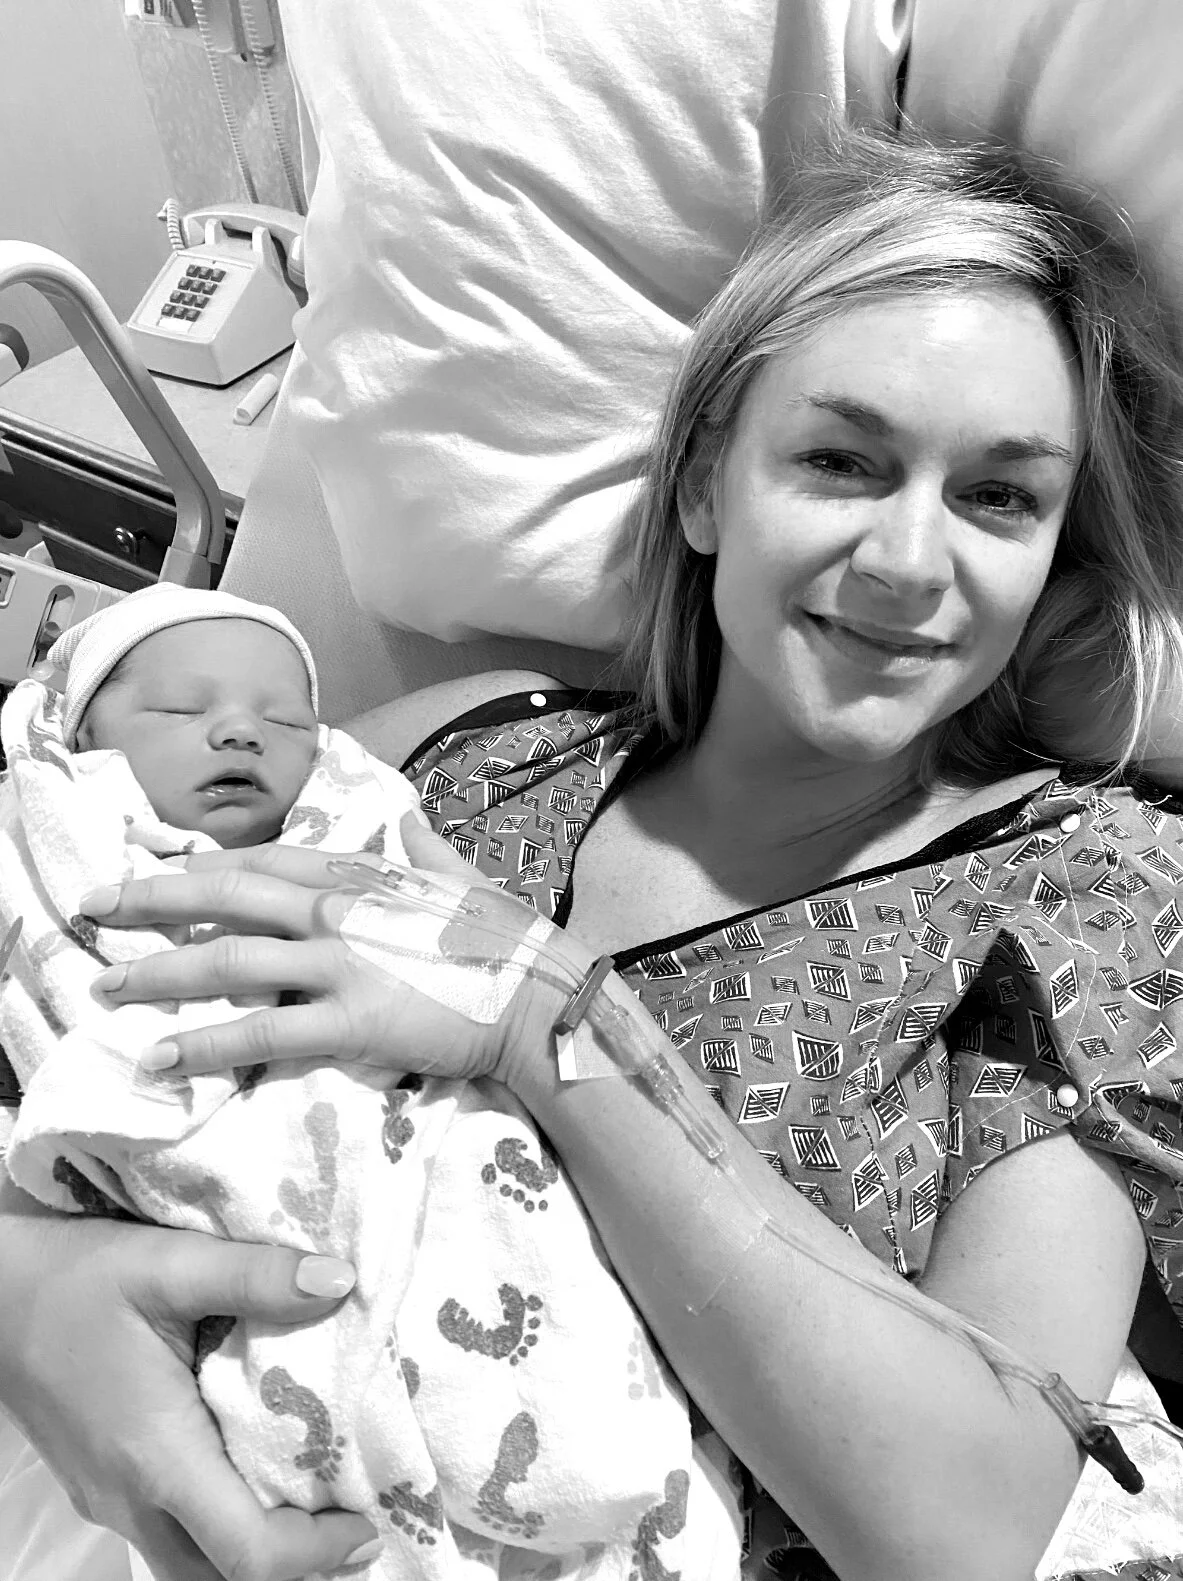
We spent 2 more nights in the hospital. After a total of 4 nights, you would think I couldn’t get out of there fast enough, but I learned that the hospital experience – even as rough as it got for me – is a huge part of the many milestones that come out of pregnancy/birth and that time should be savored and cherished. I had all kinds of plans for pictures in my mind because I knew this would be our only experience in the hospital having a baby, so I wanted the perfect pictures. I didn’t get perfect pictures and it doesn’t matter. The ones we took are raw and real, and I love them because they tell Xav’s story so much better than any planned ones ever could. My makeup was gone, hair was a mess, and I didn’t look like the fabulous mother who gave birth effortlessly I had hoped to look like – as a matter of fact, I looked my most horrid. That doesn’t matter either because Xav looks cute as a button and it was his most special day! We didn’t drink any of the champagne, wine, or eat the cheese boards. That also doesn’t matter because we celebrated him all the same!

I tell this birth story to not scare anyone – believe me, I heard SO MANY easy-going birth stories I never thought I would have a bad one. I just wanted to share all the details as honest and real as they were. Do I think most people will have this hard a time having a baby? No, I most definitely do not. I truly think most birth experiences are pretty simple so keep that in mind if you read this and are now scared to give birth. None of it matters though… Xav got here safely, he's healthy, and we are just having the best time with him since we got home! Thank y’all for following along at the hospital until I disappeared from social media for days and scared everyone, but now you know why - haha. I so appreciate all the love and support from everyone I got throughout the pregnancy, the birth, and since we got home. I hope to bring Xav into this cooking world of mine just a little bit and hope y’all will continue to follow along!

Lemon Spaghetti with Roasted Red Shrimp and Mint

September 16, 2020 Andrea LeTard
Adjustments.jpeg

Some recipes are requested by my clients again and again. They’re usually meals that Tres and I also prefer eating over and over, so I spend a lot of time in my kitchen repeating dishes. Two big positives come from this: 1) I learn to perfect them over time and 2) We get to eat them on the regular. This lemon spaghetti happens to be one of those recipes. It just never gets old. It’s fresh, clean and makes me feel like I’m on the coast of Italy when we eat it. The Trader Joe’s red shrimp I use is so very legit. I don’t LOVE shrimp, so the fact that this one is pre-frozen and still delicious says a lot! But any shrimp you love works great in this recipe. You could even forgo the shrimp all together for a fantastic meatless meal.

1 pound spaghetti

1 pound Trader Joe’s Argentinian Red Shrimp (or shrimp of choice) - thawed

1 tablespoon + 1/2 cup good quality extra virgin olive oil

Kosher salt and pepper

1 cup shredded parmesan, plus more for serving

4 lemons - zested and juiced

3 tablespoons torn mint leaves

Preheat oven to 425 degrees. In a heavily salted pot of water, boil the spaghetti until al dente. Drain and save the pasta water. On a sheet pan, toss together the shrimp, 1 tablespoon olive oil, 1 teaspoon of salt, and a dash of pepper. Roast for 8 to 10 minutes or until cooked through. In a glass jar, add 1/2 cup of olive oil, a heavy dash of salt and pepper, parmesan, and lemon zest and juice. Shake together until combined. Add the spaghetti and lemon mixture to a large serving bowl and toss together with about 1/4 to 1/2 cup pasta water until combined. Top with shrimp, parmesan, and mint.

Apple Pear Burrata Salad with Maple and Cinnamon

September 15, 2020 Andrea LeTard
Adjustments.jpeg

Ease into fall flavors with this easy peasy crowd pleasing salad because burrata isn’t just for tomatoes, y’all! I love burrata best paired with something sweet. From figs and honeycomb to sweet crackers and bread, I have found burrata’s true soulmate to be a little something sweeter than tomatoes. This salad is so quick, simple, and crowd pleasing. Plus, it’ll give you an excuse to go apple picking!

1 apple - cored and thinly sliced into rounds

1 pear - cored and thinly sliced into rounds

1 to 2 balls burrata cheese

1/2 candied walnuts

1/4 dried cranberries

Kosher salt

1/4 cup good quality extra virgin olive oil

1 tablespoon maple syrup

1 teaspoon apple cider vinegar

Ground cinnamon

On a large serving platter, layer the apple and pear slices. Tear the burrata cheese over the top. Evenly add the walnuts and cranberries over the cheese. Sprinkle the entire salad lightly with salt. In a small bowl, whisk together the olive oil, maple syrup, and apple cider vinegar. Drizzle the dressing over top and sprinkle with cinnamon.

Goat Cheese Stuffed Peppers with Balsamic Mushrooms and Candied Kale

September 8, 2020 Andrea LeTard
Adjustments.jpeg

We have lots of random peppers growing in our garden this time of year. I created this recipe to use them all up as an end of summer treat, but these can actually be made all year from any peppers you find at the farmers market or grocery. This is the ultimate appetizer that does a great job of mixing end of the summer produce with couple of earthy, hearty colder season garnishes - mushrooms and kale.

6 to 8 peppers (Anaheim, Pablano, or large Jalapeño) - cut in half lengthwise and seeded 

6 ounces softened goat cheese

1/4 cup shredded Parmesan 

Extra virgin olive oil

Kosher salt and pepper 

1/2 bunch of kale - stems removed, chopped

1 tablespoon maple syrup

8 ounces mushrooms - chopped 

1 tablespoon balsamic

Preheat oven to 400 degrees. Place peppers on a baking sheet and roast for 5 to 8 minutes or until slightly soft. Take out of the oven and let cool. In a small bowl, mix together the goat cheese, Parmesan, 1 tablespoon olive oil, and a dash of salt and pepper. Evenly fill with the cheese mixture. On another baking sheet, toss together the chopped kale, maple syrup, 1 tablespoon olive oil, and a heavy dash of salt and pepper. Place both the peppers and kale in the oven and let roast for 8 to 10 minutes or until kale is crispy and cheese is bubbly. 

While the peppers and kale are cooking, prepare the mushrooms. Heat 1 tablespoon of olive oil in a small sauté pan. Add the mushrooms with a heavy dash of salt and pepper. Cook until soft then add the balsamic. Cook one more minute or until caramelized. Plate the peppers and top with the mushrooms and kale. Serve warm or at room temperature. 

← Newer Posts Older Posts →

MEET ANDREA

Hey y'all! Welcome to Andrea’s Cooktales. I’m a believer that the best stories are shared and the fondest memories are made in the kitchen, at the dinner table, and surrounded by food. This blog is about storytelling from the kitchen and the dinner table.  (Read more...)

RECENT POSTS

Featured
IMG_1079.jpg
Mar 1, 2024
Better Than a Steakhouse Filet Mignon
Mar 1, 2024
Mar 1, 2024
IMG_1267.jpg
Mar 1, 2024
Raspberry Rose Brie Bread
Mar 1, 2024
Mar 1, 2024
IMG_2041.jpg
Mar 1, 2024
Best Breakfast Burrito in Existence
Mar 1, 2024
Mar 1, 2024
IMG_2037.jpg
Mar 1, 2024
Campari Spritz
Mar 1, 2024
Mar 1, 2024
IMG_2034.jpg
Mar 1, 2024
Truffle Seafood Pot Pies
Mar 1, 2024
Mar 1, 2024
IMG_1066.jpg
Feb 4, 2024
Steakhouse Creamed Spinach Casserole
Feb 4, 2024
Feb 4, 2024
IMG_7278.jpg
Nov 9, 2023
“Season of the Witch” Salad
Nov 9, 2023
Nov 9, 2023
IMG_8931.jpg
Nov 9, 2023
Vampire Aperol Spritz
Nov 9, 2023
Nov 9, 2023
IMG_2388.jpg
Nov 9, 2023
Zombie Meat Spaghetti
Nov 9, 2023
Nov 9, 2023
IMG_4252.jpg
Nov 9, 2023
“Somebody’s Watching Me” Baked Cheese with Chile Eyeballs
Nov 9, 2023
Nov 9, 2023

ARCHIVES

Archive
  • March 2024 5
  • February 2024 1
  • November 2023 6
  • September 2023 12
  • August 2023 6
  • September 2022 1
  • February 2021 2
  • December 2020 8
  • November 2020 9
  • October 2020 4
  • September 2020 6
  • August 2020 7
  • July 2020 3
  • May 2020 2
  • February 2020 5
  • January 2020 3
  • December 2019 3
  • November 2019 4
  • October 2019 8
  • September 2019 4
  • August 2019 2
  • July 2019 6
  • May 2019 3
  • April 2019 5
  • March 2019 2
  • February 2019 2
  • December 2018 6
  • November 2018 7
  • October 2018 5
  • July 2018 1
  • June 2018 3
  • April 2018 1
  • February 2018 2
  • January 2018 10
  • November 2017 1
  • October 2017 2
  • September 2017 2
  • August 2017 1
  • July 2017 1
  • June 2017 3
  • May 2017 1
  • March 2017 4
  • February 2017 1
  • January 2017 2
  • December 2016 4
  • November 2016 7
  • October 2016 3
  • September 2016 5
  • August 2016 2
  • July 2016 4
  • June 2016 2
  • May 2016 9
  • April 2016 7
  • March 2016 7
  • February 2016 18
  • January 2016 8
  • December 2015 10
  • November 2015 14
  • October 2015 14
  • September 2015 13
  • August 2015 5
  • July 2015 6
  • June 2015 5
  • May 2015 6
  • April 2015 5
  • March 2015 6
  • February 2015 3
  • December 2014 3
  • October 2014 7
  • September 2014 6
  • August 2014 6
  • July 2014 7
  • June 2014 6
  • May 2014 6

CATEGORIES

  • TRAVEL TALES
  • LIFESTYLE POSTS
  • RECIPES
  • ANDREA'S COOKTALES
  • QUICK BITES
  • TV APPEARANCES
  • WHAT DO YOU DO WITH THAT

BLOG     |     VIDEOS     |      SERVICES    |       RECIPE INDEX    |      PRIVACY

Copyright Andrea's Cooktales 2016-2017 | Design by Oh Simple Joys Design Studio