• Cookbook
  • About
  • Video
  • Recipes
  • Travel
  • Inspiration
  • Services
  • Contact
Menu

Andrea's Cooktales

Street Address
City, State, Zip
Phone Number
A STORY BEHIND EVERY RECIPE

A STORY BEHIND EVERY RECIPE

Andrea's Cooktales

  • Cookbook
  • About
  • Video
  • Recipes
  • Travel
  • Inspiration
  • Services
  • Contact

Chocolate Rubbed Steak with Red Wine Cherry Sauce

February 4, 2020 Andrea LeTard
Adjustments.jpeg

You could buy your sweetheart the traditional box of chocolate covered cherries for Valentines Day or you can take it up a notch and cook it - in steak form. This may seem like an odd flavor combo for a piece of meat but it works beautifully, and it’s ideal and oh so fun for Valentine’s Day dinner at home. Sirloin is used in this recipe to make it a little more lean and healthy but you can use any piece of meat you prefer (flank and ribeye are also perfection). The chocolate dry rub makes it extra luscious with a hint of sweetness and richness from the cherry wine sauce. Cook up some simple sides, open a bottle of special red wine, and you have the perfect romantic dinner. 

2 Servings

Steak: 

1 ( 1 to 1 1/2 pound, 1 to 1 1/2 inch thick) premium sirloin steak 

1 tablespoon good-quality cocoa powder 

1 tablespoon brown sugar

1 teaspoon kosher salt

1/2 teaspoon freshly cracked pepper 

2 tablespoons butter 

Fleur de Sel, for finishing

Sauce: 

1 shallot - peeled and thinly sliced 

1 garlic clove - smashed 

1 sprig rosemary 

3/4 cup red wine

1 teaspoon sugar

1 cup fresh or frozen cherries - pitted, plus more to garnish 

1 tablespoon butter 

Kosher salt and freshly cracked pepper 

Take the steak out of the refrigerator and using paper towels, completely pat it dry. On a large plate, mix together the cocoa powder and brown sugar. Sprinkle the meat evenly with the salt and pepper, pressing to adhere. Completely cover all sides of the steak in the dry rub. Let it sit at temperature for at least 30 minutes.

Place a large cast iron skillet in the oven and preheat to the highest temperature (480 to 500 degrees). Let the oven come to full temperature, then using an oven mitt, remove the pan and place over high heat on the stovetop for 2 to 3 minutes or until smoking. Place butter in the skillet, let melt, and swirl around to coat the bottom - continue using the oven mitt, the skillet will be extremely hot. 

Transfer the steak from the plate to the skillet, placing flat down, and don’t move. Let cook for one minute then flip and let cook another minute. Flip one more time and transfer the skillet to the oven. Let steak cook for 4 to 6 minutes (medium-rare to medium, depending on your preference). Remove the skillet from the oven. Transfer the steak to a cutting board and cover with foil until ready to cut and serve. 

Add the shallot to the pan drippings and cook over medium low heat until softened. Add the garlic clove, rosemary, wine, and sugar then lightly scrape the bottom of the pan with a wooden spoon, getting up some of the brown bits. Bring to a boil and let reduce to half - 5 to 7 minutes- adding the cherries halfway through. Take off the heat, swirl in the butter, and taste for seasoning. Add salt and pepper if needed. Slice the steak, place on a serving platter, and top with the cherry sauce and sprinkle with Fleur de Sel. Share and be cozy! 

Best Ever Super Bowl Snacks

January 22, 2020 Andrea LeTard
IMG_9440.jpeg

You don’t need every game day food item in the world for a Super Bowl party. All you need are a few - best of the best - filling snack foods. A few unbelievably flavorful dips and a couple of hearty appetizers, and you’re good to go. Impress your guests with these tried and true game day recipes that my family, friends, and clients beg me to make again and again! Literally, every recipe on here will have your guests flipping… they’ll be at the food table, not watching the game.

Cream Taco Dip

This recipe will forever and ever go first on my game day snacks recommendation list. This dip is beyond the best dip that literally ever existed on earth. I don’t know how to more dramatically explain it in words. I’ll bluntly put it this way, if you’ve ever made a cheese dip, Velveeta dip, or chili cheese dip and thought it was fabulous, get rid of it and make this one. I promise it’s 100,000 times better than any dip you’ve ever made. You’ll never make another cheese dip recipe. People show up to my house hoping I have this on the stove or in the Crock Pot.

Cream Taco Dip.jpeg

Truffle Duck Fat Fries

I mean, the name of the recipes explains it all - need I say more? The fries are crispy and salty, the dip is creamy and truffley. Your guests will flip over this one.

IMG_9440.jpeg

Creamy Feta Tomato Dip

Inspired by a dish we had in Santorini, this is a once you pop you can’t stop dip. Served with pita, it adds a little variety to the typical game day tortilla and ruffle chip and dips.

IMG_9442.jpeg

Buffalo Hot Wing Hummus

This dip is just like eating your favorite hot wings, without the extra calories and messy fingers. This hummus gives a vegetarian option to your party and can easily be vegan if you leave off the cheese.

IMG_9446.jpeg

Southwestern Tuna Dip

Another healthy dip to throw into the mix, I call this one: the tuna salad for people who think they hate canned tuna. I am NOT a canned tuna fan but after this creation, I now eat it for lunch several times a week!

IMG_9443.jpeg

Copycat Petro’s Chili and Chips

You don’t have to be a University of Tennessee fan to know corn chips layered with chili, cheese, and the works is one of the best game day snacks of all time. Adapted from the famous Knoxville staple, Petro’s, these mini chili cheese Mason jars are adorable and taste as good as they look.

IMG_8460.jpeg

Truffle Sliders

Think of the best slider you’ve ever had, then imagine this one: caramelized onions, sweet honey and truffle aioli, chunky truffle buttered meat. This may be your new favorite.

IMG_9445.jpeg

Smoky Pimento Grilled Cheesies

The cutest little bites of pimento cheese and Italian bacon grilled cheeses you’ll ever eat!

IMG_9441.jpeg

3 Trader Joe’s Almond Beverage Smoothie Recipes You Can’t Live Without

January 14, 2020 Andrea LeTard
Adjustments.jpeg

On my latest Trader Joe’s trip, I discovered the most delicious almond milk beverages. They can be enjoyed chilled with no frills of course, but I’ve been using them for everything from putting them in my coffee and cereal to making smoothies and overnight oats with them. They are simply delicious and I’ve compared them with other brands of “sweetened almond milk” and it appears they’re lower in sugar content too. These smoothies have been making a regular appearance at our house. They make the perfect breakfast, snack, and meal replacement for a cleanse! You can find a full video that includes my thoughts on each of these yummy beverages on Instagram @andreas_cooktales. Enjoy and please comment on Insta to let me know what you think! 

Each recipe: 2 servings 

Blueberry Lavender Smoothie 

Adjustments.jpeg
Adjustments.jpeg


1 cold banana 

1 cup cold blueberries 

1 handful raw cashews 

1/4 orange - juiced 

1 - 1 1/2 cups Trader Joe’s Blueberry Lavender Almond Beverage 

1 cup ice (optional) 

Place all ingredients in a high-speed blender, starting with 1 cup of milk. Blend on high speed until completely combined. Add extra milk to thin out if needed. 

Tropical Matcha Smoothie 

Adjustments.jpeg
Adjustments.jpeg

1 cold banana 

2 cups baby spinach or kale 

1/2 cup raw coconut flakes 

1/4 cup chopped mango 

1/4 cup macadamia nuts 

1 to 1/2 cups Trader Joe’s Matcha Almond Beverage 

2 teaspoons honey or sweetener (optional) 

1 cup ice (optional)

Place all ingredients in a high-speed blender, starting with 1 cup of milk. Blend on high speed until completely combined. Add extra milk to thin out if needed. 

Pumpkin Spice Date Smoothie 

Adjustments.jpeg
Adjustments.jpeg

1 cold banana 

5 dried dates - pitted and chopped 

1/4 cup raw walnuts 

1 to 1 1/2 cups Trader Joe’s Pumpkin Spice Beverage 

1 cup ice 

2 teaspoons maple syrup (optional)

Place all ingredients in a high-speed blender, starting with 1 cup of milk. Blend on high speed until completely combined. Add extra milk to thin out if needed. 

10-Minute Banana Egg Pancakes with Dates & Walnuts

January 13, 2020 Andrea LeTard
Adjustments.jpeg

These pancakes are super healthy and most importantly, the flavor is beyond. So quick to make, they can be whipped up before heading out the door in the morning. Better yet, they can also be made ahead, refrigerated, and heated for a few minutes in the microwave - make a double batch and have them several days in a row. You won’t get sick of them, I assure you! Creamy, nutty, and egg-y, with sweet little date surprises in every bite. Complete perfection! 

Serving size - 6 to 7 pancakes 

Cooking spray 

1 large ripe banana - mashed until smooth

2 large eggs 

1/2 teaspoon vanilla 

1/4 cup oat flour

1 1/2 teaspoons baking powder 

1/4 teaspoon salt 

4 pitted dates - finely chopped 

2 tablespoons chopped walnuts 

Heat a nonstick pan coated in cooking spray over medium heat. To a large bowl, add the mashed banana, eggs, vanilla, oat flour, baking powder, and salt. Whisk together until smooth. Stir in the dates and walnuts. Using a 1/4 measuring cup, spoon the pancakes on the hot pan. Flip when bubbling and cook one to two more minutes or until through. Serve with maple syrup. 

Frosty’s Cheese and Snack Board

December 19, 2019 Andrea LeTard
image.jpeg

I love a good seasonal cheese board, and I couldn’t celebrate the holiday season this year without one. I typically attempt to bypass the basic red and green color palate when decorating, which isn’t the case with my holiday food because it’s so easy to find red and green ingredients. I thought I’d challenge myself for this board and do something a little different. Snowflakes have always been one of my favorite holiday decor themes for a few reasons: 1) they’re neutral and can be decorated around simply and aesthetically, 2) they’re not just “holiday-ish” but also “winter-ish” so they can stay up past the new year without being tacky, and 3) they’re simply pretty. I’ve most recently discovered they rock on a food board too! This cheese and sweet snack focused board is simple, quick to put together, and will make a big impression on guests. Tres’ reaction when he walked in and saw it: “Wow, that’s really pretty!” 

1 sheet snowflake craft paper (optional)

1 small Brie wheel 

White or silver decorating gel or frosting 

1 small log goat cheese 

Holiday snowflake or silver/white sprinkles 

4 ounces cream cheese 

1/4 cup coconut flakes 

8 ounce ball fresh mozzarella 

Snowflake cookie cutter (size that fits a circle of sliced mozzarella) 

Mini cheese curds or mozzarella balls (or both)

1 1/2 cups white yogurt pretzels 

1/2 cups white yogurt almonds 

1/2 cup white yogurt raisins 

1 package thin white crackers 

*Tip: Anything white coated, snowflake, or festive you can find, feel free to add it to the board! I found all the white yogurt coated snacks in the nut/dried fruit aisle of the grocery store. 

If using, place the sheet of craft paper over the board you’re using. This is not a must, but adds a festive touch! 

Make the cheeses. Take the Brie out of the package, and using a photo online, paint a large snowflake on top with the decorating gel or frosting. Place on the board. 

Take the goat cheese out of the package and pour about 2 tablespoons of the sprinkles on a plate. Roll the goat cheese around, coating with the sprinkles on all sides then place on the board. 

Roll the cream cheese into a smooth ball using your hands. Pour the coconut flakes and about 1 tablespoon of sprinkles on a plate. Roll the cream cheese around on the plate, coating on all sides then place on the board. 

Slice the mozzarella about 1/4 inch thick (you should get 6 to 7 slices). Using the cookie cutters, cut the slices into snowflakes. (Use the extra scraps for a baked pasta or snack on it later). Layer the mozzarella snowflakes on the board.

Full in the gaps on the board with the cheese curds, small mozzarella balls, yogurt pretzels, yogurt almonds, yogurt raisins, crackers, and any other items you’re using on the board. Serve to guests and enjoy! 

Chai Spiced Crepes with Maple Cream

December 5, 2019 Andrea LeTard
Adjustments.jpeg

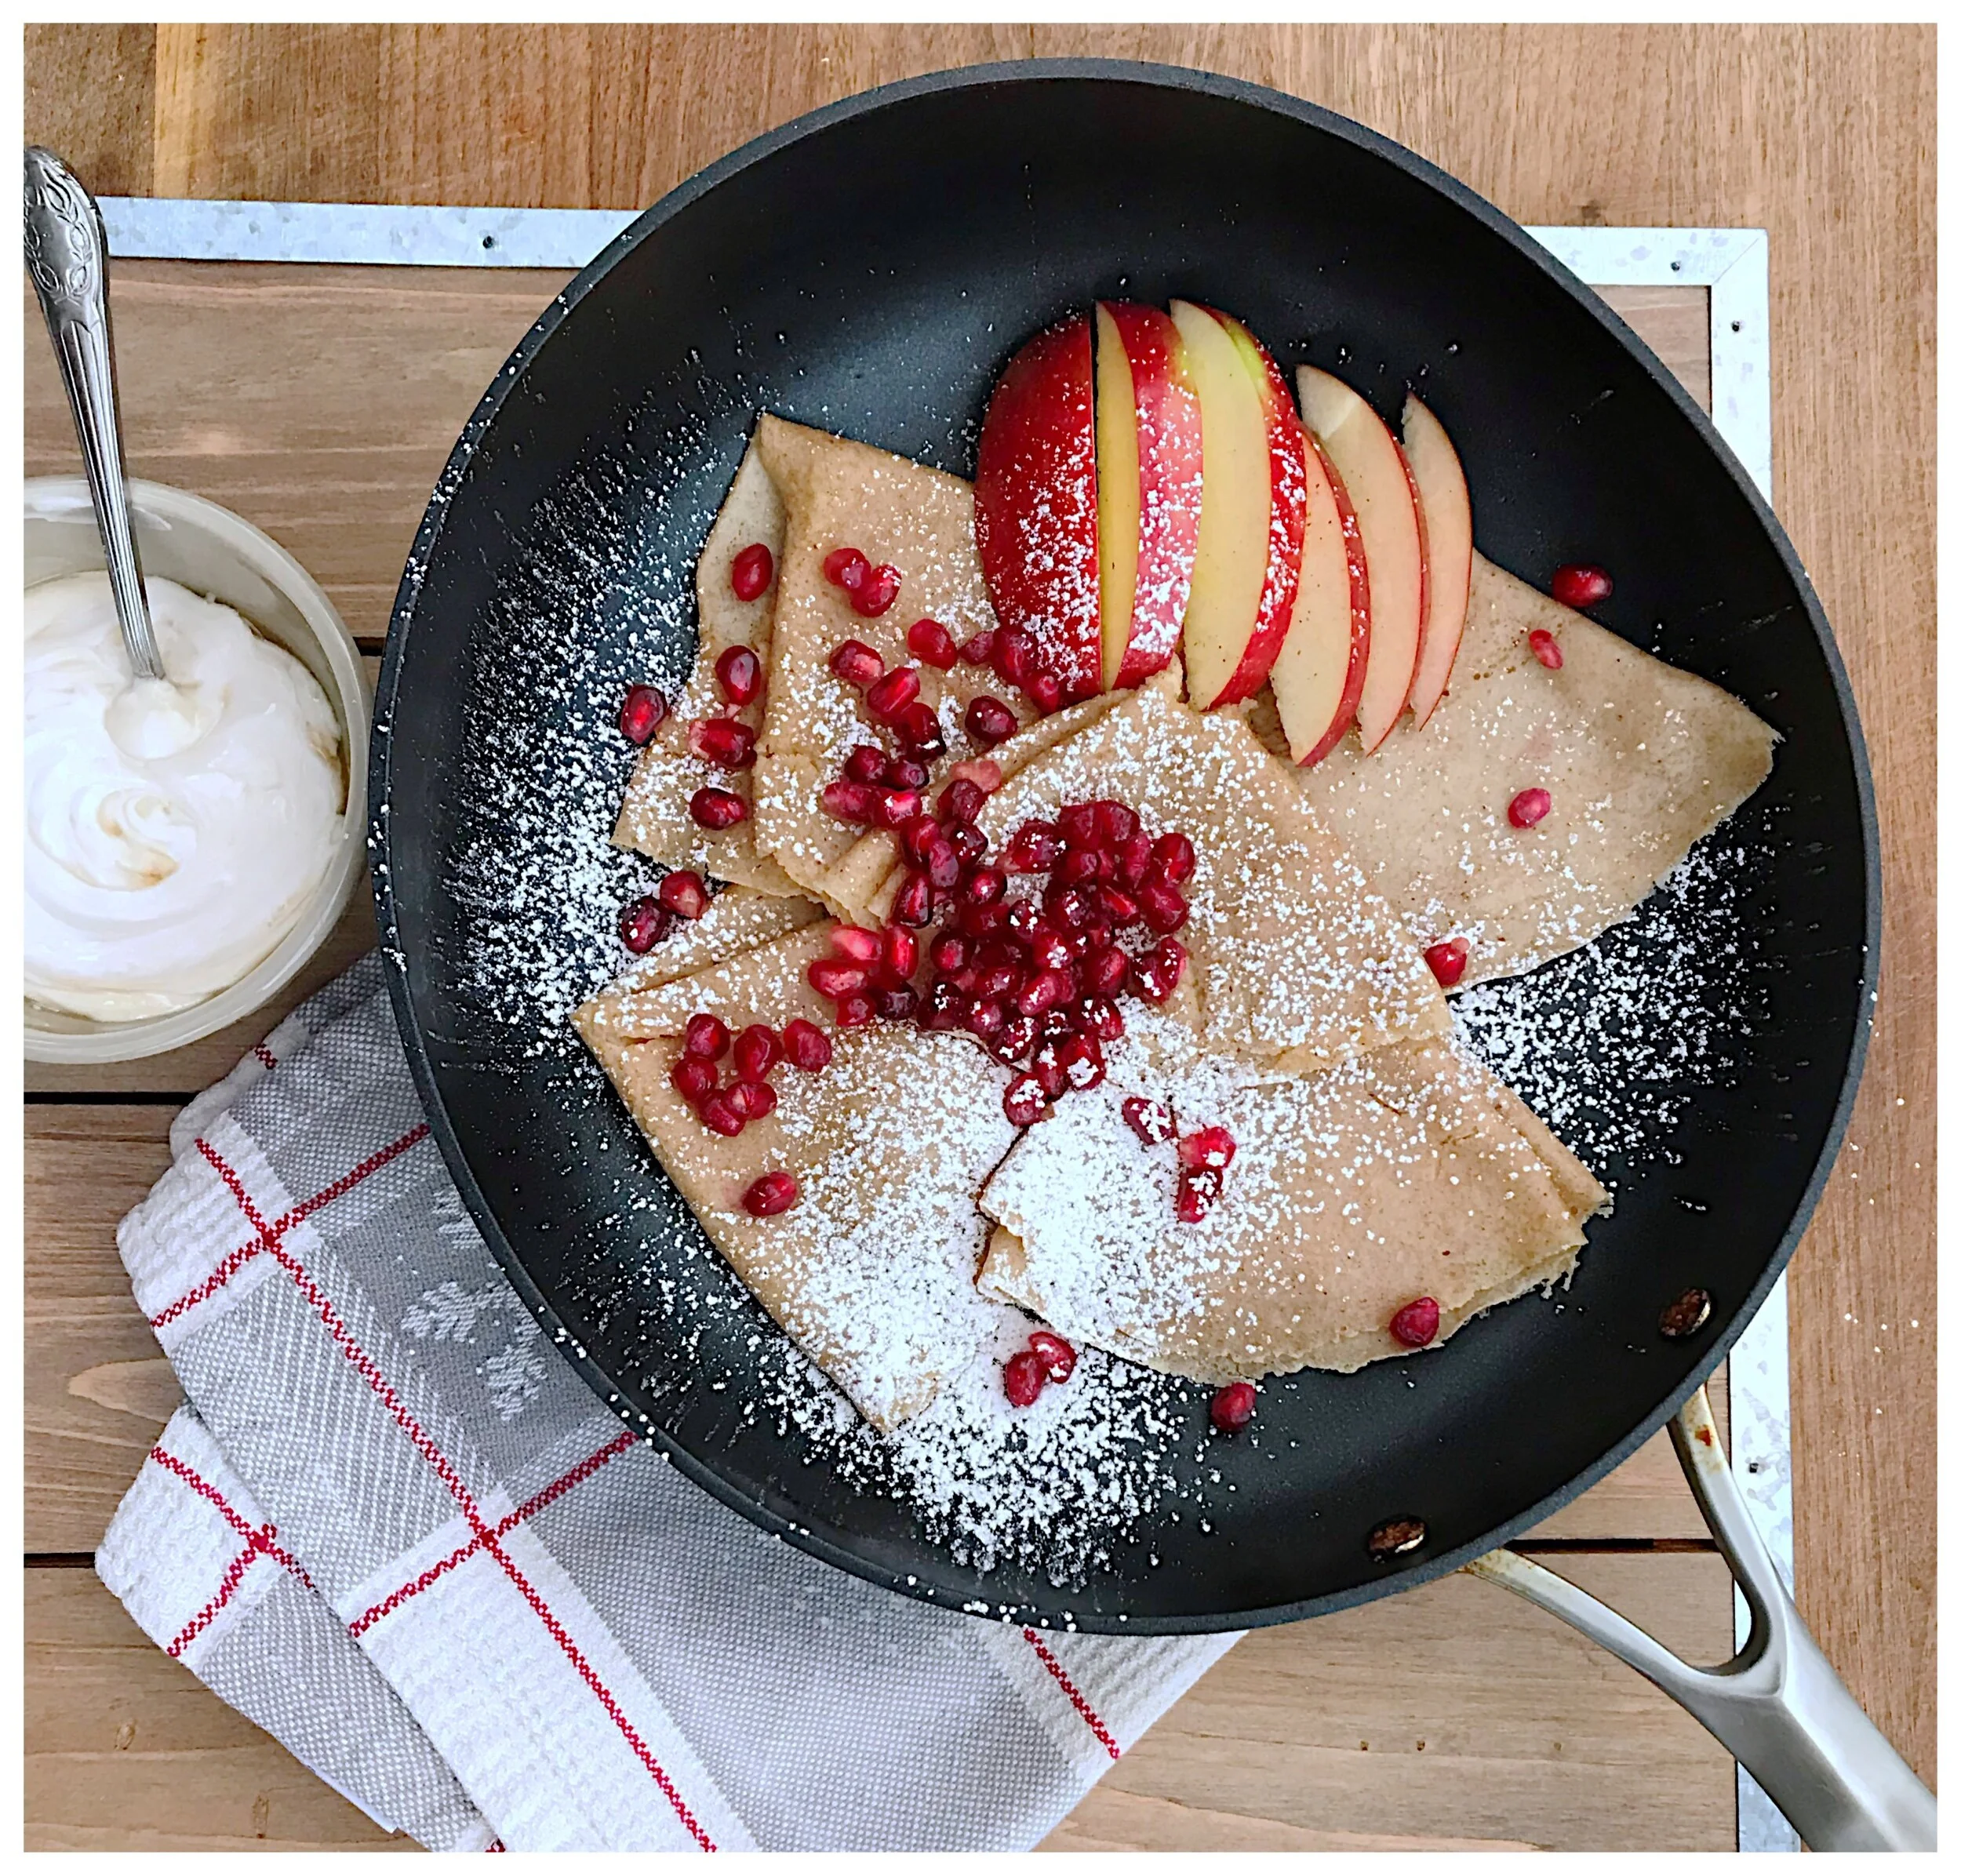
Breakfast is essential for holiday entertaining, especially if you have people staying in your home. These make-ahead crepes can be pulled out and re-heated all week, so they’re the perfect quick, easy breakfast! They also have a very holiday twist that the whole family will love - from the chai spice and the maple sweetness to the bright red fruits and the snowy dust on top, they’re perfect for this time of year! 

If you’ve never made crepes before, you will discover flipping them can be tricky for a novice cook and even for an experienced one (me!). I’ve never gotten down that whole wrist flip thing! That’s where my RAD USA non-stick pan has saved the day for me. It’s light, incredibly non-stick, and the best part is it has what I call a “flip lip” at the top - making flipping everything from crepes to omelets easy peasy! Everyone needs one of these essential pans in their cookware collection (P.S. - it’s the perfect gift for the cooks in your life. Read more about the Rad Pan and how to purchase it on their website: https://radusa.co.

Crepes: 

2 eggs

1 cup milk 

1/4 cup water 

2 tablespoons melted butter, plus more for greasing the pan 

1 tablespoon maple syrup

1 teaspoon chai spice (can be found on the spice aisle or you can make your own)

1/2 teaspoon pure vanilla extract 

1 cup all-purpose flour 

Pomegranates, for serving 

Apples, for serving 

Powdered sugar, for serving 

Cream:

1/2 cup plain yogurt

3 tablespoons maple syrup 

In a high-speed blender, add the eggs, milk, water, butter, maple syrup, chai spice, vanilla extract, and flour. Blend together until smooth - about 10 seconds. Place in the fridge for at least 1 hour - this helps the bubbles go down, which also helps keep the crepes thin and sturdy. Meanwhile, make the cream in a small bowl by mixing together the yogurt and maple syrup. 

Heat a small nonstick pan over medium-low heat and coat the bottom with butter. When hot enough, pour a about 1/4 cup of the mixture in the pan and swirl around until the bottom of the pan is covered and the batter is thin. Cook for about 30 seconds then flip and cook a few more seconds. Fold into triangles and set aside. Serve with pomegranates seeds, sliced apples, dusted powdered sugar, and the maple cream. 

*Crepes can be stored in air-tight containers in the fridge for several days. Just re-heat in the microwave for 30 seconds to one minute then garnish.

In Breakfast & Brunch, Recipes

Smoky Chicken and Apple Cider Stew with Crispy Sweet Potato Spirals

December 4, 2019 Andrea LeTard
Adjustments.jpeg

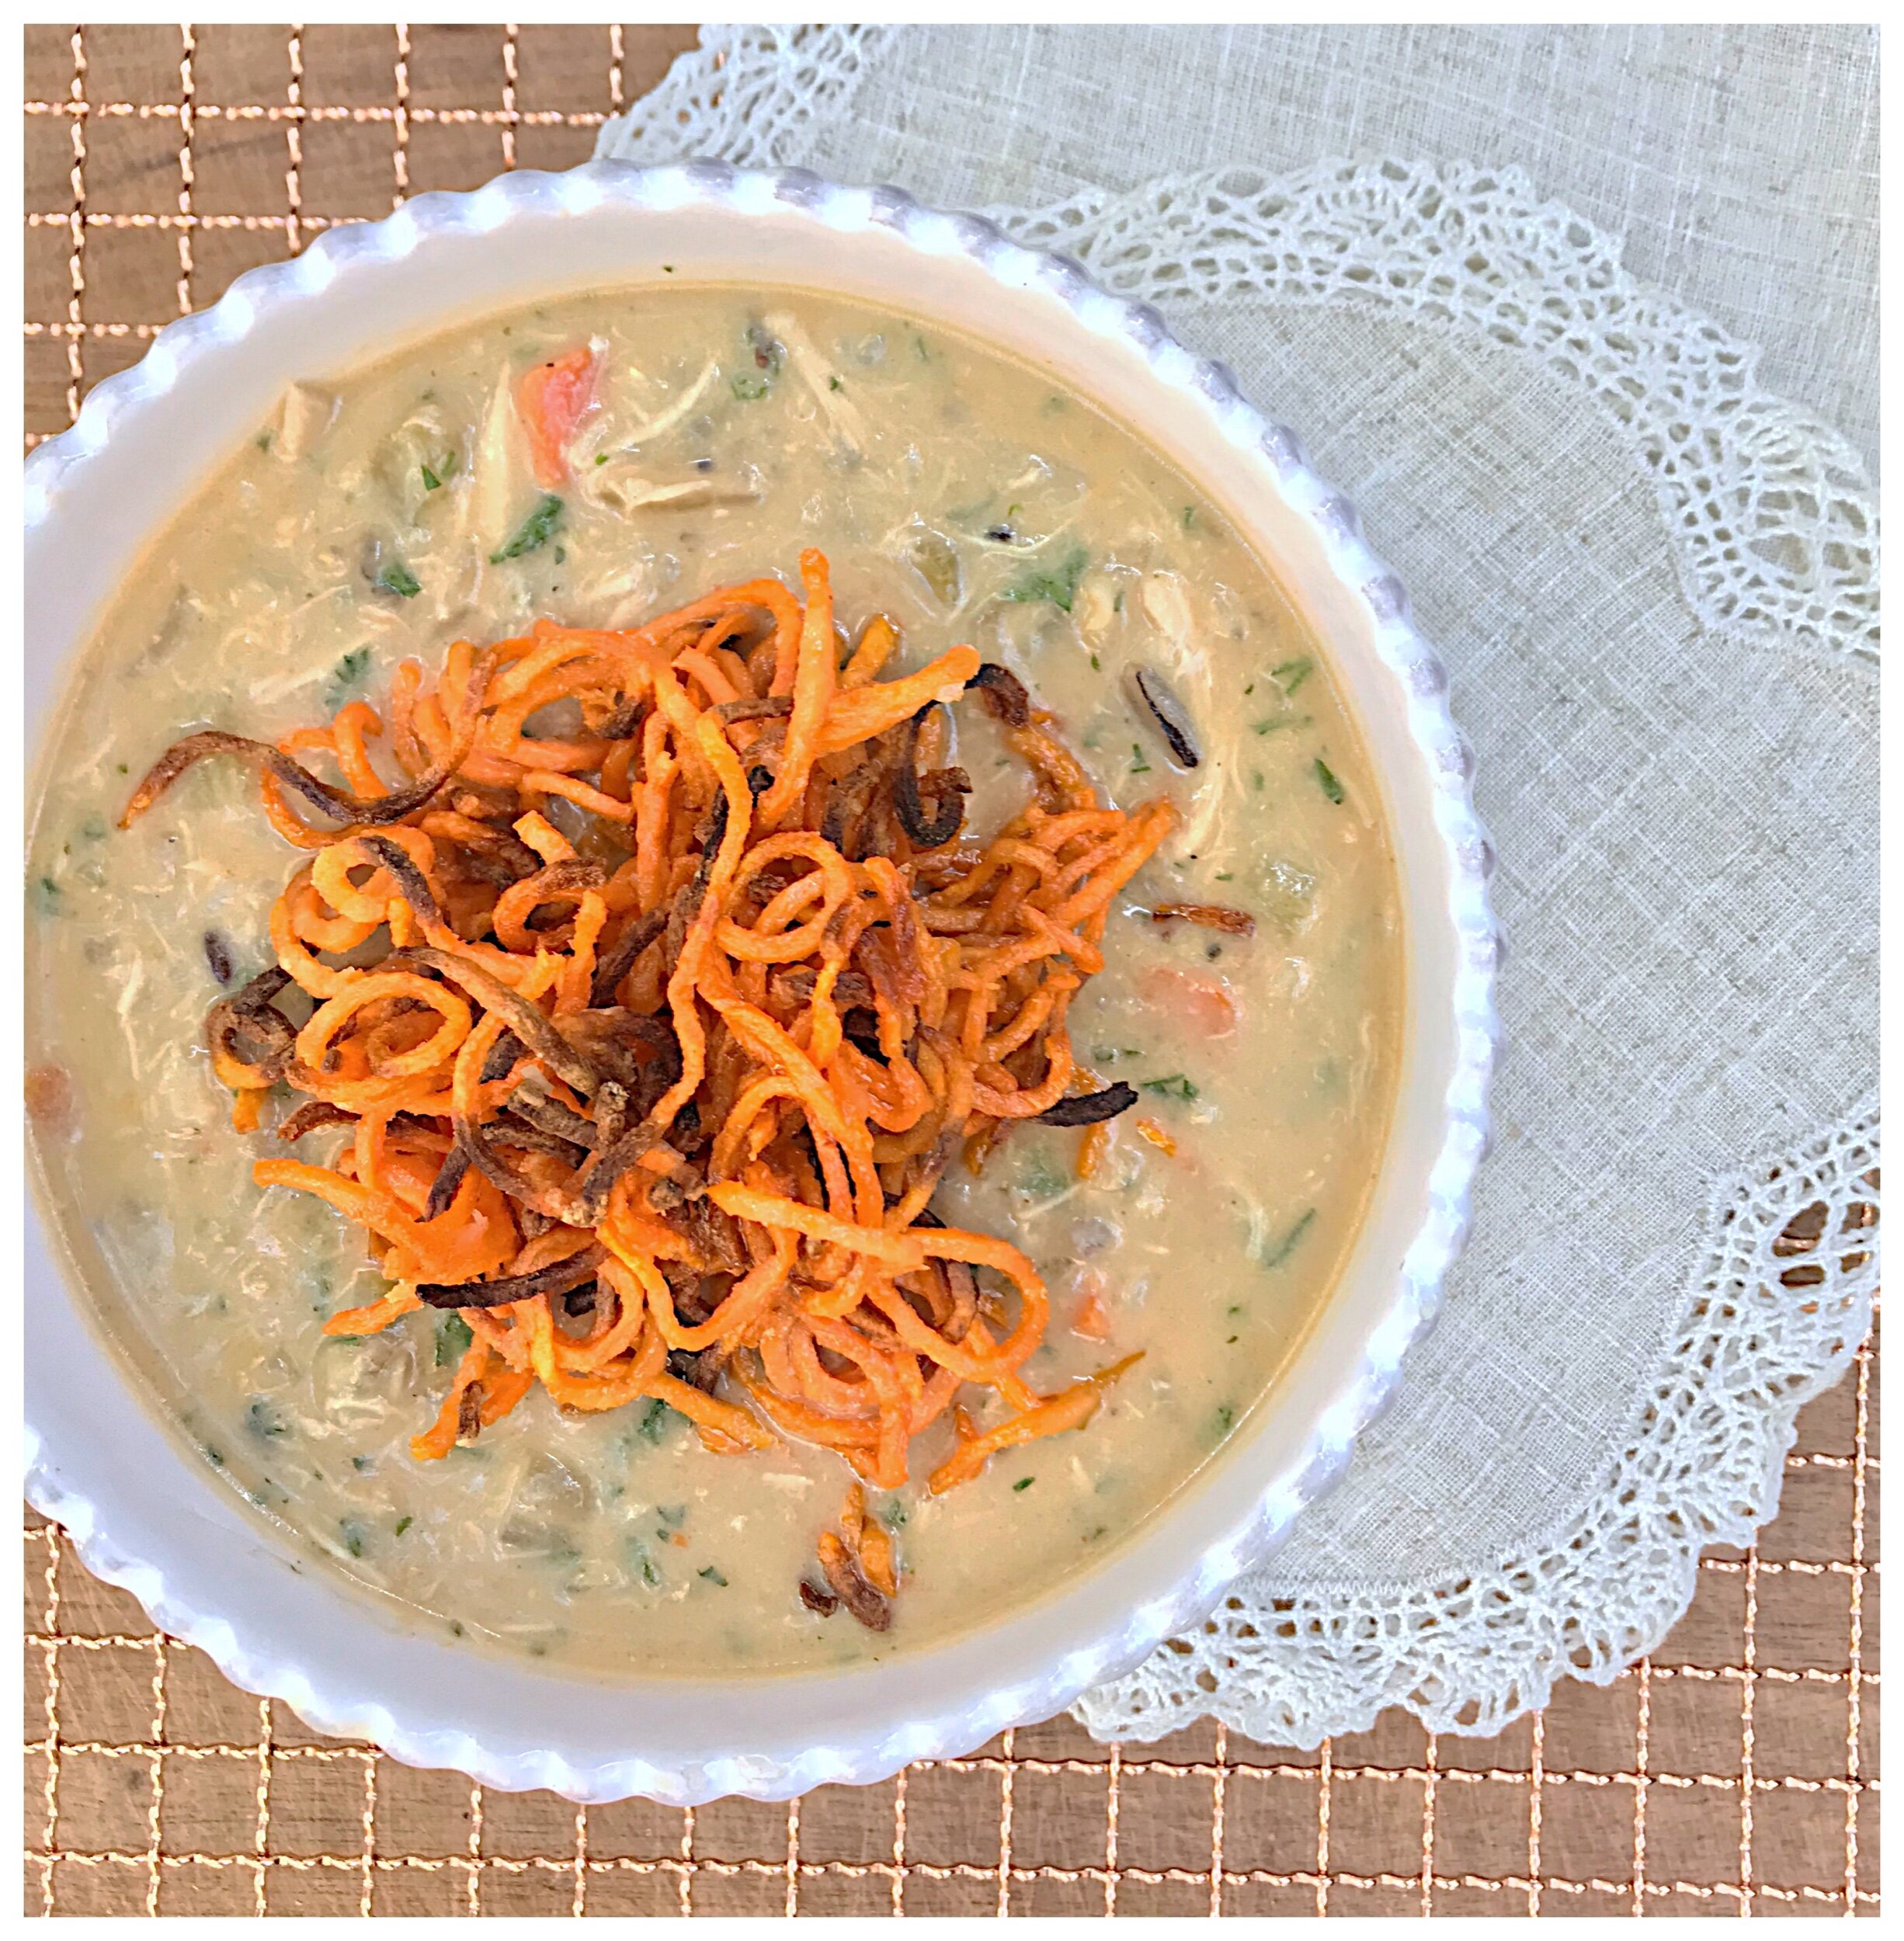
When a chill is in the air, I can literally eat soup for every single meal. And sometimes I do! I’ve mentioned before, I have my go-to soups that I make on repeat including Paula Deen’s Chicken Noodle, Rachael Ray’s Why-The-Chicken-Crossed-The-Road-Santa-Fe-Tastic Tortilla, Ina Garten’s Tomato Basil, and my own Chicken Corn Chowder. I’ve run into a lot of soup recipes that are just ok, so I tend to keep those 4 on repeat. This one is unique, fun, and simply delicious! And it just may become the 5th one on repeat.

3 tbsps butter

1 large yellow onion - diced 

3 sticks celery - diced 

3/4 cup diced carrot 

Kosher salt and freshly cracked pepper 

4 garlic cloves - minced 

2 tablespoons flour

2 cups apple cider 

4 cups chicken stock, plus more for thinner soup

3/4 cup heavy cream

1/3 cup wild rice 

1 1/2 tablespoons liquid smoke 

1 tablespoon sriracha 

4 cups spiralized sweet potato

2 tablespoons olive oil

2 tablespoons corn starch

Breast meat from one rotisserie chicken - meat shredded, skin and bones discarded 

1/4 cup minced parsley 

Preheat your oven to 400 degrees. Heat butter in a heavy bottom soup pot over medium heat. Add the onion, celery, carrots, and a heavy dash of salt and pepper. Cook the veggies until softened. Add the garlic and flour and cook for 2 more minutes. Pour in the apple cider and scrape up the brown bits from the bottom of the pot. Add the chicken stock, heavy cream, rice, liquid smoke, and sriracha and bring to a slight boil. Simmer until rice is cooked - about 35 minutes. 

While the soup cooks, make the crispy sweet potatoes. On a parchment-lined baking sheet, toss together the sweet potato, olive oil, corn starch, and a heavy dash of kosher salt (they should be salty like French fries). Bake for 10 minutes then take out of the oven and toss around. Bake for another 10 to 12 minutes or until crispy. Take out and let sit - they’ll get crispier as they sit. Add the chicken and parsley to the soup and stir until combined. Taste for seasoning and add more salt and pepper if needed. Ladle soup into bowls and top with the crispy sweet potatoes. 

In Dinner, Soups, Recipes

Whisky Pepper Jelly Glazed Rainbow Carrots

November 26, 2019 Andrea LeTard
IMG_7423.jpeg

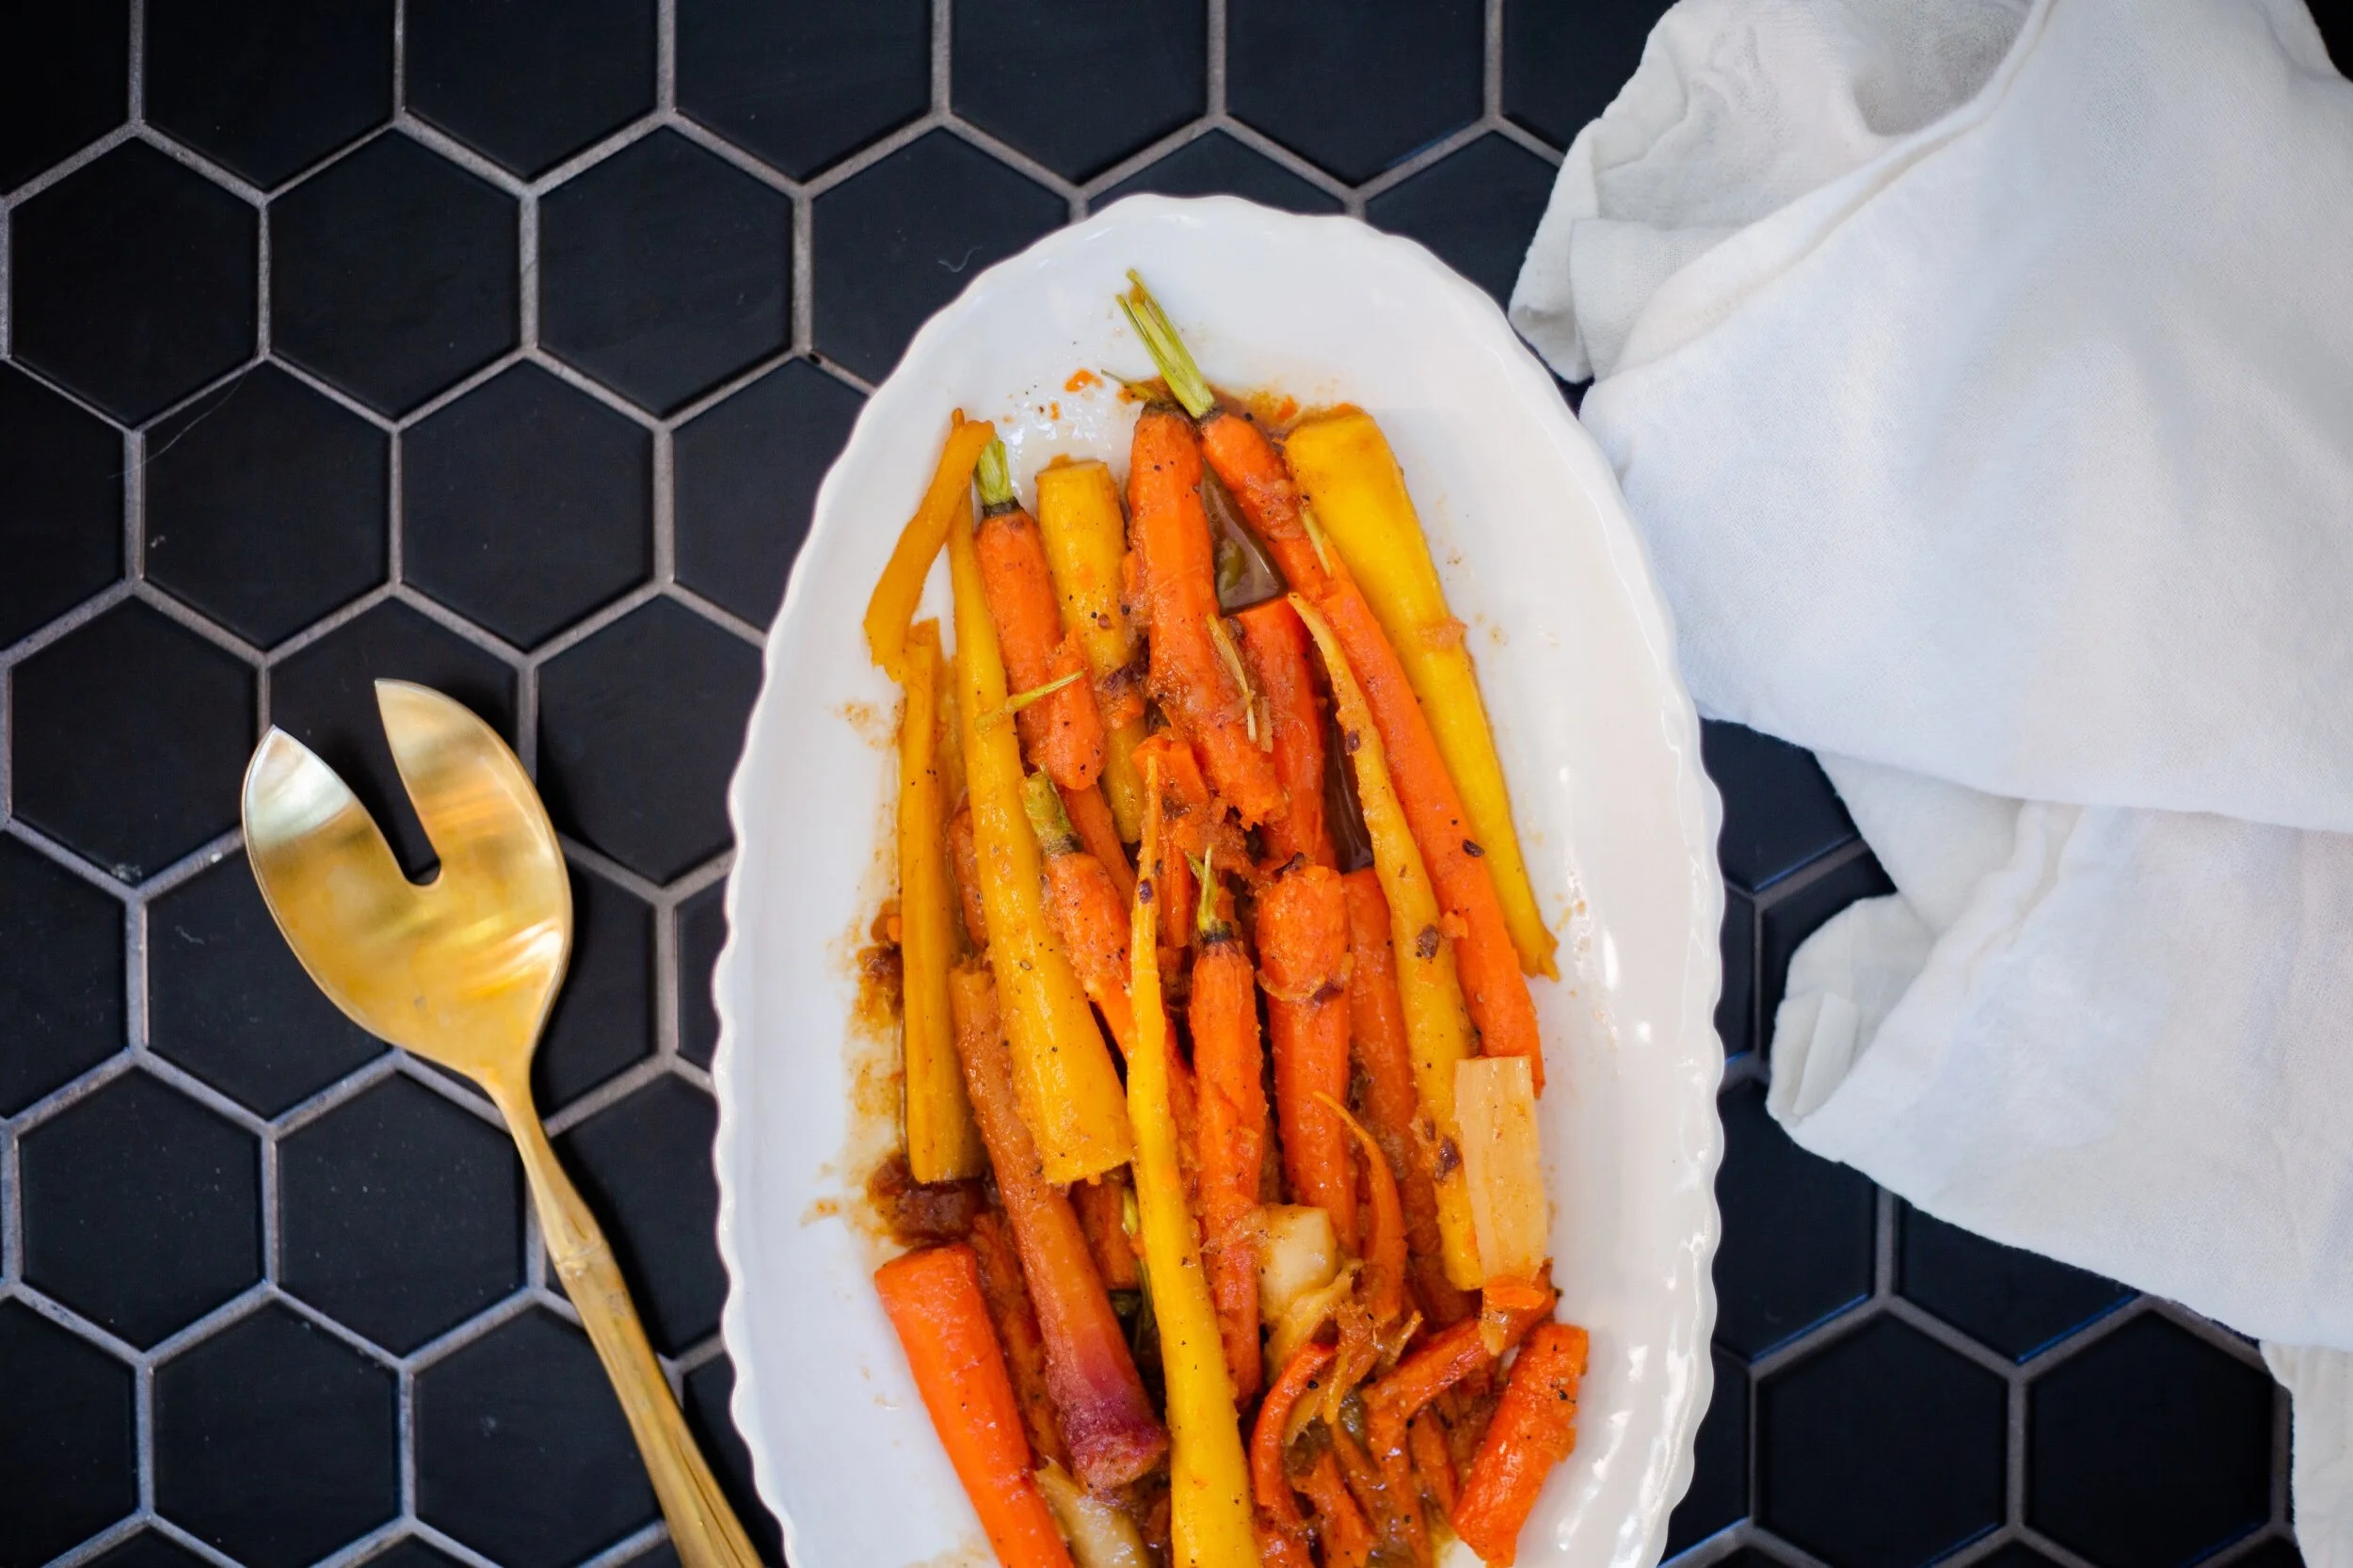
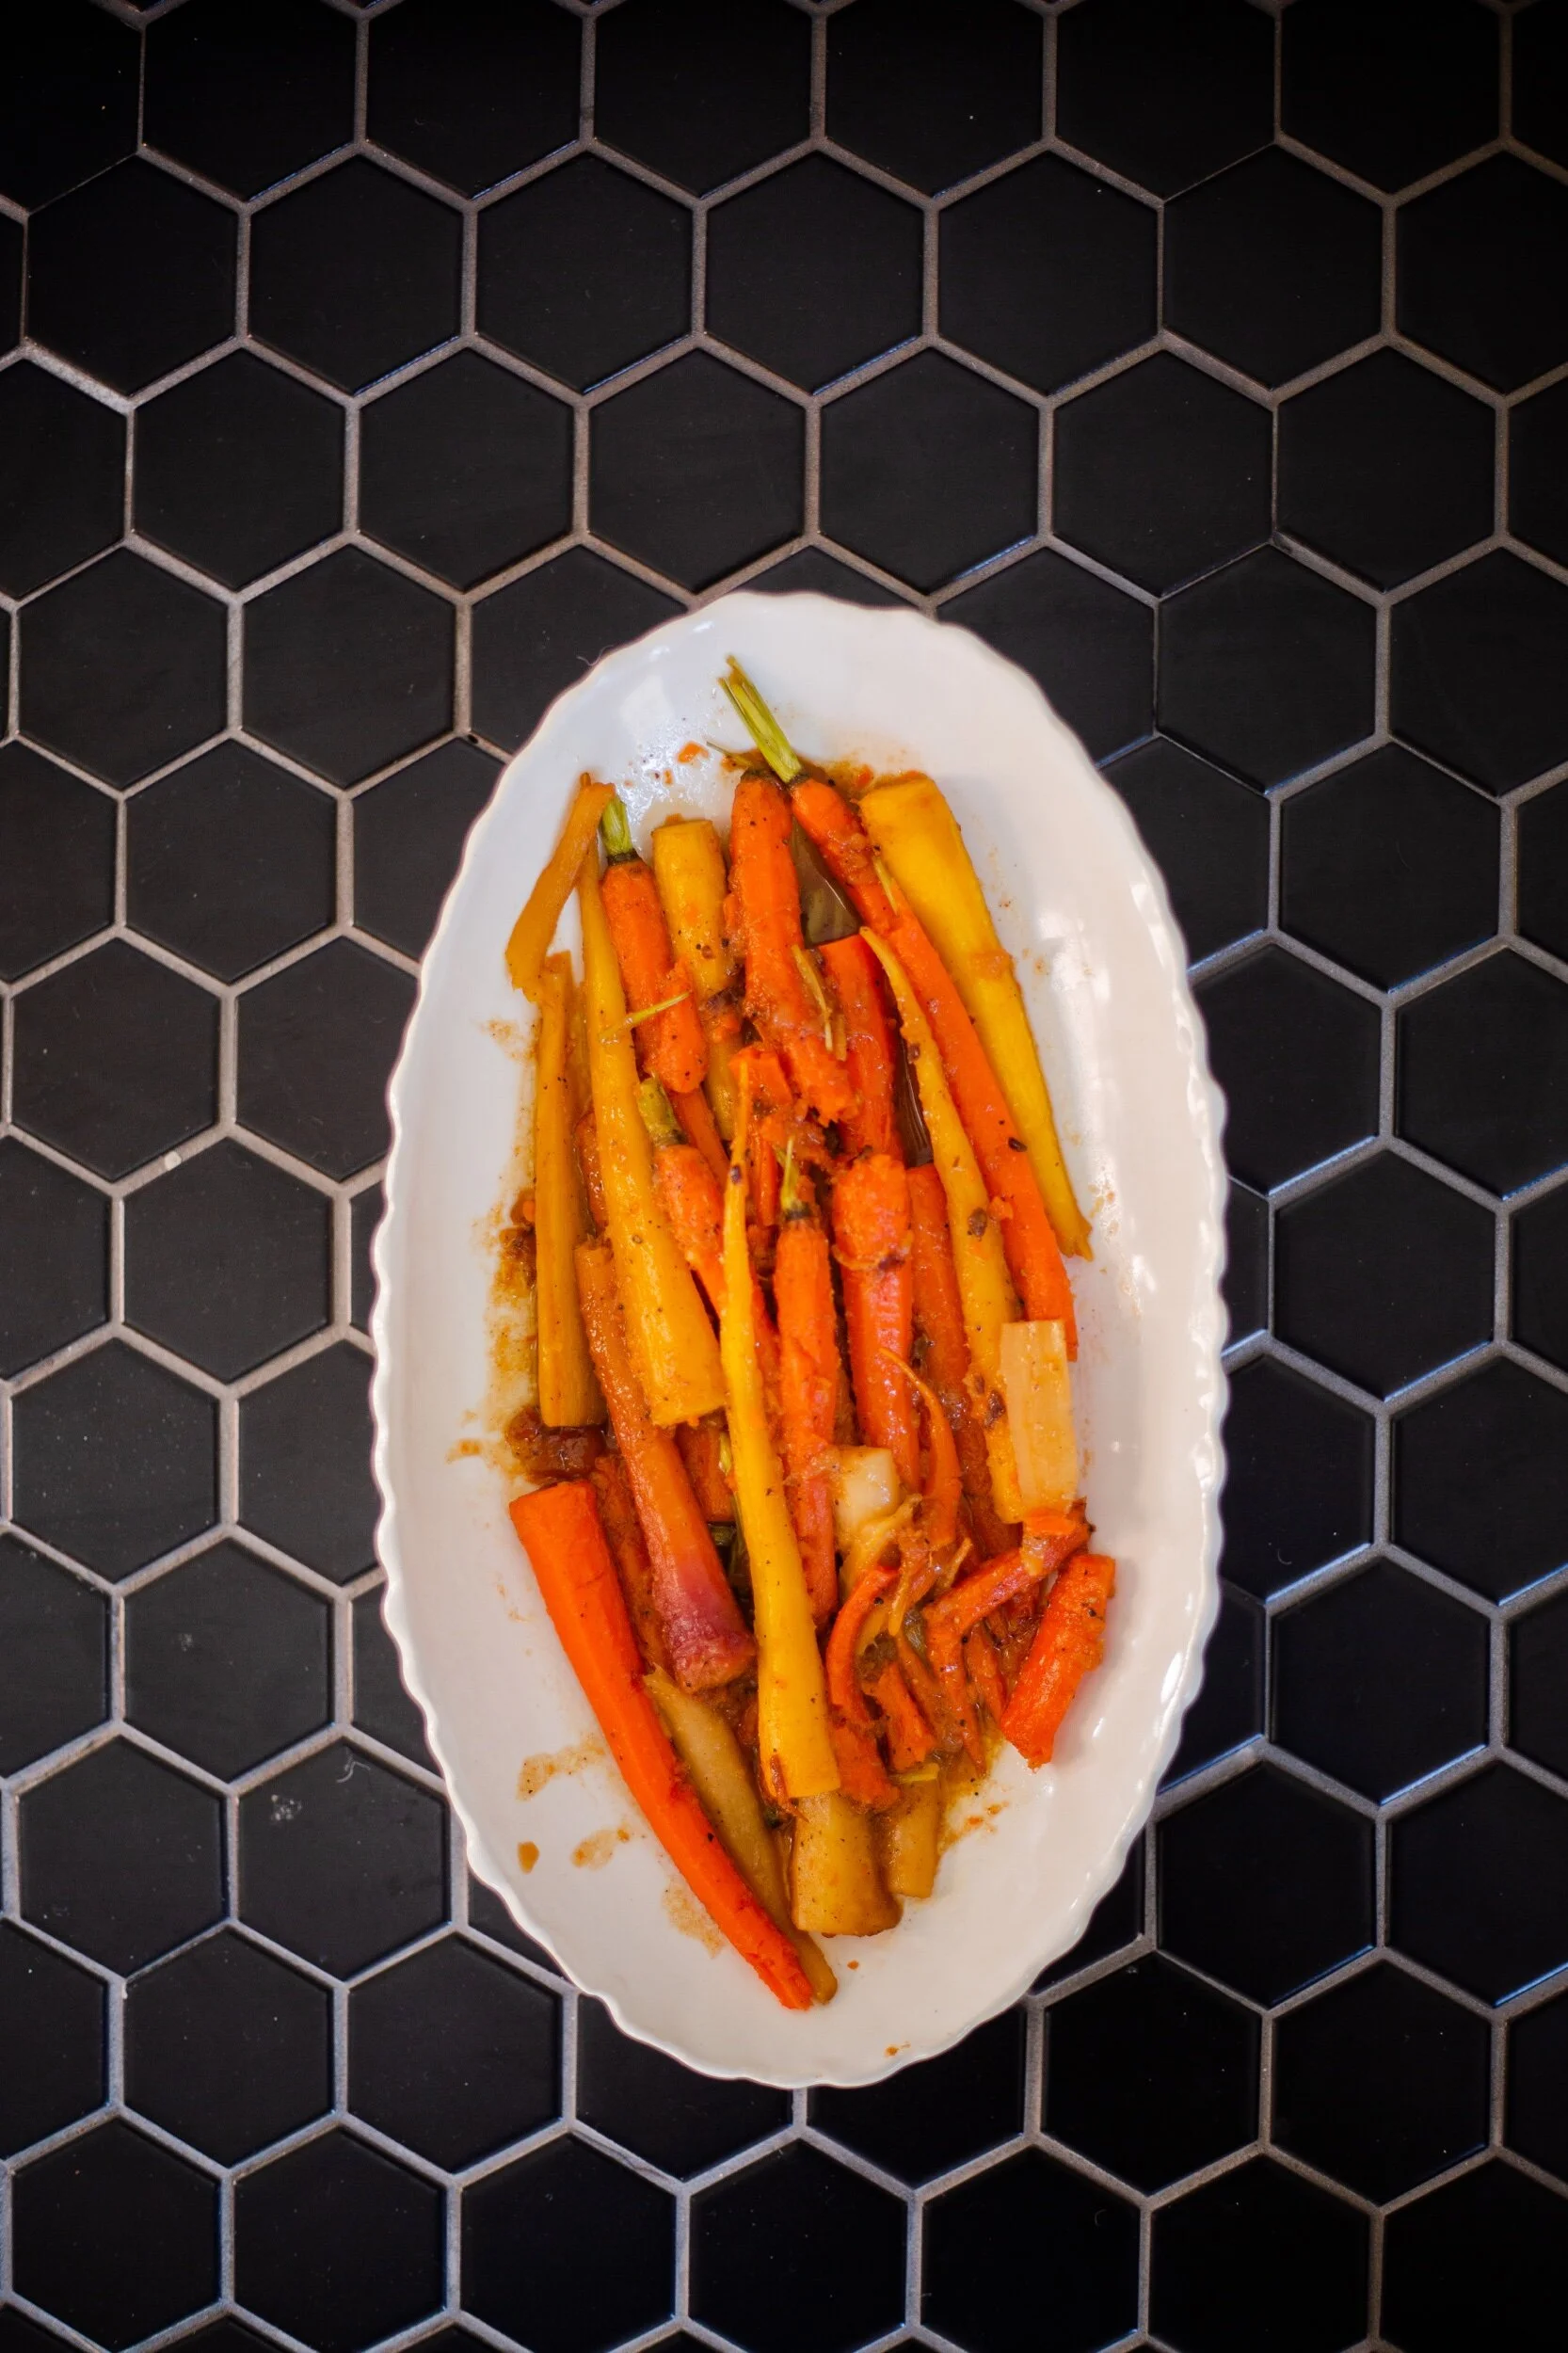
There are so many lovely, versatile ways to use pepper jelly and these carrots are stellar! I absolutely love Jacko’s Pepper Jelly out of Memphis. My great friend Lela Gerald is boss-gal to this fabulous company, and people truly can’t get enough of her pepper jellies - including myself. It’s absolutely to die for! I’ve been adding Jacko’s to several dishes lately that I want a slightly sweet yet spicy flavor to, and carrots came to mind for a great holiday side dish. A few things I love about this dish that I think you will to: 1) it’s a quick last minute add to a Thanksgiving or holiday menu, 2) it takes about 10 minutes to make, 3) it’s a stunningly beautiful dish that will light up your table! If these aren’t on your menu, add them now! For all the info on Jacko’s Pepper Jelly and where to purchase visit the website: https://www.jackospepperjelly.com.

IMG_7424.jpeg

4 servings 

4 tablespoons unsalted butter

3 bunches rainbow carrots - stems trimmed to 1/2 inch, cleaned, and peeled 

1 1/2 teaspoons kosher salt

1 teaspoon pepper 

2 tablespoons whisky

3/4 cup low-sodium chicken broth 

2 tablespoons pepper jelly 

Mint or parsley, for garnish (optional)

In a wide sauté pan, heat butter over medium high heat. When the butter is melted, add the carrots and toss until coated. Sprinkle in the salt and pepper then toss again. Add the whisky and chicken broth then partially cover with a lid. Let cook for about 8 minutes or until tender - but not mushy. Take off the heat. Stir in the pepper jelly until melted and lightly toss the carrots until coated in the pepper jelly. Plate and sprinkle with mint or parsley if desired. 

In Sides, Recipes

Crispy Prosciutto & Caramelized Onion Butternut Squash Lasagna

November 22, 2019 Andrea LeTard
IMG_7247.jpeg

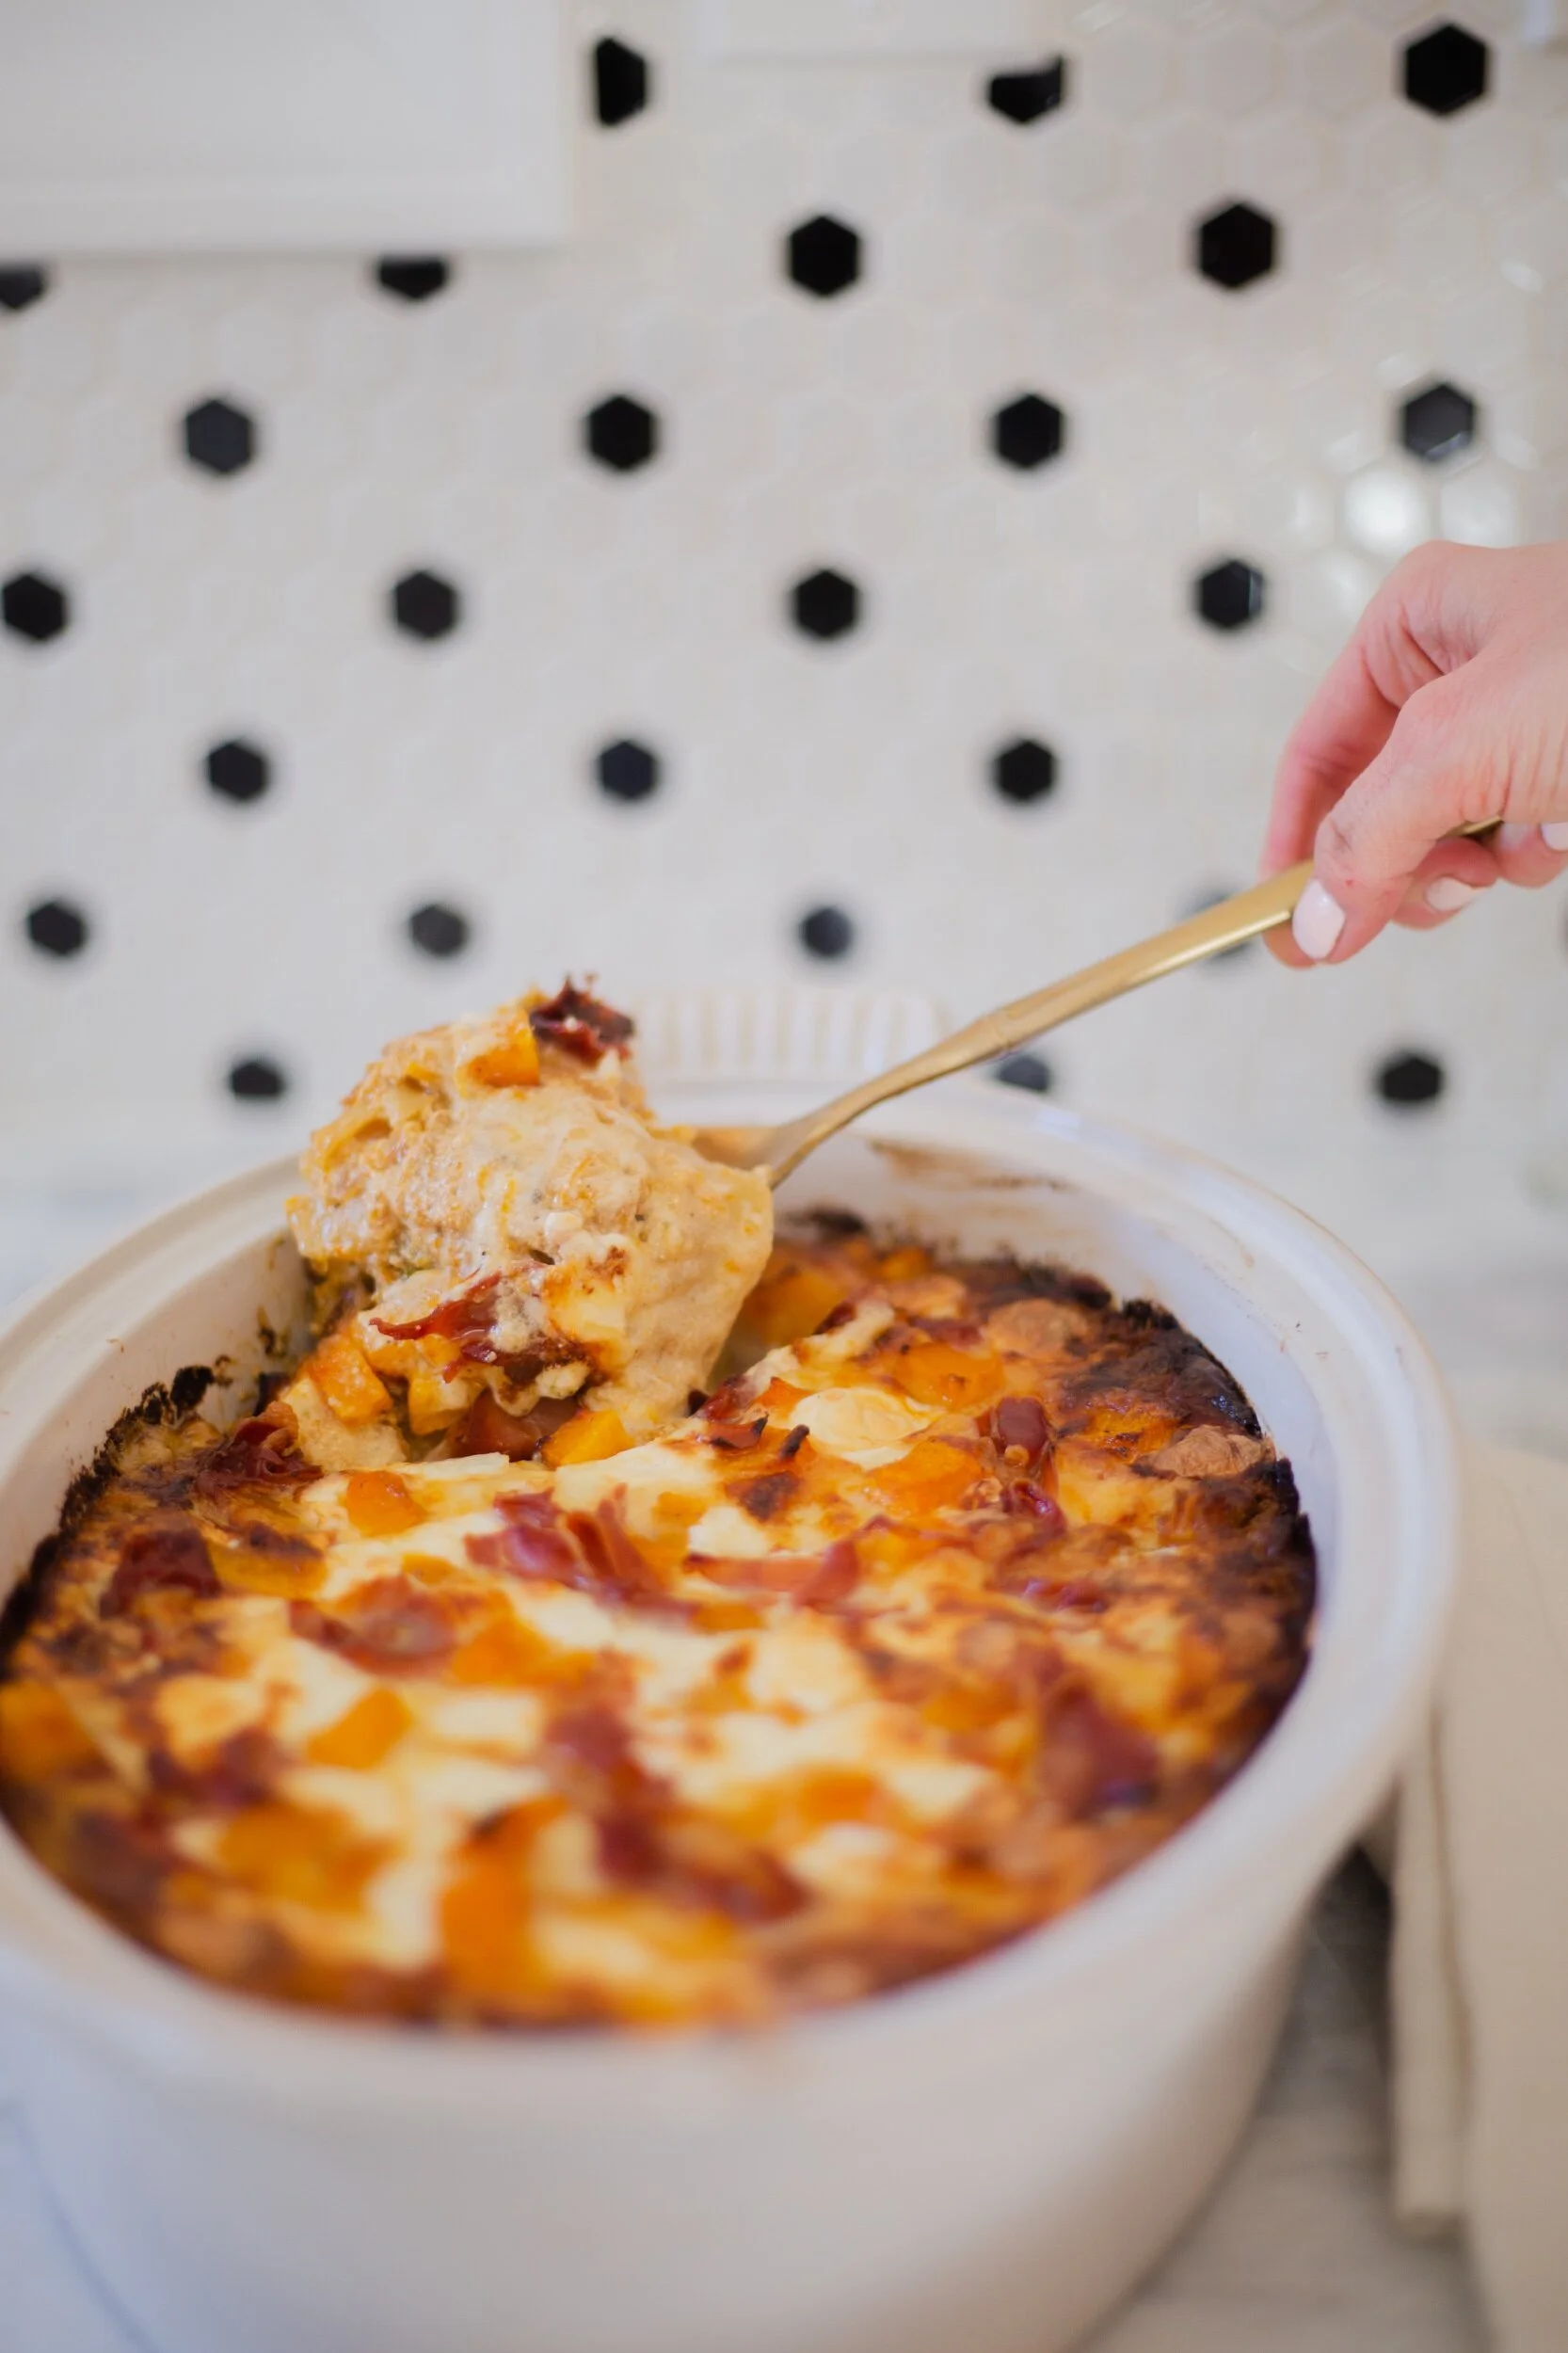
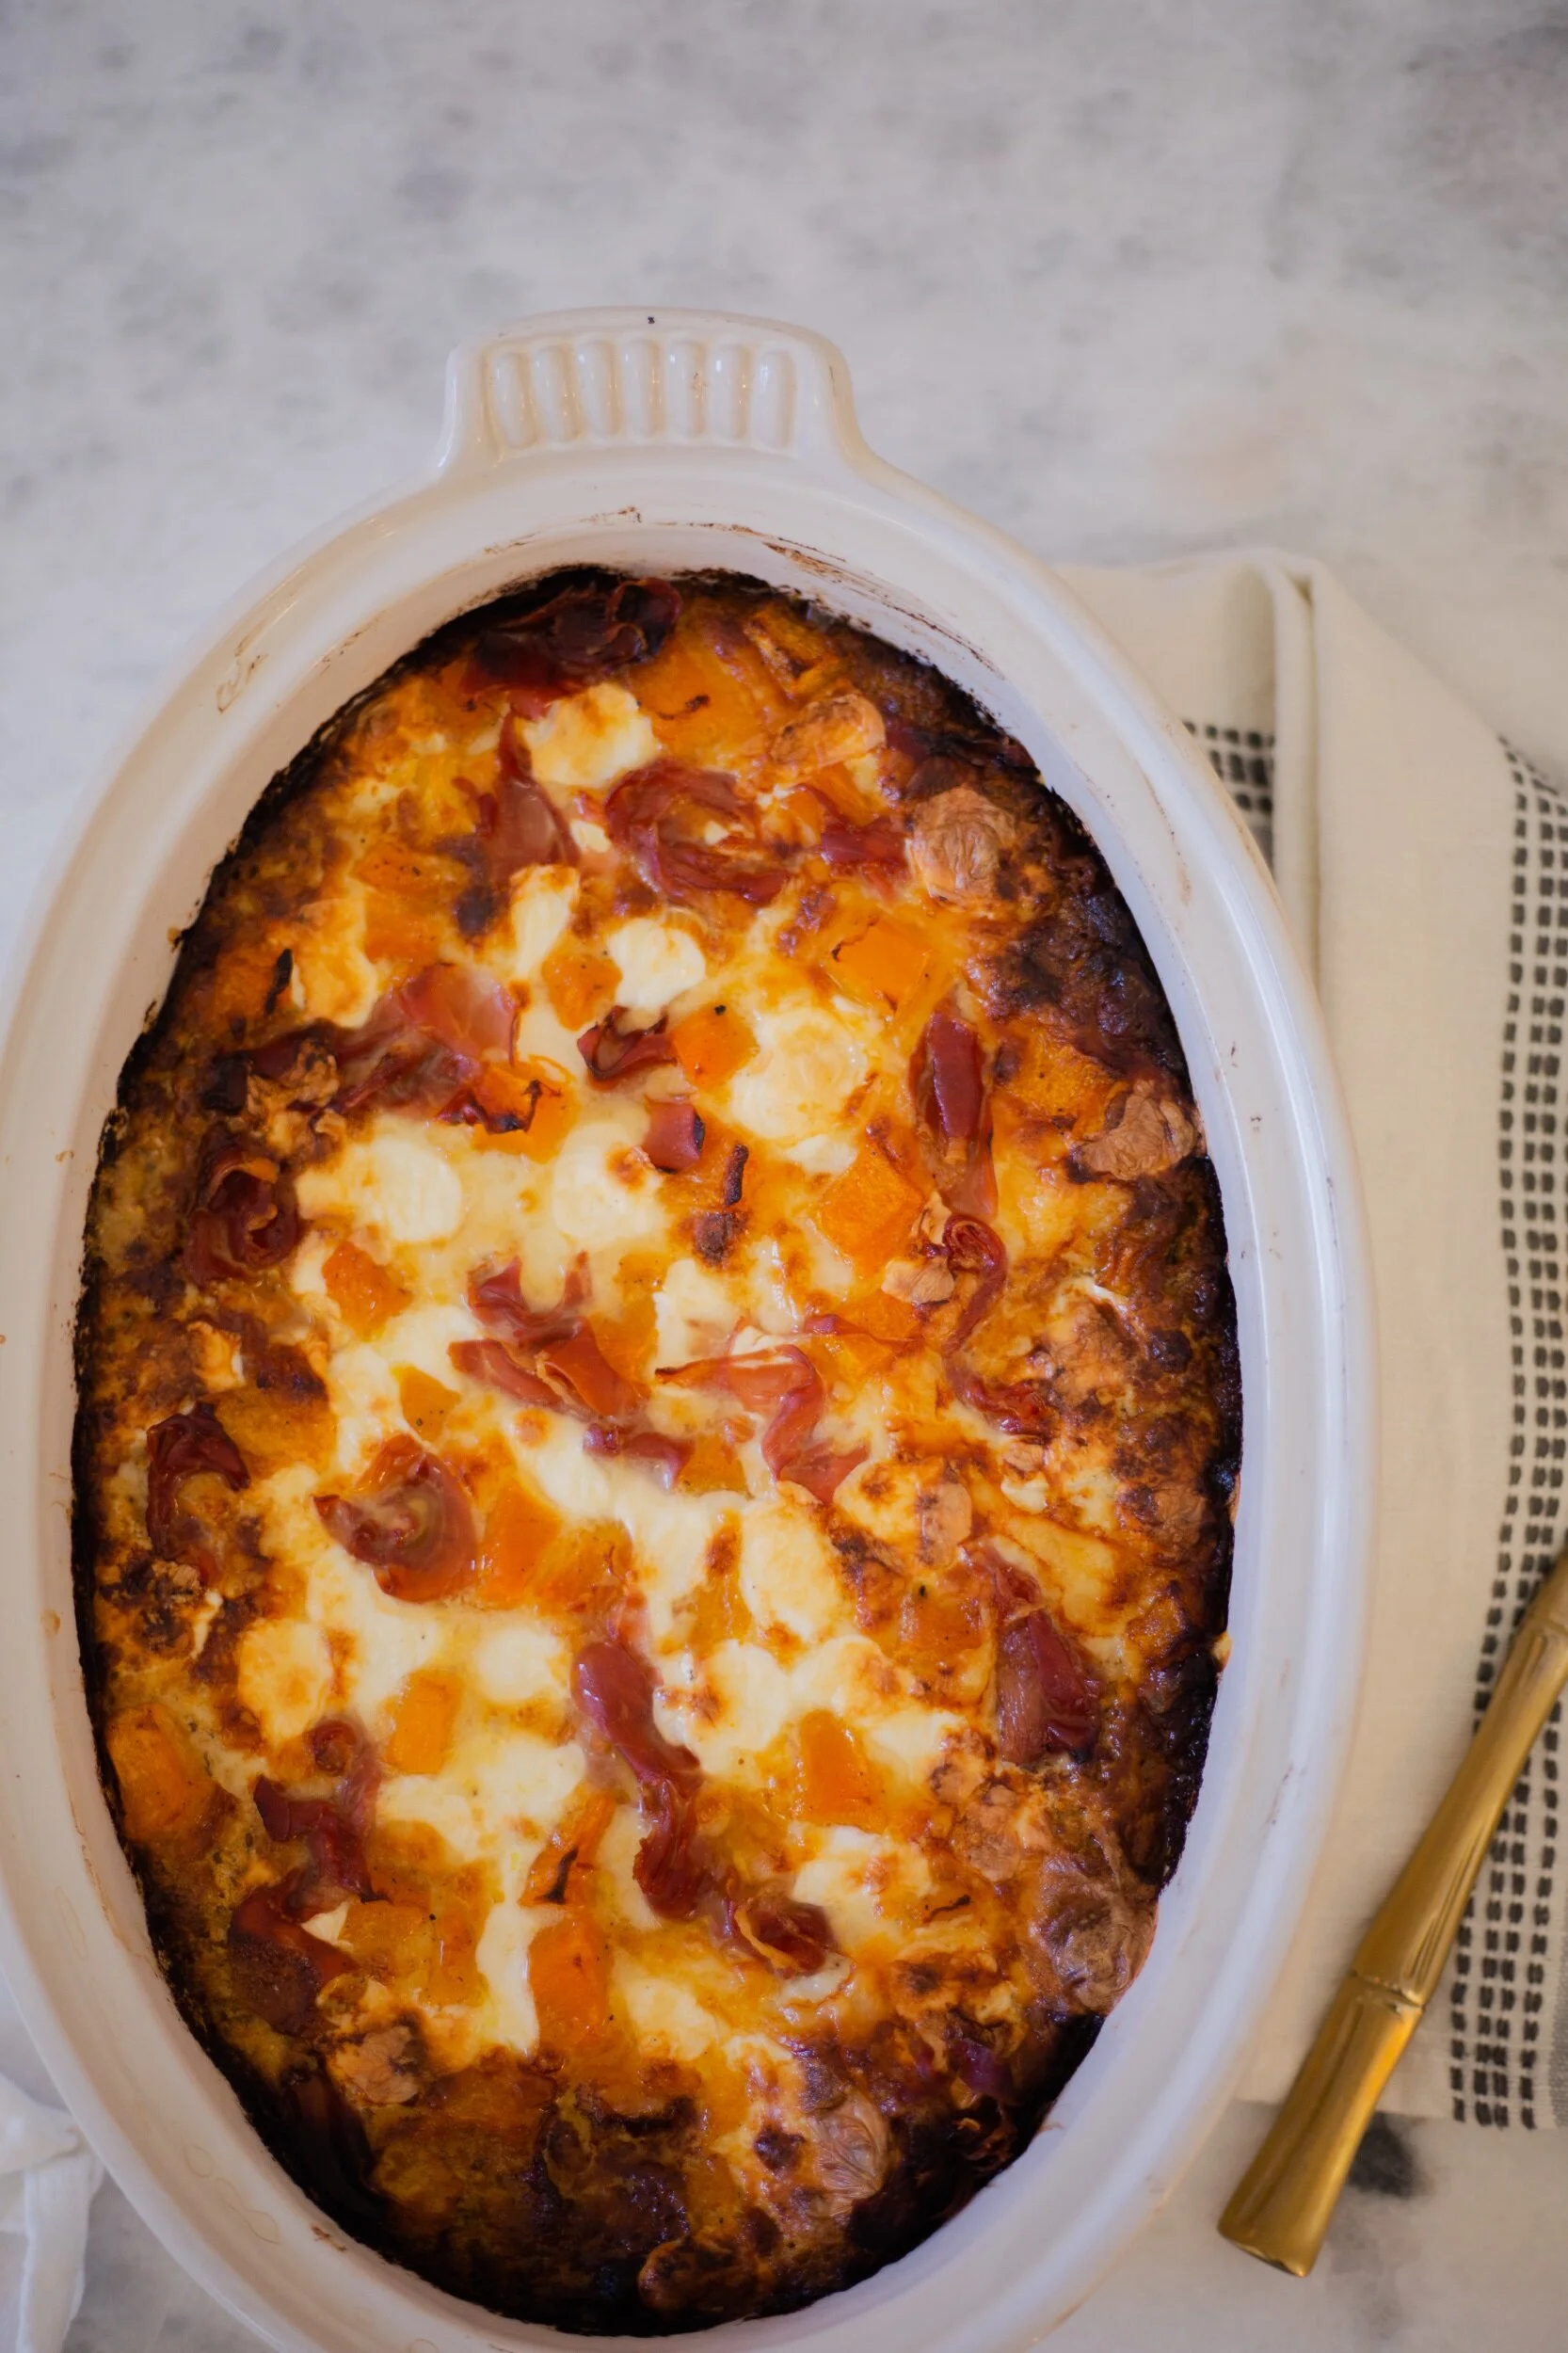
Ok, folks. I don’t know how else to say it: If this dish isn’t on your holiday table, you’re simply doing yourself a disservice. It’s been tested and approved by not only myself and my husband but also by clients and a Friendsgiving table of 10+ bloggers. Of all the dishes I made for Friendsgiving, this one won the favorite award. Every layer is cheesy, creamy deliciousness with a slight sweetness from the maple syrup caramelized onions and a tiny bit of crunchy meatiness from the crispy prosciutto. You can forgo the prosciutto to make it vegetarian. You don’t want to do Thanksgiving or any upcoming holiday without this dish on your table!

IMG_7248.jpeg

6 to 8 servings 

5 cups cubed butternut squash

4 tablespoons olive oil

Kosher salt and freshly cracked pepper 

1 tablespoon unsalted butter, plus more for greasing

2 large sweet onions - sliced thin 

2 tablespoons maple syrup 

2 tablespoons minced sage

1 (16 oz) container whole milk ricotta 

1 cup Parmesan 

1 (8 oz) container creme fraiche 

1 teaspoon anchovy paste (or sub salt but I highly recommend the anchovy paste - trust me)

1/4 teaspoon nutmeg 

1/2 pound no boil lasagna noddles 

4 ounces grated fontina cheese 

8 ounces fresh mozzarella pearls or whole mozzarella torn into pieces 

3 to 4 ounces prosciutto - torn into pieces 

Preheat your oven to 350 degrees. On a large baking sheet, toss together the butternut squash, 3 tablespoons of olive oil, and 1 1/2 teaspoons of kosher salt and 1/2 teaspoon of freshly cracked pepper. Bake for 25 to 30 minutes or until soft.

While the squash cooks, heat the other tablespoon of olive oil and butter in a large sauté pan over medium heat. Add the onions, a heavy dash of kosher salt and pepper, and the maple syrup. Cook until brown and caramelized. Add the sage and cook for one more minute. 

In a large mixing bowl, add all but 1/2 cup of the cooked butternut squash and roughly mash with a fork or potato masher. Add the caramelized onion, ricotta, and Parmesan. Stir together until combined. In a medium mixing bowl, whisk together the creme fraiche, anchovy paste, and nutmeg with 1/4 cup of cold water. Keep adding water until smooth and the consistency of white pasta sauce - it should be thin but not watery. 

Turn your oven temperature up to 400 degrees then build the lasagna. Start by greasing an 8 x 12 inch baking dish. Spoon a thin layer of white sauce evenly into the bottom. Top with the lasagna noddles, a layer of butternut squash mixture, and a thin layer of white sauce. Repeat 3 more times, ending with white sauce on the top. Evenly sprinkle the fontina, mozzarella, and reserved squash cubes over the top. Top with pieces of the prosciutto. Bake for 30 to 35 minutes or until golden and bubbly. 

In Dinner, Recipes, Pasta and Grains

Prep for Thanksgiving Like a Personal Chef

November 14, 2019 Andrea LeTard
Adjustments.jpeg

I’ve already shared with y’all that Thanksgiving really isn’t my thing and we (kind of) boycott it by going on a trip every year instead. The main reason for this is, when you’re a personal chef, every week feels like prepping for Thanksgiving. So I want to share with y’all my tips on how to prep for the big holiday the way I prep for big dinner parties, events, and my clients every week. Just because I don’t celebrate Thanksgiving doesn’t mean I don’t know how to host it - this is an every-week thing at my house!

Brainstorm good eats

Sit down one quiet morning or afternoon with a cup of coffee or tea and start looking into menu ideas. I do this at the beginning of every week to plan my client’s meals and any photo shoots, blog posts, and dinner parties I have coming up. This is the starting point and you may be dreading it, but if you love food (and who doesn’t) it will be so much fun! I look at it as one of my more relaxing tasks of the week, which is why I always sip something warm and cozy while I’m doing it. 

Use surefire family recipes and cookbooks 

Ok, y’all have heard me go on and on about this but I can’t stress it enough... ever. Recipes online are not always good recipes and won’t always turn out the way they look in pretty Pinterest pictures. Anyone can post recipes on Pinterest, Instagram, and all over the internet these days. Unless you have tested the recipe - no matter how pretty the picture is the blogger took - don’t use it for a big day like Thanksgiving unless it comes from a legit publication or cookbook. Now I’m not saying all publication recipes and cookbooks are perfect BUT (more than likely - Lord Jesus, at least I HOPE publications and cookbook authors test their recipes before publishing) most legit cookbook authors and publications have tested printed recipes multiple times. That’s not always the case with recipe bloggers - I’m not hating, I’m a blogger too. I’m just telling the truth. Family recipes are also perfect for the big day. Great-granny may not have written it down in any form that makes sense to you, but usually mama knows the hidden secrets and can help make that old family recipe perfect for the dinner table. 

Create your menu 

Decide what dishes you want to serve and jot them down in an app like Notes or Evernote. Sometimes for big events, I like to create the menu aesthetically on my phone through an app like Canva or Unfold. Seeing it look pretty always inspires and excites me to get the plans moving. 

Adjustments.jpeg

Make a list and check it twice 

Making your grocery list is one of the most important steps in planning any big party or dinner. And if you’re very through when doing so, you can knock everything out in one grocery trip. At this point, I take my menu, go through each recipe’s ingredient list, and write down what I need. A complete game-changer is doing this in the Lists app on your phone. Write each ingredient and how much needed on a separate line, then when you go to the grocery store, you can just check off as you go - right on the app! 

Adjustments.jpeg

Stay focused at the market 

Stick to the list! Stick to the list! Stick to the list! Yes, it’s very easy to run across something like apple cider and think, “Ah! I didn’t plan a cocktail and need one!” That’s ok, just don’t let too much of that interfere with your plan and what you walked in for. Give yourself time and don’t rush, but also set a goal when you walk in. Every time I make a grocery trip, I have a time limit in mind of how long I need to be there and what time I want to walk out. 

Organize your fridge and pantry 

I didn’t mention this before, but before you go to the store, you should clean your fridge out completely. It should be near empty and ready to be filled with Thanksgiving goodies. When unloading, try to keep ingredients together that go together in certain recipes. That way, you can pull everything out at once when prepping a dish and everything is ready to go. It will expedite the prep work for that recipe. 

IMG_6895.jpeg

Prep and store, prep and store, then prep and store some more 

Go through every recipe and decide if there’s anything that can prepped days before. Even if a dish can’t be completely made ahead, I guarantee there are PARTS to every dish that can. I promise, there’s more than you think. Here are some examples: marinades, dressings, chopping of veggies, sauces/gravy that can be re-heated, roasting of nuts or croutons, etc. Most sections of a recipe like these things can be done anywhere from 3 to 5 days ahead of time (the Sunday before is a perfect prep-day). Make sure you store and label all parts of a dish prepped ahead. Dressings can be stored in mason jars, veggies can be stored in large plastic containers, and sauces can be stored in deli containers. Dry food like nuts and croutons (that don’t have to be refrigerated) can be stored right on your countertop, giving you extra fridge space. 

IMG_6896.jpeg

Make as much ahead as possible 

While dishes like salads can’t be completely made ahead, there are plenty of traditional style Thanksgiving dishes that can. Casseroles, gratins, lasagnas, cranberry sauce, pies, etc can all be completely made and either a) baked ahead, refrigerated, and re-heated or b) completely prepped ahead, refrigerated, and baked the day-of. 

Nenne Pie.jpeg

Store-buy yummy snacks 

Everything doesn’t have to be made from scratch the day of Thanksgiving. I always, always like to have small bites out for early arrivers or to simply have a cocktail-hour before dinner. It’s festive, everyone will get a drink and a few bites in them while you’re pulling the final dishes out of the oven, and then it will be time for dinner! 

Adjustments.jpeg

Set the table as early as possible 

Even weeks before, it’s ok to go ahead and set the table. That’s one last thing you have to worry about, and if you go ahead and do it now, you won’t be scrambling to get it done last minute. The beauty of it may even inspire you to host a fall dinner party or Friendsgiving before - just don’t forget to set the table back!

Adjustments.jpeg
In Holiday

Pumpkin Mascarpone Grits

November 13, 2019 Andrea LeTard
Adjustments.jpeg

I’m a bit of a stickler when it comes to grits. So much so, the grits in my cookbook are called “Don’t Be Ugly” Grits. What does that mean, you may ask. Years ago, my girlfriends would say “don’t be ugly” if I ordered grits, concerned that I would send them back if they weren’t creamy or salted properly. I have a hard time ordering grits in restaurants because unfortunately - more often than not - they’re not good. Two things grits should always be: creamy and salted properly, and restaurants get it wrong all too often. 

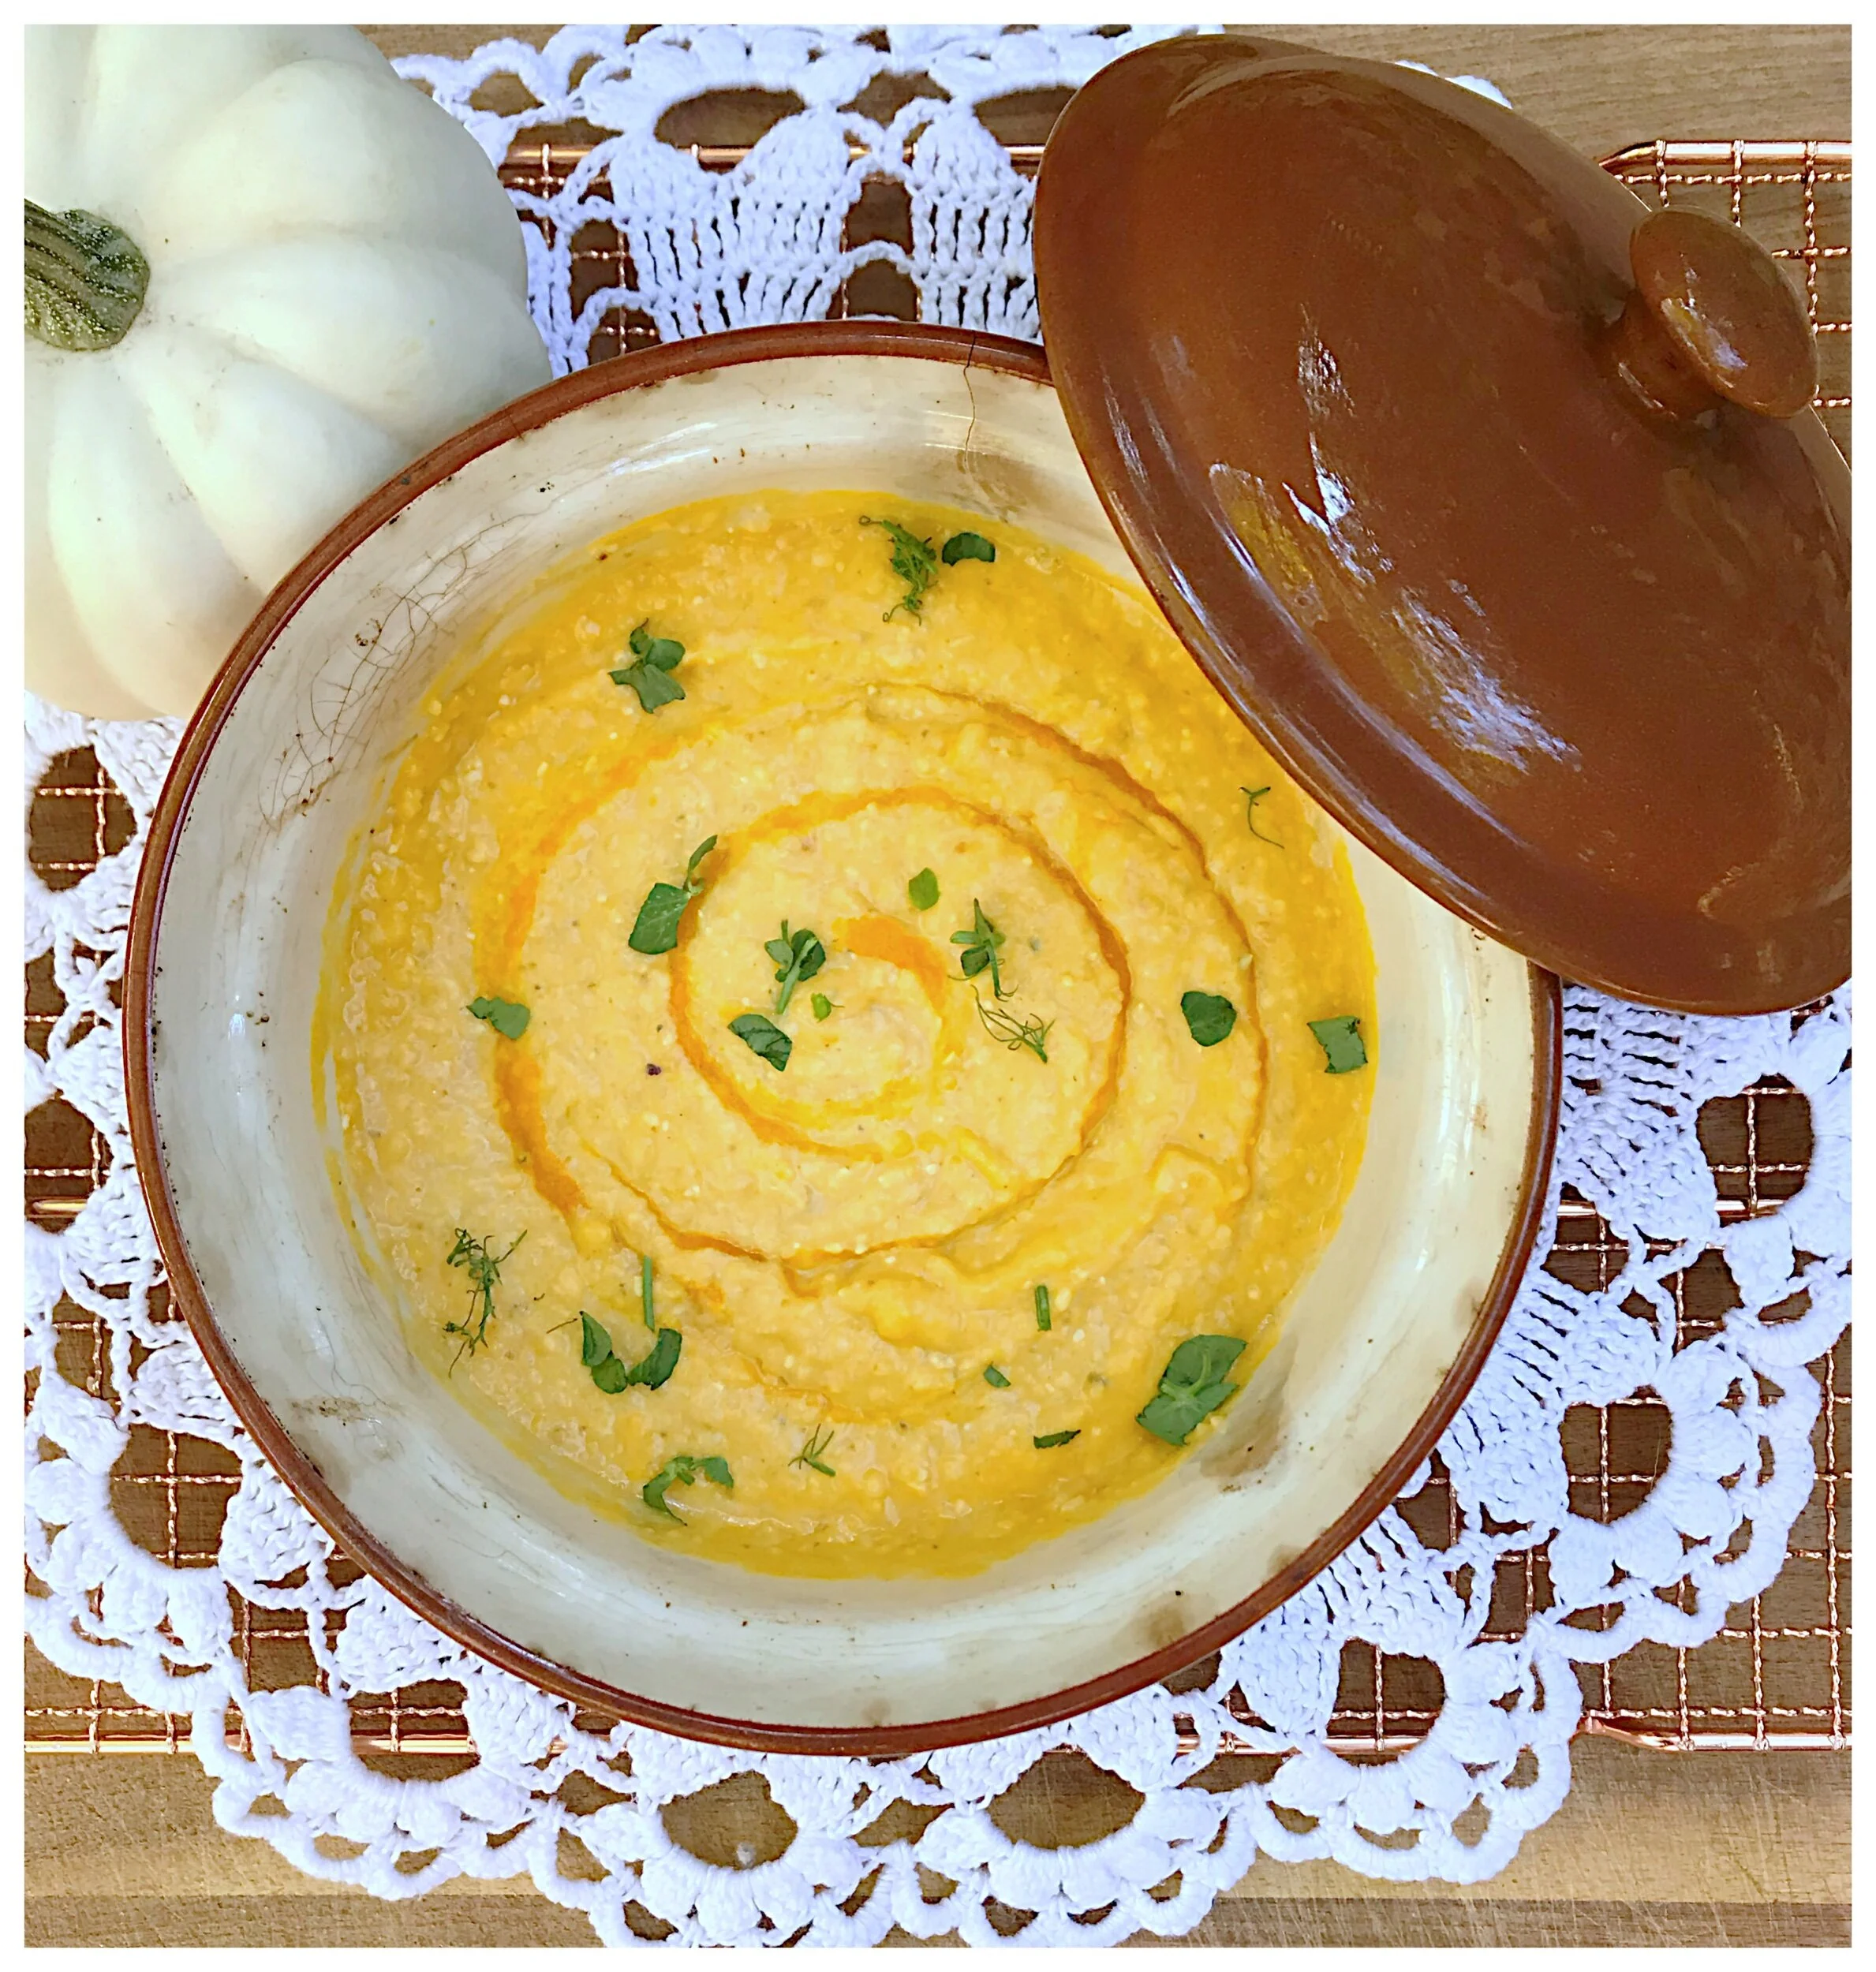
Over the years, I’ve tested grits a tremendous number of times and perfected the recipe just in time to put in my cookbook. Sometimes I switch up the cheese or add herbs or other ingredients, but the base recipe always stays the same. This particular recipe has a lovely fall twist - creamy pumpkin and subtle toasty sweetness from maple syrup. It’s the perfect side dish for Thanksgiving or throughout the entire crisp season! 

2 cups whole milk, plus more for thinning 

2 cups chicken stock 

1 cup stone-ground grits 

1 1/2 teaspoons kosher salt, plus more to taste

1 teaspoon freshly cracked pepper 

8 ounces mascarpone cheese 

3/4 cup pumpkin purée

1 tablespoon maple syrup

2 tablespoons butter 

In a large saucepan, heat the milk and chicken stock over medium heat. When the liquid begins slightly bubbling, whisk in the grits slowly then season with the salt and pepper. Let the grits boil slightly then lower the heat. Cover and let simmer for about 15 to 20 minutes, uncovering and whisking occasionally. If they get too dry, thin them out with more milk. Stir in the mascarpone cheese, pumpkin purée, maple syrup, and butter until melted. Taste and add more salt if needed. The end product should be an extra-creamy consistency. 

*Make ahead tip: These can be made several days before, refrigerated, and reheated. Store them in the fridge, covered, in the pan you make them in. Reheat slowly. Once they’re warm, check the consistency. Add milk if they need thinning out - remember they should be served extra creamy. 

*Crock Pot tip: Once they’ve been reheated over the stove, you can keep them warm in a Crock Pot. Just transfer and set heat to low. 

In Recipes, Sides

55 Halloween Songs That Actually Rock

October 25, 2019 Andrea LeTard
Adjustments.jpeg

Let’s be real… some Halloween songs are silly and don’t get anyone in the mood to party. For YEARS I have worked on the perfect Halloween playlist for our annual Halloween party, and I think I finally got it ready to roll. I pulled my 55 favorites and now you can download my playlist on Spotify! Y’all know I’m a rock n roll fan so these songs are clearly rock heavy, but they’re all a lot of fun and completely Halloween/spooky themed.

So where did I get the idea for these songs? Some of them, you will see on most Halloween playlists, but a lot of them are unique to my playlist. I pulled many from classic horror movies (ex: Into the Fire by Dokken - Nightmare on Elm Street 3, Youth of America by Birdbrain - Scream soundtrack). Some came from the Stranger Things new soundtrack because they did a killer job of picking weird 1980s songs for the latest season (ex: Moving in Stereo by The Cars). And others are just so 1980’s awesome, they should be in an old horror movie or I can just picture them being played at a wild 80’s Halloween bash (for example: Metro by Berlin, Rock Lobster by B52s).

Now, let’s get to rockin’!

In Holiday

A Halloween Cheese and Charcuterie Gathering

October 16, 2019 Andrea LeTard
public.jpeg

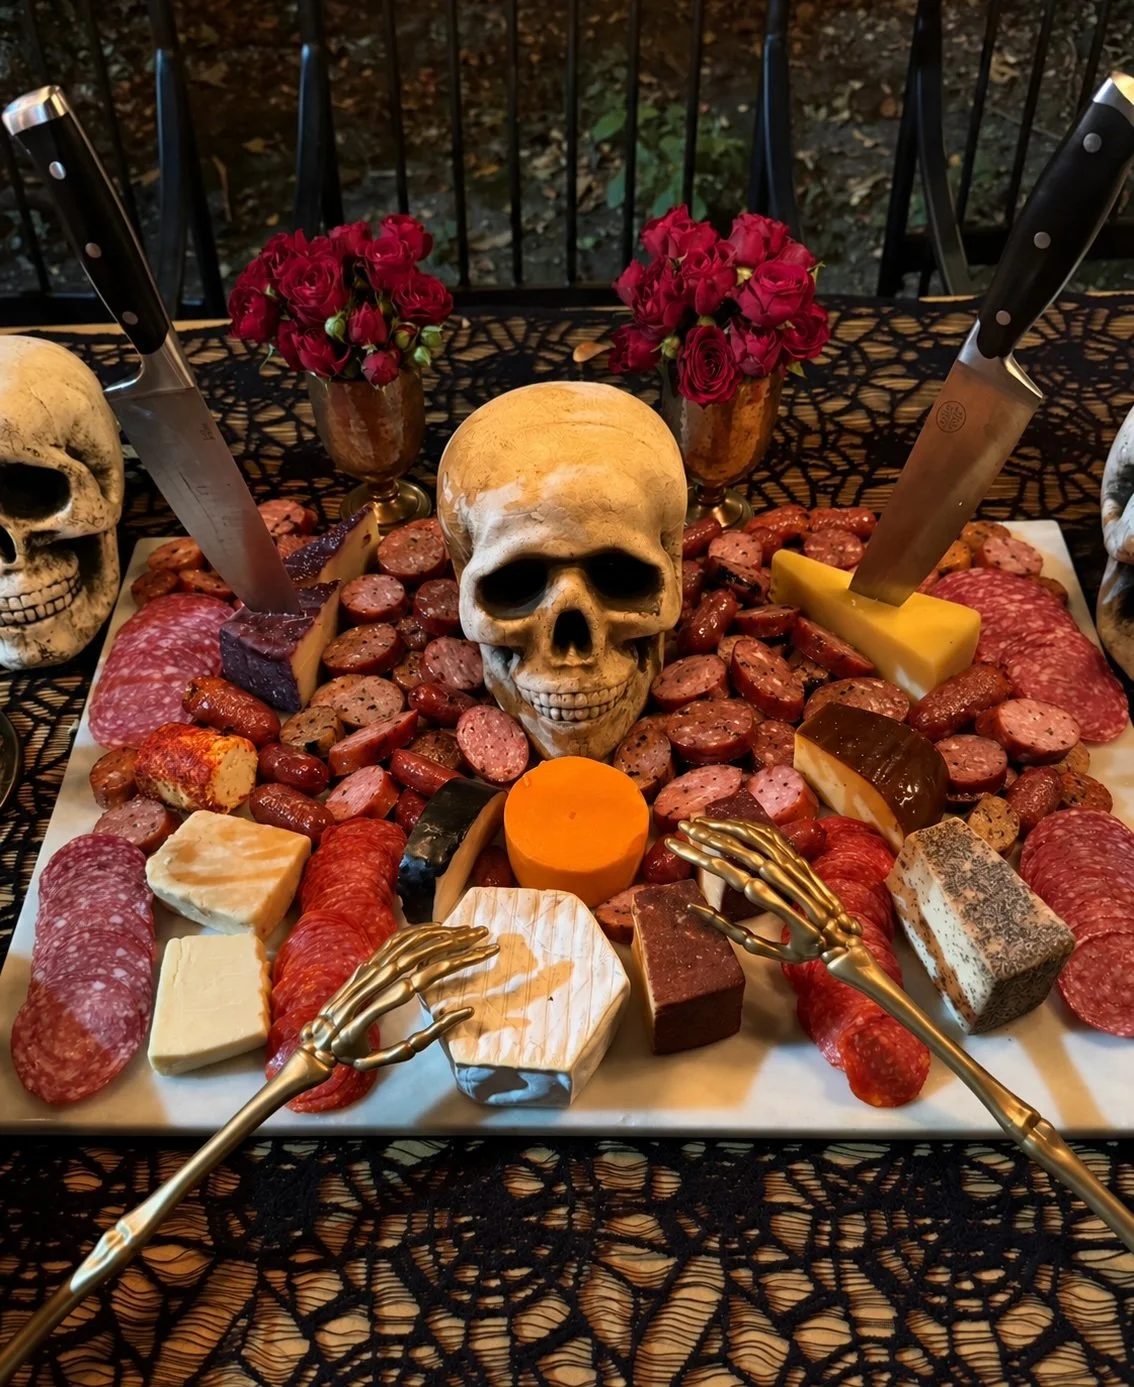
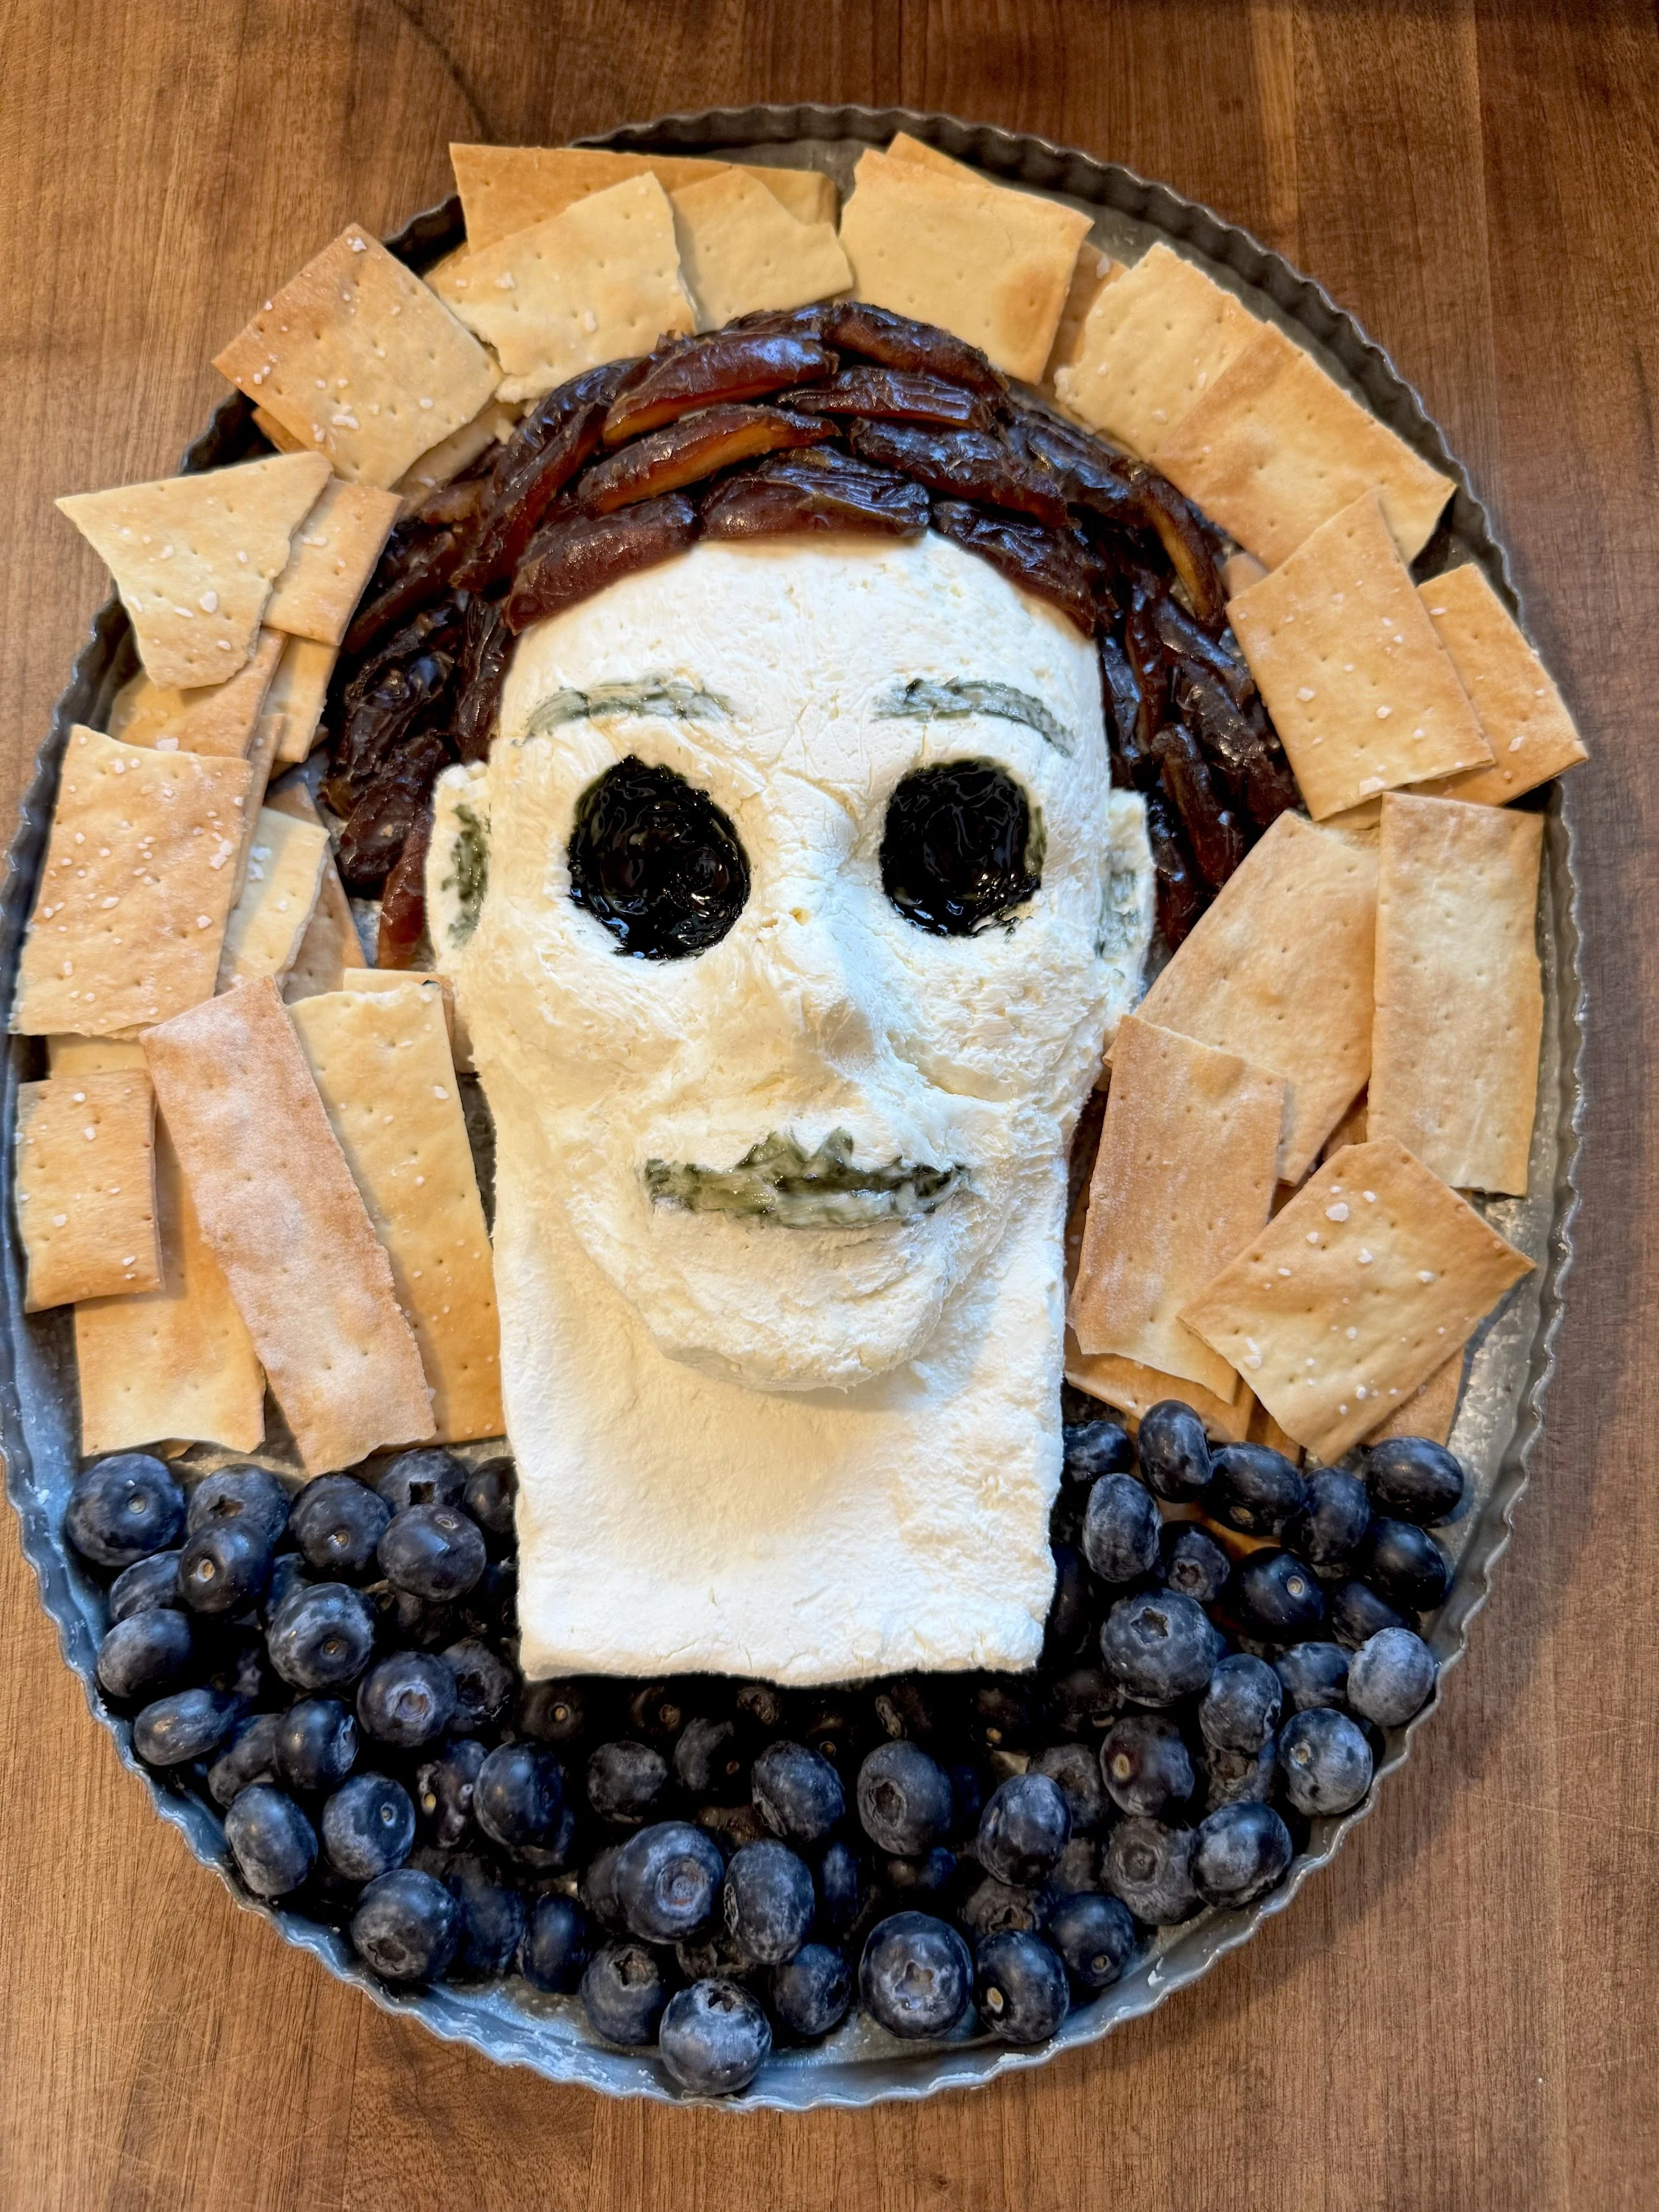
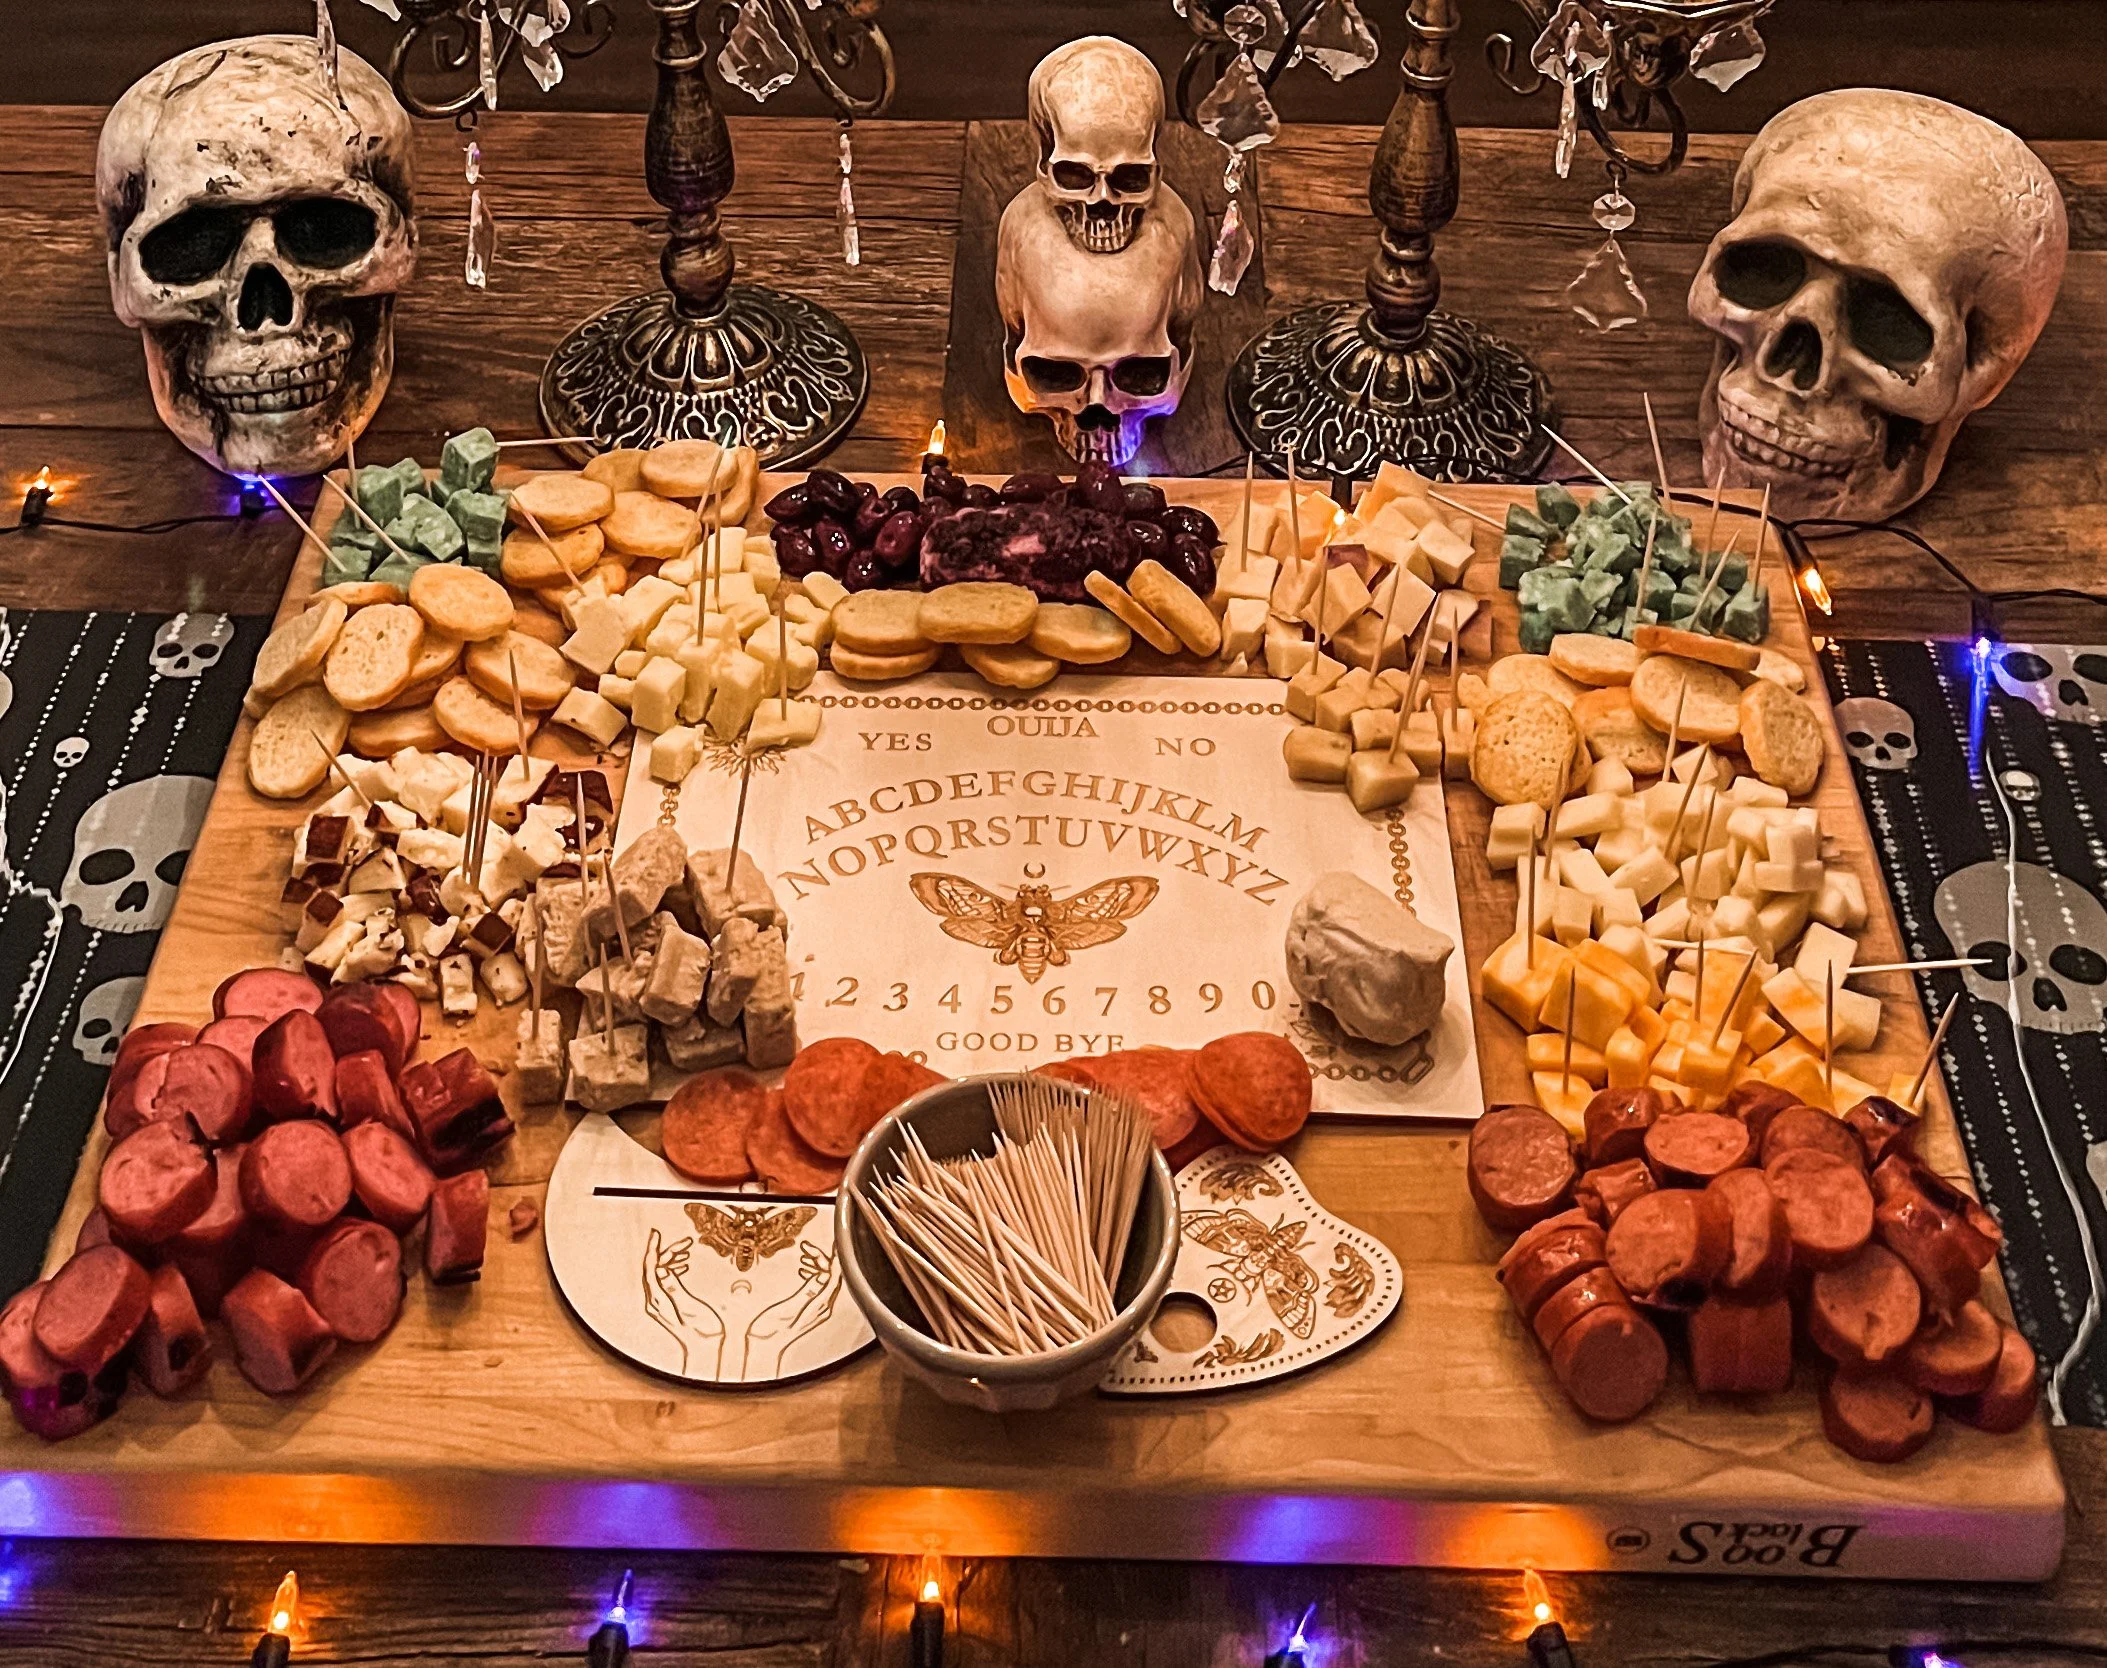
One of the simplest yet most impressive ways to entertain with food is making a good-quality cheese or charcuterie board. In my opinion, they can be substantial enough to count as dinner and served with seasonal wine or beer pairings – they’re the perfect spread for any gathering. If you’re looking for the cutest of the cute Halloween themed boards, you’ve come to the right place! I put my witchin’ Halloween ways to good use and created 2 cheese and 2 charcuterie boards – totally Halloween themed. You can find the complete ingredient list and how-to for each here:


Witchin’ Fruit and Cheese Board

public.jpeg


Spooky Snack Table

Darling Pumpkin Cheese Board

public.jpeg

Monster Meat Head

public.jpeg


Spooky Sausage Board

Michael Myers Cheese Ball

Ouija Snack Board

In Holiday

An Elegant Yet Spooky Tablescape

October 15, 2019 Andrea LeTard
public.jpeg

The struggle I’ve had over the years with Halloween décor is trying to keep things sophisticated and elegant while also throwing in a bit of spooky edge. I love spooky Halloween décor and will always choose it over cutesy hay bells, scarecrows, and pumpkins – this goes back to many years of the ghouls, goblins, and monsters my dad decorated with when I was a kid. It’s nostalgic and what makes me love Halloween in the first place. But at the same time, I want to keep my home classic and stylish too without plastering tacky Halloween décor everywhere.

public.jpeg

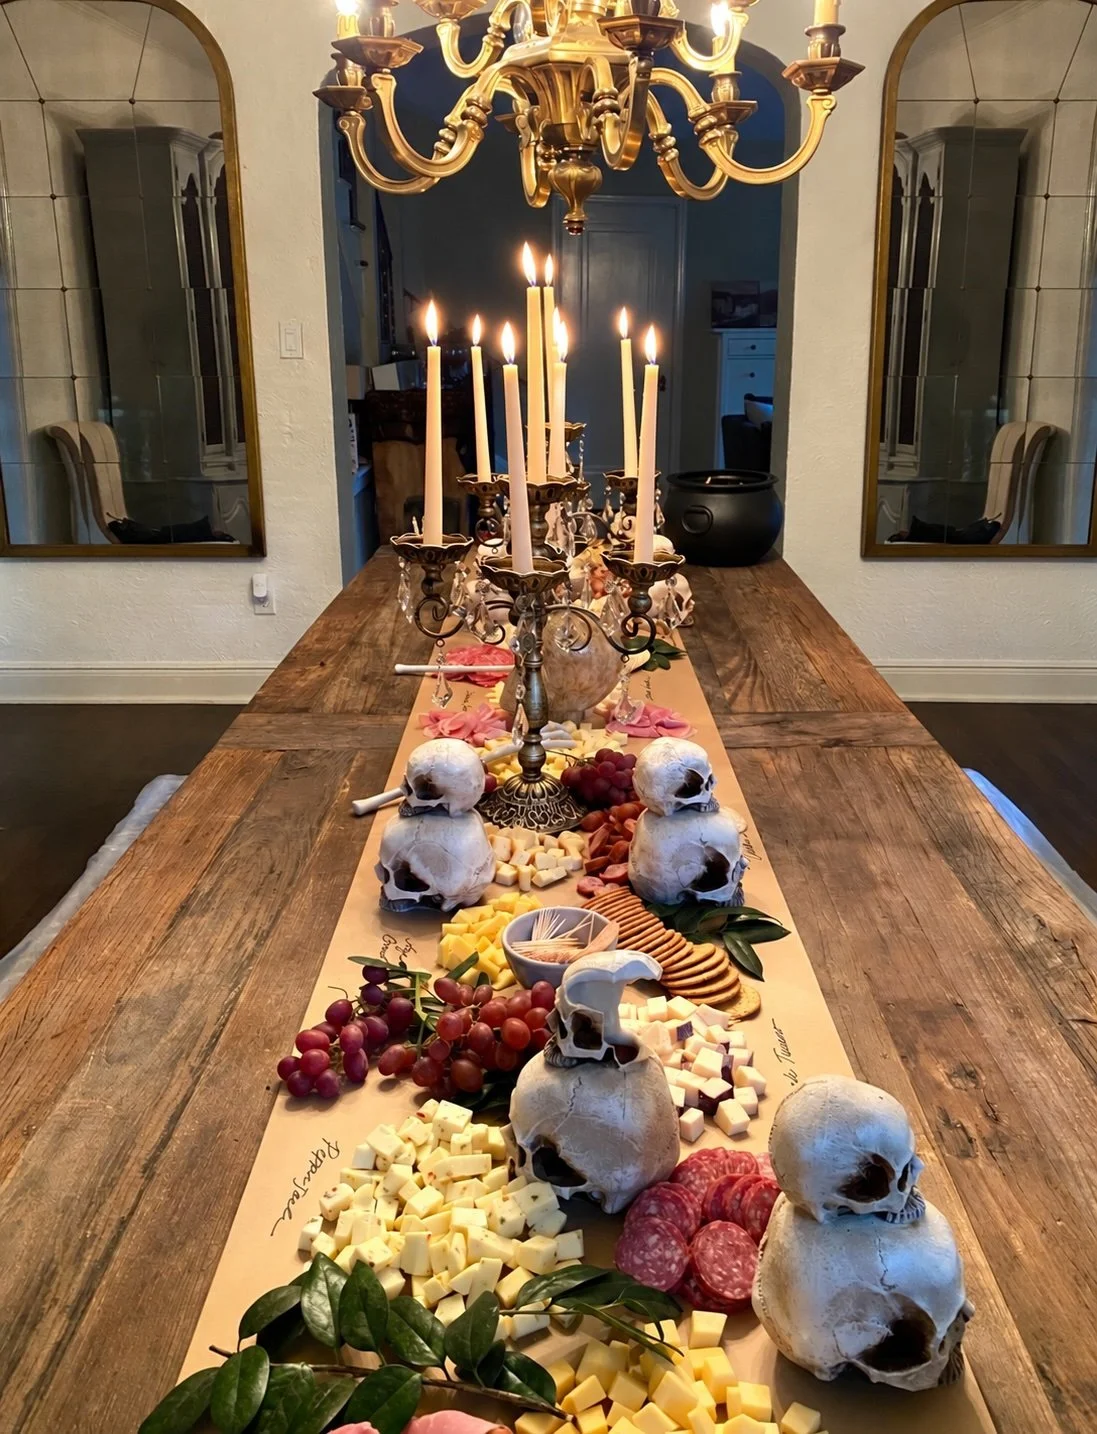
Last year, I decided I wanted to make my dining room the perfect mix of spooky and elegant. This Halloween tablescape guide will hopefully inspire your own dining room and carry over to all your future Halloween décor. 

public.jpeg

Theme 

No matter what I’m decorating, I like to keep a consistent theme and color scheme – especially with a dining area. While there’s certainly a way to mix skulls and pumpkins or ghosts and black cats, I decided to pick just one. To me, skeletons are the perfect mix of cute and spooky – and there’s a way to make them elegant too. They’ve become my Halloween décor of choice, so it only made sense to make them the focus of my dining room. They’re a neutral color so they’re easy to decorate around and they keep things nice and simple – the way I like it. 

public.jpeg

Color Palate 

 Neutrals are my jam in all areas of life from what I wear to my home décor to - you guessed it - my Halloween décor. Skulls/skeletons being ivory make them the most obvious choice to decorate my home with when October rolls around. And because black is spooky and classy, I decided to throw it in the mix as well. The antique gold adds a tasteful little pop, giving the basic black and white color palate something extra special. 

public.jpeg

Place Settings 

A black lace tablecloth works beautifully for this theme. If you can’t find one, go to the fabric section of Hobby Lobby and get them to cut you a piece that will fit your table. I added a gold charger and black plate to each setting topped with a double-headed ivory skull that could also double as a place card holder. I love the rustic look of these skulls I found at Michael’s as they tie in so well with the antique gold centerpieces. 

public.jpeg

Centerpiece 

Normally, I would go with flowers for a table centerpiece but I wanted something a little more memorable – and of course, a little more Halloween. These gold chandelier candleholders I found at Michael’s are not only beautiful but the perfect mix of the spooky-elegant theme. Black candles keep the color palate going and give the table an extra old-timey Halloween look.

public.jpeg

Food 

The most important part of course! For a dinner party, I always like to do three to four courses. They don’t have to be super fancy, but well-presented and something that goes along with the theme is always nice. For a Halloween dinner party, I like to stay on theme so here are some ideas. For a first course try one of my cheese boards or fall soups: Darling Pumpkin Cheese Board, Witching Cheese Board, Spiderwebbed French Onion Soup, Pumpkin Beer Soup with Bacon and Dates. For a second course, your favorite pasta recipe using black spaghetti (can be found at specialty food stores or made with squid ink) is always a hit. My Hocus Pocus Pasta has always been a favorite as well. Or maybe even serve an extra rare steak or pot pie with the crust cut as a pumpkin face! For dessert I love these two simple ones Pumpkin Dumplings - served warm with ice cream or my Everything Halloween Candy Milkshake.

public.jpeg

Setting 

The setting around you is just as important as the tablescape. I amp mine up “Halloween style” with smells and lighting to music and decor. Lots of fall candles lit, plug ins plugged, and light sprays throughout the house are a must. Dim lights or overhead lights off with lamps and cozy candles lit. Classic music or a Halloween soundtrack lightly played in the background. And of course, more decor throughout the house. Little details like this put a Halloween tablescape of any kind over the top!

In Holiday

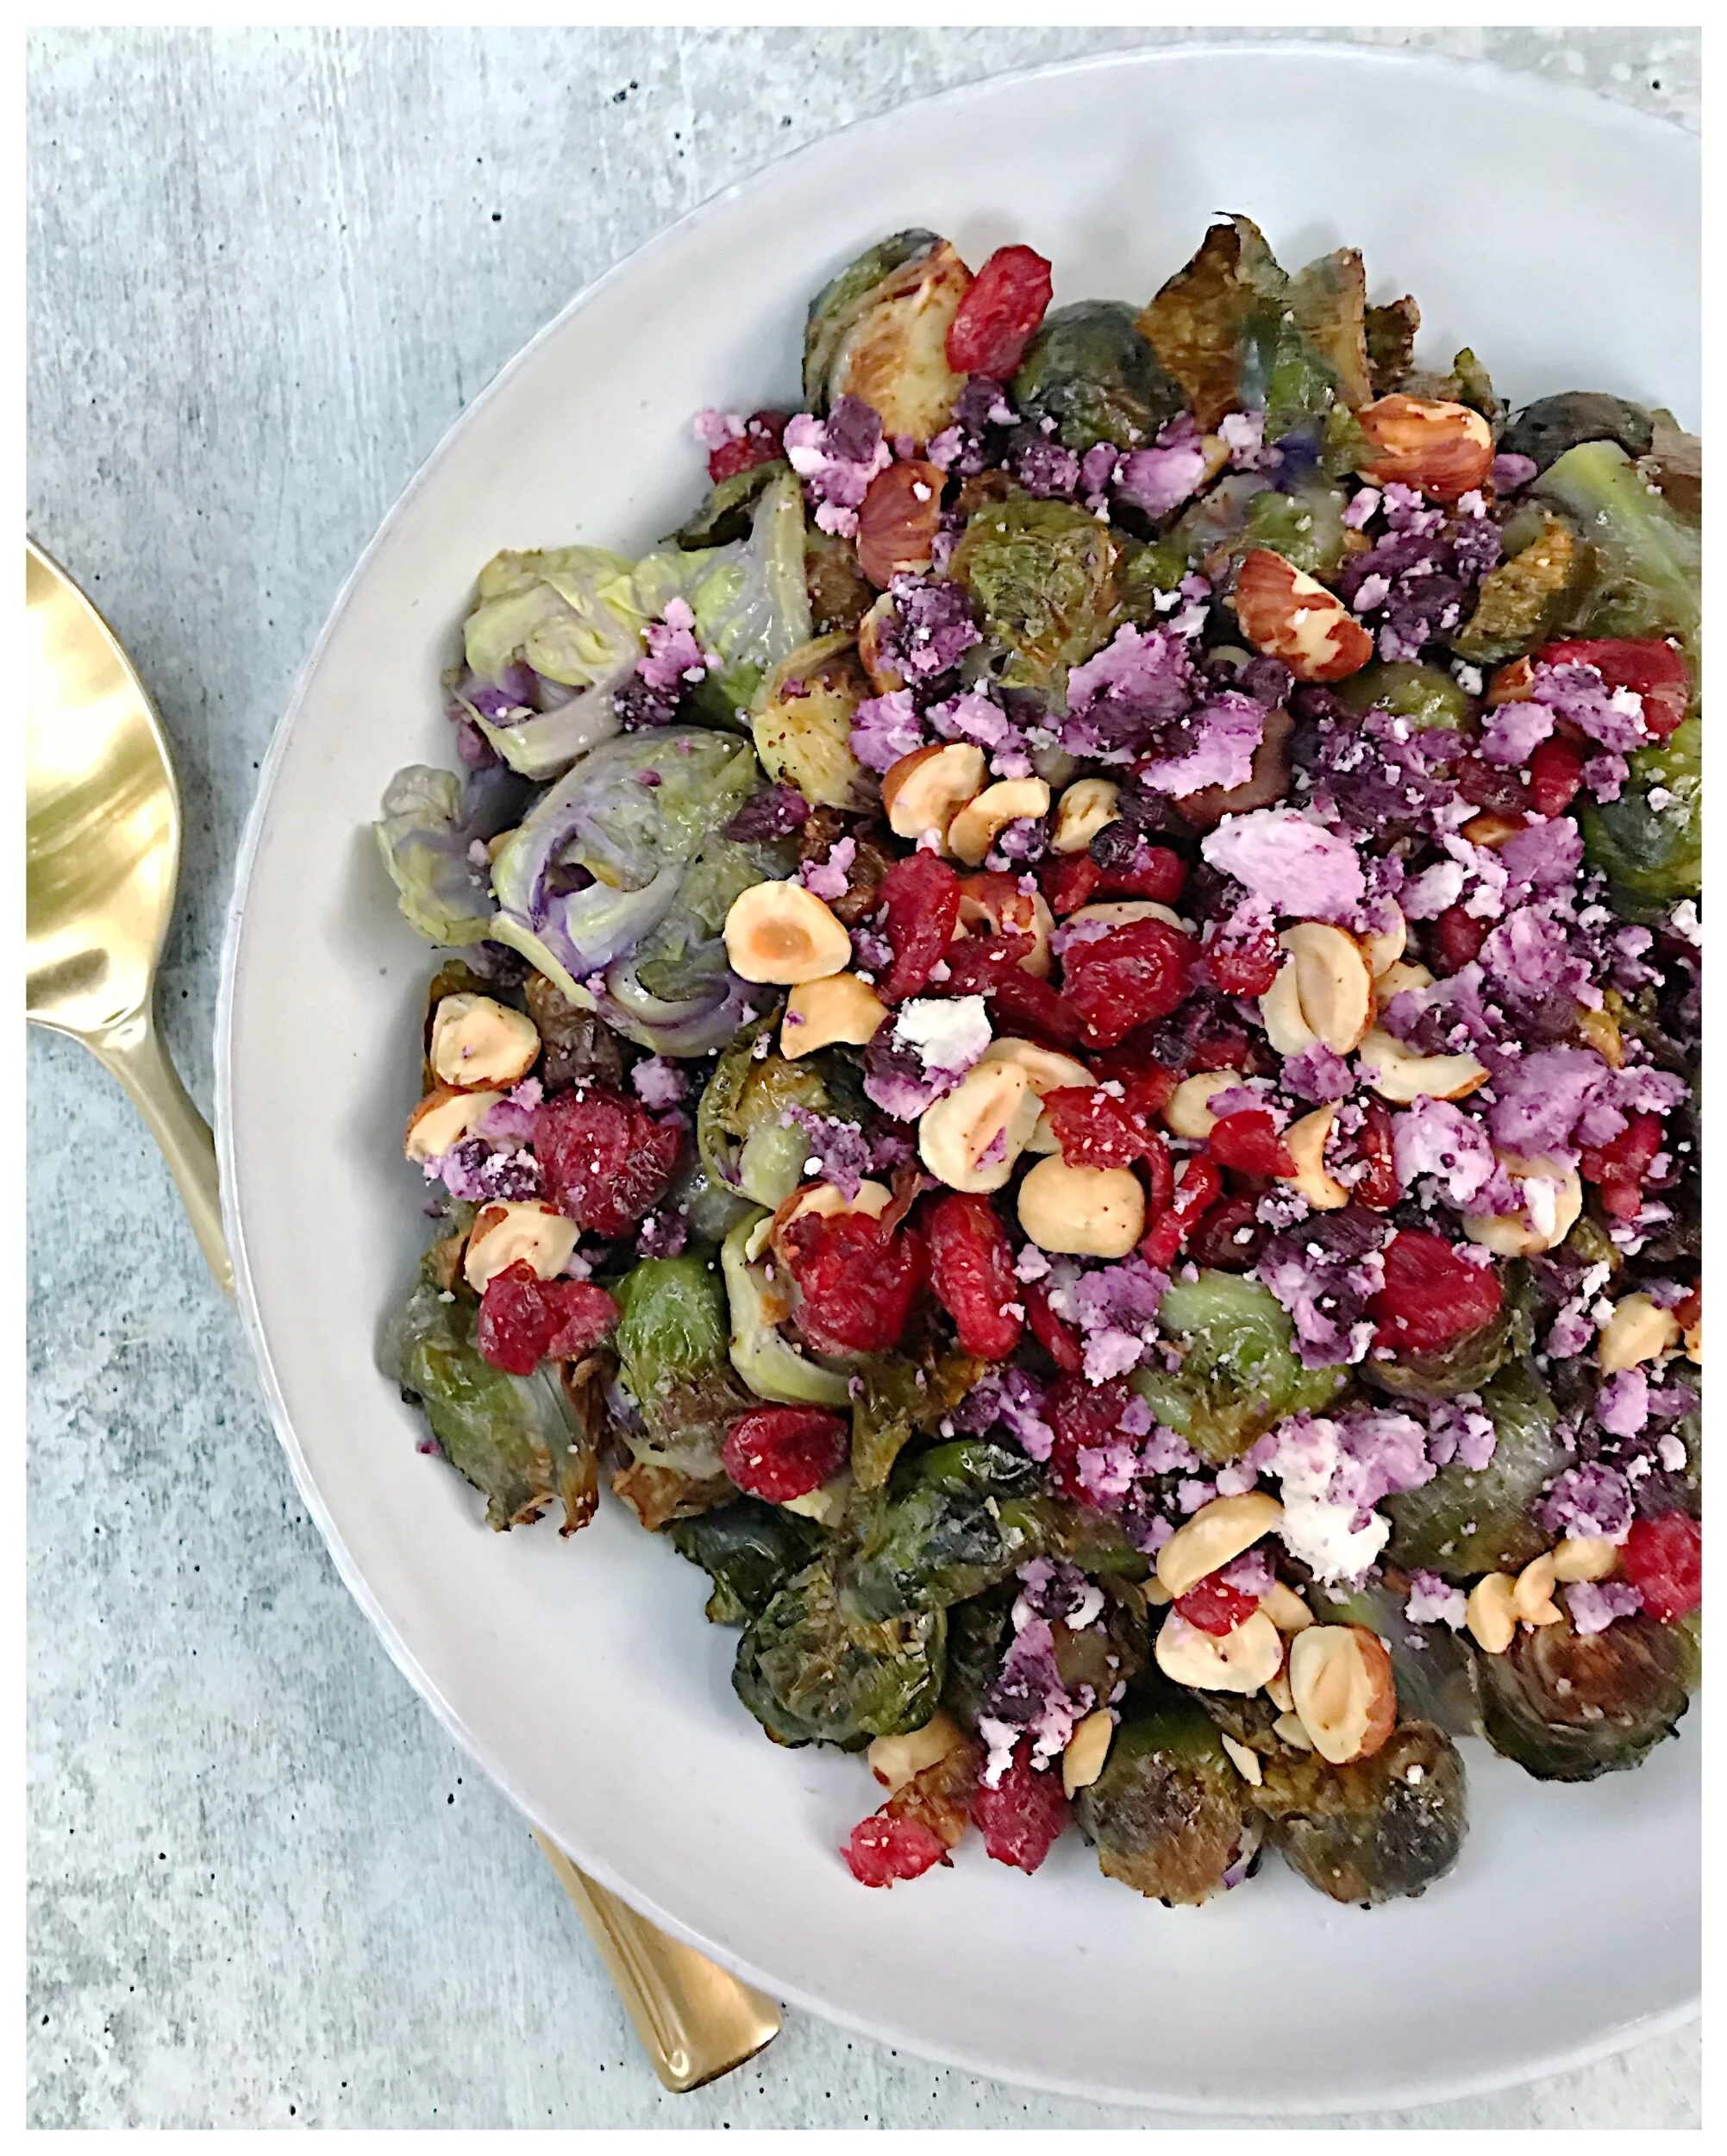
Crispy Brussels Sprouts with Berry goat cheese & toasted hazelnuts

October 14, 2019 Andrea LeTard
public.jpeg

I’ll take a Brussels sprouts dish any way it comes - so long as they’re roasted and crispy. Roasting Brussels is the quickest, easiest, and most delicious way way you’ll ever eat them. It was also the turning point way of preparing them that took this veggie from one we all used to hate as kids to the trendy yumminess we know them as today. Once roasted, there are loads of toppings that work wonders on this dish from crispy bacon to dried fruit and beyond. This one is a “loaded autumn” version and has slid into the number one spot of my favorite ways to make these lovely little guys. This is the vegetarian version, but you’re more than welcome to add bacon to take them way over the top!

1 1/2 pounds (purple or green) Brussels sprouts - ends removed and halved

2 tablespoons olive oil

1 1/2 teaspoons kosher salt

1/2 teaspoon freshly cracked pepper

4 ounces blueberry or cranberry goat cheese

1/2 cup toasted hazelnuts- chopped

1/4 cup dried cranberries

Preheat your oven to 400 degrees. Line a large sheet pan with foil. On the baking sheet, toss together the Brussels, olive oil, kosher salt, and pepper. Spread evenly, making sure not to overcrowd the veggies - overcrowded veggies will steam rather than roast. Roast for 20 to 30 minutes or until tender and crispy. If you want the tops extra crispy, turn the broiler on at the end for 2 to 3 minutes. Transfer to a serving bowl and crumble the goat cheese on top then add the hazelnuts and cranberries to finish.

In Recipes, Sides

Spiderwebbed French Onion Soup

October 11, 2019 Andrea LeTard
public.jpeg

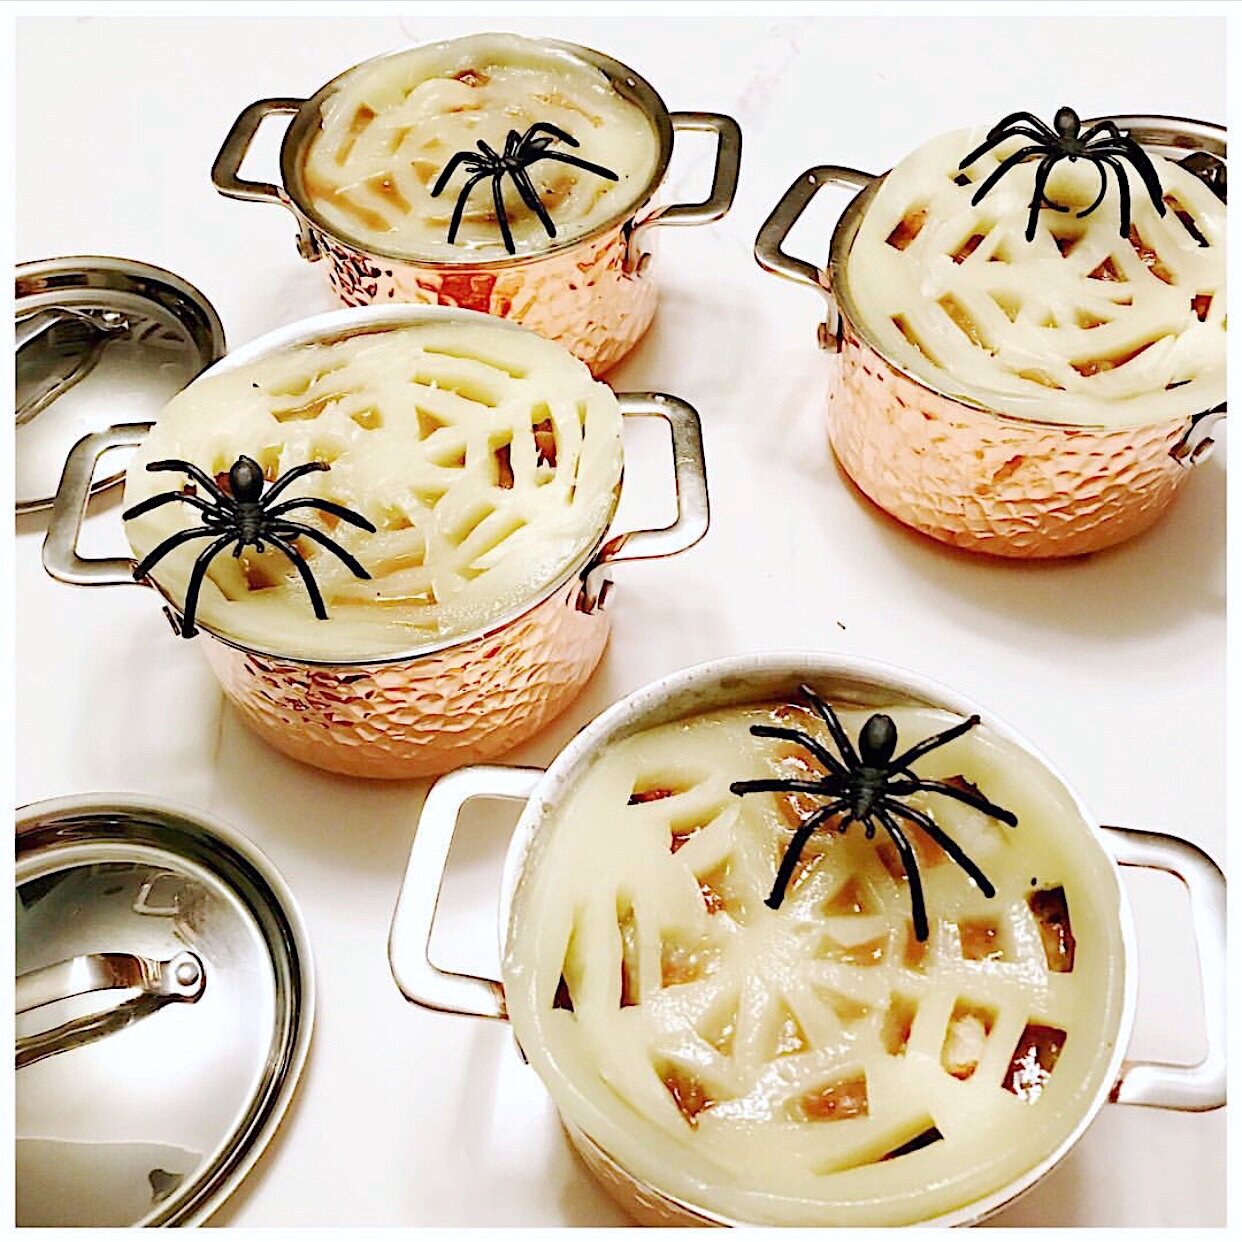
The most adorable yet elegant Halloween soup you’ll ever see or serve in your life! These cuties are show stoppers for any dinner party. The soup, croutons, and cheese webs can all be prepped separately a few days ahead to save time. Just heat up, ladle in bowls, top with croutons and cheese, and your first course is done! 

4 to 6 servings


4 to 6 slices provolone cheese 

6 tablespoons rich, good-quality butter (I like Kerrygold)

3 large yellow onions - sliced thin

Kosher salt and freshly cracked pepper

2 small or 1 large bay leaf 

1 teaspoon finely minced fresh sage 

1 tablespoon balsamic reduction 

1/2 cup dry sherry

4 cups beef bone broth or rich beef stock 

1/2 baguette (I like sourdough) - cut into cubes 

1 tablespoon olive oil

Parmesan cheese 

Make the spiderwebs. Using a spiderweb stencil or picture from Pinterest and a pairing knife, lightly mark each slice of provolone to look like a spiderweb. Start in the middle, then go outward in several rows cutting triangles to make the webs. They do not have to be perfect, the more rustic, the better. * FYI: Don’t let this intimidate you. It may take a little bit of time (took me about 3 to 5 minutes for each). I cannot draw a straight line and did this! Set aside or refrigerate until ready to use.

Preheat your oven to 400 degrees. In a large Dutch oven or soup pot, melt butter over low heat. Add the onions and a heavy dash of salt and pepper. Cook low and slow for about 15 minutes until cooked down and translucent, stirring often. Add the bay leaf, sage, and balsamic reduction and raise the heat to medium. Let cook until caramelized, stirring often. 

Add the sherry to deglaze, scraping the brown bits off the bottom of the pot. Let reduce almost completely, about 4 minutes. Add the bone broth - more or less, depending on how thick you like your soup. Bring to a boil and let simmer until ready to eat. If making ahead of time, let cool down and refrigerate until ready to reheat and serve. When ready to serve, taste for seasoning and add more salt and pepper if needed. While soup is at a simmer, toss the bread cubes with olive oil and 1/2 teaspoon salt. Place in the oven and let bake until golden, about 10 minutes. Ladle the soup into mini Cocotte or oven safe soup bowls (4” or 1/2 quart). Stir a handful of croutons and handful of Parmesan into each bowl then top with the spiderweb cheese.

Side note: At this point, you can serve. The cheese will melt naturally into the soup. If you like a broiled top,  present the soups to guests, then broil the top for 3 to 4 minutes. The cheese will all melt together once it’s in the oven though! 

In Holiday, Recipes

A Scream Queen’s Halloween Q & A

October 6, 2019 Andrea LeTard
public.jpeg

Top 3 favorite classic horror movies?

Halloween (1978) - Probably one of my favorite movies of all time, period.

The Texas Chainsaw Massacre (1974)

The Shining

Runner Up: Rosemary’s Baby - This is the one I tell people who are scaredy cats to watch. It’s the perfect classic horror and not too scary!

*This list could literally go on and on! You can see my entire list of favorites here:

Scary Movies To Watch Every Day Of Halloween Month

public.jpeg

Top 3 modern horror movies?

Scream - I’ve seen it probably 1,000 times (not even exaggerating), and I will still stop everything I’m doing to watch it if it’s ever on TV. It’s so nostalgic for me. Growing up I would say, “Where ever they shot this movie is where I want to live.. it’s beautiful!” I discovered as an adult they shot it in and around California wine country -Napa/Sonoma/Healdsburg - my literal favorite place on earth and a place we visit yearly. A weird coincidence! Have I ran all over these cities looking for the actual homes and filming locations from the movie? The answer is yes. Am I crazy? The answer is also yes.

Sinister

The Strangers

Runner Up: It Follows - Something about this movie is so 70’s-80’s horror. The way it’s shot and the teen slasher plot just makes it feel like the horror films I grew up watching.

public.jpeg

When do you start shopping for Halloween?

September. And I make it a point at least once a week to go walk around different stores’ Halloween sections. I have about triple the amount of Halloween decor as I do Christmas decor.

When do you start decorating?

My goal is always to have everything up the last weekend of September. When October 1 rolls around, the lights come on, and they’re on for 31 days!

public.jpeg

Top 3 favorite Halloween movies to watch on Halloween?

Halloween (1, 4, and 5)

Hocus Pocus

Monster Squad

Runner Up: Trilogy of Terror - It’s old, original 1970’s horror and it’s just everything on earth. Watch it! I also love, love Nightmare on Elm Street - the first one and most of the ones following. I watch those all October.

public.jpeg

Top 3 favorite Halloween TV episodes?

The Roseanne Halloween episodes - always!

Stranger Things - Season 2 Halloween episode

American Horror Story - Murder House Halloween Episode

Runner Up: IT (1990) - It was a mini series on TV before it was turned into a movie, and as a child I LOVED this story. I’m adding it to TV because it was actually on TV at one point!

public.jpeg

Favorite Halloween costume memory from childhood?

There are 2 - One is funny and my actual favorite memory. The other is weird, creepy, and not a good memory.

Scarlett O’Hara from Gone with the Wind - My grandmother made me this unbelievable ball gown and I had my mom spray paint my hair black. It took over a week of washing my hair to get the black out!

Clown - I was a clown twice, and it just so happened both times, I was (almost) too sick to go trick or treating. Weird, huh?

public.jpeg

What kind of candy do you give out to trick or treaters?

Candy bars all the way! Snickers, Butterfinger, Kit Kat, Mr. Goodbar. If I can find Dots in a big pack by themselves, I will do those too - only because I LOVED getting Dots in my trick or treat bag as a kid.

What do you like to cook/eat on Halloween?

We have a STRONG ongoing tradition we’ve had for many years on Halloween night. I make a huge pot of chili with a toppings bar and we have friends over to pass out candy, drink beer, and watch scary movies.

Favorite Halloween cocktail?

Anything pumpkin or chai. I will post a few recipes this month.

public.jpeg

Best way to get the Halloween atmosphere going in your home?

No matter what I’m doing, I have a Halloween movie on in the background every single day starting October 1. Tres has never understood it or gotten used to it. Still to this day when he comes home from work and I’m working in the kitchen, he’s like, “Really Andrea? Do I really have to come home to a screaming girl being murdered every single day?” Haha! But he does agree to sit down and watch one with me almost every night in October! I also light a lot of fall candles each night, cook a lot of cozy soups and chilis, and of course all the Halloween decor is out! And of course, my favorite thing to do in October is to wake up early on cool mornings and sit outside by the fire drinking my coffee. Our neighborhood is old, so most people have wood burning fireplaces that you can smell coming from chimneys all around!

Gatherings are hosted at our house all month and there’s always a “schedule of events” leading up to the big day. Hay rides, haunted houses, pumpkin carving, spooky wine and pumpkin pairing night, chili scary movie night, Halloween themed dinner parties, the annual LeTard Monster Bash - you name it, we do it!

public.jpeg

Where do you buy your Halloween/Fall candles?

Bath and Body Works - they have the best scents for fall and their candles are really strong if you get the right ones!

What store has the best Halloween section?

Each year it varies! I find my consistent favorites to be: Target, At Home, and Michael’s

public.jpeg

What are you going to be for Halloween this year?

It’s always a surprise until our Halloween party!

Best Halloween costumes you’ve ever had?

My hands-down favorite was when Tres and I did Beavis and Butt-Head… we pretty much nailed the hell out of it. And funny enough, it was actually the one costume that we didn’t decide on and pull together until the night before Halloween. Mama was disgusted and mortified that I dressed like such an imbecile - haha! My favorite part that night was when I texted her a picture of us and she texted me back, “UGGGHHHHHHHH SOOOOO UGLY!!!!!” She loathed that show when we were growing up and we had to sneak to watch it. So that costume was pretty much her worst nightmare. But our costumes every year are pretty unforgettable! Here’s a list of my favorites:

Best-Ever Couples Halloween Costume Ideas

public.jpeg

Best city to celebrate Halloween in?

Salem, Mass. Hands down, you can’t beat it. Everything about that town screams Halloween and IS Halloween the entire month of October. Plus, the trees are all bright orange, yellow, red and there’s a constant fall breeze in the air. It’s truly magical. I feel like I’ve died and gone to Halloween Heaven there. I recommend flying into Boston, doing Boston a few days, then taking the short road trip to Salem (45 minutes). Or you can fly into Portland, Maine (food-lover’s dream) and take a road trip down (1 hour and 45 minutes) with a stop in Provincetown, Cape Cod to break the trip up!

public.jpeg

Why do you like Halloween so much?

It’s extremely nostalgic for me. Growing up, fall for my family wasn’t about pumpkin spice and football. When October arrived, it was all about scary movies, creepy masks, and all-things Halloween. My dad had an epic front-yard Halloween decor set up every year - Hay bells, scarecrows with scary masks, ghosts flying in trees, strobe lights. You name it, we made it! And it was all DIY… nothing fancy. Just a bunch of his old flannel shirts and jeans stuffed with hay and some extremely scary mask he found at the dollar store. I always loved that very moment every year when we would help him. Dusk falling, a breeze so cool in the air our hands were like ice, and that smell - the smell of fall. I remember telling my mom as a girl, “I can smell Halloween when it comes.” And she said, “That’s because it’s your favorite.” That stands true today. October is truly my month - I love it more than Christmas and my birthday (which is actually New Year’s Day) combined. I literally wait on Halloween ALL YEAR - starting November 1st of every year!

In Holiday

Brown Butter Halibut over Maple Chai Delicata Squash

October 5, 2019 Andrea LeTard
public.jpeg

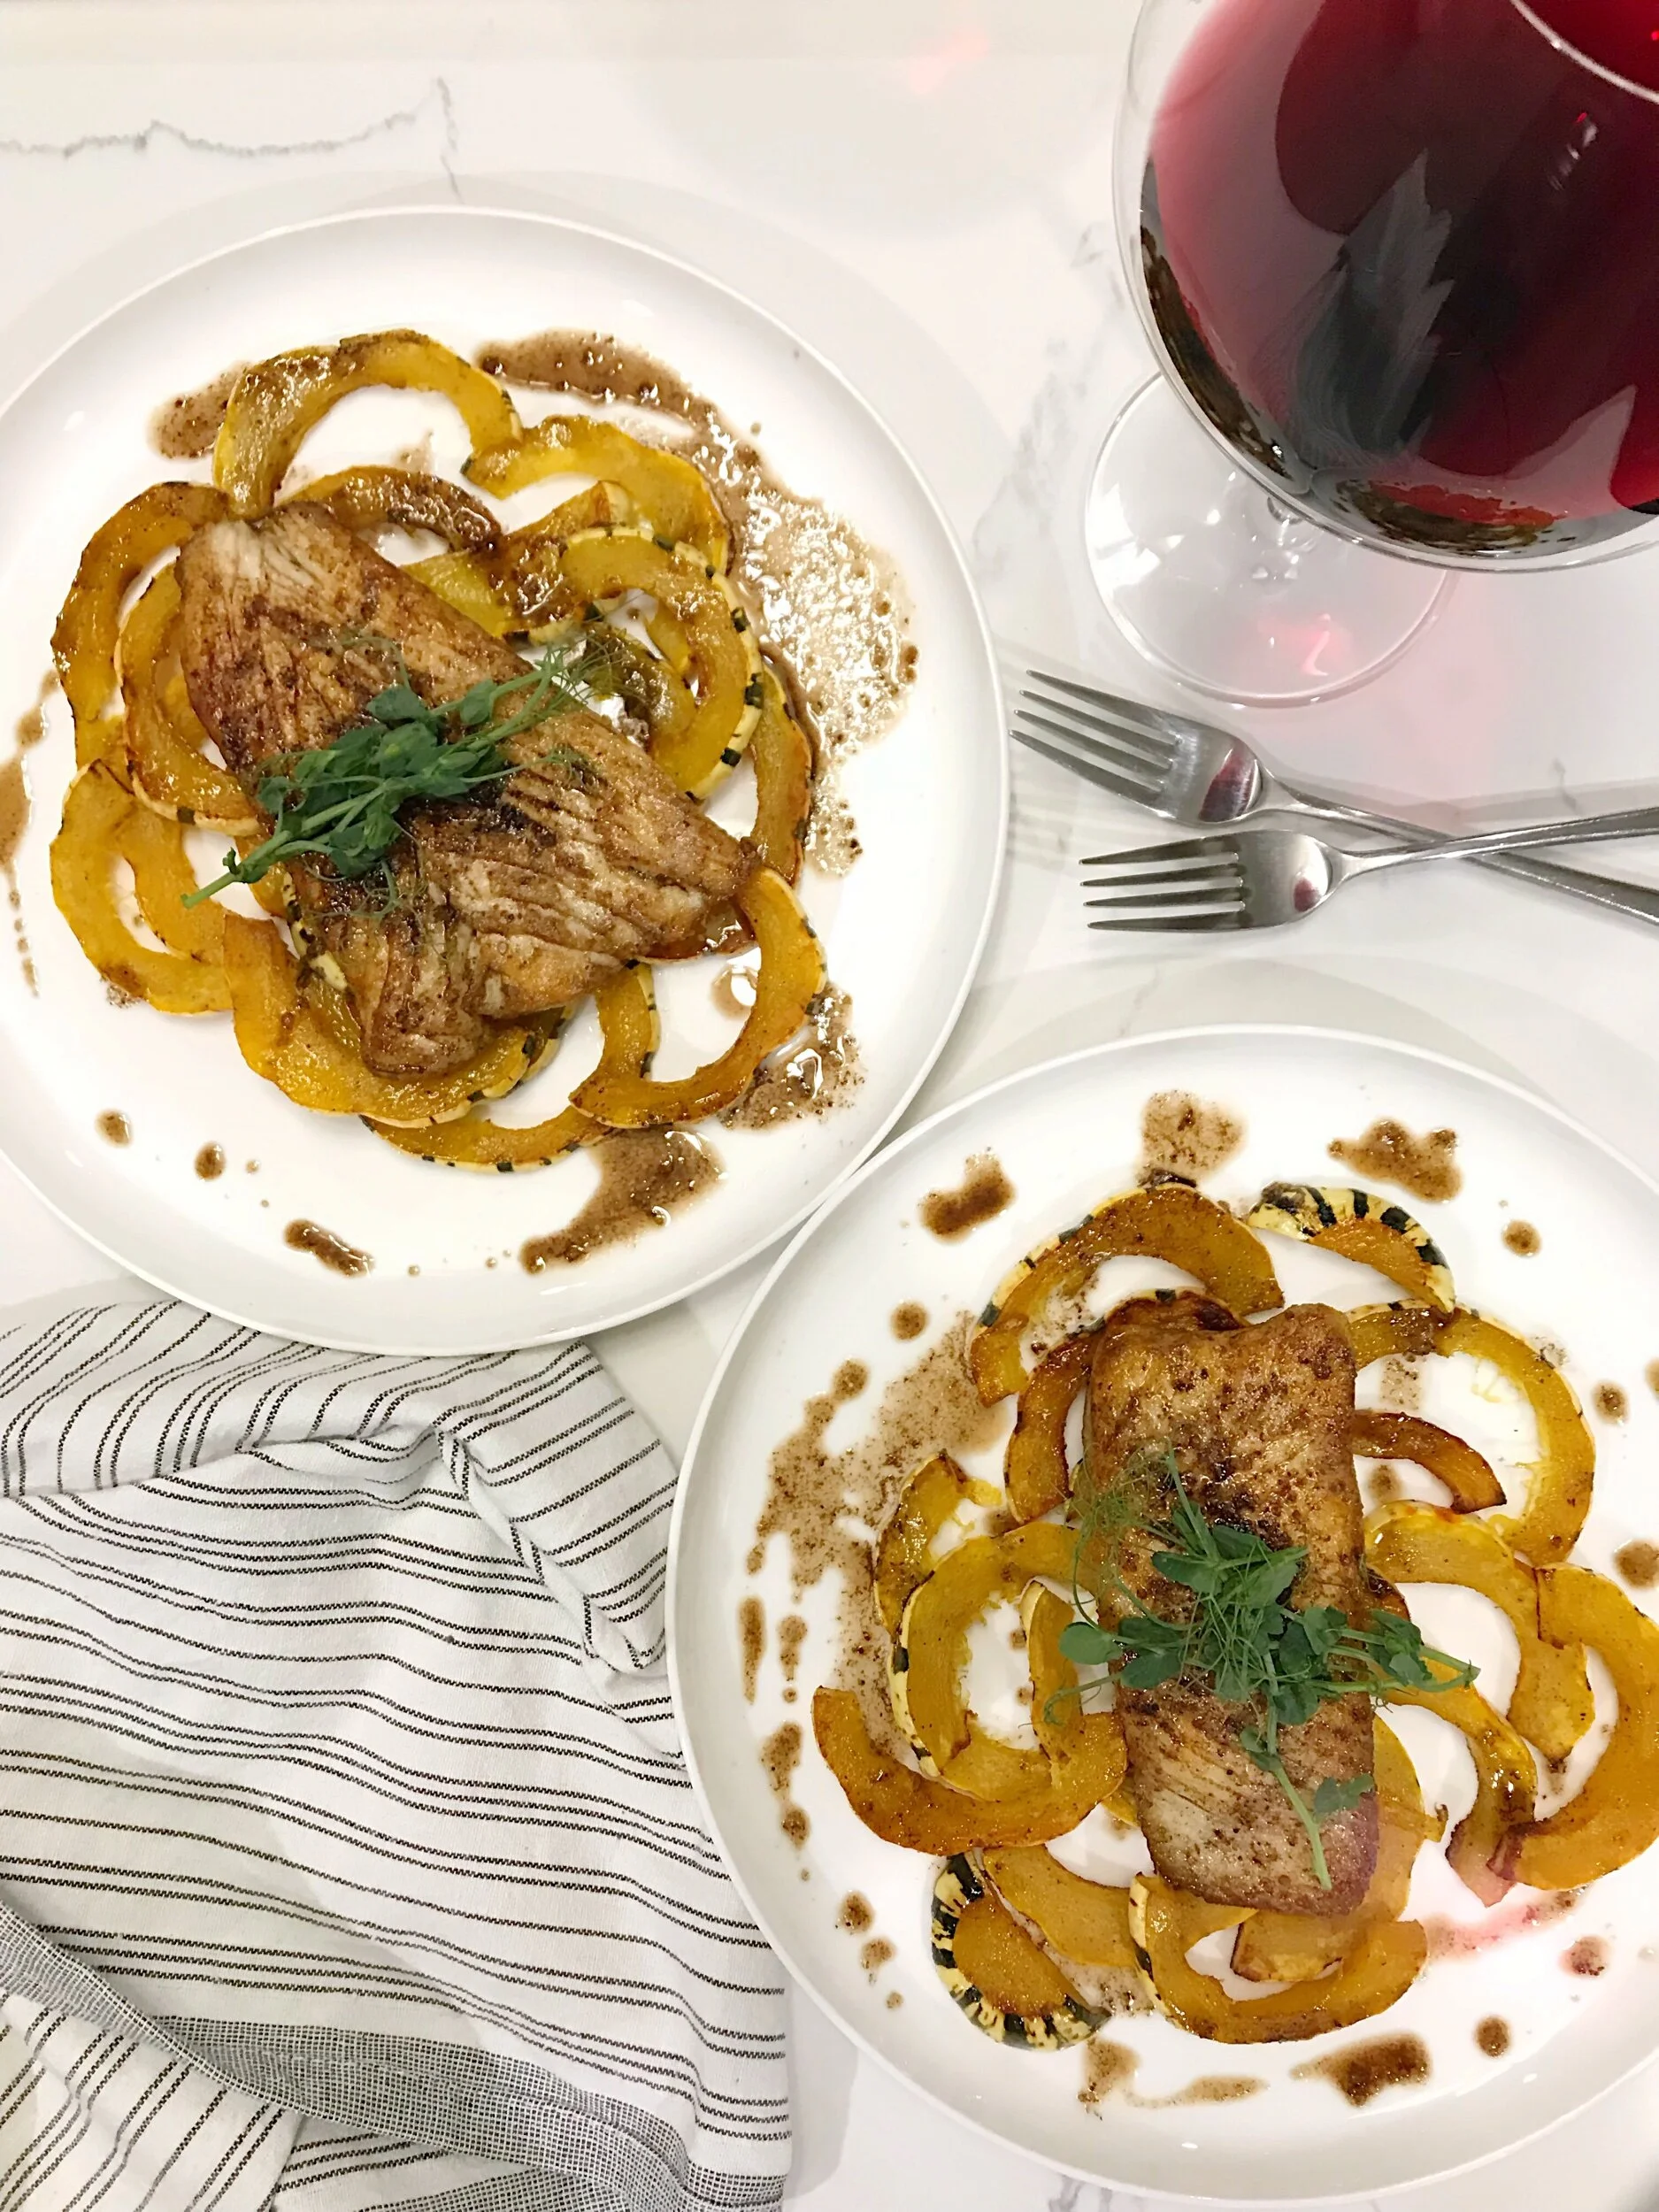
I normally don’t like posting recipes I haven’t tested more than once. I know we live in a world now where content is key and we’re all supposed to post a ton of it. But when it comes to my recipes, I’ve always been very quality over quantity kind of gal. While I may be slow as a turtle to get recipes posted, the good news is, the recipes you do see have been tested and I will never post one that’s not knock your socks off delicious! Luckily, sometimes a recipe turns out perfectly the first time - this is one of them so I’m sharing it! 8 ingredients, under 30 minutes, and restaurant quality delicious! When I made this the other night, Tres’ reaction was, “This is one of the best dishes you’ve created in awhile.” 

2 servings 

1 delicata squash - cut in half lengthwise, seeds removed, sliced 1/4 inch 

1 tablespoon olive oil 

1 tablespoon maple syrup

1/2 teaspoon chai seasoning 

Kosher salt and freshly cracked pepper 

3 tablespoons butter 

2 Halibut filets 

Heat your oven to 400 degrees. On a baking pan, toss the squash together with the olive oil, maple syrup, chai, and about 1 teaspoon of salt and 1/2 teaspoon of pepper. Roast for 12 to 15 minutes or until tender and golden. 

While the squash is cooking, heat the butter in a pan over medium heat and let sit without moving until it starts to get slightly golden. Increase the heat to high and wait for the butter to start smoking - don’t be alarmed if it starts to get really dark, it won’t burn once the fish hits the pan. Once smoking, add the fish and cook for 2 to 3 minutes on each side or until cooked through and flaky. Plate the squash, top with the fish, and drizzle brown butter over the entire dish. 

In Seafood, Recipes, Healthy Tags best fish dish ever, best fish revcipe, best fish recipe ever, fall fish, fall fish recipes, winter fish recipes

Creamy Feta Tomato Dip

October 2, 2019 Andrea LeTard
public.jpeg

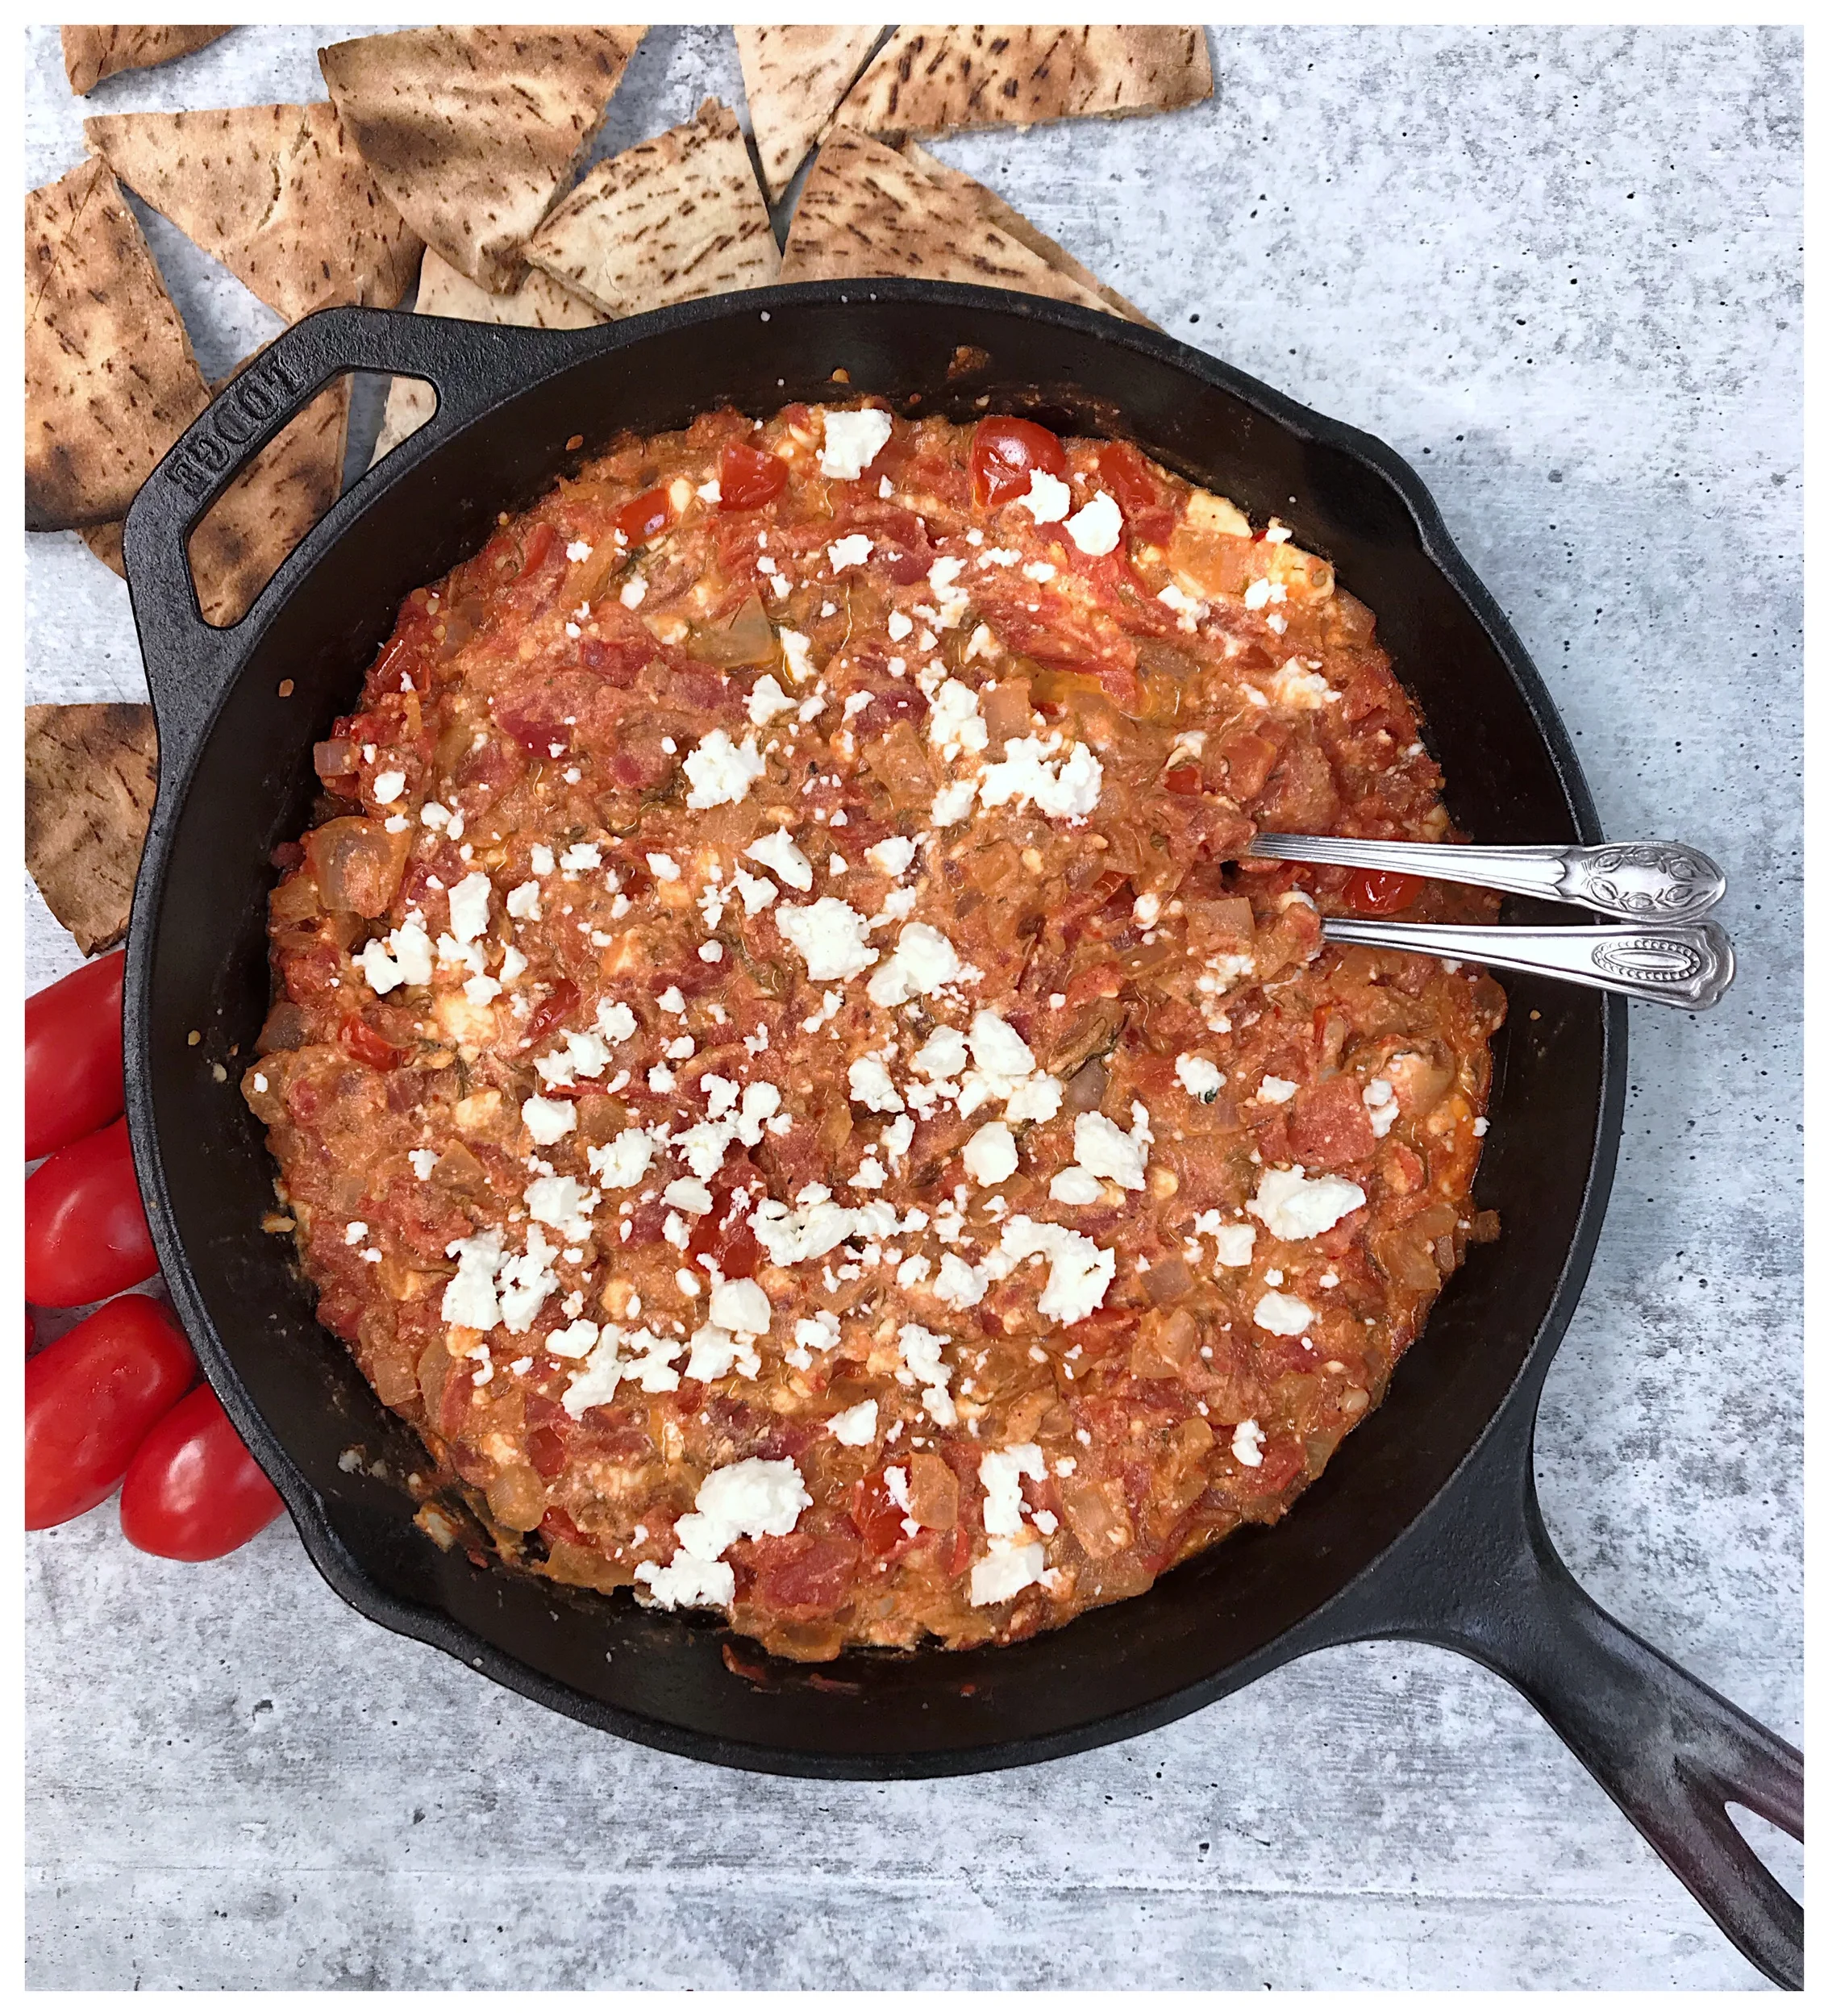
Whip up this one-pot, stovetop to table dip in under 15 minutes! Inspired by a dish we had in Santorini, this dip is fresh, creamy, and simply delish. It’s perfect for game day or a dinner party appetizer, and it won’t last long. 

1 tablespoon extra virgin olive oil 

1/2 yellow onion - diced 

Kosher salt and fresh cracked pepper 

3 cups grape tomatoes - diced 

3 garlic cloves - minced 

1/2 teaspoon chili pepper flake (or to taste)

1 (28 ounce) can San Marzano whole peeled tomatoes - drained and crushed by hand 

2 tablespoons unsalted butter 

10 ounces traditional block feta cheese 

1/4 cup minced dill, plus more for sprinkling 

Pita, veggies, or crostini - for serving 

Heat olive oil in a medium cast iron pan over medium low heat. Add the onion with a dash of salt and pepper and cook until soft. Add the grape tomatoes, garlic, chili pepper, San Marzano tomatoes and bring to a boil. Simmer and cook for about 8 minutes - or until the tomatoes are completely broken down and most of the liquid is absorbed. Stir in the butter, half of the feta cheese, and the dill until completely melted and combined. Crumble the rest of the feta and more dill on top. Serve hot with pita, veggies, crostini, or all three! 

In Snacks & Apps, Vegetarian, Recipes

Cooktales Travels: 24 Perfect Hours in Ravello

September 17, 2019 Andrea LeTard
public.jpeg

We started our 2-week Amalfi Coast/Greece adventure in Ravello, and while we wish we would’ve had one more day there, we did A LOT in 24 hours. We actually did so much and had such a perfect experience, I didn’t leave feeling like we missed very much when it was time to leave the next day. Ravello is a small place atop a mountain with views for days of the Amalfi Coast water. It’s relaxing and the food is fabulous. It ended up being the perfect start to our trip, as we got to relax off some of the jetlag. I recommend it as a starting place if you’re hopping the Amalfi Coast, as it’s more serene with less chaos than the other popular beach towns. Rather than list my food recs the way I normally do, I’m going to break this one down for you in sequence, so you get the idea of how you can actually do this lovely place in 24 hours. Here we go!

public.jpeg

10:30am – Land in Naples. Apparently you can train and bus all over the Amalfi Coast, but Ravello is right at one hour’s drive, so we opted to go by car. Our hotel had a car service that made it easy peasy. We simply landed, found our driver, and were in the car in no time.

public.jpeg

12:00pm – Check into hotel. Ok, guys… Ravello is full of fancy, fabulous hotel options. Here’s my advice: spluge on this one. It’s important to have a hotel here with 1) views and 2) a pool because that’s pretty much all you’re going to do here as the water is way down the winding mountain. We visited all of the top hotels (you can have lunch, dinner, and drinks at all of them) and I think the hotel we stayed at, Villa Cimbrone, was best for a quick experience. Why? One of the top attractions in Ravello is the Villa Cimbrone Gardens – they’re beautiful and the views you get from here are the best in Ravello. The gardens of our hotel were PACKED full during the day so we decided to wait until the next morning to visit. Here’s the kicker and why our hotel was the absolute best: We woke up early and explored the gardens before they were even open. We got to walk around the place like we owned it, and because no one else was there, we got the BEST pictures you could ever get of the famous head sculptures. These statues over the coast are iconic and we got to be all alone with them. Had we not stayed here, we would’ve been elbowing left and right to just get one picture without someone in it. Just look at these pictures – this is THE place to stay if you want a private experience of the gardens.

public.jpeg
public.jpeg

1:00pm – Lunch. We’d heard how amazing Belmond Hotel Caruso was as we had friends who stayed there, so it only made sense to pay this hotel a visit. It’s extra fancy and really spectacular, and their restaurant Belvedere was exquisite and the perfect first Italian meal overlooking the water. Their wood-fired pizzas are life and the marinated anchovies were lovely. If you go here to eat, walk around the hotel grounds. They’re gorgeous and the infinity pool gets the “best pool in Ravello” award.

public.jpeg
public.jpeg
public.jpeg

3:00pm – Relax at the pool. I adored our hotel’s pool and after a long day of travel, we couldn’t wait to take a dip and lounge with a bottle of wine. We planned a nap but enjoyed ourselves too much to actually take one. The pool at Villa Cimbrone is beyond dreamy – it’s like being in a cozy, quiet garden oasis.  I love a pool surrounded by greenery and flowers, and that’s just what this was. It was the perfect afternoon for tired travelers.

public.jpeg
public.jpeg
public.jpeg

7:00pm – Sunset snacks and drinks. Also having the reputation of one of the best hotels in Ravello, we decided to go to Palazzo Avino for sunset, and I can’t imagine having gone anywhere else for it. This is THE place to watch the sunset in Ravello. Their terrace is something you only see in dreams. I would go on describing it, but I will leave you with the photos. Our cocktails came with the best Castelvetrano olives I’ve ever had in life and a sampler platter of savory goodies. We saw a lot of sunsets on this trip – pretty much 2 weeks of the most perfect sunsets every evening and this particular setting was one of the most memorable.

public.jpeg
public.jpeg

9:30pm – Dinner. I’ll be honest, all the beautiful pictures I saw of Ravello and they weren’t what made me want to visit. Truthfully, what brought us to Ravello was Trattoria da Cumpa'Cosimo for dinner. I remember telling Tres, I really just want to go to Ravello to eat at this restaurant because I keep reading it’s stellar, perfect Italian food. It was just that, but the experience made it even better. Our waiter pretty much ordered for us – bringing us the appetizer sampler to start, the pasta sampler, and limoncello to finish. I mean… pasta sampler? Could you ask for more?! He did everything for us from the wine choice to the order and it was casual, delicious fun!

public.jpeg
public.jpeg

 12:00am – Sleep. Finally sleep.

 7:00am – Walk the Villa Cimbrone Gardens. I think I already elaborated on this enough above, but I will say it again. There was nothing like having these typical crowded gardens and views all to ourselves. We watched the sunrise and took about 2,000 pictures because I promise if you come here, you wont be able to stop taking pictures. It was worth getting up early! *There’s only one downside to this experience. There IS a (secret) bar right below the views, down a set of stairs from the statues. I wouldn’t have minded having a cocktail here, but it wasn’t open at 7:00am.

public.jpeg
public.jpeg

 9:00am – Breakfast on the hotel’s drop dead gorgeous terrace. I am not a breakfast person and usually don’t mind skipping it – I save every bit of room in my belly for lunch and dinner – but the breakfast here was relaxing, lovely, and delicious. A great sendoff.

public.jpeg

 11:00am – Get in the hotel car and head to Il Pirata in Praiano for lunch. I have to mention this too about our hotel. We had lunch reservations at Il Pirata – it was one of the first things I booked for the entire trip. We weren’t staying in Praiano, we were actually headed to Positano, but I was determined to eat at this restaurant. So the hotel recommended dropping us off in Praiano and drove to Positano to drop our bags off. And thank the good Lord they did. Because to get to the restaurant, one must hike down the bottom part of a mountain. I had no idea, and thanks to our hotel, we weren’t dragging our bags down the side of a cliff. Whew! Bullet dodged.

Truly a dream, Ravello is a must-visit if you take a trip to the Amalifi Coast. But just know, you CAN actually do this little city in a day - however, I wouldn’t blame you if you wanted to stay longer. The little town area is adorable, and had we more time, we would’ve spent a day tooling around all the outdoor patios and beautiful restaurants. But if you do it in 24 hours, I’m telling you, THIS is your perfect guide!

In Travel Tales Tags ravello in 24 hours, how to do travello, how to do ravello, traveling to ravello, best ravello trip, ravello in 48 hours
← Newer Posts Older Posts →

MEET ANDREA

Hey y'all! Welcome to Andrea’s Cooktales. I’m a believer that the best stories are shared and the fondest memories are made in the kitchen, at the dinner table, and surrounded by food. This blog is about storytelling from the kitchen and the dinner table.  (Read more...)

No results found

RECENT POSTS

Featured
IMG_1207.jpg
October 18, 2026
The Perfect Halloween Dinner Party Menu
October 18, 2026
Read more →
October 18, 2026
cozy fall recipes.jpg
September 22, 2026
12 Cozy Fall Recipes to Make All Season
September 22, 2026
Read more →
September 22, 2026
halloween chili.jpg
September 15, 2026
The “Halloween Chili” that Wins Chili Cook Offs
September 15, 2026
Read more →
September 15, 2026
Five Star Menu.jpg
September 10, 2026
A “Five Star Weekend” Girls’ Night: The Complete Nantucket-Inspired Menu
September 10, 2026
Read more →
September 10, 2026
IMG_5362.jpeg
September 3, 2026
7 Cozy Soups to Make During the Summer-to-Fall Transition
September 3, 2026
Read more →
September 3, 2026
IMG_1079.jpg
March 1, 2024
Better Than a Steakhouse Filet Mignon
March 1, 2024
Read more →
March 1, 2024
IMG_1267.jpg
March 1, 2024
Raspberry Rose Brie Bread
March 1, 2024
Read more →
March 1, 2024
IMG_2041.jpg
March 1, 2024
Best Breakfast Burrito in Existence
March 1, 2024
Read more →
March 1, 2024
IMG_2037.jpg
March 1, 2024
Campari Spritz
March 1, 2024
Read more →
March 1, 2024
IMG_2034.jpg
March 1, 2024
Truffle Seafood Pot Pies
March 1, 2024
Read more →
March 1, 2024

ARCHIVES

Archive
  • October 2026 1
  • September 2026 4
  • March 2024 5
  • February 2024 1
  • November 2023 6
  • September 2023 12
  • August 2023 6
  • September 2022 1
  • February 2021 2
  • December 2020 8
  • November 2020 9
  • October 2020 4
  • September 2020 6
  • August 2020 7
  • July 2020 3
  • May 2020 2
  • February 2020 5
  • January 2020 3
  • December 2019 3
  • November 2019 4
  • October 2019 8
  • September 2019 4
  • August 2019 2
  • July 2019 6
  • May 2019 3
  • April 2019 5
  • March 2019 2
  • February 2019 2
  • December 2018 6
  • November 2018 7
  • October 2018 5
  • July 2018 1
  • June 2018 3
  • April 2018 1
  • February 2018 2
  • January 2018 10
  • November 2017 1
  • October 2017 2
  • September 2017 2
  • August 2017 1
  • July 2017 1
  • June 2017 3
  • May 2017 1
  • March 2017 4
  • February 2017 1
  • January 2017 2
  • December 2016 4
  • November 2016 7
  • October 2016 3
  • September 2016 5
  • August 2016 2
  • July 2016 4
  • June 2016 2
  • May 2016 9
  • April 2016 7
  • March 2016 7
  • February 2016 18
  • January 2016 8
  • December 2015 10
  • November 2015 14
  • October 2015 14
  • September 2015 13
  • August 2015 5
  • July 2015 6
  • June 2015 5
  • May 2015 6
  • April 2015 5
  • March 2015 6
  • February 2015 3
  • December 2014 3
  • October 2014 7
  • September 2014 6
  • August 2014 6
  • July 2014 7
  • June 2014 6
  • May 2014 6

CATEGORIES

  • TRAVEL TALES
  • LIFESTYLE POSTS
  • RECIPES
  • ANDREA'S COOKTALES
  • QUICK BITES
  • TV APPEARANCES
  • WHAT DO YOU DO WITH THAT
Summary Block
This block is invalid. Please check the block settings and try again.
Featured
Aenean eu leo Quam
Aenean eu leo Quam

Quisque iaculis facilisis lacinia. Mauris euismod pellentesque tellus sit amet mollis.

Read more →

BLOG     |     VIDEOS     |      SERVICES    |       RECIPE INDEX    |      PRIVACY

Copyright Andrea's Cooktales 2016-2017 | Design by Oh Simple Joys Design Studio