• Cookbook
  • About
  • Video
  • Recipes
  • Travel
  • Inspiration
  • Services
  • Contact
Menu

Andrea's Cooktales

Street Address
City, State, Zip
Phone Number
A STORY BEHIND EVERY RECIPE

A STORY BEHIND EVERY RECIPE

Andrea's Cooktales

  • Cookbook
  • About
  • Video
  • Recipes
  • Travel
  • Inspiration
  • Services
  • Contact

Truffle Sliders 

June 26, 2015 tatumletard@gmail.com
IMG_9767.jpg

Once upon a time, I took Tres to the Pearl Jam concert at Wrigly Field in Chicago, and since then we have become Chicago summer regulars. In addition to an awesome concert scene and perfect weather, Chicago has easily become one of my favorite food cities. I had the best sliders of my entire life at Sable Kitchen and Bar in this great city! We found out about the place from a local, and the cocktails and food did not disappoint. When visiting a city with tons of great restaurants, we rarely go back to the same restaurant more than once, but we ended up at Sable three times for their truffle sliders!! So of course, I had to recreate them when I got home, and I have to say, mine are pretty close to the real thing! 

WATCH THE VIDEO HERE!!! 

  • 2 tbsp olive oil

  • 2 tbsp butter

  • 2 onions - sliced thin

  • 1 tbsp balsamic vinegar

  • 2 tsp salt

  • 1 tsp pepper

  • 1 lb Ground Chuck (80 lean/20 fat)

  • 3 oz truffle butter - room temperature

  • 4 oz Taleggio or Havarti cheese

  • 1 tbsp plus 1 tsp honey

  • 10 mini burger buns or rolls

  • 1/4 cup mayo

  • 1 tsp truffle oil

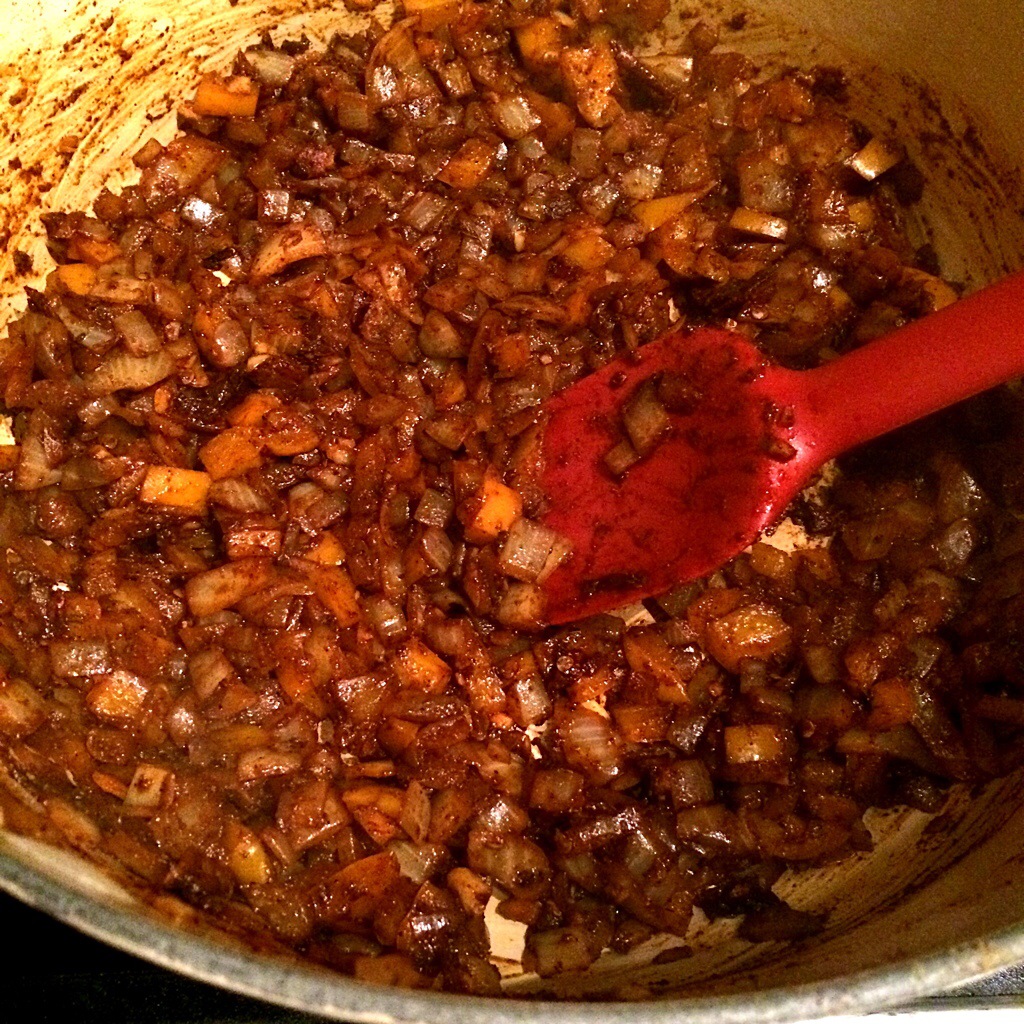
Heat grill to medium-high. On your stovetop, heat olive oil and butter in a large sauté pan over medium-low. Add onions, balsamic vinegar, 1 tsp salt, and 1/2 tsp pepper. Put the lid over the pan and let onions cook, covered, for 10 minutes. Remove the lid and let onions continue to cook for about 30 minutes, stirring occasionally. When ready they should be soft, brown, and caramelized. 

While the onions cook, prep the sliders. In a medium bowl, add ground chuck, 2 oz truffle butter, 1 tsp salt, and 1/2 tsp pepper. Mix ingredients together lightly with a fork - just enough to combine. Be careful to not over mix or the meat will get tough. Using a 1/4 cup measuring cup, shape the meat into 10 patties. In the center of each patty, make an indention with your thumb (this will keep sliders from puffing up too much when grilling). 

Add 1 tbsp of honey to the leftover 1 oz truffle butter and mix together. Open each burger bun and spread the mixture on the inside of each bun. 

Place buns on the grill, cut side down and toast for about 1 minute. Grill sliders for about 2 minutes on each side. When you flip the burgers, top each one with a slice of cheese and close the lid the last minute. 

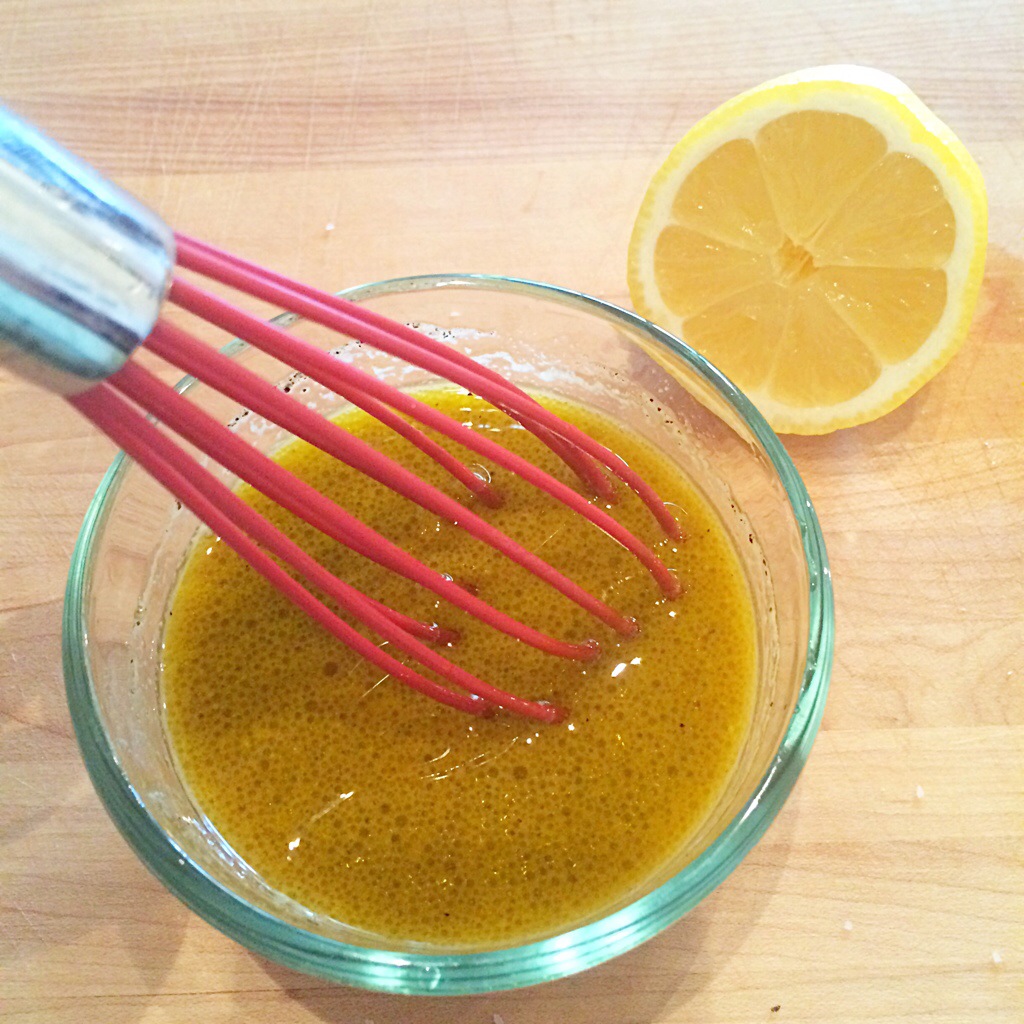
5) In a small bowl, add the mayo, truffle oil, and 1 tsp honey and mix together. Build burgers by spreading the mayo mixture on the buns. Top with the cheesy burger and the caramelized onions. 

CHEERS TO HAPPY EATING!!! 

In Recipes, Lunch, Dinner, Meat, Sandwiches and Bread, Snacks & Apps, Snacks Tags unique grilling recipes, what to do with truffle butter, copy cat cooking, award winning sliders, truffle butter recipes, what to do with truffle oil, summer recipes, unique sliders, best sliders ever, copy cat restaurant recipes, award winning burger, sable kitchen and bar, ground beef recipes, unique burger ideas, truffle burger, truffle sliders, best sliders, chicago recipes, sable Chicago, chicago cooking, chicago cooking inspiration, truffle oil recipes, best burger ever, best summer recipes, how to cook with truffles, truffle recipes, summer grilling recipes, cooking with truffles, burger fest, what to do with truffles
1 Comment

Cocoa-Cola Baby Back Ribs

May 6, 2015 tatumletard@gmail.com
74cooktalesedits.jpg
IMG_8750.jpg

It's May!!!! In Memphis that means sun, fun, festivals, and none other than what we're famous for: BBQ! I tell every out of town friend I have, if you visit Memphis, make sure it's in May! Every weekend, there's something fun going on, but the biggest weekend yet is the World Championship BBQ Cooking Contest! Tents line Tom Lee Park along the river with the smell of BBQ in the air. The entire week is one big party and some serious competition! 

Tres and I go every single year, spending a lot of our time at our good friends' tent, Pigs Gone Wild. Those guys are a blast, and to go along with them having a tent bursting with celebration, they can also cook some mean BBQ! BBQ Fest... It's literally the BEST WEEKEND IN MEMPHIS! So in honor of the weekend coming up, I'm doing my own version of ribs. Cocoa-Cola Ribs are exactly what they sound like... A little bit of chocolate and a little bit of Coke make these guys sweet, hearty, and will always make me think of the city I live in and love!

WATCH THE VIDEO HERE!!!! 

Grocery List (4 people): 

  • 2 racks baby back ribs

  • 4 tbsp good quality unsweetened cocoa powder

  • 3 tbsp brown sugar

  • 2 tbsp salt

  • 2 tsp liquid smoke

  • 2 tsp all spice

  • 1 tsp smoked paprika

  • 1/2 tsp pepper

  • 1 1/2 cup regular coke

  • 4 medium onions - roughly chopped into large pieces

  • 1 cup good quality barbecue sauce

Directions: 

1. Rinse the ribs and pat dry with paper towels. Mix the cocoa, brown sugar, salt, liquid smoke, all spice, paprika, and pepper together in a bowl. Rub the mixture onto the ribs and press to adhere. Cover ribs and refrigerate for a few hours or overnight.

2. Heat oven to 325 degrees. Prep two baking pans by pouring 3/4 cup of coke into each pan. Add the chopped onions over the coke. Place the ribs on top of the onions. Cover the pan tightly with foil. Roast for 2 1/2 to 3 hours or until meat is tender and almost falling off the bone (I like my ribs to still have substance to them.. Not quite falling off the bone). 

3. Using tongs, move ribs to a baking sheet lined with foil. Strain the onions from the coke. Reserve 1/4 cup of the coke and mix with barbecue sauce. Brush a thick layer of the sauce onto ribs. 

4. Put ribs back in the oven for 20 minutes. Serve with the extra cola-barbecue sauce on the side! 

CHEERS TO HAPPY EATING!! 

In Recipes, Dinner, Holiday, Meat Tags may in memphis, cola ribs, chocolate ribs, best ever baby back ribs, best ever ribs, how to cook memphis ribs, bwst bbq contest, dinner ideas, bbq and coke, bbq sauce, low and slow cooking, international memphis in may, melt in your mouth bbq, bbq, memphis in may, slow cooker recipes, bbq fest, cooking ribs without a smoker, memphis style bbq, easy cooking, bbq and cocoa powder, oven cooked ribs, memphis food, world bbq competition, memphis bbq contest, unique rib recipes, world bbq contest, chocolate bbq, cooking in memphis, easy dinner, barbeque recipes, bbq festival, easy meals, easy bbq recipes, cooking bbq without a smoker, slow cooked rib recipes, crockpot recipes, memphis bbq competition, melt in your mouth ribs, slow cooked meals, beat bbq competition, memphis style ribs, unique baby back rib recipes, memphis festivals, fall off the bone ribs, fall off the bone bbq
2 Comments

Spaghetti with Gouda Mornay & Toasted Crunchies

April 8, 2015 tatumletard@gmail.com
IMG_85181.jpg

My husband, Tres, travels a lot for work, and spring happens to be his busiest time of year so I often fly solo when it comes to my meals. As much as I would rather have Tres around to hang out with and eat dinner with (since we ARE the two best friends that anyone could have :), I happen to enjoy my "me" time quite a bit. I do all kinds of things alone: I'll go for long walks on the river. I'll find a coffee shop, beer joint, or wine bar, take a book and read for hours. I'll grab a table on a patio and have lunch, soaking up the sun. Last week, I even went to a nice reataurant for dinner, had a glass of wine and a fancy meal - all by my lonesome! The possibilities are endless when it comes to "me" time!

IMG_8516.jpg

What I mostly think of, though, is curling up on the couch and watching a good movie with a dinner I've cooked for just myself. It can be difficult cooking for just one person but in my opinion, a good answer is always pasta! It's typically always in my pantry, I can measure it out to be the perfect portion for one person, and I can add anything to it that I want and it makes a complete meal! I came up with this recipe one weeknight when Tres was away, and I thought it'd be the perfect recipe to feature for ONE! 

WATCH FULL VIDEO HERE!!!!!

Grocery List (for ONE): 

  • 1 1/2 tbsp butter

  • 1/2 tbsp flour

  • 2/3 cup milk - warmed

  • Dash of salt

  • Dash of white pepper

  • Pinch of nutmeg

  • 1/4 cup good quality gouda cheese - freshly grated

  • 3 oz spaghetti (or whatever pasta you want to use)

  • 1/4 cup Panko breadcrumbs

  • Parmesan cheese (optional)

  • Parsley (optional)

Directions: 

1. Melt 1/2 tbsp of butter in a sauté pan over medium heat. Add the flour and whisk for several minutes, but don't let the roux turn brown. You want the roux to stay white while the raw taste is cooked out of the flour. 

2. Slowly add the warm milk, constantly whisking until it all comes together. Bring sauce to a slight boil and simmer, letting the sauce thicken. Add the salt, pepper, and nutmeg. Taste for seasoning and add more if needed. Add the grated cheese and whisk until melted and smooth.

3. Add pasta to a pot of boiling, salted water. Let cook according to the package directions, until al dente. Drain pasta and reserve 1/4 cup of pasta water. Toss as much sauce into the pasta as you like, and add a little pasta water if you want to create a thinner sauce. 

4. Melt the remaining 1 tbsp of butter in a small sauté pan. Add the Panko breadcrumbs and toast until lightly golden brown. Top pasta with the breadcrumbs and the Parmesan and parsley if you wish. 

CHEERS TO HAPPY EATING!!! 

IMG_8518.jpg
In Recipes, Lunch, Dinner, Pasta and Grains Tags quick pasta recipes, food your kids will love, recipes kids love, best pasta recipes ever, how to make dinner for one, what to cook for your kid, how to make mornay sauce, mornay sauce, spaghetti, pasta ideas, gouda recipes, gouda sauce, what is mornay sauce, pasta sauces, recipes to clean out fridge, restaurant quality recipes, easy pasta recipes, making small portions for dinner, simple pasta dishes, cooking with gouda, recipes for one person, cooking for one, making dinner for one person, recipes to clean out pantry, best spaghetti recipes, rish recipes, restaurant quality pasta, cooking with kids
1 Comment

Spicy Carbonara with Shaved Asparagus

March 4, 2015 tatumletard@gmail.com
IMG_7911.jpg

This weekend was a girls weekend. I spent time with two of my best girlfriends, and we had the grandest time!! The grandest time to us usually means food, and we didn't skimp out once this weekend. We visited a local Memphis Italian restaurant, Bari Ristorante, not once but twice for dinner - Saturday and Sunday - and ordered the pasta carbonara. Since it was so good, I insisted on having it again Monday night, but this time I was the chef! I had never cooked it before so I said, what the heck, and added a little spin on the traditional dish. A little spice and a little asparagus never hurt anybody! 

Grocery List: 

• Kosher Salt

• 1/2 lb spaghetti 

• 1 tbsp olive oil 

• 2 strips thick cut bacon - cut into small pieces 

• 3 garlic cloves - minced 

• 1 tsp red pepper flake 

• 1 bunch asparagus - ends trimmed and discarded, tops shaved with a vegetable peeler

• 2 eggs 

• 3/4 cup fresh Parmesan - grated

• 1/2 tsp Kosher salt

• 1/4 tsp pepper 

• 1 tbsp butter 

Directions: 

1. In a large pot, heat water to a boil with a handful of salt. In a large sauté pan, heat olive oil over medium heat, add bacon and sauté until crispy. Remove bacon and drain on paper towels. 

2. Turn the heat down to medium low (so the garlic doesn't burn) and add garlic and red pepper flake to the bacon fat. Cook for one minute or until fragrant. Add the shaved asparagus and sauté until soft. 

IMG_7913.jpg

3. When salty water comes to a boil, cook the spaghetti. Cook for about 6-7 minutes or until al dente. 

*** Do not drain the spaghetti. You want to reserve the pasta water for the sauce, and the hot spaghetti will help cook the sauce. 

4. Whisk together 2/3 cup of the Parmesan, eggs, salt, and pepper. As soon as the spaghetti  is done cooking, using tongs, immediately add the noodles into the asparagus mixture, take off the heat, and pour in the egg mixture. Stir the eggs into the pasta as fast as you can for several minutes. *** you want the hot noodles to cook the eggs, but you don't want the eggs to scramble. 

IMG_7914.jpg

5. Add pan back to low heat, add 1/4-1/2 cup of the hot pasta water, depending on how thick or think you like your sauce. Then stir in the butter and the bacon pieces. Top with the remaining Parmesan. 

In Dinner, Recipes, Pasta and Grains
Comment

Ziti a la Vodka

December 10, 2014 tatumletard@gmail.com
IMG_6418.jpg
.

.

.

.

When me and my brother were kids, we hated traditional Thanksgiving and Christmas food. No turkey, ham, dressing, or green bean casserole for us... We wanted pasta!!! So every year, my sweet mama made sure we had a delicious, cheesy, bubbly dish of comforting baked pasta. She usually cooked lasagna but there were a few times baked ziti was on the menu, and I absolutely loved the dish! Here I have taken the traditional vodka sauce and put it into another form.. Baked ziti! A perfect dish for Christmas or any of these cold days! Every time I eat baked pasta, I can't help but think of it as Christmas food.

Grocery List:

  • 1 tbsp olive oil

  • 1 tbsp butter

  • 1/2 cup shallot

  • 3 garlic cloves

  • 1 tsp Italian seasoning

  • 1/2 tsp red pepper flakes

  • 1/2 cup vodka

  • 26.46 oz Dei Fratelli Finely chopped tomatoes

  • 2 cup cream

  • 1/3 cup chopped basil

  • 1 tbsp salt

  • 8 oz mozzarella

  • 4 oz Parmesan

  • 1 lb penne pasta or similar

  • 1 tbsp good, fruity olive oil

Directions:

Step 1:

Heat oven to 375 degrees.

.

.

.

.

Heat olive oil and butter in a large sautée pan over medium heat. Sautée shallots until they begin to brown. Add garlic, seasoning, and red pepper and sautée for one minute or until fragrant.

Step 2: Add vodka and scrape up brown bits off the bottom of the pan. Let vodka reduce by half. Stir in tomatoes, cream, basil, and salt. Let sauce cook over low heat for 15-20 minutes.

.

.

Step 3: Bring a large pot of water with a handful of Kosher salt to a boil. Add pasta and cook until almost al dente but not quite (about 1-2 minutes less than package says). Drain pasta and set aside.

I.

I.

.

.

.

.

Step 4: Add mozzarella and pasta to the sauce mixture and stir to combine. Transfer to a casserole or baking dish. Top with Parmesan and olive oil. Bake for 20-25 minutes until cheese is melty and bubbly. Top with more basil if desired.

CHEERS TO HAPPY EATING!!!

In Dinner, Recipes, Pasta and Grains Tags baked pasta, baking for christmas, best christmas cooking, best christmas food, best pasta dishes, christmas cooking, christmas dishes, christmas recipe ideas, cooking at christmas, cooking for family at christmas, first christmas cooking, first year hosting christmas dinner, hosting christmas dinner, out of the box christmas recipes, pasta sauce, unique christmas dinners, unique christmas dishes, unique christmas recipes, vodka sauce, what to cook christmas dinner, ziti vodka
Comment

Butternut Squash Soup with Apple Relish

October 29, 2014 tatumletard@gmail.com
IMGL0183.jpg

Fall is by far my favorite time of year for one reason: Halloween! I live life for this holiday. I look forward to October 31 all year, and aside from my brother's birthday being on November 1, I think that is the worst day of the year (my husband claims it's his favorite day of the year but I can't imagine why? :) My obsession with Halloween goes back to childhood memories. My family always welcomed fall with such open arms, and my dad made a huge deal out of Halloween. We would go to the extremes with decorations - making scarecrows and monsters out of old flannel shirts, hay, and scary masks. Pumpkins and hay bells would always be at the end of our driveway, complete with monsters hanging in trees and scarecrows sitting in chairs. My dad and my Nenne were both big on dressing up, and they always had such memorable costumes! My dad loved to buy a new scary mask every year and play tricks on people with it.

Looking back, I feel like we celebrated Halloween the entire month of October. I can remember being just a little girl, and telling my mom, "There's something extra special about fall.. It's the only season I can smell." That stands true today. I can smell fall when it's coming, and starting October 1, our house smells of pumpkin, chili is often on the stove, our television plays only movies in the scary genre, and I insist on buying at least 20 gigantic pumpkins and squash to decorate with. I get chills just thinking about it.

This soup is special to me because we do a Halloween dinner party every year, and this was the first fall soup I ever created for it. It was a huge hit, so I make a batch (or three) every fall.

SEE THE VIDEO HERE!!!

Grocery List:

Soup:

2 large butternut squash - peeled and chopped into 1 in pieces

1 sweet potato - peeled and chopped into 1 in pieces

1 carrot - peeled and chopped into 1 in pieces

3 tbsp olive oil

Kosher salt

Pepper

1 small onion - chopped

1 stalk of celery - chopped

2 tbsp garlic - chopped

2 tbsp shallot - chopped

2 tbsp apple cider vinegar or apple liquor

6 cups chicken stock

2 tbsp maple syrup

1 tbsp sage

1 tsp cinnamon

1/4 tsp nutmeg

1/8 tsp cayenne

Relish:

1 Fuji Apple - finely chopped

1/4 cup walnuts - toasted and finely chopped

1/4 cup red onion - finely chopped

1/4 cup dried cranberries or cherries - finely chopped

2 tbsp maple syrup

1 tbsp - apple juice

4 small acorn squash (optional)


.

.

.

.

Directions:

Step 1:

Preheat oven to 425 degrees.

Toss squash, potato, and carrot with 2 tbsp of olive oil, salt, and pepper on a baking sheet. Roast veggies for 35 minutes or until soft.

.

.

.

.

Step 2:

While veggies are roasting, heat 1 tbsp of olive oil in a Dutch oven or large pot over medium heat. Sautée onion and celery with a dash of salt until translucent. Add garlic and shallot to the pot with a dash of salt and cook for one minute. Add the vinegar or liquor, stock, maple syrup, spices, and roasted veggies to the pot. Stir to combine. 

.

.

Step 3:

Using a hand blender (or transfer soup to an electric blender working in batches) blend soup together until smooth. Let the soup sit over low heat for 30 minutes or longer (the longer it sits the better it tastes).

.

.

.

.

Step 4:

Make the relish. In a bowl, stir together the apple, walnuts, red onion, cranberries, maple syrup, apple juice, and about 1/8 tsp salt. Make the squash bowls by cutting off the corner of the bottom (this makes a flat surface for it to sit on). Then, cut off about 1 inch of the top. Using a spoon, scoop out the seeds and insides until smooth and in the shape of a bowl. Taste soup before serving and add more salt if needed. Ladle soup into the squash bowls and top with apple relish.

CHEERS TO HAPPY EATING!!!

In Recipes, Lunch, Dinner, Healthy, Soups Tags best cooking videos, unique foos bowls, make food into bowls, fall recipes, halloween recipes, the best soup ever, beat cooking on youtube, how to make squash bowls, halloween ideas, best food on tv, how to make soup, how to blend soup, how to make the best soup, acorn squash bowls, best cooking tv, using squash, cooking on youtube, halloween soup
Comment

Farmer's Market Pasta

October 6, 2014 tatumletard@gmail.com
Farmers Market Pasta (2).jpg
.

.

Any cooking story with mama is a great one. I love being in the kitchen with my mom. It can be the middle of summer, and for some reason cooking with mama makes it seem like it's Thanksgiving or Christmas. It's just so festive and fun. My earliest cooking memories with her were right around the holidays so a day in the kitchen with her always seems like a special occasion. We often go to the farmer's market together on Saturday mornings. One Saturday last summer, we went and I told her whatever we found, I'd make up a recipe with it when we got home. We just so happened to find the most beautiful and unique zucchini, squash, and eggplant - such odd colors and shapes - so when we got home I cooked up a pasta for my parents. They said it was the best pasta they ever had, so I wrote down the recipe and called it my Farmer's Market Pasta!

.

.

 SEE THE VIDEO HERE! 

Grocery list:

  • 2-3 cups of fresh veggies (any will work but I use eggplant, squash, zucchini, tomatoes)

  • 4 slices of bacon + the bacon grease

  • 1 tbsp olive oil 3 garlic cloves - minced

  • 1 1/2 tsp Kosher salt

  • 1 tsp pepper

  • 1/2 cup Parmesan cheese - fresh grated

  • 1 lb penne pasta (or any bite sized pasta)

  • Basil - chopped

Dressing:

  • 1 tbsp garlic - minced

  • 1/2 a lemon - juiced

  • 1/4 cup red wine vinegar

  • 2 tbsp Dijon mustard

  • 1/2 tsp Kosher salt

  • 1/4 tsp pepper

  • 1/2 cup good, fruity olive oil

Directions:

.

.

Step 1:

Heat oven to 450.

Fry bacon and set aside the bacon strips and the grease.

.

.

Step 2:

Cut the veggies into 1 inch cubes and place on a baking sheet. Toss together with bacon grease, olive oil, minced garlic, Kosher salt, and pepper. Roast in the oven for 15-20 minutes.

.

.

.

.

Step 3:

Boil pasta in a large pot with water and a handful of salt. Boil for 6-7 minutes or until al dente. While pasta boils, make dressing. Combine the garlic, lemon juice, vinegar, and Dijon mustard in a bowl. Whisk in the olive oil.

.

.

Step 4:

Put cooked pasta directly into a serving bowl with about 1/4 cup of pasta water. Crumble bacon directly into the pasta. Add Parmesan, roasted veggies and all their juices, and dressing. Toss together to combine. Top with more Parmesan and chopped basil.

CHEERS TO HAPPY EATING!!!

In Recipes, Dinner, Lunch, Pasta and Grains Tags how to cook vegetables, how to cook the best pasta, fun recipes, the best pasta, getting kids in the kitchen, what to do with zucchini, healthy cooking, how to cook veggie, what to do with eggplant, what to do with farmers market vegetables, cooking with kids, vegetable recipes, what to do with vegetables from the farmers market, what to do with squash, kid friendly recipes, veggie recipes
2 Comments

Pumpkin & Short Rib Chili

September 17, 2014 tatumletard@gmail.com
chili.jpg
20140917-213314-77594582.jpg

I smelled it today... The smell of fall. All it takes is stepping outside in 60-70 degree weather, a small breeze blowing, pumpkins displayed at markets and grocery stores, and chili in the Crock-Pot. As a young girl, I remember my mom making the best chili ever. Chili always meant fall. Fall is a comin, and while I'm certain there are plenty more chili recipes I'll create this fall, I put a little spin on the typical Crock-Pot chili - pumpkin, short ribs, and Red Gold tomatoes! No matter how you make yours or what recipes you try out, Red Gold tomatoes are THE way to bring out the true flavor of your chili. Sweet, crisp, and fresh, you would never know these tomatoes came directly from a can. The Red Gold Diced tomatoes are perfectly chopped, so all you have to do is dump them into your crock pot - no knife skills necessary! And the Red Gold Petite Diced tomatoes with Green Chilis give your chili a tiny amount of heat without over powering it!

For a rundown of the recipe and complete review of Red Gold tomatoes, watch the video!

Grocery list (4-6 people):

2-3 lbs short ribs

2 bottles pumpkin beer

Kosher salt

Pepper

2 tbsp olive oil

1 large onion - chopped

2 garlic cloves - minced

1 orange bell pepper - chopped

3 chipotle peppers in adobo sauce - chopped 2 tbsp chili powder

1 tbsp cumin

1 tsp oregano

2 tbsp brown sugar

1/4 cup maple syrup

1 (14.5 oz) can of RED GOLD DICED TOMATOES

1 (14.5 oz) can of RED GOLD PETITE DICED TOMATOES WITH GREEN CHILIS

2 cups beef broth

1 can pumpkin purée

1 can black beans - drained 

4 cloves

1 1/4 tsp cinnamon

Green onions - chopped (for garnish)

Sour cream - optional

Directions:

Step 1:

20140917-192947-70187921.jpg
20140917-193032-70232521.jpg

Prepare the ribs (to save time, I do this the night before). In a large pot, combine beers and 2 cups water. Bring to a boil and add short ribs. Simmer and let the ribs sit for 10 minutes. Drain and pat dry to remove some of the fat from the ribs. Heat olive oil in a pot over medium heat. Salt and pepper all sides of the short ribs and brown the ribs in batches - about 5 minutes for each batch. Set ribs aside.

Step 2:

20140917-193121-70281553.jpg

In the same pot, add onions, garlic, bell pepper, and a pinch of salt. Cook veggies until soft. Add chipotle peppers, chili powder, cumin, oregano, and brown sugar. Stir together and let cook for about 2 minutes. Step 3:

Dump cooked veggies into slow cooker. Add maple syrup, diced tomatoes, petite tomatoes, beef broth, pumpkin purée, black beans and stir to combine.

20140917-193214-70334442.jpg

Add short ribs into the liquid. Add cloves at the very top so you can find them to discard later. Cover and cook on low for 6-8 hours.

Step 4:

20140917-193300-70380368.jpg
20140917-193338-70418962.jpg
20140917-193425-70465177.jpg
20140917-193606-70566934.jpg

Uncover the cooked chili and discard cloves. Transfer short ribs onto a plate or cutting board. Remove the bones and fat and discard. Shred the short rib meat into small pieces with two forks or your hands. Skim the surface of the chili to remove any extra fat that floated to the top. Add the shredded meat back into the slow cooker and stir to combine. Stir in the cinnamon. Taste the chili and add 1/4-1/2 tsp of salt if needed. Serve in bowls and top with green onions and sour cream if desired.

CHEERS TO HAPPY EATING!!!

In Dinner, Recipes, Lunch, Meat, Soups Tags best chili recipe ever, what to cook for large group, best beef recipe ever, cooking for the fall, best pumpkin recipe ever, what to do with canned pumpkin, easy ideas using pumpkin, braised short ribs, short rib chili, halloween recipes, cooking with ahort ribs, pumpkin chili recipes, cooking in october, unique chili recipes, cooking in september, savory pumpkin recipes, cooking for halloween, halloween party recipes, unique chili, fall cooking, using pumpkin to cook, pumpkin recipes, fun cooking, cooking with pumpkin, short rib recipes, easy pumpkin recipes
Comment

Coffee Rubbed Filet Mignon

July 16, 2014 tatumletard@gmail.com
IMGL0471.jpg
20140716-175348-64428732.jpg
20140716-161539-58539540.jpg
20140716-173222-63142870.jpg

I decided I loved to cook a couple of years ago when I was in between jobs and had not much else to do except be a housewife, and because that requires cooking, I did a lot of cooking TV watching. I was in graduate school at the time, so I kept busy with that, but I got so infatuated with watching cooking shows that when I wasn't studying or writing a paper, I was watching "my friends," on Food Network and Cooking Channel. These random people on TV led me to this life and love of cooking. In between cooking shows, I would google recipes, read cookbooks and cooking magazines, and soon enough, I started writing my own recipes. It's the watching, reading, and studying about food that inspires me, and from several years of having food overload on my brain I've gotten kind of decent at this. It probably doesn't hurt that not only do I read cookbooks as if they're novels, but I actually enjoy it. This recipe reminds me of the beginning of my cooking obsession because I was inspired to write this recipe when I saw something similar on a few cooking shows. Sometimes it just takes inspiration from a few recipe to create your own. That's what I did with this one.

Grocery List (4 people):

4 (1 1/2 inch thick) filet mignons

2 tbsp butter - melted

1/2 cup brown sugar

1/4 cup coffee grind

1 tbsp smoked salt (or Kosher)

2 tsp granulated garlic

2 tsp paprika

2 tsp red chili pepper

1 tsp cinnamon

1/2 tsp black pepper

Directions: Step 1:

Take steaks out of the fridge and let come to room temperature for about 15-20 minutes.

20140716-173319-63199266.jpg

Step 2:

Make the dry rub by mixing together the brown sugar, coffee grind, salt, garlic, paprika, chili pepper, cinnamon, and black pepper.

20140716-173358-63238478.jpg

Step 3:

Brush the steaks lightly with the melted butter and generously rub them with the coffee mixture. I like them to have a thick layer of the rub on all sides.

20140716-173443-63283294.jpg

Step 4:

Grill the steaks on high heat for about 6 minutes per side (or 135 degrees with a meat thermometer) for medium-rare steaks.

20140716-173524-63324271.jpg

When finished grilling, set steaks aside with foil tented over the top of them for 10 minutes before cutting into them. Serve with duck fat fries or any side you wish! 

20140716-173601-63361764.jpg

CHEERS TO HAPPY EATING!!!

In Recipes, Dinner, Meat Tags lifestyle blog, easy recipes, blogging, steak, healthy recipes, meat eater, heathly eating, recipe blogger, recipes, easy dinner, cooking blog, cooking blogger, coffee recipes, lifestyle blogger, recipe blog, meat recipes, blogger, steak recipes, fast dinner, fast recipes
1 Comment

BLT Chicken

July 14, 2014 tatumletard@gmail.com
.

.

I can't lay my eyes on a tomato without thinking of my great-grandmother, aka Grams. As a kid, I remember visiting her in Coffeeville, Mississippi, a little town off of I-55 that isn't bigger than a minute (that's about how long it takes to drive through it). Grams always ate tomato sandwiches. That's one of the first things I think of when reminisce about visiting her... Tomato sandwiches. Sometimes I think she must have eaten them for breakfast, lunch, and dinner. Plain white bread, fresh tomatoes from the garden, and mayo... How can you not like her style?! I mean, that's perfection! Not to mention, she was a tiny little lady, so they must not have an effect on the waistline either! Back then, I wasn't real fond of tomatoes, but today, I call that an absolutely delicious, flawless meal. I loved visiting my Grams in that little town, and I can see her in my mind now, sitting at the little kitchen table in her house eating tomato sandwiches. Tomatoes are my life in the summer... And they should be all of yours too! It' the most extravagant fruit of all time, and they're only perfect this very season! Hence, y'all are gonna see me posting a lot of recipes with tomatoes in the next several weeks... Particularly BLTs. In the summer months, I eat BLTs like bacon and tomatoes will never exist again. It's totally necessary. Here's a fun version of a BLT... Plenty more where this one came from.

20140714-161621-58581125.jpg

Grocery List (for two):

2 skinless boneless chicken breasts

2 tbsp mayo 1

lemon - zested and juiced

2 tsp chives - chopped

2 small tomato - cut into 4 thick slices and dried with paper towels

4 slices of thick cut bacon

8 oz shredded lettuce

1 tbsp creamy Dijon mustard (you can buy this in the bottle, but if you can't find it, use regular Dijon and add 1 tsp of mayo)

2 tbsp olive oil

Avocado (optional)

Kosher Salt

Pepper

Toothpicks

Directions

Step 1:

Heat oven to 400 degrees. Lightly salt and pepper both side of the chicken breasts. Set aside.

Step 2:

Prepare the mayo spread. Mix together the mayo with chives, lemon zest, 2 tsp of lemon juice, and 1/4 tsp of salt and 1/4 tsp of pepper.

20140714-161733-58653192.jpg

Step 3:

Spread 1 tbsp of mayo on top of each chicken breast.

20140714-161823-58703892.jpg

Top each with two slices of the dried off tomato slices. Wrap bacon around the chicken and secure with a toothpick on top of each tomato (the bacon should help hold the tomato slices into place). Place each prepared breast on a baking sheet lined with foil and bake for 35 to 40 minutes or until bacon is crispy. 

20140714-162006-58806814.jpg

Step 4:

Prepare the salad. Mix together the mustard with a dash of salt and pepper. Whisk in olive oil slowly. Put shredded lettuce in a bowl and toss with the dressing (do this right before serving so the lettuce doesn't get soggy).

20140714-162106-58866425.jpg

Split the salad in half and make a "bed" on each plate. Top the salad with the prepared chicken. Top the chicken with avocado if desired.

CHEERS TO HAPPY EATING!!!

In Recipes, Dinner, Healthy, Meat Tags easy recipes, unique recipes, easy dinner, chicken recipes, dinner tonight, family dinners, easy chicken dinners, easy meals, easy cooking, blts, weeknight cooking, easy chicken recipes, family meals, easy chicken meals, dinner, blt
Comment

Fig and Prosciutto Salad with Mint Dressing

July 1, 2014 tatumletard@gmail.com
20140701-162552-59152552.jpg
20140701-155700-57420659.jpg

20140701-155700-57420659.jpg

Simple weeknight dinners are sometimes the best dinners. Easy salads on Monday nights make me think of two things: 1) little stress in the kitchen and 2) clean eating for an after weekend detox. After a long Monday at work, particularly a stressful one, nothing beats coming home, putting our feet up, watching TV, and eating a good meal. Sure, it's always great to do a more formal meal at the dining table or even a fun little wine dinner out on the patio every once in awhile during the week, but most Mondays call for sitting in front of the TV and vegging. Like most of the world, we have become Netflix binge watchers and it's what I love to do on Monday nights. A few hours of mindless TV is just simply something great to look forward to after being at work all day. And nothing makes it more special than doing it with the person I love the most, all while having a delightful meal sitting in between us and the TV. I came up with this simple salad recipe last night and couldn't wait another day to share it!

Grocery List (for two):

5 oz spinach and arugula salad mix 6 large figs (dates would also work if you can't find figs) 3 red radishes - thinly sliced 4 oz goat cheese 4 oz thinly sliced prosciutto 2 tbsp balsamic vinegar 1/2 lemon - juiced and zested 1/4 cup mint - minced 1 tsp honey 1/3 cup olive oil Salt Pepper

Directions:

Step 1

20140701-155747-57467011.jpg

20140701-155747-57467011.jpg

20140701-155828-57508426.jpg

20140701-155828-57508426.jpg

Cut each fig in half and toss them all with a little olive oil, salt, and pepper. Set a grill pan to medium high heat. Grill the figs for 3 minutes cut side down. Flip them and grill another two minutes. Set aside to cool down then slice each half into two pieces. Step 2

Toss radishes with a little olive oil, salt, and pepper. Grill radishes slightly for about 1 minute per side. Set aside to cool.

20140701-155914-57554090.jpg

20140701-155914-57554090.jpg

Step 3

Prep the salad dressing. Mix together balsamic, lemon juice and zest, mint, honey, and a dash of salt and pepper. Slowly stream in olive oil while whisking. Taste the dressing and add salt and pepper to desired taste.

20140701-160027-57627595.jpg

20140701-160027-57627595.jpg

Step 4

Prep the salad. Toss greens into a bowl and add pieces of the sliced prosciutto on top. Crumble the goat cheese over the greens and prosciutto and add cooled radishes and figs. Add the dressing and toss together.

20140701-160125-57685554.jpg

20140701-160125-57685554.jpg

CHEERS TO HAPPY EATING!!!

In Lunch, Dinner, Recipes, Salads Tags easy cooking, lifestyle blogger, cookingblog, lifestyle blog, easy salads, good salads, salads, summer salads, easy recipes, figs, healthy food, blogger, cooking blogger, food network, summer eating, healthy recipes, recipe blogger, summer recipes
Comment

Summer Squash and Zucchini Tomato Bake

June 24, 2014 tatumletard@gmail.com
squashbake.jpg

Tomatoes are to July and August as pumpkin is to October. It's the official start of summer, and for me that means being on the lookout for farmers markets anywhere, everywhere, and anytime. But sometimes, it doesn't take a farmers market to find the freshest produce around. I learned that as a kid, and I'm rediscovering it now. Growing up in a small town in Mississippi, I can remember regularly seeing people in blue overalls sitting on the side of the road in chairs with an old truck backed up to the street, tailgate down, and fresh produce spilling right off the back of the truck. That description may sound like I saw it in a painting in the Cracker Barrel and just decided to roll with it as a "childhood memory," but it is in fact the truth. Even today when I go back to my hometown, I see people in those same spots selling tomatoes, watermelons, and all the beauties of a farmer's summer garden. Because I now live in the city, it's rare to see random farm stands and trucks full of produce on the side of the road, but luckily, I travel to small towns for work and it's a lot of fun to keep an eye out for these little pop-up produce markets. This recipe comes inspired by a random market I found in one of the small towns I regularly visit. Similar to a ratatouille, this dish full of fresh, slowly baked veggies with a little surprise on the inside: cheese! And as for the newest random produce stand I found on the street, I'll just say as soon as I cut into the tomatoes, there was no question that they had just been picked that day. My kind of summer produce!

Grocery List (2 people):

IMG_4028.jpg
  • 4-5 large, even sized summer squash and zucchini

  • Kosher salt

  • 4 oz mascarpone cheese - room temperature

  • 4 oz goat cheese - room temperature

  • 3 tbsp. basil - minced

  • 1 tbsp. parsley - minced

  • 1 tsp garlic - minced

  • Pepper

  • 12 oz marinara

  • 1 tsp red pepper flake (optional)

  • 1 large tomato - sliced thick

  • Fresh parmesan

  • Olive oil

Directions:

1. Heat oven to 350 degrees and heat an oiled grill pan to high heat on the stove.

Cut the ends off of each squash and zucchini. One at a time, sit a squash upright with the cut side down so you have a flat, sturdy surface. Cutting downward, slice squash into long, thin pieces. Repeat with the zucchini. Avoid using the end pieces -- you only want the middle so each slice is even, thin, and easy to roll.

IMG_4036.jpg

Place squash and zucchini pieces on a rack and sprinkle with salt on both sides. Let stand for 10 minutes so the moisture comes out of the veggies.

IMG_4031.jpg

Lightly dry each squash and zucchini piece off with paper towels, trying not to remove all the salt from the veggies.

Grill each squash and zucchini piece 2-3 minutes on each side and set aside to cool.

IMG_4033.jpg

2. While the veggies are cooling, prepare the filling by mixing together the mascarpone, goat cheese, basil, parsley, garlic, and a dash of salt and pepper.

IMG_4034.jpg

Take one piece of squash and zucchini at a time, fill with about 1 tsp of cheese mixture, and roll up.

IMG_4035.jpg

3. Lay each rollup down in a small baking dish (if you double up the recipe, use a large baking dish - 9 x 13 in). Cover the pieces with the marinara and sprinkle the top with red pepper flakes.

IMG_4037.jpg

Top sauce with sliced tomatoes and grate fresh parmesan over the top.

IMG_4038.jpg

4. Bake for 20-25 minutes. Top with more basil and serve immediately.

 CHEERS TO HAPPY EATING!!!

In Dinner, Recipes, Healthy, Vegetarian, Lunch Tags veggie recipes, home and garden, veggies, recipes, food porn, home and garden blog, chef, kitchen, home blog, chopped, home, kitchen fun, cook, home cooking, easy cooking, meatless monday, cooking at home, healthy food, food blog, best recipes, food network, cooking blog, farmers market recipes, lifestyle blog, healthy eating, easy recipes, recipe blog, home chef, eating veggies, cooking
Comment

Pork 'N Peaches (or Pears)

May 22, 2014 tatumletard@gmail.com
IMG_3300.jpg

I wonder if every chef remembers the very first recipe they ever created all on their own. I do, and that’s the recipe and cooktale I’m sharing with you today. Pork ‘n Peaches. A classic meat and an essential summer fruit, and not to mention, butter, brown sugar, and roasted pecans. It sounds like a little southern dash of goodness doesn’t it? Well, let me tell ya’ll… IT IS! After about a year of doing nothing but watching Food Network, reading cook books cover to cover, studying recipes as if I had a test on them the next day and following them word by word with every measuring cup and measuring spoon I had in my cabinets, I decided to give up my fear of “a little of this and a dash of that” and boycott following recipes word for word. I mean, I could cook really well when I followed a recipe. It seemed everyone always loved what I cooked, and I had decent enough knowledge of food to give my family and friends tips regularly, so why couldn’t I just start making up my own recipes?

A Saturday morning at the farmer’s market and a sack full of peaches later, I walked in the kitchen and just downright went for it. I was scared. But I wanted to do it. I loved to cook, and I loved the challenge of a difficult recipe, so I thought it was time to start getting creative in the kitchen. In July 2012, my very own version of Pork ‘n Peaches was created, and that same day, my kitchen confidence went sky high. That was the day I went from “cook” to “chef.” I think this can happen for anyone who loves to cook. Don’t be afraid to get creative by taking ingredients you already have and just go for it! Does it always turn out perfectly? Heck no. But you learn and you move on to the next one. In the meantime, I’m happy for you all to follow my recipes, and hopefully I can teach you something along the way!

.

.

Grocery List (4 people):

Pork:

  • 2 lbs pork loin with fat trimmed

  • 2 tbsp olive oil

  • 1 orange (zest and juice)

  • 2 lemons (zest of one, juice of both)

  • 2 limes (zest of one, juice of both)

  • 1 tbsp fresh grated ginger

  • ¼ cup of brown sugar

  • 1 tbsp fresh thyme – chopped

  • 3 garlic cloves – minced

  • 2 tsp Kosher salt

  • 1 tsp pepper

Peaches or Pears (whatever is in season):

  • 4 peaches or pears (or one for each person) – halved, core or seeds scooped out

  • 2-3 tbsp of melted butter (or more if more fruit is used)

  • 1 tsp brown sugar for each peach/pear half

Dressing:

  • 1 lemon – juiced

  • 1/3 cup honey

  • 1 tbsp red wine vinegar

  • ¼ cup of mint – minced (plus some whole leaves for garnish)

  • Goat cheese – for topping

  • Pecans – for topping (recipe below)

Pecans:

  • ¼ cup whole pecans

  • 1 tsp olive oil

  • 1 tsp brown sugar

  • 1/4 tsp ground cinnamon

  • 1/8 tsp ground ginger

  • Pinch of cayenne

  • Pinch of salt

Directions:

Step 1:

Pork:

Start by making the marinade. Combine all the ingredients in a plastic Ziploc bag. Put pork in the bag and make sure it’s covered in the marinade. Let the marinated porksit in the fridge for at least an hour or more.

.

.

Grill on medium heat, turning every 5 minutes (and basting with remaining marinade as you turn) for 30 minutes or until the thickest part of the loin is heated to 155-160 degrees. It can be grilled indoors on a grill pan or on an outdoor grill. I prefer an outdoor grill’s flavor for this dish.

.

.

 Once the meat is the correct temperature, take off the grill and set aside. Tent the meat with foil and let rest for about 10 minutes.

To serve, slice meat in ½ inch pieces at an angle and top with chives for garnish. Serve alongside the peaches.

Step 2:

Peaches (these can be prepared when the pork is marinating):

.

.

Brush peach (or pear) halves with melted butter, liberally and sprinkle with the brown sugar. Set aside until ready to grill with the pork.

Grill for 3 minutes, cut side down. Flip, and grill for 2 more minutes on the other side.

.

.

For the dressing: combine the honey, lemon juice, vinegar, and chopped mint in a small sauce pan and whisk. Bring to a boil and let simmer for 5-10 minutes. Take off the heat to thicken.

.

.

Top grilled peaches (or pears) with dressing, goat cheese crumbles, and pecans.

Step 3:

Pecans (these can also be prepared when the pork is marinating):

.

.

Heat oven to 350. Toss pecans with olive oil, sugar, and spices. Roast for 12-15 minutes.

CHEERS TO HAPPY EATING!!!

In Dinner, Recipes, Healthy, Meat Tags best recipes, chef, chopped, cook, cooking, cooking at home, cooking blog, cooking in costa rica, easy cooking, easy recipes, food blog, food network, food porn, home, home and garden, home and garden blog, home blog, home chef, home cooking, kitchen, kitchen fun, lifestyle blog, mothers day recipes, peach recipes, pear recipes, pecan recipes, pork recipes, quick and easy recipes, quick recipes, recipe blog, recipes, simple recipes
Comment

Balsamic Salmon with Tomato Avocado Salad

May 20, 2014 tatumletard@gmail.com
image.jpg

I don't always come home exhausted and not willing to cook. Typically, cooking is what makes me happy and relaxes me after a long day. But there's a difference in having a long day and being down right exhausted. For the last couple of years, grad school has been my "after work activity" one or two days a week. Funny enough, I discovered my love for cooking about the same time I started grad school, and unfortunately, there wasn't always time to come home and cook a big elaborate meal when getting home at 9 pm on some nights. I was grateful to have a husband who would cook dinner or order takeout for us while I was in class and have it plated up and ready by the time I got home, but some nights, I just wanted to cook. It just helped me wind down. It did then, and it does now. On these nights I had to come up with something quick and easy to cook. I'm happy to say I have graduated with an MA in Journalism (yay), but that's not to say there still won't be nights I'll need a go-to, no-fuss meal. This is one of those meals... a meal that most people in the world will appreciate. 8 ingredients, 10 minutes... done!!! Thank you grad school for challenging me in this way!

Grocery List:

  • 1/2 cup good quality balsamic vinegar

  • Kosher salt

  • Good quality olive oil - 1 tbsp for each filet, plus some for the pan

  • 4 fresh salmon filets - skin off

  • 4 tomatoes - firm to the touch

  • 2 avocados

Directions:

1. Heat oven to 450 degrees. In a small saucepan, bring 1/4 cup of the balsamic and a pinch of salt to a boil and let simmer. Heat a saute pan with a splash of olive oil to the highest heat (like you're going to boil something) until olive oil is smoking. Sprinkle olive oil, salt, and pepper on each side of the salmon - about 1 tbsp of olive oil, 1/2 tsp of salt, and 1/4 tsp of pepper. 

2. When oil is smoking on the pan, place salmon on the pan face down and don't touch or move for 2 full minutes (not touching it creates an amazing crust... the kind you see on your salmon in restaurants). Flip salmon and let cook for 1 minute on the other side then put the salmon (pan and all) in the 400 degree oven for 3-4 minutes.

3. While salmon is cooking, cube the tomatoes and avocado, throw into a large bowl, and add the rest of the balsamic, 1 tsp of salt (or to taste), pepper, and stir together.

4. When the salmon is done, take out and set aside. To plate, put a serving of the tomato and avocado salad on a plate and top with the salmon. Spoon balsamic glaze over the fish and the salad.

CHEERS TO HAPPY EATING!!!

In Recipes, Dinner, Healthy, Seafood Tags recipe blog, home cooking, farmers market recipes, food network, home and garden blog, cooking blog, salmon recipes, healthy eating, home blog, healthy food, cooking at home, easy cooking, easy recipes, home, avocado recipes, recipes, lifestyle blog, kitchen, food blog, home chef, fish recipes, cook, home and garden, tomato recipes, cooking, chef, kitchen fun, best recipes, healthy recipes
1 Comment

Spaghetti with Mascarpone Marinara and Pork Crunchies

May 14, 2014 tatumletard@gmail.com
42cooktalesedits.jpg
.

.

IMG_3137.jpg

Sometimes there’s more than one cooktale for a recipe. If it’s good, you’re going to make it again and again with more stories to follow the first one. This is one of those recipes. I’ll start with the tale of the first time I made it.

There’s nothing like cooking when you’re out of town – particularly in a different country. You’re completely out of your element at the grocery store and quite frankly clueless of what half the ingredients are that you lay eyes on when you walk in the place – or so I discovered. However, it’s a great time to experiment with your culinary skills. The first time I created this dish it was completely by accident. It was my 30th birthday and New Year’s trip in Costa Rica with my best gal friends Ginger, Tracy, and Amy Claire, as well as my husband, Tres and Ginger’s husband, James. We rented a spectacular house in the mountains with an ocean view and the plan was to cook, cook, cook it up the entire trip. I had my recipe ideas written down and a grocery list ready to go, but as soon as we walked in the grocery store I realized no “planned” recipe was going to happen, as the store had none of the ingredients I needed. So, with help from the guys and gals, I just started grabbing whatever looked familiar that could potentially be put together and become meals. When we got back to the house, it was time for me to play Food Network’s “Chopped,” as our shopping trip ingredients had turned into one of those mystery baskets. That’s where this recipe came from, and I’m quite happy about it because it turned out G-O-O-D! Most of the meals we had that trip were a success, and I have to say it’s the first I ever played the game “use up everything in the fridge before we go home” and actually won at it!

I’ve made this pasta dish twice since Costa Rica. I made it for a group of 15 people when Tres and I were in Destin last month. We stayed in a condo on the beach, complete with a kitchen. Knowing it would be the biggest group I had ever cooked for, I thought what better to cook than pasta? It was a hit again, so I made it for Mother’s Day this past weekend. Surprise ingredients from a grocery store in Costa Rica became a staple, go-to meal for travel cooking and at home, and it’s now the first post on my blog.

.

.

Grocery List:

  • 1 package of large pepperoni slices

  • 1 package of large salami slices

  • 1 tbsp olive oil

  • 1 small onion – chopped

  • 3 garlic cloves – minced

  • 2 tsp fresh thyme – chopped

  • 1 tsp dried oregano

  • 2 tsp red pepper flakes

  • ¼ cup red wine

  • 1 (24 oz) jar marinara sauce

  • 8 oz container mascarpone

  • 1 lb package spaghetti

  • 1 ½ tsp salt and more to taste (for sauce) and a palmful of salt (to boil the pasta)

  • ¼ cup fresh basil – chopped or torn

  • Freshly grated parmesan cheese

Directions:

1. Heat oven to 400 degrees. Line 2 baking sheets with foil and spread the salami slices on one and pepperoni slices on the other. Bake until crisp for about 8-10 minutes.

.

.

Watch meat carefully when it’s in the oven… Ehh umm, this is a picture of what NOT to do. Yep, it happens.

burnt

burnt

When salami and peperoni are crisp (not burned), take out of the oven, let cool, and crumble into a bowl. Set aside with the basil and parmesan

.

.

2. While the meat is baking away in the oven, start the sauce. Heat olive oil over medium-high heat, add onion and a dash of salt (dashes of salt help soften veggies and increase flavor along the way). Let cook down and get slightly brown for 5-7 minutes.

Turn down heat to medium-low and add garlic, thyme, oregano, and pepper flake.

.

.

Stir and cook for two minutes. Add wine, scrape any brown bits created on the bottom of the pan, and let wine reduce by half.

.

.

3. Add marinara and let heat 2-3 minutes. Stir in mascarpone until sauce becomes light in color and cheese is dissolved. Add 1 ½ tsp of salt or more (to taste… this is a preference thing. I cannot emphasize this enough. If I am ever vague in my salt measurements on any of these recipes it’s because I am a strong believer in tasting your food before you serve it. Salt can make or break a recipe – it’s very possible for it to have too little or too much. Add with caution and taste before you add more. You’ll know if it needs more. A dish is at its fullest of flavor when it has enough salt).

.

.

4. Boil pasta. Heat a pot over high heat with a palm full of salt. When it comes to a boil, add the pasta. Cook for 8-9 minutes or until al dente (cooked well but firm to bite). Drain pasta but leave a little pasta water (about ¼ cup) in your noodles (this helps the sauce stick to the noodles and gives the dish a hint of that starchy pasta flavor). Combine the noodles and sauce or put sauce on top of the noodles.

Top with salami and pepperoni crunches, basil, and parmesan.

CHEERS TO HAPPY EATING!!!

In Dinner, Holiday, Meat, Pasta and Grains Tags food network, easy pasta recipes, home blog, food in costa rica, home, easy recipes, home cooking, food in destin, best spaghetti, best recipes, mothers day recipes, kitchen fun, lifestyle blog, mothers day food, chopped, home and garden, food porn, home and garden blog, chef, pasta, cooking in destin, cooking blog, recipe blog, spaghetti, cooking in costa rica, cooking at home, food blog, cooking, recipes, home chef, kitchen, easy cooking, mothers day cooking, cook, costa rica
8 Comments
← Newer Posts

MEET ANDREA

Hey y'all! Welcome to Andrea’s Cooktales. I’m a believer that the best stories are shared and the fondest memories are made in the kitchen, at the dinner table, and surrounded by food. This blog is about storytelling from the kitchen and the dinner table.  (Read more...)

RECENT POSTS

Featured
IMG_1079.jpg
Mar 1, 2024
Better Than a Steakhouse Filet Mignon
Mar 1, 2024
Mar 1, 2024
IMG_1267.jpg
Mar 1, 2024
Raspberry Rose Brie Bread
Mar 1, 2024
Mar 1, 2024
IMG_2041.jpg
Mar 1, 2024
Best Breakfast Burrito in Existence
Mar 1, 2024
Mar 1, 2024
IMG_2037.jpg
Mar 1, 2024
Campari Spritz
Mar 1, 2024
Mar 1, 2024
IMG_2034.jpg
Mar 1, 2024
Truffle Seafood Pot Pies
Mar 1, 2024
Mar 1, 2024
IMG_1066.jpg
Feb 4, 2024
Steakhouse Creamed Spinach Casserole
Feb 4, 2024
Feb 4, 2024
IMG_7278.jpg
Nov 9, 2023
“Season of the Witch” Salad
Nov 9, 2023
Nov 9, 2023
IMG_8931.jpg
Nov 9, 2023
Vampire Aperol Spritz
Nov 9, 2023
Nov 9, 2023
IMG_2388.jpg
Nov 9, 2023
Zombie Meat Spaghetti
Nov 9, 2023
Nov 9, 2023
IMG_4252.jpg
Nov 9, 2023
“Somebody’s Watching Me” Baked Cheese with Chile Eyeballs
Nov 9, 2023
Nov 9, 2023

ARCHIVES

Archive
  • March 2024 5
  • February 2024 1
  • November 2023 6
  • September 2023 12
  • August 2023 6
  • September 2022 1
  • February 2021 2
  • December 2020 8
  • November 2020 9
  • October 2020 4
  • September 2020 6
  • August 2020 7
  • July 2020 3
  • May 2020 2
  • February 2020 5
  • January 2020 3
  • December 2019 3
  • November 2019 4
  • October 2019 8
  • September 2019 4
  • August 2019 2
  • July 2019 6
  • May 2019 3
  • April 2019 5
  • March 2019 2
  • February 2019 2
  • December 2018 6
  • November 2018 7
  • October 2018 5
  • July 2018 1
  • June 2018 3
  • April 2018 1
  • February 2018 2
  • January 2018 10
  • November 2017 1
  • October 2017 2
  • September 2017 2
  • August 2017 1
  • July 2017 1
  • June 2017 3
  • May 2017 1
  • March 2017 4
  • February 2017 1
  • January 2017 2
  • December 2016 4
  • November 2016 7
  • October 2016 3
  • September 2016 5
  • August 2016 2
  • July 2016 4
  • June 2016 2
  • May 2016 9
  • April 2016 7
  • March 2016 7
  • February 2016 18
  • January 2016 8
  • December 2015 10
  • November 2015 14
  • October 2015 14
  • September 2015 13
  • August 2015 5
  • July 2015 6
  • June 2015 5
  • May 2015 6
  • April 2015 5
  • March 2015 6
  • February 2015 3
  • December 2014 3
  • October 2014 7
  • September 2014 6
  • August 2014 6
  • July 2014 7
  • June 2014 6
  • May 2014 6

CATEGORIES

  • TRAVEL TALES
  • LIFESTYLE POSTS
  • RECIPES
  • ANDREA'S COOKTALES
  • QUICK BITES
  • TV APPEARANCES
  • WHAT DO YOU DO WITH THAT

BLOG     |     VIDEOS     |      SERVICES    |       RECIPE INDEX    |      PRIVACY

Copyright Andrea's Cooktales 2016-2017 | Design by Oh Simple Joys Design Studio