• Cookbook
  • About
  • Video
  • Recipes
  • Travel
  • Inspiration
  • Services
  • Contact
Menu

Andrea's Cooktales

Street Address
City, State, Zip
Phone Number
A STORY BEHIND EVERY RECIPE

A STORY BEHIND EVERY RECIPE

Andrea's Cooktales

  • Cookbook
  • About
  • Video
  • Recipes
  • Travel
  • Inspiration
  • Services
  • Contact

Unfried BBQ Pickles 

June 5, 2015 tatumletard@gmail.com
IMG_9473.jpg

I was invited to go on Local Memphis Live again this week and create more Southern Recipe Pork Rinds recipes! I have to say, this gets more and more fun every time. I love getting creative with the pork rinds and coming up with new, innovative recipes. I happen to love fried pickles, so I thought a healthy, high protein version would be perfect for summer!


Grocery List:


2 eggs - beaten

1/4 cup flour

1 1/2 tsp salt

1/2 tsp pepper

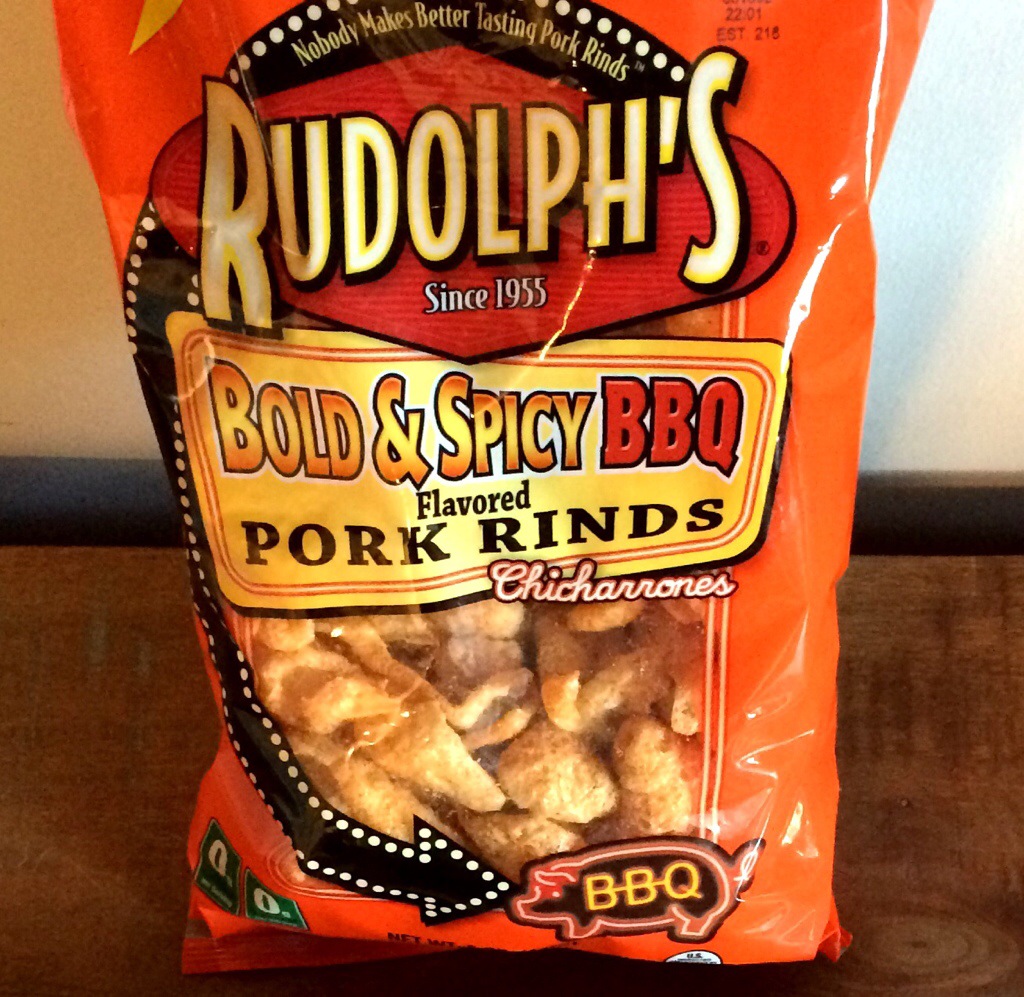
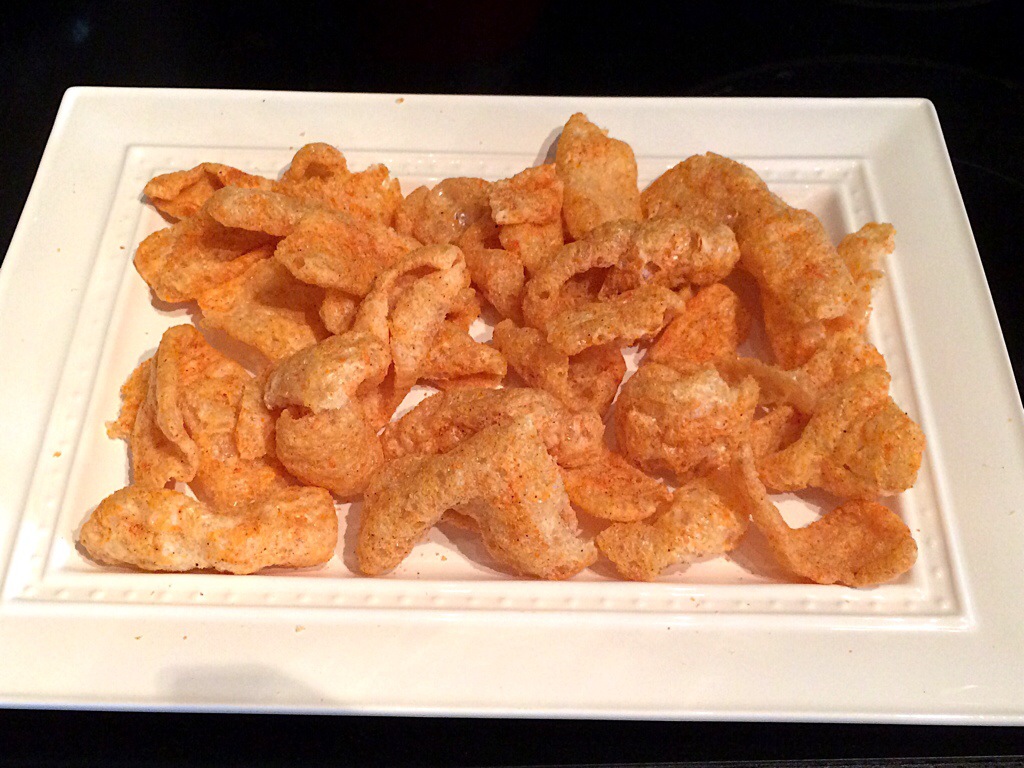
2 cups Southern Recipe BBQ Pork Rinds - finely crushed

1 16 oz jar sliced pickles


Directions:


1. Heat oven to high broil. Place oven rack in the middle of the stove. Beat the eggs, flour, salt and pepper together in a small bowl. In another small bowl, add the finely crushed pork rinds (I crush them with my hands).


2. Take the pickles out of the jar and lay on paper towels. Blot off all the liquid from the pickles. Dip each dry pickle into the egg mixture, then into the crushed pork rinds, pressing to adhere the crumbs to the pickles.


3. Lay "breaded" pickles onto a lightly greased baking sheet. Put in the oven for about 6-8 minutes. You want them to be brown and extra crispy when they come out! Serve with your favorite dipping sauce.

In Recipes, Snacks & Apps, Healthy, Snacks, Sides Tags new ways to eat clean, new healthy recipes, unique low carb recipes, southern snacks, making southern foods healthy, southern party foods, southern recipe pork rinds, southern cooking, low carb snacks, pork rind recipes, healthy food, healthy snacks, pork rinds, healthy recipes, unfried pickles, unfried bbq pickles, rudolphs pork rinds
Comment

Buffalo Hot Wing Hummus

February 8, 2015 tatumletard@gmail.com
Buffalo Hot Wing Hummus.jpg
IMG_7548.jpg

When I was in high school, I had a serious addiction to boneless hot wings... I ordered them everywhere I went! Today, I have a serious addiction to hummus. When I'm trying to eat healthy, I like to keep it around as a snack. I thought why not put the two together and create the best of both worlds?! This stuff is seriously good!

Grocery List:

  • 1/3 cup sesame seeds

  • 2-3 tbsp olive oil

  • 1 can garbanzo beans - drained and rinsed

  • 1 can cannellini beans - drained and rinsed, 1/3 cup liquid reserved

  • 1 lemon - juiced

  • 4 garlic cloves - roughly chopped

  • 2 tsp red wine vinegar

  • 1 1/2 tsp Kosher salt

  • 1/3 cup Frank's buffalo wing sauce, plus extra for drizzling

  • 1/4 cup Blue, Gorgonzola, or Feta cheese

Directions:

1. Make the Tahini paste. In a small pan over medium low heat, toast the sesame seeds until light brown. Put seeds in a food processor and add olive oil, blending until it comes together into a runny paste. It will make about 1/4 cup of paste.

2. To the food processor, add the paste, beans, bean liquid, lemon juice, garlic, vinegar, salt, and hot sauce. Blend all the ingredients together until smooth. If it's not smooth enough, add more liquid from the beans and lemon juice until it's to your desired consistency.

3. Taste for seasoning and add more salt if needed. Pour in a bowl and top with the cheese and a drizzle of the hot sauce. Serve with celery, carrots, cucumbers, or pita bread.

CHEERS TO HAPPY EATING!!


In Recipes, Healthy, Snacks, Snacks & Apps, Vegetarian Tags buffalo hummus, franks hot sauce recipes, unique hummus recipes, hot sauce recipes, Gameday apps, gameday food, gameday snacks, best hummus recipes, best dips, hummus recipes, buffalo hot wing hummus
Comment

Butternut Squash Soup with Apple Relish

October 29, 2014 tatumletard@gmail.com
IMGL0183.jpg

Fall is by far my favorite time of year for one reason: Halloween! I live life for this holiday. I look forward to October 31 all year, and aside from my brother's birthday being on November 1, I think that is the worst day of the year (my husband claims it's his favorite day of the year but I can't imagine why? :) My obsession with Halloween goes back to childhood memories. My family always welcomed fall with such open arms, and my dad made a huge deal out of Halloween. We would go to the extremes with decorations - making scarecrows and monsters out of old flannel shirts, hay, and scary masks. Pumpkins and hay bells would always be at the end of our driveway, complete with monsters hanging in trees and scarecrows sitting in chairs. My dad and my Nenne were both big on dressing up, and they always had such memorable costumes! My dad loved to buy a new scary mask every year and play tricks on people with it.

Looking back, I feel like we celebrated Halloween the entire month of October. I can remember being just a little girl, and telling my mom, "There's something extra special about fall.. It's the only season I can smell." That stands true today. I can smell fall when it's coming, and starting October 1, our house smells of pumpkin, chili is often on the stove, our television plays only movies in the scary genre, and I insist on buying at least 20 gigantic pumpkins and squash to decorate with. I get chills just thinking about it.

This soup is special to me because we do a Halloween dinner party every year, and this was the first fall soup I ever created for it. It was a huge hit, so I make a batch (or three) every fall.

SEE THE VIDEO HERE!!!

Grocery List:

Soup:

2 large butternut squash - peeled and chopped into 1 in pieces

1 sweet potato - peeled and chopped into 1 in pieces

1 carrot - peeled and chopped into 1 in pieces

3 tbsp olive oil

Kosher salt

Pepper

1 small onion - chopped

1 stalk of celery - chopped

2 tbsp garlic - chopped

2 tbsp shallot - chopped

2 tbsp apple cider vinegar or apple liquor

6 cups chicken stock

2 tbsp maple syrup

1 tbsp sage

1 tsp cinnamon

1/4 tsp nutmeg

1/8 tsp cayenne

Relish:

1 Fuji Apple - finely chopped

1/4 cup walnuts - toasted and finely chopped

1/4 cup red onion - finely chopped

1/4 cup dried cranberries or cherries - finely chopped

2 tbsp maple syrup

1 tbsp - apple juice

4 small acorn squash (optional)


.

.

.

.

Directions:

Step 1:

Preheat oven to 425 degrees.

Toss squash, potato, and carrot with 2 tbsp of olive oil, salt, and pepper on a baking sheet. Roast veggies for 35 minutes or until soft.

.

.

.

.

Step 2:

While veggies are roasting, heat 1 tbsp of olive oil in a Dutch oven or large pot over medium heat. Sautée onion and celery with a dash of salt until translucent. Add garlic and shallot to the pot with a dash of salt and cook for one minute. Add the vinegar or liquor, stock, maple syrup, spices, and roasted veggies to the pot. Stir to combine. 

.

.

Step 3:

Using a hand blender (or transfer soup to an electric blender working in batches) blend soup together until smooth. Let the soup sit over low heat for 30 minutes or longer (the longer it sits the better it tastes).

.

.

.

.

Step 4:

Make the relish. In a bowl, stir together the apple, walnuts, red onion, cranberries, maple syrup, apple juice, and about 1/8 tsp salt. Make the squash bowls by cutting off the corner of the bottom (this makes a flat surface for it to sit on). Then, cut off about 1 inch of the top. Using a spoon, scoop out the seeds and insides until smooth and in the shape of a bowl. Taste soup before serving and add more salt if needed. Ladle soup into the squash bowls and top with apple relish.

CHEERS TO HAPPY EATING!!!

In Recipes, Lunch, Dinner, Healthy, Soups Tags best cooking videos, unique foos bowls, make food into bowls, fall recipes, halloween recipes, the best soup ever, beat cooking on youtube, how to make squash bowls, halloween ideas, best food on tv, how to make soup, how to blend soup, how to make the best soup, acorn squash bowls, best cooking tv, using squash, cooking on youtube, halloween soup
Comment

Quick & Easy Pumpkin French Toast

October 4, 2014 tatumletard@gmail.com
20141004-094738-35258449.jpg
20141004-094819-35299669.jpg

I always love to wake up on a weekend morning, make myself a cup of coffee, and sit outside on the balcony and enjoy the day. Sometimes, I like to make myself a quick breakfast before. This morning was one of those mornings. I woke up starving, but I didn't want to waste the beautiful day away cooking for hours. I found a few things in the pantry and created something I think we can all agree to like this time of year: Pumpkin French Toast! Y'all, this took 15 minutes and the enjoyment it gave me will last me all day!

Grocery list (2 people):

3 eggs

3 tbsp cream

1 tsp pumpkin pie spice

1/2 tsp vanilla extract

1 tbsp honey

2 heaping tbsp canned pumpkin

Pinch of salt

Butter Bread (I like a fresh loaf but you can use any you have on hand)

Directions:

Step 1:

20141004-094852-35332841.jpg

In a shallow dish combine the eggs, cream, spice, vanilla, honey, pumpkin, and salt with a fork until smooth.

Step 2:

Over medium heat, add butter to a griddle or pan.

20141004-095012-35412134.jpg

Dip sliced bread into egg mixture.

Step 3:

20141004-095056-35456834.jpg

Fry bread for 2-3 minutes on each side or until golden.

CHEERS TO HAPPY EATING!!!

In Breakfast & Brunch, Recipes, Healthy, Sandwiches and Bread, Sweets Tags fast french toast, easy breakfast ideas, easy brunch ideas, quick french toast, pumpkin french toast, easy french toast, quick brunch ideas, quick breakfast ideas, best ever french toast, how to make french toast, cooking french toast, pumpkin recipes
Comment

Dr. Frank's Famous Okra & Tomatoes

September 24, 2014 tatumletard@gmail.com
20140924-173554-63354410.jpg

You know that recipe a family member gave to you long ago? Everyone has one. It's usually written down on a piece of paper with faded pen-marks, maybe even ripped and worn on the sides. Those are the recipes that you hold on to for dear life because you can never quite remember the exact measurements, and you cherish it because it's delicious and it came from family. I have several of these, but this one specifically was given to Tres by his dad. Tres usually cooks this dish, and I help him. It's a fun excuse to spend time in the kitchen together. Long before I knew how to cook worth a darn, I tasted Tres' dad's cooking. It was at Frank's house that I learned you don't have to be a chef to cook like one. Let me tell ya, he's one of the best home cooks I've ever come across, and his okra and tomatoes prove just that. Very few simple, fresh ingredients make this not only an easy meal or side dish, but it's recipes like this one that prove 1,000 ingredients aren't necessary to make a perfect dish. It's the freshness that matters! And speaking of Frank, the last time we made this dish, the okra came straight from his garden.

20140924-173625-63385944.jpg

Grocery list:

1 lb fresh okra - chopped into 1/2 inch pieces 2 large fresh tomatoes - chopped into 1/2 inch cubes

1/2 onion - chopped

2 slices of bacon - chopped (we love Applewood Smoked from Fresh Market)

1/2 cup water

2 tsp salt

1 tsp pepper

1/2 tsp Accent

Directions:

Step 1:

Heat large sautée pan to high heat.

20140924-173700-63420837.jpg

Throw all the chopped ingredients into the pan with water, salt, pepper, and Accent.

Step 2:

20140924-173732-63452803.jpg

Stir all ingredients together to combine. Step 3:

Cook over high heat for about 15-20 minutes, stirring often. For crunchier okra, cook less, for softer okra cook more.

Step 4:

20140924-173841-63521404.jpg

Add to a bowl and serve with cornbread or add as a side dish to roasted chicken or anything you wish!

CHEERS TO HAPPY EATING!!!

In Healthy, Recipes, Sides Tags okra recipes, skinny okra, healthy veggie recipes, low calorie okra recipes, healthy okra, low calorie recipes, best ever okra and tomatoes, healthy okra recipes, how to cook okra, clean recipes, okra recipes not fried, okra and tomatoes recipe, cooking with okra, using okra to cook, nonfried okra, other ways to cook okra besides frying it, cooking vegetables without oil, not fried okra, healthful okra recipes, low calorie tomato recipes, stewed okra and tomatoes, cooking vegetables, non fried okra
1 Comment

Pork Rind BBQ Nachos

August 20, 2014 tatumletard@gmail.com
Pork Rind Nachos.jpg
20140820-174316-63796980.jpg

To continue my recipes from the Local Memphis Live TV segment on Tuesday, today I'm posting recipe #2: Pork Rind BBQ Nachos. This is a low carb version of the real thing. And I have to say, using pork rinds instead of tortillas may just give the original recipe a run for it's money. If you live in Memphis, you know that BBQ nachos are a staple around here. If you don't live in Memphis and you come to Memphis, the first thing you should eat is BBQ Nachos. I'm not joking. Do it.

This fun snack will always remind me of Redbirds and Grizzlies games. Yeah sure, we love watching the games, love the atmosphere, and love all the fun that comes along with the 'Birds and Grizz, but I have to admit, half the reason me and Tres go to the games are for the BBQ Nachos! We can't be in our seats for more than 5 minutes without getting an order of BBQ Nachos and a beer. It never fails and never will! Now we can make them at home -- low carb!

20140820-174155-63715031.jpg

Grocery List:

1 bag Rudolph's BBQ Pork Rinds

32 oz pulled pork (I like to use leftovers from sandwiches the night before or you can find it in the freezer section of your grocery store)

1 cup cheddar cheese - grated

1/2 cup (or more) BBQ sauce

1 jalapeño - chopped into rounds (optional)

Parsley - for garnish

Directions:

Step 1:

20140820-174535-63935716.jpg
20140820-174236-63756438.jpg

On a large platter, spread out the pork rinds directly from the bag.

Step 2:

Top the rinds with the pulled pork, then the cheese, and finally the BBQ sauce (you can add as much or little of any of these as you like).

Step 3:

If you like a little spice, add the chopped jalapeño. Garnish with parsley.

CHEERS TO HAPPY EATING!!!

In Snacks & Apps, Recipes, Healthy, Lunch, Meat, Snacks Tags southern food, recipes, southern recipe blogger, game recipes, gameday recipes, local memphis, rudolphs food, pork rinds, gameday cooking, party food, party recipes, south recipe, cooking in the south, southern food blog, local memphis live, food blog, party apps, apps, southern blog, southern recipe, southern recipes, food, southern cooking, southern recipe blog, cooking with pork rinds
1 Comment

Fig Toast

July 20, 2014 tatumletard@gmail.com
FullSizeRender.jpg
20140720-133928-49168889.jpg

One of my favorite things to do on a Saturday or Sunday morning is tip-toe out of bed without waking Tres and have breakfast made for him before he gets up. I make my coffee, pull out whatever ingredients I picked up from the market during the week, and create something with whatever I have on hand. I never turn on the TV or listen to the radio. I just simply enjoy the silence I have in the kitchen. It's so relaxing. I did this very thing yesterday and loved the recipe I made so I wanted to share it with you. We've all heard of Avocado Toast but for a much "sweeter" version, try Fig Toast!

Grocery List (for 2):

2 pieces thick cut bread

2 tbsp butter

4 ripe figs - chopped

1 tbsp honey

1/2 tsp cinnamon

1/8 tsp salt

1 inch honeycomb (or more honey)

Balsamic vinegar

Directions:

Step 1:

20140720-134000-49200731.jpg

Toast and butter the bread.

Step 2:

20140720-134032-49232101.jpg
20140720-134108-49268705.jpg

With a fork, smash the figs together in a bowl with the honey, cinnamon, and salt. Spread the mixture thickly and evenly over the bread.

Step 3:

20140720-134155-49315466.jpg

Slice and crumble the honeycomb over top of the mixture. If you don't have honeycomb, no problem! Just drizzle a little more honey over the top.

Step 4:

20140720-134249-49369542.jpg

Drizzle the toast with balsamic.

CHEERS TO HAPPY EATING!!!

In Recipes, Sandwiches and Bread, Healthy, Breakfast & Brunch, Sweets Tags brunch recipes, avocado toast, fast breakfast, brunch, summer recipes, fig recipes, quick breakfast, fig toast, bread recipes, easy breakfast, fruit recipes, easy breakfast recipes, figs, breakfast, toast, breakfast recipes
Comment

BLT Chicken

July 14, 2014 tatumletard@gmail.com
.

.

I can't lay my eyes on a tomato without thinking of my great-grandmother, aka Grams. As a kid, I remember visiting her in Coffeeville, Mississippi, a little town off of I-55 that isn't bigger than a minute (that's about how long it takes to drive through it). Grams always ate tomato sandwiches. That's one of the first things I think of when reminisce about visiting her... Tomato sandwiches. Sometimes I think she must have eaten them for breakfast, lunch, and dinner. Plain white bread, fresh tomatoes from the garden, and mayo... How can you not like her style?! I mean, that's perfection! Not to mention, she was a tiny little lady, so they must not have an effect on the waistline either! Back then, I wasn't real fond of tomatoes, but today, I call that an absolutely delicious, flawless meal. I loved visiting my Grams in that little town, and I can see her in my mind now, sitting at the little kitchen table in her house eating tomato sandwiches. Tomatoes are my life in the summer... And they should be all of yours too! It' the most extravagant fruit of all time, and they're only perfect this very season! Hence, y'all are gonna see me posting a lot of recipes with tomatoes in the next several weeks... Particularly BLTs. In the summer months, I eat BLTs like bacon and tomatoes will never exist again. It's totally necessary. Here's a fun version of a BLT... Plenty more where this one came from.

20140714-161621-58581125.jpg

Grocery List (for two):

2 skinless boneless chicken breasts

2 tbsp mayo 1

lemon - zested and juiced

2 tsp chives - chopped

2 small tomato - cut into 4 thick slices and dried with paper towels

4 slices of thick cut bacon

8 oz shredded lettuce

1 tbsp creamy Dijon mustard (you can buy this in the bottle, but if you can't find it, use regular Dijon and add 1 tsp of mayo)

2 tbsp olive oil

Avocado (optional)

Kosher Salt

Pepper

Toothpicks

Directions

Step 1:

Heat oven to 400 degrees. Lightly salt and pepper both side of the chicken breasts. Set aside.

Step 2:

Prepare the mayo spread. Mix together the mayo with chives, lemon zest, 2 tsp of lemon juice, and 1/4 tsp of salt and 1/4 tsp of pepper.

20140714-161733-58653192.jpg

Step 3:

Spread 1 tbsp of mayo on top of each chicken breast.

20140714-161823-58703892.jpg

Top each with two slices of the dried off tomato slices. Wrap bacon around the chicken and secure with a toothpick on top of each tomato (the bacon should help hold the tomato slices into place). Place each prepared breast on a baking sheet lined with foil and bake for 35 to 40 minutes or until bacon is crispy. 

20140714-162006-58806814.jpg

Step 4:

Prepare the salad. Mix together the mustard with a dash of salt and pepper. Whisk in olive oil slowly. Put shredded lettuce in a bowl and toss with the dressing (do this right before serving so the lettuce doesn't get soggy).

20140714-162106-58866425.jpg

Split the salad in half and make a "bed" on each plate. Top the salad with the prepared chicken. Top the chicken with avocado if desired.

CHEERS TO HAPPY EATING!!!

In Recipes, Dinner, Healthy, Meat Tags easy recipes, unique recipes, easy dinner, chicken recipes, dinner tonight, family dinners, easy chicken dinners, easy meals, easy cooking, blts, weeknight cooking, easy chicken recipes, family meals, easy chicken meals, dinner, blt
Comment

Summer Squash and Zucchini Tomato Bake

June 24, 2014 tatumletard@gmail.com
squashbake.jpg

Tomatoes are to July and August as pumpkin is to October. It's the official start of summer, and for me that means being on the lookout for farmers markets anywhere, everywhere, and anytime. But sometimes, it doesn't take a farmers market to find the freshest produce around. I learned that as a kid, and I'm rediscovering it now. Growing up in a small town in Mississippi, I can remember regularly seeing people in blue overalls sitting on the side of the road in chairs with an old truck backed up to the street, tailgate down, and fresh produce spilling right off the back of the truck. That description may sound like I saw it in a painting in the Cracker Barrel and just decided to roll with it as a "childhood memory," but it is in fact the truth. Even today when I go back to my hometown, I see people in those same spots selling tomatoes, watermelons, and all the beauties of a farmer's summer garden. Because I now live in the city, it's rare to see random farm stands and trucks full of produce on the side of the road, but luckily, I travel to small towns for work and it's a lot of fun to keep an eye out for these little pop-up produce markets. This recipe comes inspired by a random market I found in one of the small towns I regularly visit. Similar to a ratatouille, this dish full of fresh, slowly baked veggies with a little surprise on the inside: cheese! And as for the newest random produce stand I found on the street, I'll just say as soon as I cut into the tomatoes, there was no question that they had just been picked that day. My kind of summer produce!

Grocery List (2 people):

IMG_4028.jpg
  • 4-5 large, even sized summer squash and zucchini

  • Kosher salt

  • 4 oz mascarpone cheese - room temperature

  • 4 oz goat cheese - room temperature

  • 3 tbsp. basil - minced

  • 1 tbsp. parsley - minced

  • 1 tsp garlic - minced

  • Pepper

  • 12 oz marinara

  • 1 tsp red pepper flake (optional)

  • 1 large tomato - sliced thick

  • Fresh parmesan

  • Olive oil

Directions:

1. Heat oven to 350 degrees and heat an oiled grill pan to high heat on the stove.

Cut the ends off of each squash and zucchini. One at a time, sit a squash upright with the cut side down so you have a flat, sturdy surface. Cutting downward, slice squash into long, thin pieces. Repeat with the zucchini. Avoid using the end pieces -- you only want the middle so each slice is even, thin, and easy to roll.

IMG_4036.jpg

Place squash and zucchini pieces on a rack and sprinkle with salt on both sides. Let stand for 10 minutes so the moisture comes out of the veggies.

IMG_4031.jpg

Lightly dry each squash and zucchini piece off with paper towels, trying not to remove all the salt from the veggies.

Grill each squash and zucchini piece 2-3 minutes on each side and set aside to cool.

IMG_4033.jpg

2. While the veggies are cooling, prepare the filling by mixing together the mascarpone, goat cheese, basil, parsley, garlic, and a dash of salt and pepper.

IMG_4034.jpg

Take one piece of squash and zucchini at a time, fill with about 1 tsp of cheese mixture, and roll up.

IMG_4035.jpg

3. Lay each rollup down in a small baking dish (if you double up the recipe, use a large baking dish - 9 x 13 in). Cover the pieces with the marinara and sprinkle the top with red pepper flakes.

IMG_4037.jpg

Top sauce with sliced tomatoes and grate fresh parmesan over the top.

IMG_4038.jpg

4. Bake for 20-25 minutes. Top with more basil and serve immediately.

 CHEERS TO HAPPY EATING!!!

In Dinner, Recipes, Healthy, Vegetarian, Lunch Tags veggie recipes, home and garden, veggies, recipes, food porn, home and garden blog, chef, kitchen, home blog, chopped, home, kitchen fun, cook, home cooking, easy cooking, meatless monday, cooking at home, healthy food, food blog, best recipes, food network, cooking blog, farmers market recipes, lifestyle blog, healthy eating, easy recipes, recipe blog, home chef, eating veggies, cooking
Comment

Pork 'N Peaches (or Pears)

May 22, 2014 tatumletard@gmail.com
IMG_3300.jpg

I wonder if every chef remembers the very first recipe they ever created all on their own. I do, and that’s the recipe and cooktale I’m sharing with you today. Pork ‘n Peaches. A classic meat and an essential summer fruit, and not to mention, butter, brown sugar, and roasted pecans. It sounds like a little southern dash of goodness doesn’t it? Well, let me tell ya’ll… IT IS! After about a year of doing nothing but watching Food Network, reading cook books cover to cover, studying recipes as if I had a test on them the next day and following them word by word with every measuring cup and measuring spoon I had in my cabinets, I decided to give up my fear of “a little of this and a dash of that” and boycott following recipes word for word. I mean, I could cook really well when I followed a recipe. It seemed everyone always loved what I cooked, and I had decent enough knowledge of food to give my family and friends tips regularly, so why couldn’t I just start making up my own recipes?

A Saturday morning at the farmer’s market and a sack full of peaches later, I walked in the kitchen and just downright went for it. I was scared. But I wanted to do it. I loved to cook, and I loved the challenge of a difficult recipe, so I thought it was time to start getting creative in the kitchen. In July 2012, my very own version of Pork ‘n Peaches was created, and that same day, my kitchen confidence went sky high. That was the day I went from “cook” to “chef.” I think this can happen for anyone who loves to cook. Don’t be afraid to get creative by taking ingredients you already have and just go for it! Does it always turn out perfectly? Heck no. But you learn and you move on to the next one. In the meantime, I’m happy for you all to follow my recipes, and hopefully I can teach you something along the way!

.

.

Grocery List (4 people):

Pork:

  • 2 lbs pork loin with fat trimmed

  • 2 tbsp olive oil

  • 1 orange (zest and juice)

  • 2 lemons (zest of one, juice of both)

  • 2 limes (zest of one, juice of both)

  • 1 tbsp fresh grated ginger

  • ¼ cup of brown sugar

  • 1 tbsp fresh thyme – chopped

  • 3 garlic cloves – minced

  • 2 tsp Kosher salt

  • 1 tsp pepper

Peaches or Pears (whatever is in season):

  • 4 peaches or pears (or one for each person) – halved, core or seeds scooped out

  • 2-3 tbsp of melted butter (or more if more fruit is used)

  • 1 tsp brown sugar for each peach/pear half

Dressing:

  • 1 lemon – juiced

  • 1/3 cup honey

  • 1 tbsp red wine vinegar

  • ¼ cup of mint – minced (plus some whole leaves for garnish)

  • Goat cheese – for topping

  • Pecans – for topping (recipe below)

Pecans:

  • ¼ cup whole pecans

  • 1 tsp olive oil

  • 1 tsp brown sugar

  • 1/4 tsp ground cinnamon

  • 1/8 tsp ground ginger

  • Pinch of cayenne

  • Pinch of salt

Directions:

Step 1:

Pork:

Start by making the marinade. Combine all the ingredients in a plastic Ziploc bag. Put pork in the bag and make sure it’s covered in the marinade. Let the marinated porksit in the fridge for at least an hour or more.

.

.

Grill on medium heat, turning every 5 minutes (and basting with remaining marinade as you turn) for 30 minutes or until the thickest part of the loin is heated to 155-160 degrees. It can be grilled indoors on a grill pan or on an outdoor grill. I prefer an outdoor grill’s flavor for this dish.

.

.

 Once the meat is the correct temperature, take off the grill and set aside. Tent the meat with foil and let rest for about 10 minutes.

To serve, slice meat in ½ inch pieces at an angle and top with chives for garnish. Serve alongside the peaches.

Step 2:

Peaches (these can be prepared when the pork is marinating):

.

.

Brush peach (or pear) halves with melted butter, liberally and sprinkle with the brown sugar. Set aside until ready to grill with the pork.

Grill for 3 minutes, cut side down. Flip, and grill for 2 more minutes on the other side.

.

.

For the dressing: combine the honey, lemon juice, vinegar, and chopped mint in a small sauce pan and whisk. Bring to a boil and let simmer for 5-10 minutes. Take off the heat to thicken.

.

.

Top grilled peaches (or pears) with dressing, goat cheese crumbles, and pecans.

Step 3:

Pecans (these can also be prepared when the pork is marinating):

.

.

Heat oven to 350. Toss pecans with olive oil, sugar, and spices. Roast for 12-15 minutes.

CHEERS TO HAPPY EATING!!!

In Dinner, Recipes, Healthy, Meat Tags best recipes, chef, chopped, cook, cooking, cooking at home, cooking blog, cooking in costa rica, easy cooking, easy recipes, food blog, food network, food porn, home, home and garden, home and garden blog, home blog, home chef, home cooking, kitchen, kitchen fun, lifestyle blog, mothers day recipes, peach recipes, pear recipes, pecan recipes, pork recipes, quick and easy recipes, quick recipes, recipe blog, recipes, simple recipes
Comment

Balsamic Salmon with Tomato Avocado Salad

May 20, 2014 tatumletard@gmail.com
image.jpg

I don't always come home exhausted and not willing to cook. Typically, cooking is what makes me happy and relaxes me after a long day. But there's a difference in having a long day and being down right exhausted. For the last couple of years, grad school has been my "after work activity" one or two days a week. Funny enough, I discovered my love for cooking about the same time I started grad school, and unfortunately, there wasn't always time to come home and cook a big elaborate meal when getting home at 9 pm on some nights. I was grateful to have a husband who would cook dinner or order takeout for us while I was in class and have it plated up and ready by the time I got home, but some nights, I just wanted to cook. It just helped me wind down. It did then, and it does now. On these nights I had to come up with something quick and easy to cook. I'm happy to say I have graduated with an MA in Journalism (yay), but that's not to say there still won't be nights I'll need a go-to, no-fuss meal. This is one of those meals... a meal that most people in the world will appreciate. 8 ingredients, 10 minutes... done!!! Thank you grad school for challenging me in this way!

Grocery List:

  • 1/2 cup good quality balsamic vinegar

  • Kosher salt

  • Good quality olive oil - 1 tbsp for each filet, plus some for the pan

  • 4 fresh salmon filets - skin off

  • 4 tomatoes - firm to the touch

  • 2 avocados

Directions:

1. Heat oven to 450 degrees. In a small saucepan, bring 1/4 cup of the balsamic and a pinch of salt to a boil and let simmer. Heat a saute pan with a splash of olive oil to the highest heat (like you're going to boil something) until olive oil is smoking. Sprinkle olive oil, salt, and pepper on each side of the salmon - about 1 tbsp of olive oil, 1/2 tsp of salt, and 1/4 tsp of pepper. 

2. When oil is smoking on the pan, place salmon on the pan face down and don't touch or move for 2 full minutes (not touching it creates an amazing crust... the kind you see on your salmon in restaurants). Flip salmon and let cook for 1 minute on the other side then put the salmon (pan and all) in the 400 degree oven for 3-4 minutes.

3. While salmon is cooking, cube the tomatoes and avocado, throw into a large bowl, and add the rest of the balsamic, 1 tsp of salt (or to taste), pepper, and stir together.

4. When the salmon is done, take out and set aside. To plate, put a serving of the tomato and avocado salad on a plate and top with the salmon. Spoon balsamic glaze over the fish and the salad.

CHEERS TO HAPPY EATING!!!

In Recipes, Dinner, Healthy, Seafood Tags recipe blog, home cooking, farmers market recipes, food network, home and garden blog, cooking blog, salmon recipes, healthy eating, home blog, healthy food, cooking at home, easy cooking, easy recipes, home, avocado recipes, recipes, lifestyle blog, kitchen, food blog, home chef, fish recipes, cook, home and garden, tomato recipes, cooking, chef, kitchen fun, best recipes, healthy recipes
1 Comment
← Newer Posts

MEET ANDREA

Hey y'all! Welcome to Andrea’s Cooktales. I’m a believer that the best stories are shared and the fondest memories are made in the kitchen, at the dinner table, and surrounded by food. This blog is about storytelling from the kitchen and the dinner table.  (Read more...)

RECENT POSTS

Featured
IMG_1079.jpg
Mar 1, 2024
Better Than a Steakhouse Filet Mignon
Mar 1, 2024
Mar 1, 2024
IMG_1267.jpg
Mar 1, 2024
Raspberry Rose Brie Bread
Mar 1, 2024
Mar 1, 2024
IMG_2041.jpg
Mar 1, 2024
Best Breakfast Burrito in Existence
Mar 1, 2024
Mar 1, 2024
IMG_2037.jpg
Mar 1, 2024
Campari Spritz
Mar 1, 2024
Mar 1, 2024
IMG_2034.jpg
Mar 1, 2024
Truffle Seafood Pot Pies
Mar 1, 2024
Mar 1, 2024
IMG_1066.jpg
Feb 4, 2024
Steakhouse Creamed Spinach Casserole
Feb 4, 2024
Feb 4, 2024
IMG_7278.jpg
Nov 9, 2023
“Season of the Witch” Salad
Nov 9, 2023
Nov 9, 2023
IMG_8931.jpg
Nov 9, 2023
Vampire Aperol Spritz
Nov 9, 2023
Nov 9, 2023
IMG_2388.jpg
Nov 9, 2023
Zombie Meat Spaghetti
Nov 9, 2023
Nov 9, 2023
IMG_4252.jpg
Nov 9, 2023
“Somebody’s Watching Me” Baked Cheese with Chile Eyeballs
Nov 9, 2023
Nov 9, 2023

ARCHIVES

Archive
  • March 2024 5
  • February 2024 1
  • November 2023 6
  • September 2023 12
  • August 2023 6
  • September 2022 1
  • February 2021 2
  • December 2020 8
  • November 2020 9
  • October 2020 4
  • September 2020 6
  • August 2020 7
  • July 2020 3
  • May 2020 2
  • February 2020 5
  • January 2020 3
  • December 2019 3
  • November 2019 4
  • October 2019 8
  • September 2019 4
  • August 2019 2
  • July 2019 6
  • May 2019 3
  • April 2019 5
  • March 2019 2
  • February 2019 2
  • December 2018 6
  • November 2018 7
  • October 2018 5
  • July 2018 1
  • June 2018 3
  • April 2018 1
  • February 2018 2
  • January 2018 10
  • November 2017 1
  • October 2017 2
  • September 2017 2
  • August 2017 1
  • July 2017 1
  • June 2017 3
  • May 2017 1
  • March 2017 4
  • February 2017 1
  • January 2017 2
  • December 2016 4
  • November 2016 7
  • October 2016 3
  • September 2016 5
  • August 2016 2
  • July 2016 4
  • June 2016 2
  • May 2016 9
  • April 2016 7
  • March 2016 7
  • February 2016 18
  • January 2016 8
  • December 2015 10
  • November 2015 14
  • October 2015 14
  • September 2015 13
  • August 2015 5
  • July 2015 6
  • June 2015 5
  • May 2015 6
  • April 2015 5
  • March 2015 6
  • February 2015 3
  • December 2014 3
  • October 2014 7
  • September 2014 6
  • August 2014 6
  • July 2014 7
  • June 2014 6
  • May 2014 6

CATEGORIES

  • TRAVEL TALES
  • LIFESTYLE POSTS
  • RECIPES
  • ANDREA'S COOKTALES
  • QUICK BITES
  • TV APPEARANCES
  • WHAT DO YOU DO WITH THAT

BLOG     |     VIDEOS     |      SERVICES    |       RECIPE INDEX    |      PRIVACY

Copyright Andrea's Cooktales 2016-2017 | Design by Oh Simple Joys Design Studio