• Cookbook
  • About
  • Video
  • Recipes
  • Travel
  • Inspiration
  • Services
  • Contact
Menu

Andrea's Cooktales

Street Address
City, State, Zip
Phone Number
A STORY BEHIND EVERY RECIPE

A STORY BEHIND EVERY RECIPE

Andrea's Cooktales

  • Cookbook
  • About
  • Video
  • Recipes
  • Travel
  • Inspiration
  • Services
  • Contact

Easiest Mini Blueberry Galettes

February 7, 2018 Andrea LeTard
FullSizeRender.jpg

Quick and easy for the perfect last course of any meal. These can be prepped ahead and refrigerated then popped in the oven right before the dessert course! 

6 servings  

  2 cups blueberries 

1/4 cup, plus 2 tablespoons granulated sugar

2 tablespoons corn starch

 1 tablespoon Marsala cooking wine

1 teaspoon vanilla paste  

1 package puff pastry  (2 sheets) - thawed 

Flour, for dusting  

1 egg - beaten  

Heat oven to 425 degrees. Mix together the blueberries, 1/4 cup sugar, Marsala, cornstarch, and vanilla paste. Let sit for at least 10 minutes 

Using a rolling pin, roll out the 2 sheets of puff pastry on a lightly floured surface until large enough to cut out 4 to 5 inch circles. Using a 4 or 5 inch round bowl, trace circles with a knife and cut out. Place circles on a baking sheet lined with parchment paper. 

Fill each center with some of the blueberry mixture and rustically fold ends over fairly tight. Brush with egg wash and sprinkle with remaining sugar. Bake for about 12 to 15 minutes or until golden. Serve with whipped cream. 


In Breakfast & Brunch, Recipes, Sweets, Vegetarian
Comment

Loaded Mushroom Truffle Lasagna

January 21, 2018 Andrea LeTard
IMG_7007.JPG

One of my favorite meals mama used to make was good ole fashioned lasagna. This one is a little bit different than the traditional - using white sauce, truffle butter, and lots of mushrooms. You can lighten this dish up by using skim milk, less cheese, and more mushrooms - either way, it's absolutely delightful!

8 ounces regular Lasagna noodles

1 tablespoon olive oil

1 pound mushrooms (I like to use a blend of different kinds)

Kosher salt and freshly cracked pepper

1/2 cup ricotta

1 1/2 cups shredded part-skim mozzarella

1/2 cup shredded Parmesan

3 tablespoons Truffle butter (1.5 ounces)

1/4 cup flour

2 1/4 cups milk (skim for lower fat/calories)

1/2 teaspoon ground nutmeg

Truffle oil - optional


Heat oven to 400 degrees. Place noodles in an 8 x 12 baking dish and cover with the hottest tap water you can get from your sink. Soak for 25 to 30 minutes until soft then drain and set aside. If wavy part of noodle still seems too crunchy, add more hot tap water for about 5 more minutes - drain and set aside. Dry baking dish.

Heat olive oil over medium heat and add half of the mushrooms with a dash of salt and pepper. Cook until just soft then add the rest of the mushrooms with a dash of salt and pepper. Cook until just soft. Take off the heat and let slightly cool. Add the ricotta, half the mozzarella, and half the Parmesan. Mix together and set aside.

In another pan, heat truffle butter until melted. Whisk in the flour and cook for about 2 minutes. Slowly add the milk, whisking everything together. Let come to a slight boil and thicken - it should be thick enough to coat the back of a spoon. Add the nutmeg, about 1/2 teaspoon of kosher salt, and 1/4 teaspoon pepper - taste for seasoning. Add more if needed.

Build the lasagna. Spoon a thin layer of the sauce in the bottom of the pan. Layer half the noodles, half the sauce, and the mushroom mixture. Repeat for the top layer with the rest of the noodles, the rest of the sauce, and the rest of the mushroom mixture. Sprinkle with the remaining mozzarella and Parmesan. Bake for about 20 to 25 minutes or until golden and bubbly. Serve with a drizzle of truffle oil, if desired. 

In Pasta and Grains, Dinner, Recipes, Holiday, Vegetarian
1 Comment

150 Calorie Caliente Breakfast Sandwich

July 24, 2017 Andrea LeTard
FullSizeRender.jpg

I love simple, healthy, low-cal, grab and go breakfasts in the morning. These sandwiches can be pre-made, refrigerated, and reheated in the morning. This recipe makes 4, so you'll have one Monday through Thursday. However, they take right under 10 minutes to make, so if you want them fresh, it won't ruin your morning.

Grocery list (4 sandwiches): 

  • 4 English muffins

  • Nonstick spray

  • 1 cup egg whites

  • 1 cup baby spinach - chopped fine

  • Kosher salt and pepper

  • 1/2 avocado - sliced thin

  • Sriracha or hot sauce, to taste

Directions:  

Cut English muffins in half. Using your hands, scoop out and discard some of the bread on the inside (this is not compeletely necessary but will save you calories and carbs). Toast the muffins in a toaster until golden.

Heat a small nonstick pan over low heat and coat with nonstick spray. Add 1/4 cup egg white at a time and sprinkle the spinach (if using) over top with a dash of salt and pepper. Let cook until almost cooked through and flip with a spatula. Cook for about 30 more seconds. *You can also do this in a larger pan and pour in the entire cup of egg whites then when finished cooking, cut eggs into 4 equal servings.

Place eggs on the English muffins, folding over to fit the sandwich, if needed. Top with the avocado and sriracha or hot sauce.

CHEERS TO HAPPY EATING!!!

In Breakfast & Brunch, Recipes, Healthy, Lunch, Sandwiches and Bread, Vegetarian
Comment

Triple Tomato and Olive Salad

September 7, 2016 Andrea LeTard
image.jpg

 I used to think I didn't like olives. I say "used to think" because I never gave them a chance. That's the thing about a picky eater... They seem to think they don't like lots of things - until they try them. I know this because I used to be one. Luckily, or maybe unluckily, (I haven't decided which one yet after a wee-thicker waist-line) I don't have that problem anymore.

We were in Paris a few years ago, and any time you have drinks in Paris, they always seem to put a bowl of olives on the table. At first, I passed them up. But one afternoon I was starving and started eating them. Soon enough, the bowl was empty, and I was asking for more. That's when I fell in love with olives and now I'm addicted to all shapes, colors, and sizes. This salad is a perfect mix of two lovely ingredients with a few subtle hints of flavor that merry the two together perfectly. Plus, it's super low-calorie and healthy! 

Grocery list:

  • 1/4 cup extra virgin olive oil

  • 1 garlic clove - peeled and smashed

  • 1 tsp fresh oregano - minced

  • 1/2 tsp fresh thyme - minced

  • 3 pints of various grape or cherry tomatoes - sliced in half

  • 1/2 cup Kalamata olives - pitted and sliced in half

  • 1/2 cup Castelvetrano olives - pitted and sliced in half

  • 1/2 cup black olives - pitted and sliced in half

  • 3/4 cup thinly sliced pepperoncini

  • 2 lemons - zested

  • 3 tsp kosher salt

  • 6 oz feta cheese (optional)

Directions:  

1. Heat the olive oil, garlic, oregano, and thyme over low heat. When it starts to slightly bubble, take it off and let steep. 

2. In a large bowl, mix together all the tomatoes and olives with the pepperoncini, lemon zest, and salt.  

3. When the olive oil is slightly cooled, pour it over the tomato mixture and toss together until well combined. Add the cheese if desired. 

*** This is the perfect side dish for fish. Use the extra olive oil-liquid mixture as a sauce for the fish! 

CHEERS TO HAPPY EATING!!!  


In Recipes, Dinner, Healthy, Lunch, Salads, Sides, Vegetarian Tags Best side dish ever, Best olive recipes, Best and easiest side dishes, How to cook with olives, Best end of summer recipes, End of, Quick side dishes, Grape tomato recipes, Cooking with olives, Easy sides, Quick and delicious sides, End of summer dishes, Best tomato tecipes ever, Best tomato recipes, Easiest side dishes, Quick side dish recipes, Easy side dish recipes, ways to use grape tomatoes
Comment

Spiced Citrus Salad

March 10, 2016 Andrea LeTard
Spiced Citrus.jpg
image.jpg

 See full video with step by step instructions!

Grocery list:

  • 1 lemon - juiced

  • 1 tbsp white balsamic

  • 1 tsp honey

  • 1 tsp ground coriander

  • 1/4 tsp red pepper flake

  • Kosher salt

  • Pepper

  • 1/4 cup good-quality extra virgin olive oil

  • 1 grapefruit

  • 2 oranges

  • 2 blood oranges

  • 2 cups spinach and arugula mix - roughly chopped

  • 1/2 red onion sliced thin

Directions:

1. In a small bowl, combine the lemon juice, white balsamic, honey, coriander, red pepper flake, and a dash of salt and pepper . Whisk in the olive oil until imulsifed. Set aside.

2. Slice the grapefruit, oranges, and blood oranges into 1/4 inch rounds. For each round, cut the peel off, removing the skin and the pith. Lightly sprinkle slices with salt and pepper.

3. In a large bowl, add the spinach and arugula and toss together with 3/4 of the salad dressing, making sure all of the leaves are covered in dressing. Spread the spinach and arugula mix on a large platter. Top with the citrus rounds, layering the different colors. Add the sliced red onion and pour the remaining dressing over the top.

CHEERS TO HAPPY EATING!!!

In Recipes, Healthy, Salads, Vegan, Vegetarian, Sides Tags Southern girl in the kitchen, Of all time, Unique salads, One of a kind salads, Spring cooking, How to make the perfect salad, Best salad recipe, best salad youll ever eat, Getting ready for spring, Best salad recipe ever, Southern cooking, Southern food
Comment

Homemade Ricotta 

November 25, 2015 tatumletard@gmail.com
IMG_2112.jpg

I made homemade ricotta for the first time for a dinner party because I wanted ricotta crostini but didn't want store-bought. I had just got back from Italy where homemade ricotta was abundant, and it was there, I fell in love with the cheese. So I thought, why not make it myself? I was shocked to learn how easy it was and now I make it like crazy for quick, impressive crostini when we have people over. My favorite way to use it is in my Homemade Ricotta Ravioli with Brown Butter Sage sauce recipe. To die for! 


See the the video on making homemade ricotta!  

Grocery list:

  • 4 cups whole milk

  • 2 cups heavy cream

  • 1 tsp kosher salt

  • 3 tbsp white wine vinegar

  • Extra virgin olive oil

Directions: 

1. Make the ricotta. In a large Dutch oven or cast iron pot add the milk, cream, salt and stir together over medium heat. Let it come to a complete boil, stirring occasionally, for about 5 minutes. 

2. Turn off the heat and stir in the vinegar. Let the mixture sit for several minutes (I wait at least 6-7 minutes) until it curdles. There will be large chunks throughout the mixture. Set a large sieve covered with a damp cheese cloth over a deep bowl. Pour the milk mixture into the sieve, and let the liquid drip out into the bowl. 

3. Occasionally discarding the liquid in the bottom of the bowl, let the mixture sit at room temperature for about 30 minutes or until it’s the consistency you desire. The longer it sits, the thicker it gets. When it’s to your liking, pour into bowl drizzle with about a tbsp. of olive oil and mix together. 

* Refrigerate until ready to use. It will last up to 5 days.

In Recipes, Snacks & Apps, Snacks, Vegetarian Tags best cheese of all time, prepping for thanksgiving, how to make your own cheese, making your own ricotta, homemade ricotta, best cheese ever, easy homemade cheese, homemade cheese, preparing for the holidays, easy homemade ricotta, impress your guests, easy cheese
1 Comment

Homemade Truffle Gnocchi

November 13, 2015 tatumletard@gmail.com
IMG_2024.jpg

This year Tres and I took a trip to Italy with our friends Ginger and James. While we were there, we went truffle hunting, and a sweet little dog, Nebia, found us 5 truffles! We took them back and the wife of the truffle hunter taught us how to make authentic Italian Gnocchi, and we used the truffles to shave right over the dish... Omg it was amazing! Honestly, it was one of the most authentic experiences we have ever had in another country, and I brought the recipe back with me! 

SEE THE VIDEO HERE!!! 

Grocery list (4-6 servings)–

  • 1 lb russet potatoes (about 4 potatoes)

  • Kosher salt

  • 2 eggs – lightly beaten

  • ½ tsp kosher salt

  • ¼ tsp pepper

  • 1 ½ all-purpose flour – plus extra for dusting and rolling

  • 2 tbsp truffle butter

  • ½ cup heavy cream

  • ½ tsp truffle salt (or Kosher)

  • ½ cup parmesan – freshly grated, plus more for serving

  • 1 tsp corn starch – optional

  • Fresh truffles or truffle oil – optional

Directions: 

1. Preheat oven to 400 degrees. Poke small holes all over the potatoes with a fork and place them on a baking sheet, lightly covered with Kosher salt. Bake for 45 minutes to 1 hour or until slightly overdone. Let cool then cut in half longways. If you have a ricer, you can push the potatoes through the ricer. If not, using a cheese grater, grate the potato on the smallest grating side until the entire potato, aside from the skin, has been pushed through the grater. Discard the skin or any rough part of the potato. The texture of the grated potato should be fluffy.

2. Pour the egg mixture over the grated potatoes, and sprinkle with the salt and pepper. Cover the potato mixture with about ¾ cup of the flour and start to combine lightly with your hands (the key to fluffy gnocchi is lightly handling the dough and not overworking it). Once combined and as the dough becomes sticky or sticks to the board, add more flour. Continue to add more flour as you lightly mix it together. You will know when it’s finished when it holds together and is not too dry or not too sticky.

3. Cut the dough into 4 even pieces and roll each of the 4 pieces into a ½ inch rope, lightly flouring the pieces as needed. Cut the dough into ½ inch piece gnocchi, flouring the dough as you cut them and keeping the gnocchi on a floured baking sheet or work surface.

4. When ready to cook, bring a large pot of water to a boil and add salt. Begin to prepare the truffle sauce by heating a sauté pan over medium heat. Add the butter and let melt. Add the cream and salt, and let come to a slight boil. Simmer the sauce until it thickens. For thicker sauce, whisk in the corn starch. Add the grated parmesan and grated fresh truffles if using them.

5. Boil the gnocchi for about 2 minutes or until they float to the top of the pot. Using a pasta strainer, add them directly into the cream sauce and stir to combine. Add more parmesan to the top and fresh sliced truffles or truffle oil if desired.

CHEERS TO HAPPY EATING!!!

In Dinner, Recipes, Pasta and Grains, Vegetarian
1 Comment

Creamy Butternut Lasagna 

November 9, 2015 tatumletard@gmail.com
IMG_1995.jpg

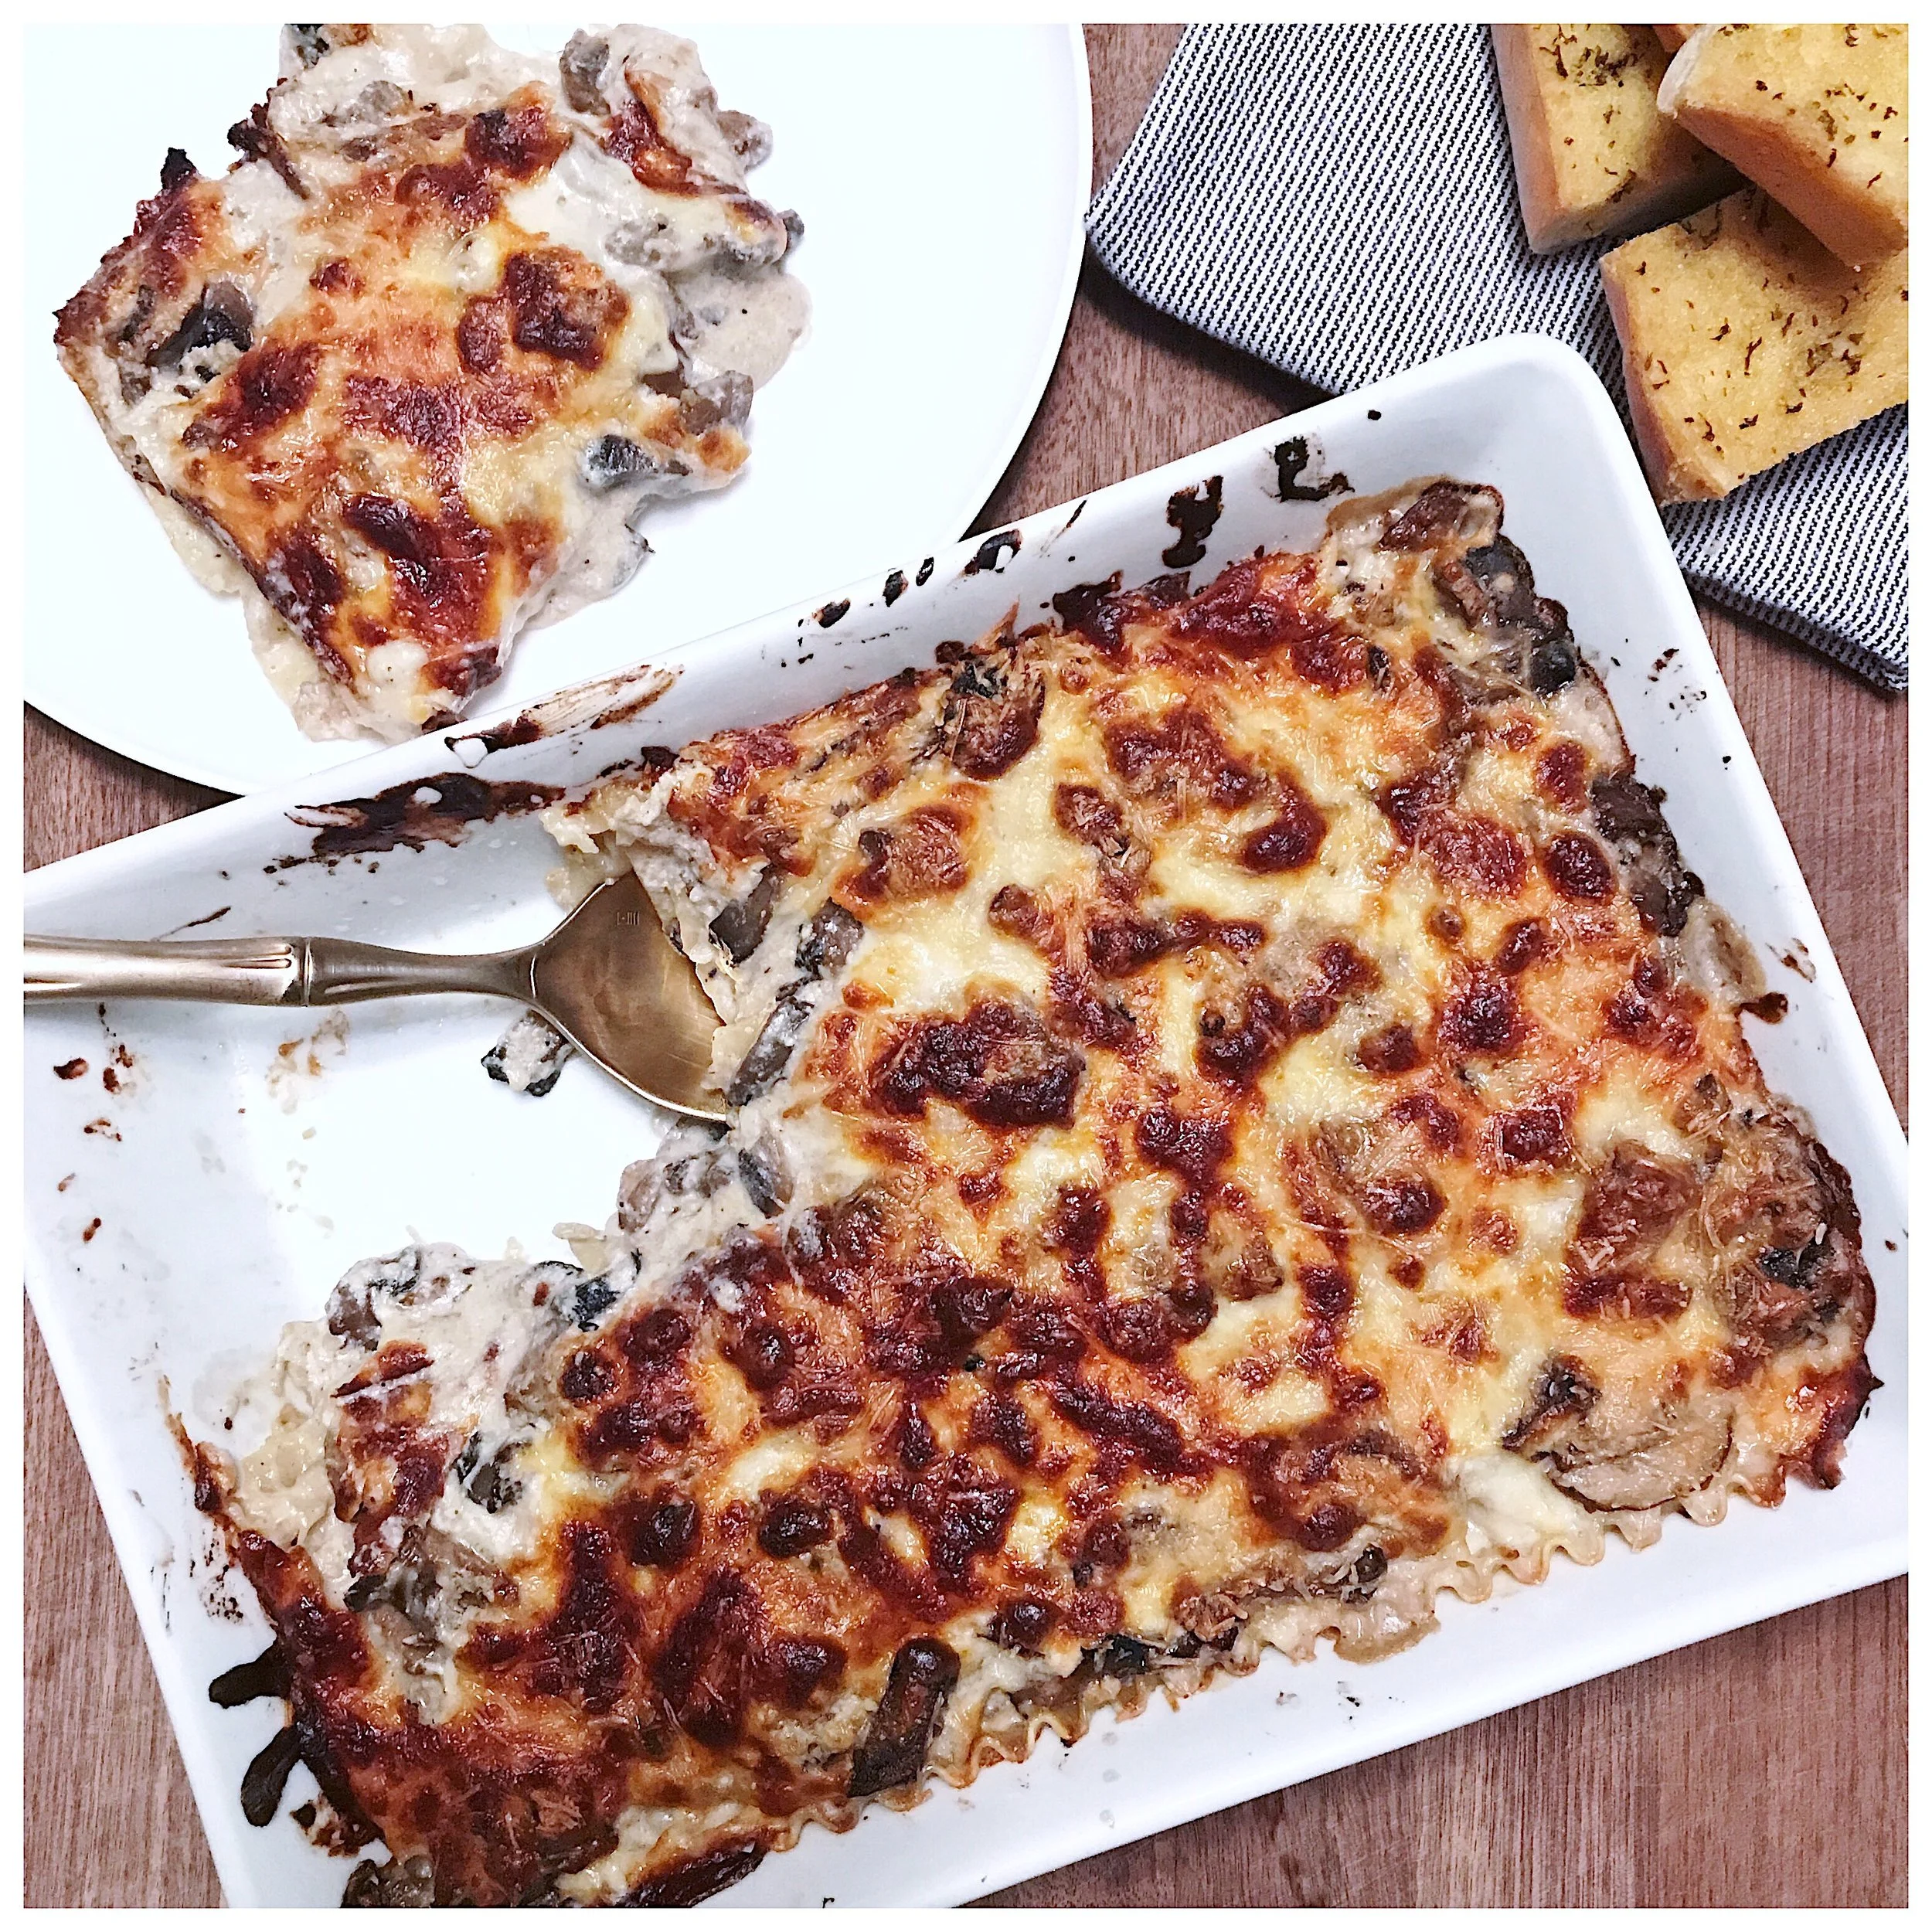
Something about a little chill in the air makes me want to eat comfort food like its going out of style. Soups, casseroles, hearty meats and veggies - I have been making it all. Traditional lasagna was always a Thanksgiving staple for my family every year, so I thought why not throw a whole lot of fall into it with a butternut squash sauce?! There's nothing more comforting than the combo! 

Grocery list: 

  • 1 large butternut squash - peeled and cut into 1/2 inch cubes

  • 3 tbsp olive oil

  • Kosher salt

  • Pepper

  • 1 small onion - finely chopped

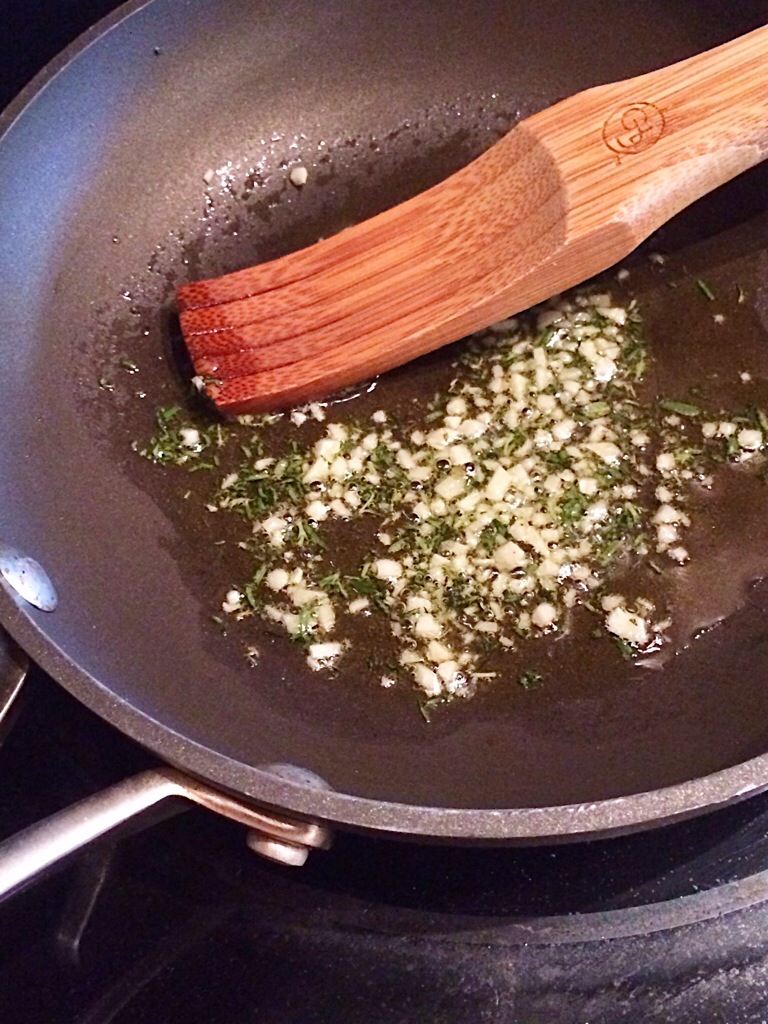
  • 1 garlic clove - minced

  • 2 tsp sage leaves - minced

  • 1 tsp all spice

  • 1/2 tsp red pepper flake

  • 1/4 cup maple syrup

  • 1 1/2 cups half and half

  • 15 oz ricotta cheese

  • 4 oz goat cheese

  • 1 egg

  • 1/4 tsp nutmeg

  • Butter for greasing pan

  • 2 cups freshly grated Parmesan cheese

  • Store bought or Homemade lazagna noodles (recipe follows), boiled about one minute or until al dente

Directions: 

1. Heat oven to 425. On a large baking sheet, toss butternut squash pieces with 2 tbsp of the olive oil and a generous amount of salt and pepper. Roast for 30 minutes or until soft. While the squash is roasting, heat the other tbsp of olive oil in a large saute pan over medium-low heat. Add the onion and a dash of salt and pepper and cook until caramelized - about 15 minutes. Add the garlic, sage, all spice, and red pepper and cook for one more minute. Transfer the mixture to a blender, along with the cooked squash, maple syrup, and half and half. Blend until smooth. 

2. In a medium bowl, mix together the ricotta cheese, goat cheese, nutmeg, and a dash of salt and pepper until smooth. 

3. Turn oven temperature down to 400. Butter the bottom and sides of a large casserole dish. Ladle a layer of the butternut squash sauce into the bottom of the dish, covering the bottom. Layer noodles, butternut squash sauce, ricotta mixture, and Parmesan cheese in that order. Repeat three times. Finally, top with about 1/2 cup of the remaining Parmesan cheese. Drizzle olive oil over the cheese. Bake for 30-35 minutes or until golden and bubbly. 

Homemade Lasagna Noodles: 

Grocery list: 

  • 1 cup cake flour

  • 1 cup all-purpose flour

  • 1/2 tsp Kosher salt

  • 2 large eggs

  • 2 tbsp olive oil

Directions: 

1. Pile the cake flour and all-purpose flour onto a clean work surface. Sprinkle salt over the top and make a hole in the center of the flour mixture with your hands. Add the eggs and olive oil to the center and beat together with a fork. 

2. Slowly, begin incorporating the flour from the sides into the egg mixture. Add a tbsp of water at a time, continuing to mix with the fork until the dough starts to come together. It will take approximately 1/4 to 1/3 cup of water to come together. 

3. When dough roughly comes together, begin kneading with your hands for 8 to 10 minutes. Add more flour if it's too wet, more water if it's too dry. The dough consistency will be smooth and elastic when it's ready. 

4. Cut into four pieces. Working with one piece at a time, flatten the dough out and run through a pasta machine about five times or until thin, about 1/8 inch. Cut each thinned piece in half, the shape of traditional lasagna noodles or to fit the casserole dish you are using. For this recipe, you'll have one of the four pieces of pasta dough leftover. Save and make another pasta dish. 

CHEERS TO HAPPY EATING!!! 

In Dinner, Recipes, Pasta and Grains, Vegetarian Tags unique lasagna recipes, unique food to cook for thanksgiving, butternut squash lasagna, thanksgiving lasagna, unique thanksgiving food ideas, untraditional thanksgiving recipes, almost famous lasagna, best ideas cooking for thanksgiving, best ever lasagna, award winning lasagna, different thanksgiving recipes
Comment

Slawesome Deviled Eggs

November 2, 2015 tatumletard@gmail.com
IMG_1914.jpg

I was introduced to Slawsa over a year ago, and it has become a staple in my kitchen. From grilling, to sandwiches, to mixing it up in traditional recipes, Slawsa is a condiment I have no idea how people can live without! I've never been a big mayo, mustard, ketchup condiment person, but I put Slawsa on just about everything. And then I tried them in deviled eggs... and I'm telling yall... Wow!!! Best and easiest deviled eggs ever! They have only 3 ingredients and no chopping is required!!! If you live in Memphis, look for Slawsa in Kroger stores in the relish section. If you try this, you'll never make deviled eggs the same again... They'll always have Slawsa in them!!  Recipe from: http://www.slawsa.com

Grocery list: 

  • 12 hard-boiled eggs, sliced in half lengthwise, yolks removed and set aside

  • 3/4 cup Slawsa Spicy

  • 1/4 cup mayonnaise

Directions: 

1. Mash together yolks in a bowl first, then throughly mix in Slawsa & mayo. 

2. Spoon generously into egg whites and garnish with paprika and/or parsley. 

Tip: For perfectly cooked and easy peel-able hard-boiled eggs, put 12 eggs in a saucepan. Cover 1 inch over eggs with water. Add 2 tsp of baking soda to water. Turn heat to high and bring eggs to a rolling boil for one minute, the cover, remove from the heat and let sit for 12 minutes. Remove eggs and place in ice bath to quickly cool before using. In addition to the baking soda trick, using older eggs also will make them easier to peel. 

CHEERS TO HAPPY EATING!!! 

In Recipes, Snacks & Apps, Healthy, Snacks, Vegetarian Tags beat deviled eggs recipe ever, best egg recipes, easiest deviled eggs ever, easiest way to hard boil eggs, easiest way to peel hard boiled eggs, easy peeling eggs, how to hard boil eggs, perfect and easy hardboiled eggs, perfect hard boiled eggs, quick and easy deviled eggs, quickest deviled eggs ever, slawesome deviled eggs, slawesome eggs, slawsa deviled eggs, slawsa eggs, trick to boiling eggs perfectly, trick to peeling eggs
Comment

Buffalo Hot Wing Hummus

February 8, 2015 tatumletard@gmail.com
Buffalo Hot Wing Hummus.jpg
IMG_7548.jpg

When I was in high school, I had a serious addiction to boneless hot wings... I ordered them everywhere I went! Today, I have a serious addiction to hummus. When I'm trying to eat healthy, I like to keep it around as a snack. I thought why not put the two together and create the best of both worlds?! This stuff is seriously good!

Grocery List:

  • 1/3 cup sesame seeds

  • 2-3 tbsp olive oil

  • 1 can garbanzo beans - drained and rinsed

  • 1 can cannellini beans - drained and rinsed, 1/3 cup liquid reserved

  • 1 lemon - juiced

  • 4 garlic cloves - roughly chopped

  • 2 tsp red wine vinegar

  • 1 1/2 tsp Kosher salt

  • 1/3 cup Frank's buffalo wing sauce, plus extra for drizzling

  • 1/4 cup Blue, Gorgonzola, or Feta cheese

Directions:

1. Make the Tahini paste. In a small pan over medium low heat, toast the sesame seeds until light brown. Put seeds in a food processor and add olive oil, blending until it comes together into a runny paste. It will make about 1/4 cup of paste.

2. To the food processor, add the paste, beans, bean liquid, lemon juice, garlic, vinegar, salt, and hot sauce. Blend all the ingredients together until smooth. If it's not smooth enough, add more liquid from the beans and lemon juice until it's to your desired consistency.

3. Taste for seasoning and add more salt if needed. Pour in a bowl and top with the cheese and a drizzle of the hot sauce. Serve with celery, carrots, cucumbers, or pita bread.

CHEERS TO HAPPY EATING!!


In Recipes, Healthy, Snacks, Snacks & Apps, Vegetarian Tags buffalo hummus, franks hot sauce recipes, unique hummus recipes, hot sauce recipes, Gameday apps, gameday food, gameday snacks, best hummus recipes, best dips, hummus recipes, buffalo hot wing hummus
Comment

Fried Green Tomatoes with Herb Goat Cheese

July 8, 2014 tatumletard@gmail.com
Fried Green Tomatoes with Herb Goat Cheese.jpg
.

.

A few several Saturdays ago, me and a couple of my "steel magnolias" made a batch of "fried green tomatoes." It was a long Saturday of being in the kitchen, drinking cocktails, laughing, telling stories, and just enjoying each other's company - a rare thing for us these days. I'll never forget going into college thinking I'd never find friends as strong and fantastic as the ones from high school. My mom assured me that in every stage of my life I would make new friends and they would be "just as fabulous" as the ones before. I have to say though, my college group of gals is and will always be "my most fabulous friends." They are my best friends, as time goes on, I realize more than ever that it's going to take more than being in different cities, busy work and family lives, and finding less and less time to get together to break the close bond we created in college and have sustained as adults. It's crazy to think I've known these girls for over 10 years now, and near or far, we do the best we can to get together at least a few times a year (the constant 24/7 group text we've had going for several years now doesn't hurt either). These southern gals are my magnolias, and this fried green tomato recipe is dedicated to y'all... I hope we make them together for another 50 years!

.

.

.

.

Grocery list:

Peanut oil - for frying

5 oz goat cheese - room temperature

1/2 lemon - juiced

2 tbsp basil - chopped

1 tbsp parsley - chopped

1 tbsp chives - chopped

Kosher Salt

Pepper

1 cup flour

1 cup buttermilk

1 1/2 cup yellow cornmeal

1 tbsp garlic powder

1/2 tsp paprika

1/4 tsp cayenne

4-5 green tomatoes


Step 1

Heat peanut oil to 350 degrees in a fryer or on your stovetop.

Make the herb goat cheese. Mix together goat cheese, lemon juice, herbs, and a dash of salt and pepper. Set aside.

20140708-143133-52293986.jpg

Step 2

Whisk 1 cup flour and 1 cup buttermilk together in a bowl. In another more shallow bowl, mix together the cornmeal, garlic powder, cayenne, and paprika.

20140708-143233-52353943.jpg

Step 3

Slice tomatoes 1/4 inches thick. Dry the tomatoes with paper towels. Salt and pepper them on both sides.

.

.

Dip tomatoes in buttermilk mixture and then coat them in the cornmeal mixture.

.

.

Step 4 Fry coated tomatoes until golden brown. Plate the fried tomatoes and dollop with goat cheese. Serve warm or at room temperature.

.

.

CHEERS TO HAPPY EATING!!! AND BEST GIRLFRIENDS!!!

.

.

In Recipes, Breakfast & Brunch, Sides, Snacks, Snacks & Apps, Vegetarian Tags lifestyle blog, southern recipes, easy recipes, home cooking, food and friends, quick cooking, cooking with friends, chefs blog, tomato recipes, girlfriends, fried food, cooking blog, fried green tomatoes, cooking at home, best friends, best southern recipes, best fried green tomatoes, recipe blog, quick recipes, farmers market recipes, weekend recipes, weeknight recipes, fried southern food, cooking, chef blog, fast recipes
Comment

Truffle Duck Fat Fries

June 30, 2014 tatumletard@gmail.com
Truffle Duck Fat Fries.jpg
20140630-120730-43650547.jpg

There was a time in my life when the thought of eating duck was not at the top of my list. But today, I'll take the fat and all of it. This recipe reminds me of parties. I love to throw them and I do often. I've made these duck fat fries a number of times for get togethers, tweeking the recipe along the way. I've learned it's also a great side for burgers or a nice juicy steak. We had it the other night with coffee rubbed filets, and I plan to share that recipe with you all very soon! I think I finally nailed the perfect duck fat fry, and this is the recipe I want to share with you!

Grocery List (4 people):

20140630-120841-43721791.jpg

4 russet potatoes

4 tbsp duck fat (find it jarred at specialty food stores)

Truffle salt

Pepper

1 tbsp truffle oil

1 tsp garlic - minced

1 tsp rosemary - minced

1 tbsp truffle honey or regular honey

1/2 cup mayo

Fresh parmesan

Directions:

Step 1

Roughly peel the potatoes. You will want to leave some skin on.

20140630-120924-43764019.jpg

Cut potatoes in thick logs. You should get about 16 from each potato.

Soak logs in water for about 1 hour. This will get extra starch out and make them crispy.

20140630-121001-43801333.jpg

Drain potatoes and pat dry with paper towels.

20140630-121058-43858254.jpg

Step 2

Heat 2 tbsp of duck fat in a sautée pan over medium high heat (keep the duck fat close by, halfway through you may have to add another tablespoon or two).

20140630-121157-43917479.jpg

In batches, sautée potato logs for about 1-2 minute on each side in the duck fat. Place sautéed logs onto a baking sheet lined with foil. Sprinkle lightly with truffle salt and pepper.

Roast potatoes at 400 degrees for 20-25 minutes. The last 5 minutes, change the stove setting to broil. This will get them nice and brown and extra crispy.

20140630-121233-43953458.jpg

Step 3

While the potatoes are roasting, make the truffle mayo. Heat truffle oil over low heat. Add minced garlic and minced rosemary. Heat for 2 minutes and set aside to cool.

20140630-121327-44007386.jpg

When cooled, add olive oil mixture along with honey and 1/4 tsp of truffle salt (to taste) to the mayo. Mix together and taste. Add more salt if needed.

20140630-121417-44057698.jpg

Step 4

When potatoes come out of the oven, immediately sprinkle them with truffle salt and freshly grated Parmesan cheese. Serve with mayo along side.

In Snacks & Apps, Recipes, Sides, Snacks, Vegetarian Tags party recipes, fries, cooking blog, blogs, party planning, chef blog, home cooking, food blog, duck fat fries, baked french fries, lifestyle blogger, mayo recipes, chef blogger, cooking, easy recipes, french fries, truffle mayo, recipes, cooking at home, recipe blogger, food network, duck fat, blogger
Comment

Summer Squash and Zucchini Tomato Bake

June 24, 2014 tatumletard@gmail.com
squashbake.jpg

Tomatoes are to July and August as pumpkin is to October. It's the official start of summer, and for me that means being on the lookout for farmers markets anywhere, everywhere, and anytime. But sometimes, it doesn't take a farmers market to find the freshest produce around. I learned that as a kid, and I'm rediscovering it now. Growing up in a small town in Mississippi, I can remember regularly seeing people in blue overalls sitting on the side of the road in chairs with an old truck backed up to the street, tailgate down, and fresh produce spilling right off the back of the truck. That description may sound like I saw it in a painting in the Cracker Barrel and just decided to roll with it as a "childhood memory," but it is in fact the truth. Even today when I go back to my hometown, I see people in those same spots selling tomatoes, watermelons, and all the beauties of a farmer's summer garden. Because I now live in the city, it's rare to see random farm stands and trucks full of produce on the side of the road, but luckily, I travel to small towns for work and it's a lot of fun to keep an eye out for these little pop-up produce markets. This recipe comes inspired by a random market I found in one of the small towns I regularly visit. Similar to a ratatouille, this dish full of fresh, slowly baked veggies with a little surprise on the inside: cheese! And as for the newest random produce stand I found on the street, I'll just say as soon as I cut into the tomatoes, there was no question that they had just been picked that day. My kind of summer produce!

Grocery List (2 people):

IMG_4028.jpg
  • 4-5 large, even sized summer squash and zucchini

  • Kosher salt

  • 4 oz mascarpone cheese - room temperature

  • 4 oz goat cheese - room temperature

  • 3 tbsp. basil - minced

  • 1 tbsp. parsley - minced

  • 1 tsp garlic - minced

  • Pepper

  • 12 oz marinara

  • 1 tsp red pepper flake (optional)

  • 1 large tomato - sliced thick

  • Fresh parmesan

  • Olive oil

Directions:

1. Heat oven to 350 degrees and heat an oiled grill pan to high heat on the stove.

Cut the ends off of each squash and zucchini. One at a time, sit a squash upright with the cut side down so you have a flat, sturdy surface. Cutting downward, slice squash into long, thin pieces. Repeat with the zucchini. Avoid using the end pieces -- you only want the middle so each slice is even, thin, and easy to roll.

IMG_4036.jpg

Place squash and zucchini pieces on a rack and sprinkle with salt on both sides. Let stand for 10 minutes so the moisture comes out of the veggies.

IMG_4031.jpg

Lightly dry each squash and zucchini piece off with paper towels, trying not to remove all the salt from the veggies.

Grill each squash and zucchini piece 2-3 minutes on each side and set aside to cool.

IMG_4033.jpg

2. While the veggies are cooling, prepare the filling by mixing together the mascarpone, goat cheese, basil, parsley, garlic, and a dash of salt and pepper.

IMG_4034.jpg

Take one piece of squash and zucchini at a time, fill with about 1 tsp of cheese mixture, and roll up.

IMG_4035.jpg

3. Lay each rollup down in a small baking dish (if you double up the recipe, use a large baking dish - 9 x 13 in). Cover the pieces with the marinara and sprinkle the top with red pepper flakes.

IMG_4037.jpg

Top sauce with sliced tomatoes and grate fresh parmesan over the top.

IMG_4038.jpg

4. Bake for 20-25 minutes. Top with more basil and serve immediately.

 CHEERS TO HAPPY EATING!!!

In Dinner, Recipes, Healthy, Vegetarian, Lunch Tags veggie recipes, home and garden, veggies, recipes, food porn, home and garden blog, chef, kitchen, home blog, chopped, home, kitchen fun, cook, home cooking, easy cooking, meatless monday, cooking at home, healthy food, food blog, best recipes, food network, cooking blog, farmers market recipes, lifestyle blog, healthy eating, easy recipes, recipe blog, home chef, eating veggies, cooking
Comment
← Newer Posts

MEET ANDREA

Hey y'all! Welcome to Andrea’s Cooktales. I’m a believer that the best stories are shared and the fondest memories are made in the kitchen, at the dinner table, and surrounded by food. This blog is about storytelling from the kitchen and the dinner table.  (Read more...)

RECENT POSTS

Featured
IMG_1079.jpg
Mar 1, 2024
Better Than a Steakhouse Filet Mignon
Mar 1, 2024
Mar 1, 2024
IMG_1267.jpg
Mar 1, 2024
Raspberry Rose Brie Bread
Mar 1, 2024
Mar 1, 2024
IMG_2041.jpg
Mar 1, 2024
Best Breakfast Burrito in Existence
Mar 1, 2024
Mar 1, 2024
IMG_2037.jpg
Mar 1, 2024
Campari Spritz
Mar 1, 2024
Mar 1, 2024
IMG_2034.jpg
Mar 1, 2024
Truffle Seafood Pot Pies
Mar 1, 2024
Mar 1, 2024
IMG_1066.jpg
Feb 4, 2024
Steakhouse Creamed Spinach Casserole
Feb 4, 2024
Feb 4, 2024
IMG_7278.jpg
Nov 9, 2023
“Season of the Witch” Salad
Nov 9, 2023
Nov 9, 2023
IMG_8931.jpg
Nov 9, 2023
Vampire Aperol Spritz
Nov 9, 2023
Nov 9, 2023
IMG_2388.jpg
Nov 9, 2023
Zombie Meat Spaghetti
Nov 9, 2023
Nov 9, 2023
IMG_4252.jpg
Nov 9, 2023
“Somebody’s Watching Me” Baked Cheese with Chile Eyeballs
Nov 9, 2023
Nov 9, 2023

ARCHIVES

Archive
  • March 2024 5
  • February 2024 1
  • November 2023 6
  • September 2023 12
  • August 2023 6
  • September 2022 1
  • February 2021 2
  • December 2020 8
  • November 2020 9
  • October 2020 4
  • September 2020 6
  • August 2020 7
  • July 2020 3
  • May 2020 2
  • February 2020 5
  • January 2020 3
  • December 2019 3
  • November 2019 4
  • October 2019 8
  • September 2019 4
  • August 2019 2
  • July 2019 6
  • May 2019 3
  • April 2019 5
  • March 2019 2
  • February 2019 2
  • December 2018 6
  • November 2018 7
  • October 2018 5
  • July 2018 1
  • June 2018 3
  • April 2018 1
  • February 2018 2
  • January 2018 10
  • November 2017 1
  • October 2017 2
  • September 2017 2
  • August 2017 1
  • July 2017 1
  • June 2017 3
  • May 2017 1
  • March 2017 4
  • February 2017 1
  • January 2017 2
  • December 2016 4
  • November 2016 7
  • October 2016 3
  • September 2016 5
  • August 2016 2
  • July 2016 4
  • June 2016 2
  • May 2016 9
  • April 2016 7
  • March 2016 7
  • February 2016 18
  • January 2016 8
  • December 2015 10
  • November 2015 14
  • October 2015 14
  • September 2015 13
  • August 2015 5
  • July 2015 6
  • June 2015 5
  • May 2015 6
  • April 2015 5
  • March 2015 6
  • February 2015 3
  • December 2014 3
  • October 2014 7
  • September 2014 6
  • August 2014 6
  • July 2014 7
  • June 2014 6
  • May 2014 6

CATEGORIES

  • TRAVEL TALES
  • LIFESTYLE POSTS
  • RECIPES
  • ANDREA'S COOKTALES
  • QUICK BITES
  • TV APPEARANCES
  • WHAT DO YOU DO WITH THAT

BLOG     |     VIDEOS     |      SERVICES    |       RECIPE INDEX    |      PRIVACY

Copyright Andrea's Cooktales 2016-2017 | Design by Oh Simple Joys Design Studio