

The snow is definitely coming this weekend! I'm tellin yall, winter is my second favorite month behind fall, and I'm pretty sure my love for cozy comfort food has everything to do with that. I'm always hoping and praying for a good snow, and when it happens, I always have a list of fantastic recipes ready to go. Here are my top Breakfast/Brunch, Lunch, and Dinner recipes for a cold, snowy day! BREAKFAST/BRUNCH


Local Memphis Live: Cooking Segment 1/18/16

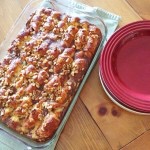
Cocoa PepsiCola Baby Back Ribs


We are just weeks from Super Bowl Sunday! Lucky for you, I have recipes galore to share for your big party! These baby back ribs are a mix of chocolate (cocoa) and PepsiCola... The combo is out of this world!
Grocery List (4 people):
• 2 racks baby back ribs
• 4 tbsp good quality unsweetened cocoa powder
• 3 tbsp brown sugar
• 2 tbsp salt
• 2 tsp liquid smoke
• 2 tsp all spice
• 1 tsp smoked paprika
• 1/2 tsp pepper
• 1 1/2 cup PepsiCola
• 4 medium onions - roughly chopped into large pieces
• 1 cup good quality barbecue sauce
Directions:
1. Rinse the ribs and pat dry with paper towels. Mix the cocoa, brown sugar, salt, liquid smoke, all spice, paprika, and pepper together in a bowl. Rub the mixture onto the ribs and press to adhere. Cover ribs and refrigerate for a few hours or overnight.
2. Heat oven to 325 degrees. Prep two baking pans by pouring 3/4 cup of coke into each pan. Add the chopped onions over the coke. Place the ribs on top of the onions. Cover the pan tightly with foil. Roast for 2 1/2 to 3 hours or until meat is tender and almost falling off the bone (I like my ribs to still have substance to them.. Not quite falling off the bone).
3. Using tongs, move ribs to a baking sheet lined with foil. Strain the onions from the coke. Reserve 1/4 cup of the coke and mix with barbecue sauce. Brush a thick layer of the sauce onto ribs.
4. Put ribs back in the oven for 20 minutes. Serve with the extra cola-barbecue sauce on the side!
CHEERS TO HAPPY EATING!!
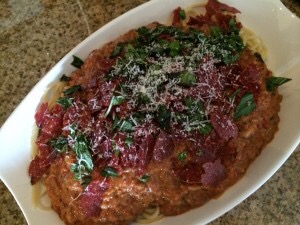
Beef Stew Over Polenta


New traditions tend to start with changes in life! We moved into a new house a few weeks ago, and since we've been here I've noticed Sunday nights have turned into Sunday suppers. And because it's so chilly outside I am really inspired by comfort foods right now. I wrote this recipe last weekend and it was a hit!
Grocery list (4 people):
1 tbsp olive oil
2 lbs beef chuck or stew meat cut into 1 in pieces
3/4 cup flour
1/2 tbsp salt
1/2 tbsp pepper
6 oz thick cut bacon - cut into lardons
2 onions - chopped
2 small parsnips - peeled and chopped into 1 in pieces
4 large carrots - peeled and cut diagonally into 1 in pieces
1 cup sweet potatoes - chopped into 1 in cubes
8 oz white mushrooms - stems removed and sliced
3 garlic cloves - minced
1/4 cup brandy
1 bottle red wine
2 cups beef stock
2 tbsp Worcestershire sauce
2 sprigs Rosemary
1 bay leaf
1 cup polenta
1/2 cup freshly grated Parmesan
4 tbsp butter - room temperature
Parsley (optional)
Directions:
1. Preheat oven to 325 degrees. Heat olive oil over medium high heat in a large dutch oven. Pat stew meat dry with paper towels. Combine the flour, 1/2 tbsp kosher salt, and 1/2 tbsp of pepper in a bowl. Toss the meat into the mixture, shake off the excess, and sauté the meat until well-browned. Set the remaining flour to the side. Transfer the browned meat to a plate.
2. Over medium heat, sauté the bacon in the pot until crispy then transfer to the plate with the meat. Add the onions, parsnips, carrots, and sweet potatoes with 1/2 tsp of salt to the pot and cook for about 10-12 minutes or until softened. Add the mushrooms and garlic with another 1/2 tsp of salt and cook for about 2 minutes. Pour in the brandy to deglaze the pot, scraping up the brown bits off the bottom and let it reduce by half. Pour in the wine, beef stock, and Worchestershire sauce. Put the meat back in and add the rosemary and bay leaf. Turn heat to high and let come to a boil for one minute. Put the lid on and transfer to the oven. Let cook for 2 hours or until meat is tender and shreds easily.
3. About 30 minutes before you take the stew out, make the polenta. Heat 4 cups of water and 1 tsp of kosher salt in a large saucepan over high heat. When the water comes to a boil, slowly whisk in the polenta. Let boil for 1-2 minutes, constantly whisking. Turn heat down to low, cover pot and let cook for 20-25 minutes, uncovering and whisking occasionally. Polenta should be a creamy (not too watery, not too dry) consistency. Take off the heat and stir in the Parmesan cheese and 2 tbsp of the butter. Taste and add more salt if needed.
4. In a small bowl, combine the 2 tbsp of the remaining flour mixture and the 2 tbsp of remaining butter and stir the paste into the finished stew. To serve, ladle a small serving (about 1/4 cup) of polenta into a bowl and top with the stew. Garnish with parsley if desired.
CHEERS TO HAPPY COOKING!!!
Local Memphis Live: Cohosting 1/6/16

Local Memphis Live: Cohosting 1/7/16

Caribbean Seared Tuna with Mojito Sauce


Last year Tres and I went with a big group of friends to St. Barts. Aside from being one of the best vacations we have ever been on, I also found of my favorite dishes of all time and I’ve decided to recreate it – Caribbean Tuna is fresh and healthy and will make you want to hit up some warmer weather. St. Barts is one of the most unique caribean islands. It’s so tiny, you have to take a hopper jet over, but the flight in alone is worth taking the trip. The scenery is beautiful and the island is full of great food! What makes it so unique is it’s a French colony, so the people speak French and the food is very French, with a slight island influence. What’s so cool about St Barts is it’s known to be the #1 destination place for celebrities so on this new year with everyone sick of the cold weather, I thought why not take you back to St Barts with me by making my favorite dish from there! Plus, it’s a new year, and we all have resolutions to watch what we eat… This is a healthy dish to keep you right on your diet track!
SEE VIDEO FOR STEP BY STEP INSTRUCTIONS!!!
Grocery list (4 people):
1 tbsp olive oil
4 (4-6 oz) good quality tuna steaks
Kosher salt
2 tbsp Jamaican Jerk seasoning
1 tbsp smoked paprika
½ tsp granulated garlic
¼ tsp cinnamon
2 medium ripe mangos or papayas – chopped
1/3 cup plain greek yogurt
1/4 cup honey
1 lime – zested and juiced
1 large handful of mint – chopped, plus more for garnish
Directions:
1. Add olive oil to a sauté pan and heat over medium high heat. Season tuna with Kosher salt. Combine the Jamaican Jerk seasoning, paprika, garlic, and cinnamon in a small bowl and stir together. Cover each tuna steak liberally with the mixture, pressing to adhere. Let Tuna steaks sit for at least 20 minutes or until they come to room temperature.
2. Make the mojito sauce by combining the mango or papaya, yogurt, honey, lime zest and juice, mint, and salt together in a blender. Blend at high speed until smooth.
3. Sear each tuna steak for 1-2 minutes on each side for rare. They should form a crust on each side. Transfer the tuna to a cutting board and slice thin. Cover a plate with a thin layer of the mojito sauce, top with the sliced tuna and a sprig of mint.
CHEERS TO HAPPY EATING!!!
Andrea's Cooktales - Series 2, Episode 21 - Carribean Seared Tuna w/ Mojito Sauce

Brown Sugar Short Ribs


Everyone has their go-to holiday dish. I serve my Brown sugar short ribs for my family every Christmas. I also used this recipe to audition for MasterChef season 6, and just so happened to be good enough to get me into the top 100. I wrote this recipe several years ago and always come back to it when I entertain big groups for the holidays. I am extra proud of this dish, and it’s just hearty and decadent enough for the holidays.
SEE VIDEO WITH STEP BY STEP DIRECTIONS!!!
Grocery list (4 servings):
2 tbsp olive oil
Kosher Salt
Pepper
4-5 lbs short ribs
1 large onion – chopped
4 garlic cloves – minced
1 ½ cup good red wine
2 cups beef stock
2 tbsp tomato paste
2 bay leaves
2 tsp rosemary
2 tsp thyme
½ cup brown sugar
Directions:
1. Preheat oven to 350 degrees. Heat 2 tbsp of olive oil in a Dutch oven or cast iron pot over medium high heat. Sprinkle short ribs liberally with kosher salt and pepper. Sear all sides of the short ribs until browned and a nice crust is formed. Set ribs aside on a plate.
2. Turn the heat down to medium and add the onion. Cook until they start to brown then add the garlic and cook for one minute or until fragrant, just make sure to not burn the garlic. Deglaze the pan with the red wine and scrape up all the brown bits from the bottom. Let the wine reduce by half. Add the beef stock, tomato paste, and bay leaves and stir together well.
3. Add the ribs back in, making sure they are almost covered in the liquid but you can still see the tops of them. If they need more liquid, add more stock. Sprinkle the rosemary, thyme and brown sugar over the top of the ribs. Roast in the oven for 2 ½ to 3 hours until tender and almost falling off the bone. Plate the ribs and blend the leftover liquid with a hand held blender. Serve gravy over the top of the ribs or on the side.
Cheers to happy eating!!!
Cooktales Holiday Series: Golden Layers of Love

Exactly a year ago, I was prepping to go to LA because I had been chosen for MasterChef Season 6 Top 100. In October when I went to the Masterchef tryout (just down the street from my downtown Memphis condo) I met so many interesting people along the way, but in just a few hours I felt like I made a lifelong friend. I met Keshia Hay Tamble who came in from Nashville and we instantly connected through our love of food. We chatted the whole time and had a great time through the whole process. Luckily when it was all over, we stayed in touch. We both share a lot of the same goals and dreams and talk on the phone occasionally to collaborate. It's great to have someone who understands this business and hopes to succeed as much as I do. Here's Keshia's holiday cooktale:
 A sweet southern classic with origins inspired by my two beautiful grandmothers. Southern charm from my Granny Hay and classic comfort from my Granny Betty. These two women have a been a strong influence in my life and I strive day to day to be the perfect combination of both! ".
Golden buttermilk cake with a layers of homemade sea salted caramel frosting. A twist on my Granny Betty's Caramel cake recipe.
A sweet southern classic with origins inspired by my two beautiful grandmothers. Southern charm from my Granny Hay and classic comfort from my Granny Betty. These two women have a been a strong influence in my life and I strive day to day to be the perfect combination of both! ".
Golden buttermilk cake with a layers of homemade sea salted caramel frosting. A twist on my Granny Betty's Caramel cake recipe.
 Golden Cake
Grocery list:
- 1 1/2 cup of unbleached all-purpose flour
- 1 1/2 tsp of baking powder
- 1/2 cup softened unsalted butter
- 3 large egg yolks and 1 whole egg
- 1 cup cane sugar
- 1 pinch of sea salt
- 1/2 tsp of baking soda
- pinch of fresh grated cinnamon
- 1/4 tsp almond extract
- 1/2 tsp of vanilla extract
- 1/2 cup of buttermilk
Directions:
Preheat oven to 325.
Cream together butter, sugar, and salt in a stand mixer until fluffy. Add in almond,vanilla,egg yolks, and whole egg, one at a time for even mixing. In separate bowl, sift flour, baking soda, baking powder, and cinnamon together. Slowly add sifted ingredients 1/2 cup at a time in the wet mixture until fully incorporated. Pour in buttermilk and mix for a minute. Grease and flour two 6" cake rounds. Lightly scoop mixture into each pan about half way. This leaves cake room to rise while baking. Bake for 15-20 minutes until golden yellow. Cool in refrigerator until completely chilled. This will help when applying your frosting.
Sea salted Caramel frosting
Grocery list:
- 2 cups of cane sugar
- 1 cup of milk
- 1 stick of butter
- 1/4 tsp baking soda
- 3/4 tsp sea salt
- 1/3 cup of organic corn syrup
Directions:
In a large sauce pan on medium-high heat, add all ingredients. Allow mixture to melt down. With a large wooden spoon, stir, stir, stir. You will do this for about 15 minutes.(this is where it gets tricky) While your stirring, the caramel will begin to bubble, thicken, and brown. DO NOT LEAVE UNATTENDED AT ANYTIME! I can hear my granny Betty now"Don't you move a muscle accept to stir stir stir. You leave that caramel and it'll bubble over!" Lol and she's right! Stirring vigorously you want caramel to go into the "soft ball stage". You can test this by adding a few drops of the thickened caramel into a bowl of cold water. Test the consistency, it shouldn't harden but be springy and soft. If the consistency is just right then it's time for you to remove the pan from the heat but continue to stir. After about five minutes off the stove add a pinch more of sea salt. This will bump up the sweet salty factor! The finished consistency should be almost the same of soft praline but still spreadable.
Make sure your layers of cake have completely cooled. Trust me your thank me later. Spoon a layer of caramel frosting on top of first cake. I like to pile it a little high for more dramatic effect. Let the caramel set a few minutes and then add the second cake on top. On the top of the second layer of cake, gently pour your caramel on top and smooth over cake. It's ok if some caramel drips off the side that's the best!! Top with some sugar spice pecans for a touch of nuttiness and enjoy!
I hope this recipe lives up to my granny Betty's highly demanded recipe and is a charming as my Granny Hay!
CHEERS TO COOKTALES FROM EVERYWHERE!!!
Cooktales Holiday Series: Julie's Holiday Recipes

Julie Busha is the definition of inspiring. I've gotten to know her through my promotion of Slawsa... The most delicious condiment on earth and something I'm a true believer in. You may know Julie from the show Shark Tank where she presented her product Slawsa. Since then, the brand has taken off and it's become a go-to in my own kitchen. Seeing Julie's hard work and dedication to Slawsa is such an inspiration to me. I hope to be half as successful about what I'm passionate about as she is for her product. I asked her to share some of her holiday recipes with me, and as busy as she is, she still found the time. These are not Slawsa recipes but you can go to their website or search Slawsa recipes right here on my blog!
RECIPE 1: English Muffin Mix
STORY: The holidays can be a really busy time and sometimes the last thing you want to do after preparing a big Christmas Eve dinner is Christmas breakfast the next morning. This is one of my favorite recipes because I can make in bulk and then portion out to either store in the fridge for a few weeks (or the freezer for a few months). It's basically a breakfast egg mixture that you top on english muffin halves and broil.
So simple yet makes for a breakfast offering that is less than traditional. You can multiply the recipe easily.
INGREDIENTS:
- 1 dozen eggs, hard boiled and chopped
- 1 lb of grated cheddar cheese (I've been using smoked cheddar with bacon)
- 1 small onion, diced
- 1/2 lb of cooked bacon, crumbled (you can substitute ham)
- 1 cup Mayo
- 1 Tbsp Worchestershire Sauce
- 1 Tbsp Spicy Mustard
- Hot Sauce (optional)
- Pepper & Garlic Powder, to taste
- English Muffins, sliced in half
- Parmesan Cheese
Mix all ingredients except english muffins & parmesan in large bowl (at this point it can be stores for future use). Place a generous spoonful of mixture on each half of an english muffin and sprinkle with parmesan cheese. Place in broiler (but not on top rack) and cook until slightly browned. This will make approx 15 servings.
RECIPE 2: Cardamom Spiced Pear Jam
STORY: I'm probably better known for the abundance of blackberry jam I make and give away because we have tons of wild blackberries in the neighborhood and every summer (just like the trout), I'll pick, clean and vac-seal/freeze until the winter when I make jam to give mainly away (50+ jars annually). The Cardamom-spiced pear jam tastes a little more like the holidays and boy, does the kitchen smell good. I did learn how to "can" in my youth with 4-H (where I made marmalade) but I really didn't start doing all the jams until about 8 years ago when I realized we had this bounty of berries in my neighborhood I could take advantage of. Of course, since I've never been a big biscuit & gravy fan (which just seems really heavy to me), I especially like serving the pear jam on biscuits for breakfast, and of course, it makes a great gift for neighbors as well. It's unique and that's what I like about it.
Ingredients:
- 4 lbs of Bartlett pears, peeled, cored and cut into 1/2 inch pieces
- 4 cups Sugar
- 1/2 cup plus 2 tbsp of lemon juice
- 1 Tbsp green cardamom pods, lightly crushed
- 1 Tbsp honey
In a large glass or ceramic bowl, toss the pears with sugar & lemon juice. Cover and refrigerate overnight. Also, put a metal spoon in the freezer (you'll need that later). Transfer the pears & liquid to a wide, heavy pot and bring to a boil. Put the crushed cardamom in a tea ball and add it to the pot. Cook the pears over high heat, stirring frequently, until the liquid starts to thicken and pears become translucent (about 10 min).
Remove pot from heat. Transfer 1/3 of the pears to a food process and puree until smooth. Do in 3 batches and place back into pot. Boil again over med-high heat until the jam is very thick (about 5 min). You can test by putting a small amount on the frozen spoon and freeze for 30 seconds. When you tilt the spoon, the jam should be thick and runs
slowly. If its too runny, cook longer and test again. Remove the tea ball and stir in the honey. Ladle into 3 clean 1-pint jars and let cool completely. Close the jars and store in the refrigerator for 2 months.
You can also do it with pectin to have shelf stable pear jam but just review the instructions on the pectin for pear. That's often easier and the cardamom ball can be still used in the cooking process.
Cooktales Holiday Series: Granny Good Witch's Sweet Rice

When I graduated college, my first job was at Varsity Brands, Inc. It's where I met my sweet husband and lots of new friends who I would keep touch with even after I left the job. Jim Lord was one of those great people. I also got to know his sweet wife, Ginger, and their son AJ. Jim and Ginger have been so helpful and supportive of Cooktales, and for that I am forever grateful. I asked Jim for a recipe because he's a big foodie himself, and he gave me this holiday treat from his Granny. Here's his holiday cooktale: Like most people, I recall my childhood Thanksgivings and Christmases with wonder and joy. And like most, my childhood holidays were filled with feasting and playing with cousins and siblings at my grandparent’s house. It was there, on those special occasions when we gathered around the table, that every child’s eyes would scan the table for the most perfect dish imaginable – Granny’s sweet rice. When I asked my grandmother how she made it taste so good, she replied with the same reply as when I asked her how come her bread tasted so much better than store-bought; a twinkle in her eye, a smile, and the single word, “Magic.” My grandmother used to joke that all of the wonderful things that came out of her kitchen were because she was “Granny Good Witch”, who used magic to make everything so good.
When Andrea asked me to submit a family recipe and a story, I knew this one would have to be the one. So, with a little fear and a lot of excitement, I asked my mom for the recipe. That’s when I found out there wasn’t one.
You see, after my Granny Good Witch passed away, our family passed around some of her “recipes”, such as they were. I don’t know a grandmother anywhere who uses a recipe to cook, and mine was no different, apparently. So, with a general working knowledge, a little family lore, and some guesswork thrown in, different aunts, my mom, and a few cousins have made and brought sweet rice to every family gathering since, with varying degrees of success. So, my mom wrote down the recipe in her head and I gave it my best shot. It turns out, even the recipe my mom gave me wasn’t the one you see here, but it turned out to be as close to my grandmother’s as I can recall it being. The surprising thing is how simple it is.
Grocery list:
- 1 cup dry long grain rice (prepared per directions to yield 4 servings
- 2 to 3 cups milk (whole milk will yield best results. Use more or less milk depending on how thick you want the final product to be.)
- ¾ cup sugar
- Sprinkle of cinnamon
Serves 6-8 warm or chilled (Also makes for a great breakfast snack the morning after the feast!)
Directions:
Prepare 1 cup of dry long grain rice per directions.
Once the rice is done, add in milk and the sugar, turn the temperature up to low medium and slowly bring the mixture to a low boil, stirring frequently. This will take time. Keep stirring at the boil for 1 – 2 minutes, then set aside, covered, for 5 to 10 minutes to cool slightly. Poor into a serving bowl and sprinkle generously with cinnamon.
The patience is the key to the dish. It will come to a boil on this low temperature, eventually. Do not turn up the heat, or the bottom will scald. This is the revelation of making this dish; the magic is in the patience. Now every time I make it, waiting patiently for it to boil, I think about my grandmother making this dish for us and I know that the most important ingredient she used in her kitchen wasn’t magic – it was love.
CHEERS TO COOKTALES FROM EVERYWHERE!
Andrea's Cooktales - Series 2, Episode 20 - Brown Sugar Short Ribs

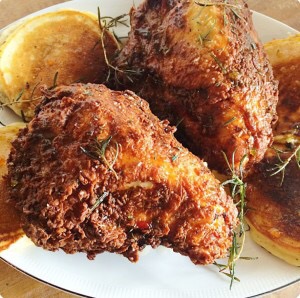
Cooktales Holiday Series: Biscuits and Chocolate Gravy


You know you're getting old when you can remember someone as a little girl and now they're an adult, a friend, and someone you're excited to see living a full, happy, successful life. I met Nicole (Vinson) Cole when I was in high school and her mom was my cheerleading sponsor. We would go to Mrs. Vinson's house often to prep for spirit events and homecoming, and I remember Nicole- just a little girl - running around. Nicole and I caught up post college and continued to keep up with each other through our blogs and social media. I have enjoyed reading her blog on God, marriage, life, and working hard to fulfil your dreams. Nicole is a full-time photographer and videographer for 314 Productions where her and her husband shoot weddings together. Her work is beautiful, and I have watched her business grow into something that is such an inspiration! She has also been so supportive of Andrea's Cooktales and for that, I'm grateful. Here's her cooktale: When I was a little girl, there was a breakfast that was so special that my mom would only make it once or twice a year. (Now that I’m older I see that it was “special” because it is so unhealthy! Ha!) It was a recipe from my Meme, a true southern lady. A lady who makes the best mac-n-cheese and my personal breakfast favorite… biscuits and chocolate gravy.
To me, there is absolutelynothing more southern than chocolate gravy and it was so fun to introduce this recipe to my husband after we got married! A handful of ingredients and a few minutes over the stove and you’ve got a pretty “sweet” breakfast if you ask me. :)

Grocery list:
1 cup of sugar
3 tablespoons of cocoa
3/4 cup of milk
2 tablespoons of butter
Directions:
In a medium saucepan, mix together the sugar and cocoa, adding a little HOT water to cream it together. Next add your milk and butter. Bring to a boil and stir constantly for around 10 minutes. Pour over biscuits and enjoy!
This is definitely a trial and error recipe so if your first batch isn’t quite the consistency you want, keep trying! It’s worth the practice.
CHEERS TO COOKTALES FROM EVERYWHERE!!
Cooktales Holiday Series: Apple Crumble Tart with Butter Brickle Ice Cream

When I got the call that I had made the Top 100 for MasterChef Season 6, I was beyond thrilled to be in the category of one of the top 100 home cooks in America. But what I didn't realize at the time is that in the week I would spent in LA, I would form amazing friendships with people who had as much of a passion for food and cooking as I did. Alex Charpentier was one of those friends. We spent nights drinking wine and sharing our culinary dreams and goals. She has a great blog where she has shared some of her journey through culinary school, food, fitness, and life: http://www.berkeleybabe.com/ This delicious recipe was inspired by her mother who recently passed away... Here's her cooktale: Growing up in a French family we tended to put a French flair on our Thanksgiving meal but one thing that we did keep traditional was dessert. I have always had a passion for cooking and over the years even prior to attending culinary school I mastered several desserts that my family has grown to love. One of them that I have been making for more than 20 years is my AppleCrumble Tart. I used to serve it with store bought vanilla ice cream but two years ago I bought myself an ice cream maker and have been churning out my own delicious flavors to compliment my tart ever since. This Thanksgiving, in honor of my mother who tragically passed away this summer and will thus not be with us I made her favorite ice cream flavor, butter brickle. Shewas after all French and loved anything with butter!
Apple Crumble Tart
Serves 8-10
Equipment: You will need a spring-form pan and a food processor for this recipe.
Pate Brisee – this is a standard recipe for pate brisee and can be used for all of your sweet pies and tarts! (Tip: for savory pies and tarts just leave out the sugar!)
Ingredients:
2 1/2 cups all purpose flour
1-tablespoon sugar
1-teaspoon salt
16 tablespoons (2 sticks) unsalted butter, cold and diced (small dice)
1/2 cup ice cold water (you may use less)
Directions:
1. In the bowl of a food processor, add the flour, sugar and salt and pulse to combine. Add the diced butter and pulse just until you have pea-sized pieces of dough.
2. Gradually trickle in the water into the dry mixture and keep pulsing just until a ball of dough forms. (You do not want to over work your dough). Remove it and form it into a large disk, wrap in plastic wrap and chill for two hours.

Apple tart:
Filing:
3 lbs apples (about 4 large) 1/2 Granny Smith and 1/2 Fuji
Juice from 1 lemon
1 cup sugar
1/4 cup flour
1/2 teaspoon salt
1 teaspoon ground cinnamon
1/4 teaspoon nutmeg
Streusel topping:
3/4 cups light brown sugar
1/4 teaspoon cinnamon
1/8 teaspoon nutmeg
1/4 teaspoon salt
1 cup all purpose flour
3/4 cups rolled oats
1 cup walnuts
1 teaspoon baking powder
8 tablespoons (1 stick) butter, melted
Directions:
1. Prepare crust: coat a 9-inch spring-form pan with non-stick spray. On a floured surface, roll out chilled dough into a 16-inch round – 1/4 inch think. (Tip: Once you have the dough rolled out, use your rolling pin to roll the dough around it and carefully lift the whole thing up and easily transfer it to the spring-form pan!) Trim the overhang and then place the pan into the fridge while you prepare the apples.
2. Preheat oven to 375 degrees. Peel, core and slice the apples in the food processor using the slicing blade. Place them into a large bowl and with the lemon juice and toss to coat. In a separate small bowl, whisk the sugar, flour, salt, cinnamon and nutmeg and then mix into the apples.
3. Scoop out the apples using a slotted spoon to avoid getting too much liquid from the lemon juice and layer the apples into the prepared crust spreading them as flat and evenly as possible (you may have extra apples, do not over fill the tart or your streusel will overflow so leave a bit of room). Bake tart for 30 minutes on the middle rack of the oven (if the tips of the apples begin to brown and burn, cover the top with foil).
4. While the tart is baking, make the streusel topping. In a medium bowl, stir together sugar, cinnamon, nutmeg, salt, flour, oats, walnuts and baking powder. Pour in the melted butter and mix to combine. Refrigerate until tart has baked for 30 minutes.
5. After 30 minutes, remove the tart from the oven, decrease the oven temperature to 325 and then gently press the streusel onto the top of the apples. Return to the oven and bake on the lower rack of the oven for an additional hour. (Cover with foil if the streusel begins to brown too quickly).
6. When the tart has finished baking, remove it from the oven and let cool to lukewarm. Run a knife around the crust to loosen the edges from the pan. Carefully loosen the clamp on the spring-form and slide it over the top and off the tart.
This tart eats best when brought to room temp with homemade ice cream (recipe to follow).

Butter Brickle Ice Cream
Makes 1 quart
Equipment – you will need an ice cream maker and a stand mixer
Ingredients
½ cup (1 stick) butter
1 cup pecan halves
1 cup English toffee bits
2 large eggs
¾ cups whipping cream
1 cup milk
Directions 1. Melt the butter over low heat in a heavy skillet. Add the pecans and salt and sauté, stirring constantly until the pecans start to turn brown. Drain the butter into a small bowl and the pecans into another bowl; let the butter and nuts cool.
2. Using the whisk attachment to your stand mixer, whip the eggs until light and fluffy, 1-2 minutes. Add the sugar a little at a time and continue to whisk until completely blended, about 1 minute. Pour in the milk and cream and whisk to blend. Add the cooled, melted butter and blend at low speed. 3. Transfer mixture to an ice cream maker and freeze following the manufacturer’s instructions.
4. Add the toffee bits and pecans about 2 minutes before the ice cream is done (when it starts to stiffen) then continue freezing until the ice cream is ready.
CHEERS TO COOKTALES FROM EVERYWHERE!!
Death by Chocolate Cake: Two Ways
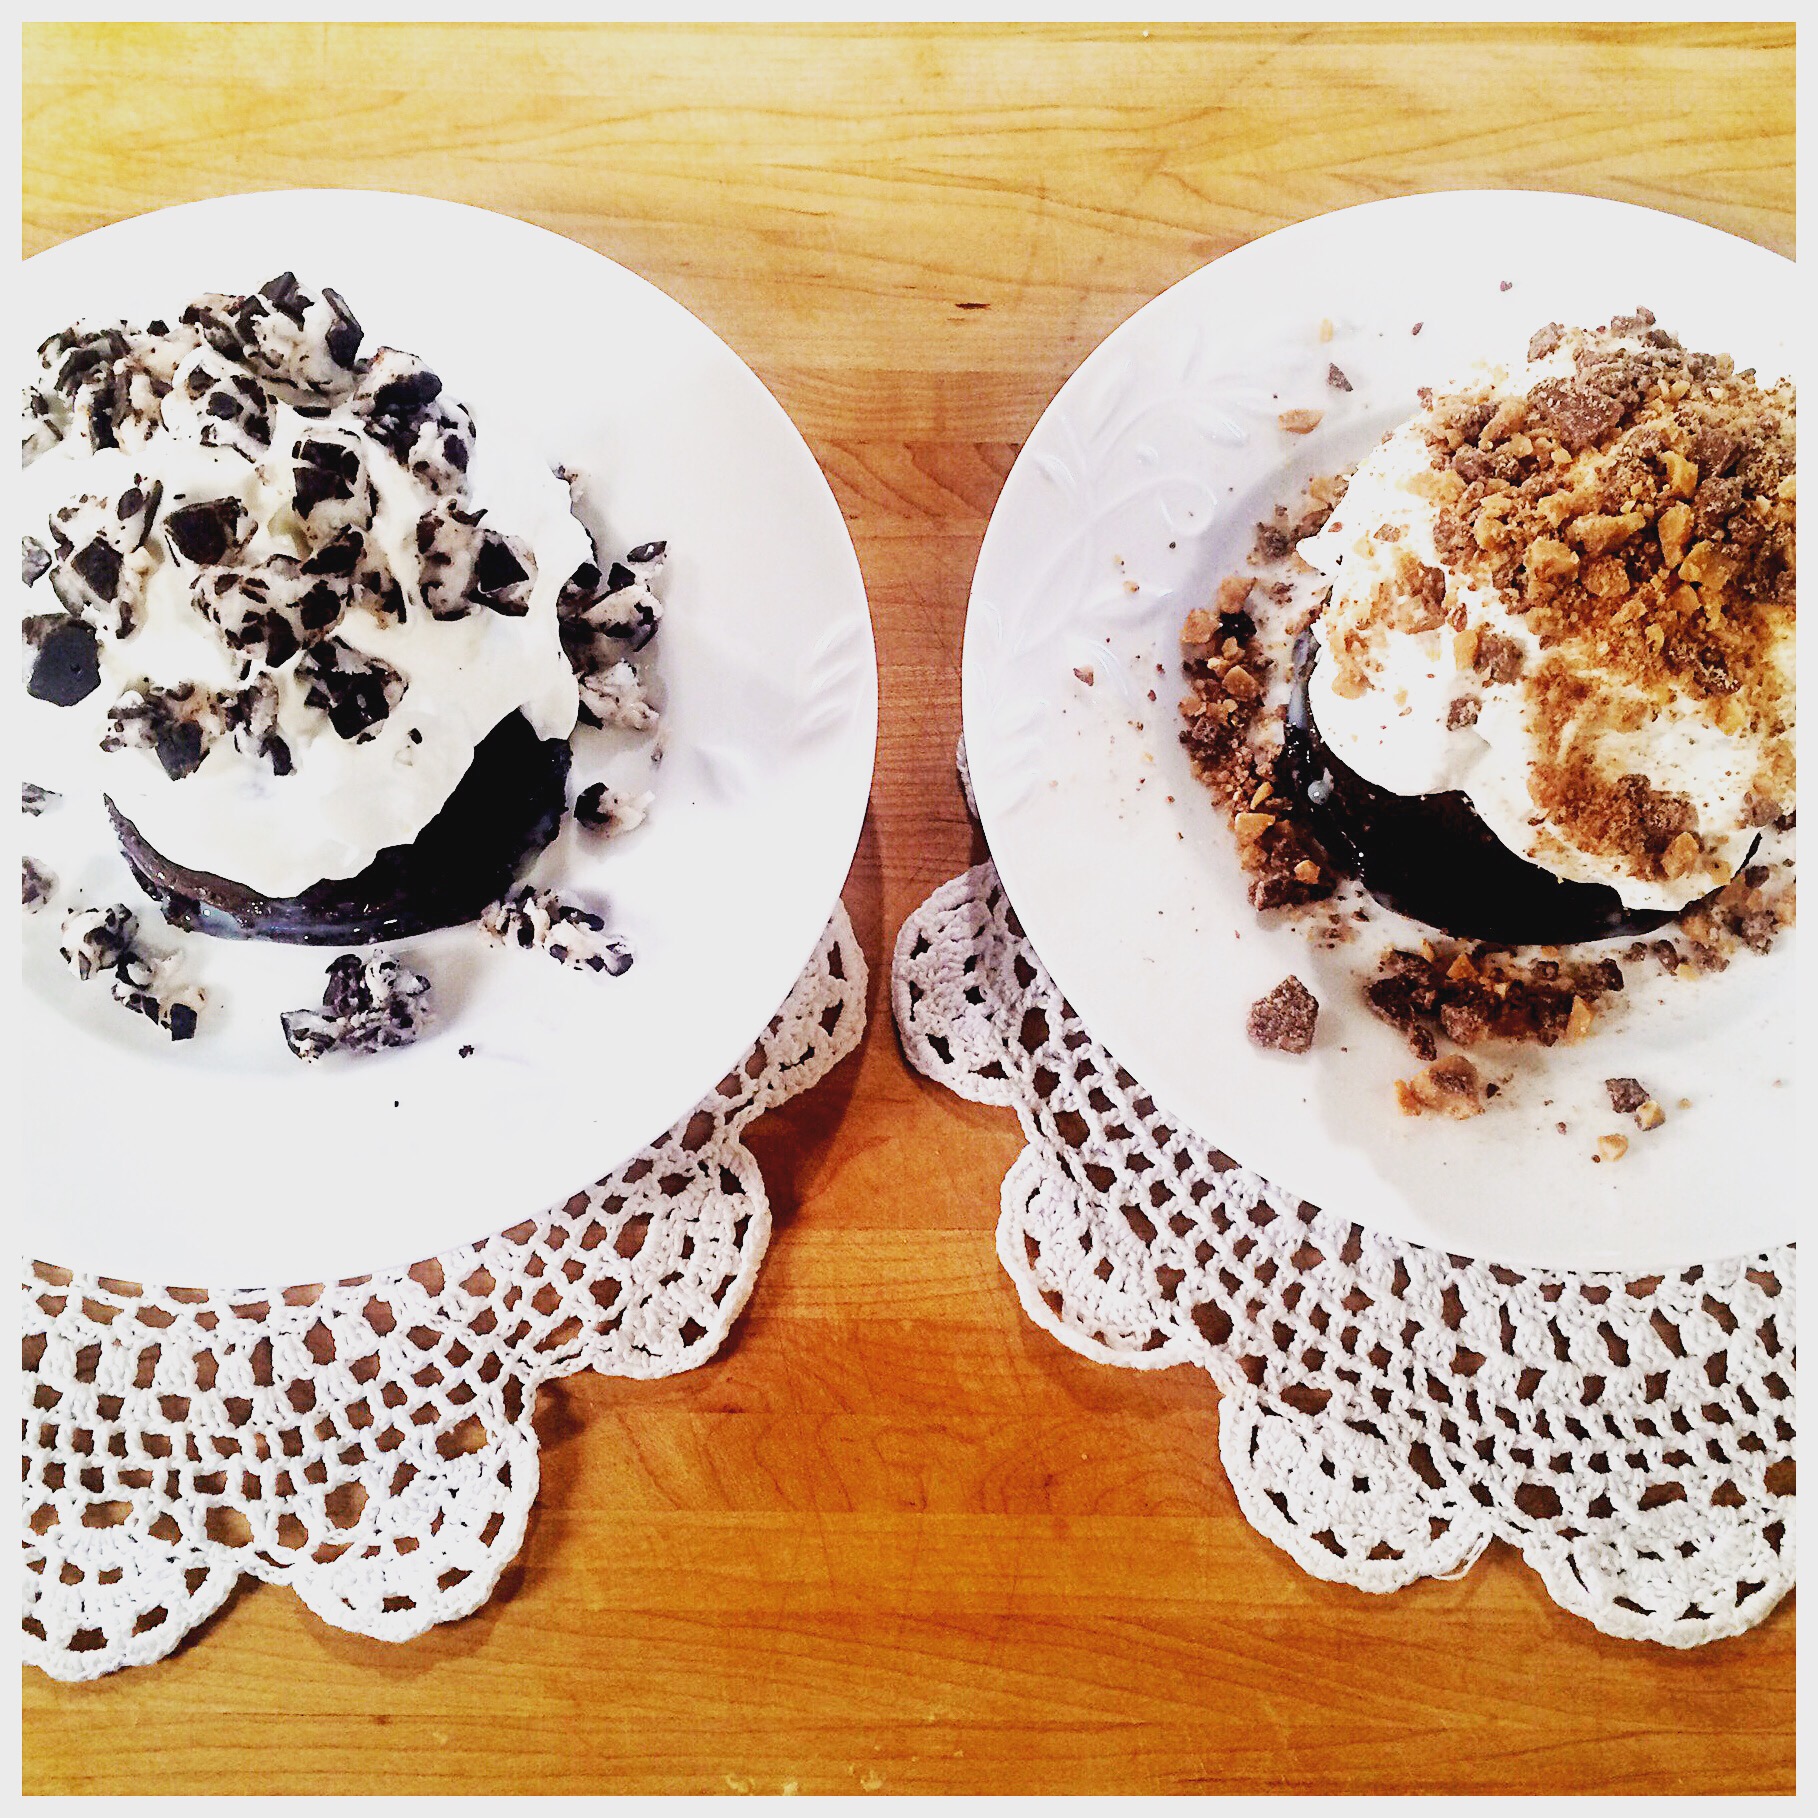
When I cheered at Delta State, I had a friend who invited me to her family's house for dinner one night. It was there I was introduced to a chocolate cake that even I, a non chocolate lover, fell in love with. So much that my momma has made me this cake for my birthday almost every year since! I have put a spin on this cake and made it into individual portions in two ways.. One is the original and one is perfect for the holidays. They're both divine! SEE THE VIDEO FOR STEP BY STEP INSTRUCTIONS!!!
Grocery list (4 individual cakes):
Butter and flour – for greasing
1 box Devil’s Food Cake mix
3 large eggs – lightly beaten
1/3 cup vegetable oil
1 can sweetened condensed milk
2 cups cold heavy whipping cream
2 tbsp sugar
¼ tsp vanilla extract
¼ tsp peppermint extract
1 cup Health Bar Candy crumbles
1 cup Andes Mint Candy or York Peppermint Patties – chopped
Directions:
1. Preheat oven to 350 degrees. Butter and lightly flour 4 large ramekins (about 1 cup in size). In a large bowl, whisk the cake mix together with 1 cup water, beaten eggs, and oil until smooth. Pour into prepared ramekins about halfway up and bake for about 15-20 minutes or until set.
2. Make the whipped cream by whipping together the heavy cream and sugar. Spoon half of the whipped cream mixture into another bowl. To one bowl of whipped cream, add the vanilla extract and; to the other bowl add the peppermint extract. Stir each together with separate spoons.
3. When the cakes are cool, several small slits all over the tops of each cake with a knife, almost pushing the knife to the very bottom. Pour sweetened condensed milk evenly into the ramekins, letting the milk soak into the cake. After about 10 minutes, turn each individual cake out onto a plate.
4. Top two of the cakes with the regular whipped cream and the other two cakes with the peppermint whipped cream. Sprinkle Health Bar candy bits on the cakes with regular whipped cream. Sprinkle Andes Chocolate or York Peppermint bits on the ones with peppermint whipped cream. Let guests choose which one they want – or serve them both!
*** This cake can also be made in a baking pan. Just bake cake in a 13 x 9 pan for 25-30 minutes, prepare with sweetened condensed milk the same way and choose toffee flavor or peppermint flavor for the whipped cream and crumbles.
CHEERS TO HAPPY EATING!!!
Andrea's Cooktales - Series 2, Episode 19 - Death By Chocolate Cake: Two Ways

Cooktales Holiday Series: Buttermilk Biscuits

I met Cassie just a few months ago but instantly connected with her. A talented musician living in Nashville to pursue her dream, I realized after only talking to her for a few minutes that Cassie and I have a lot of the same aspirations, just in a different line of work. She also told me about her grandmother who recently passed away, and it warmed my heart hearing how much her and her Mamaw connected over food and recipes. Here's her Cooktale and delicious biscuits: Some of my favorite memories with my Mamaw are of us in the kitchen together. I always enjoyed baking cookies, making casseroles, and trying desperately to master her buttermilk biscuits. She hardly ever followed a recipe, which made it difficult for little amateurs in the kitchen like me. Mamaw said, “It’s all in the way they feel…the elasticity, ya know?” One day, we finally figured out the exact measurements of the ingredients to her tasty homemade biscuits.
My Mamaw went to be with the Lord on July 17th, 2015. I miss our special moments in the kitchen, but will always hold those memories closely. While she was in the hospital, one of the last things she told me was to not forget a “dab-a sugar” and a “pinch-a salt,” then my biscuits would be just right. To this day, I don’t know what the exact measurement is for a “dab” or a “pinch,” but I always get tickled when I’m trying to figure it out.
 I’m still convinced that even if I follow one of her recipes perfectly, nothing ever seems to taste as good as it did at Mamaw’s house. Maybe it was her presence that made everything better or pinches and dabs. If you’re feeling adventurous and like your coffee with cream and sugar, try dipping these biscuits in!
From the words of my Mamaw Lynda Means, “So, as you taste and see that your dish is good, always remember to ‘Taste and see that the Lord is good.” Psalm 34:8
Grocery list:
- 2 3/4 cups self rising flour
- 1 1/2 cups buttermilk
- 2 tablespoons Crisco
- 1 teaspoon baking powder
- 1 tablespoon butter (softened)
- dab- sugar
- pinch-salt
Directions:
Preheat oven to 400. Grease pan well with Crisco. Mix ingredients together. Roll dough into desired thickness. Toss and turn dough in self rising flour. Place in pan and bake for 15-20 minutes. Broil for 2-3 minutes to brown the top. Brush with butter.
Cheers to Cooktales from everywhere!
Andrea's Cooktales - Series 2, Episode 18 - Homemade Ricotta Ravioli w/ Butter Sage Sauce

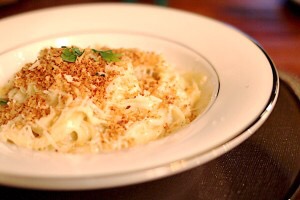
Homemade Ricotta

I made homemade ricotta for the first time for a dinner party because I wanted ricotta crostini but didn't want store-bought. I had just got back from Italy where homemade ricotta was abundant, and it was there, I fell in love with the cheese. So I thought, why not make it myself? I was shocked to learn how easy it was and now I make it like crazy for quick, impressive crostini when we have people over. My favorite way to use it is in my Homemade Ricotta Ravioli with Brown Butter Sage sauce recipe. To die for!
See the the video on making homemade ricotta!
Grocery list:
4 cups whole milk
2 cups heavy cream
1 tsp kosher salt
3 tbsp white wine vinegar
Extra virgin olive oil
Directions:
1. Make the ricotta. In a large Dutch oven or cast iron pot add the milk, cream, salt and stir together over medium heat. Let it come to a complete boil, stirring occasionally, for about 5 minutes.
2. Turn off the heat and stir in the vinegar. Let the mixture sit for several minutes (I wait at least 6-7 minutes) until it curdles. There will be large chunks throughout the mixture. Set a large sieve covered with a damp cheese cloth over a deep bowl. Pour the milk mixture into the sieve, and let the liquid drip out into the bowl.
3. Occasionally discarding the liquid in the bottom of the bowl, let the mixture sit at room temperature for about 30 minutes or until it’s the consistency you desire. The longer it sits, the thicker it gets. When it’s to your liking, pour into bowl drizzle with about a tbsp. of olive oil and mix together.
* Refrigerate until ready to use. It will last up to 5 days.