• Cookbook
  • About
  • Video
  • Recipes
  • Travel
  • Inspiration
  • Services
  • Contact
Menu

Andrea's Cooktales

Street Address
City, State, Zip
Phone Number
A STORY BEHIND EVERY RECIPE

A STORY BEHIND EVERY RECIPE

Andrea's Cooktales

  • Cookbook
  • About
  • Video
  • Recipes
  • Travel
  • Inspiration
  • Services
  • Contact

Citrus Panzanella

May 25, 2016 Andrea LeTard
image.jpg

Sometimes life just has to center around what you enjoy the very most. Not work. Not stress. Not working out. Not finances. Not relationships. Sometimes you just have to stop and enjoy life. Tres would say I do this quite too often, which I find very healthy but he doesn't think it's the most natural.

Here's the conclusion I've come to: stress and worrying turns to an unhealthy lifestyle and can eventually lead to death so why let it happen in your life? Before I was a full-time chef/blogger, I was in pharmaceutical sales. I sold 8 different drugs for 6 different types of disease states, some that eventually cause death. Guess how many of those diseases/conditions can be caused by stress? Every. Single. One. I know it's easier said than done but... Please, stop the stress! It's not worth your life and quite frankly, not worth your time. Your time on this earth should be spent having fun! 

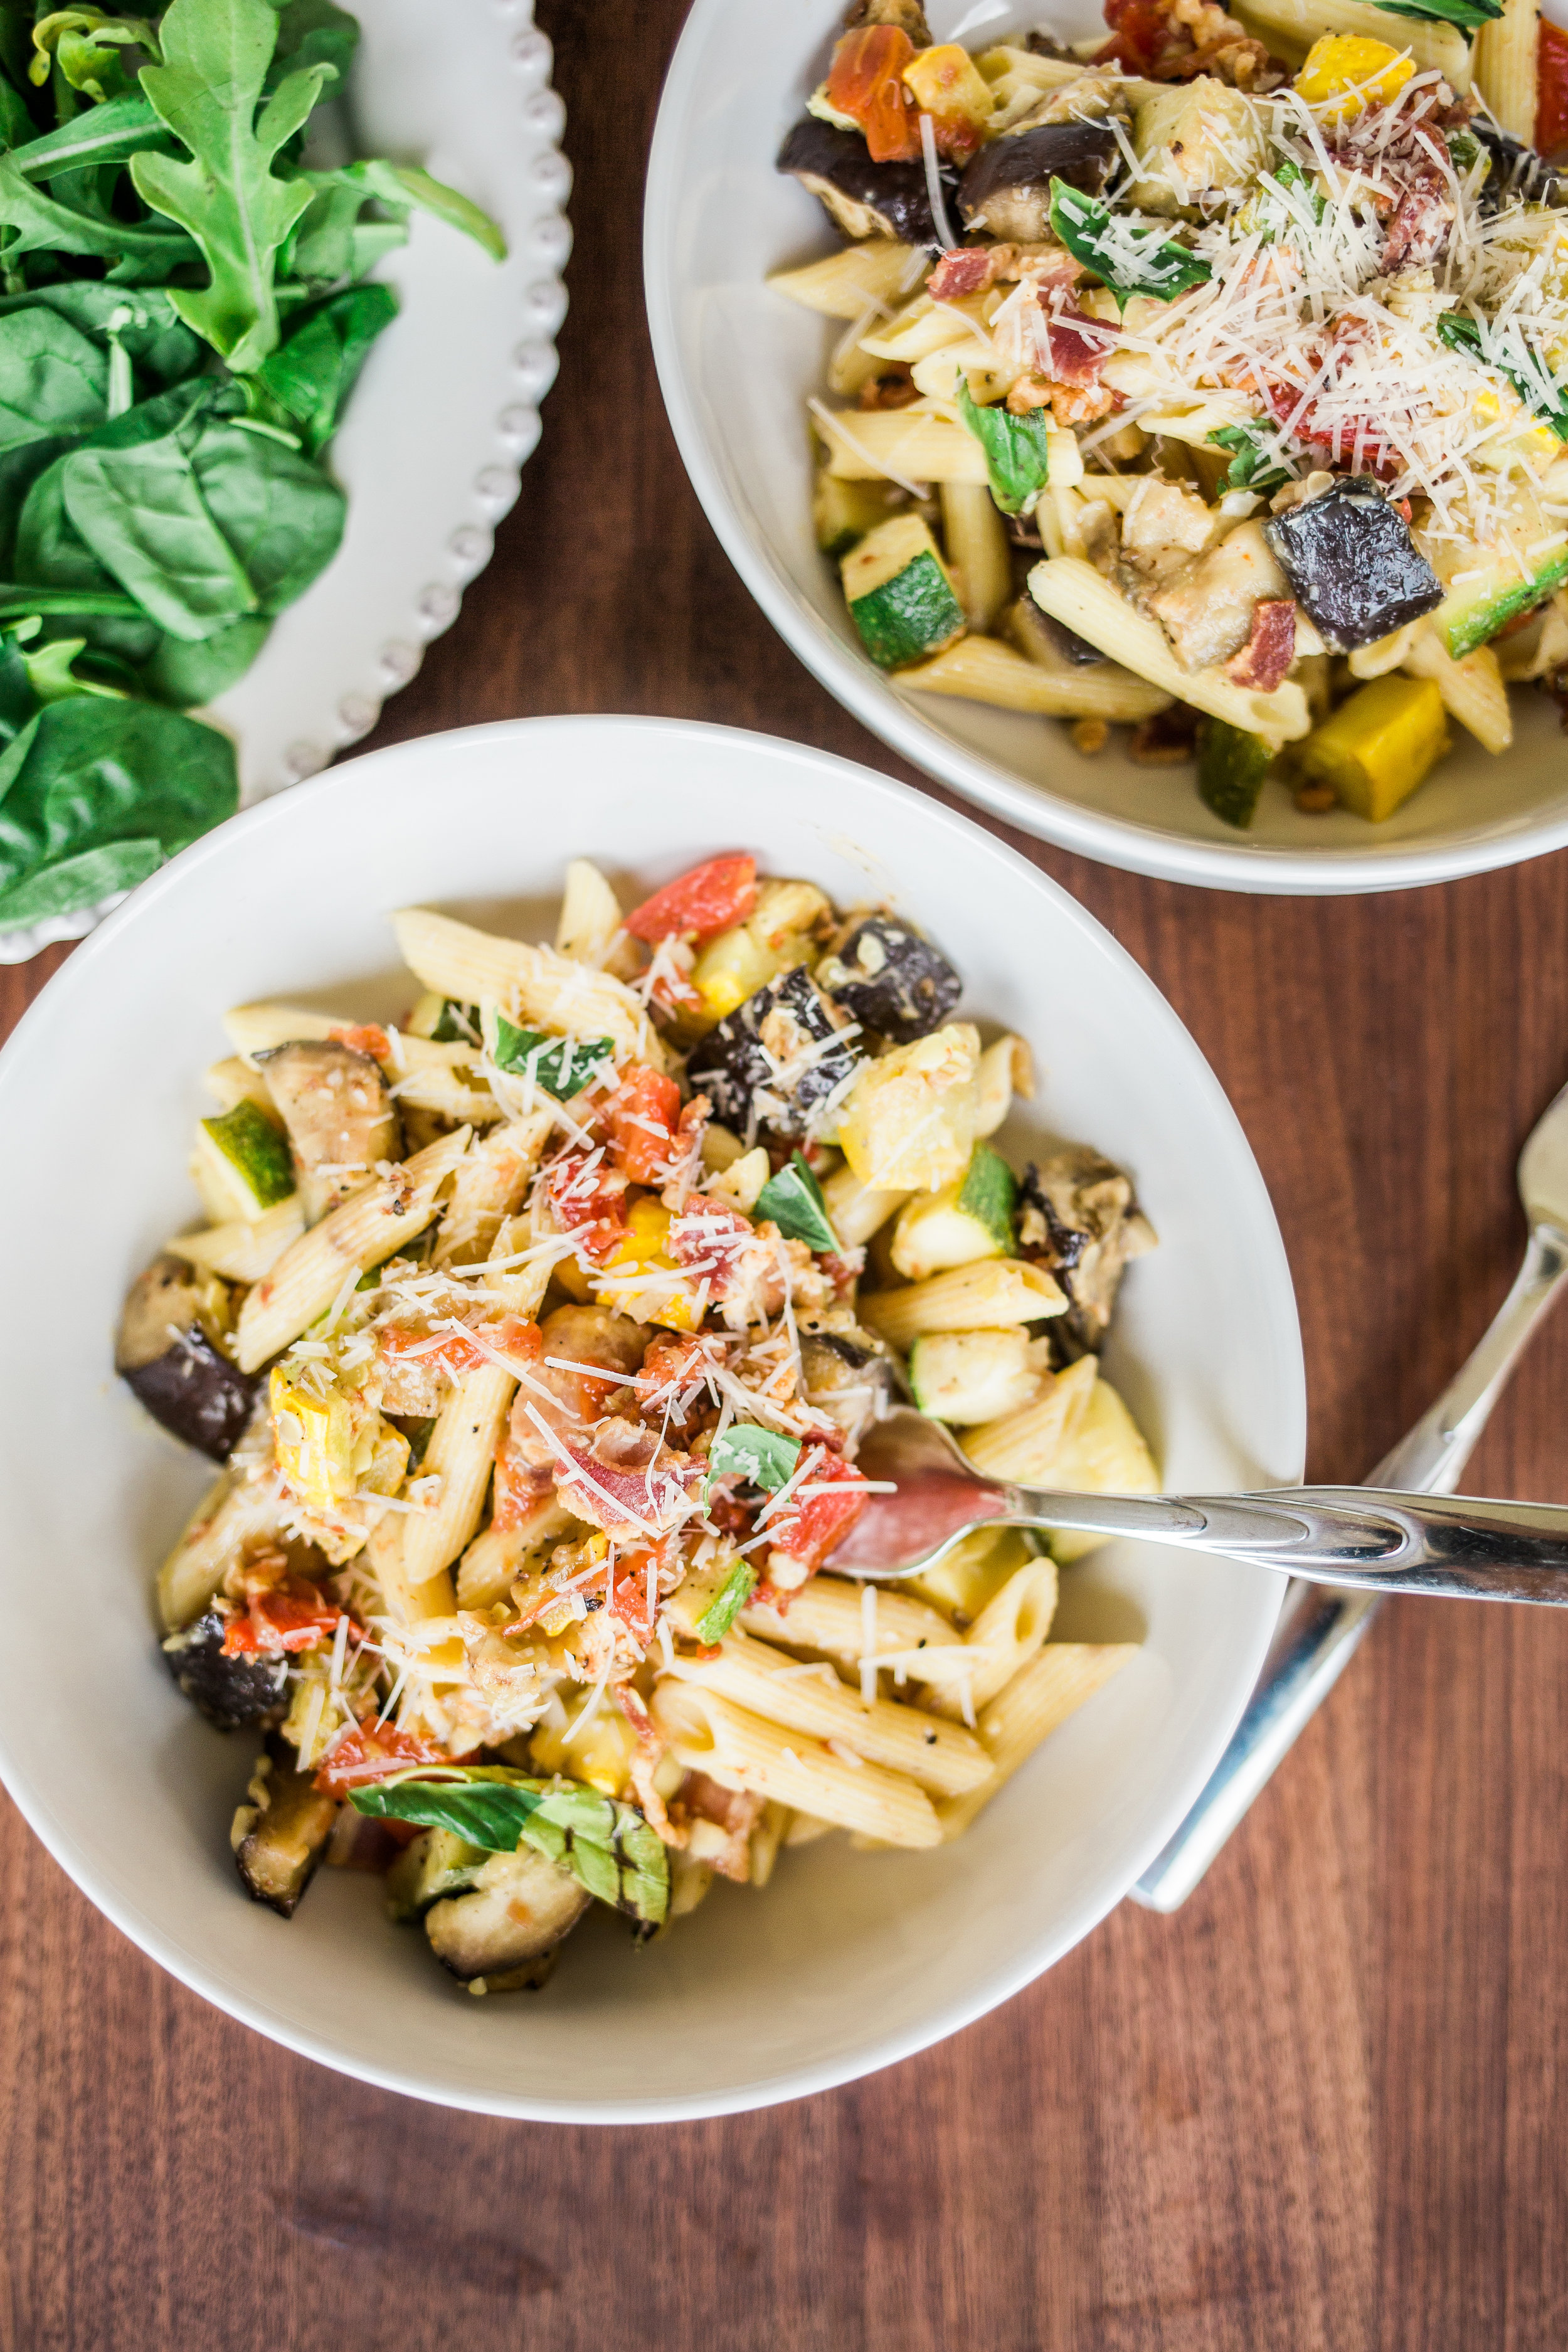
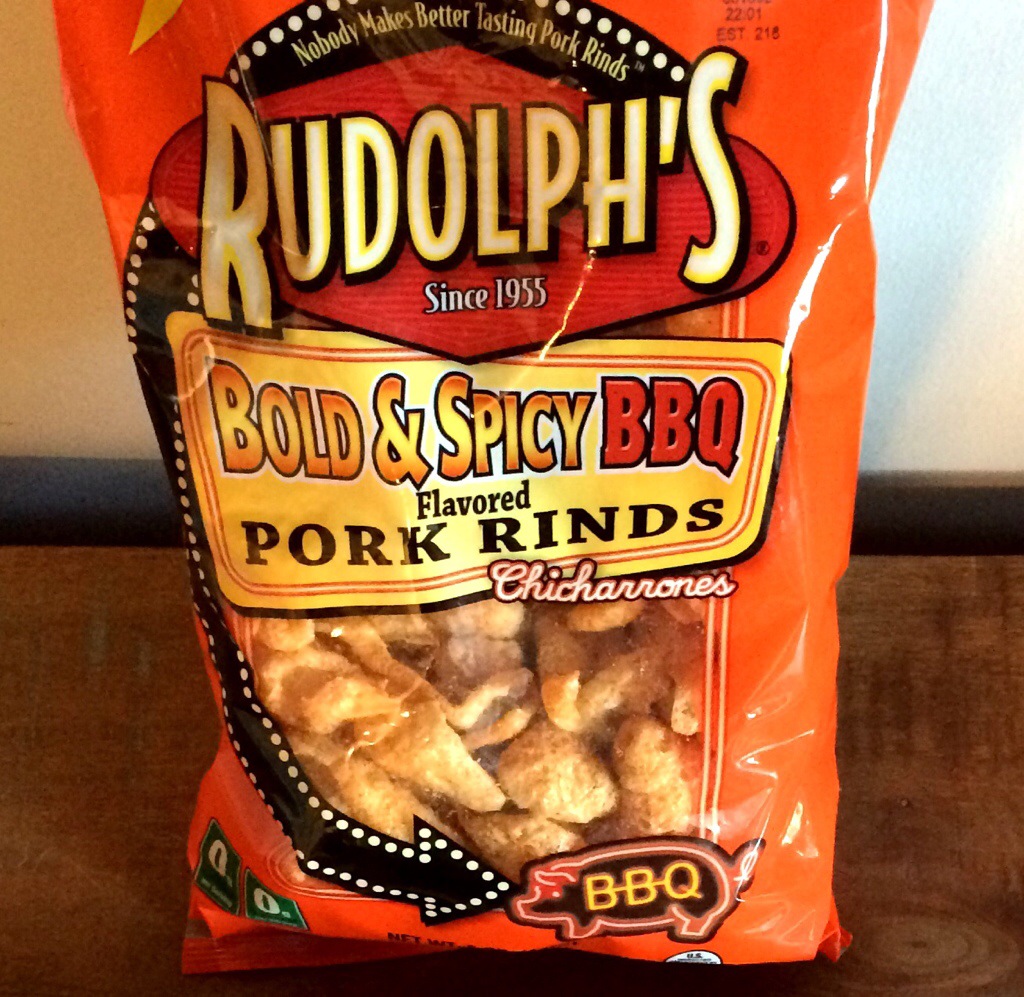
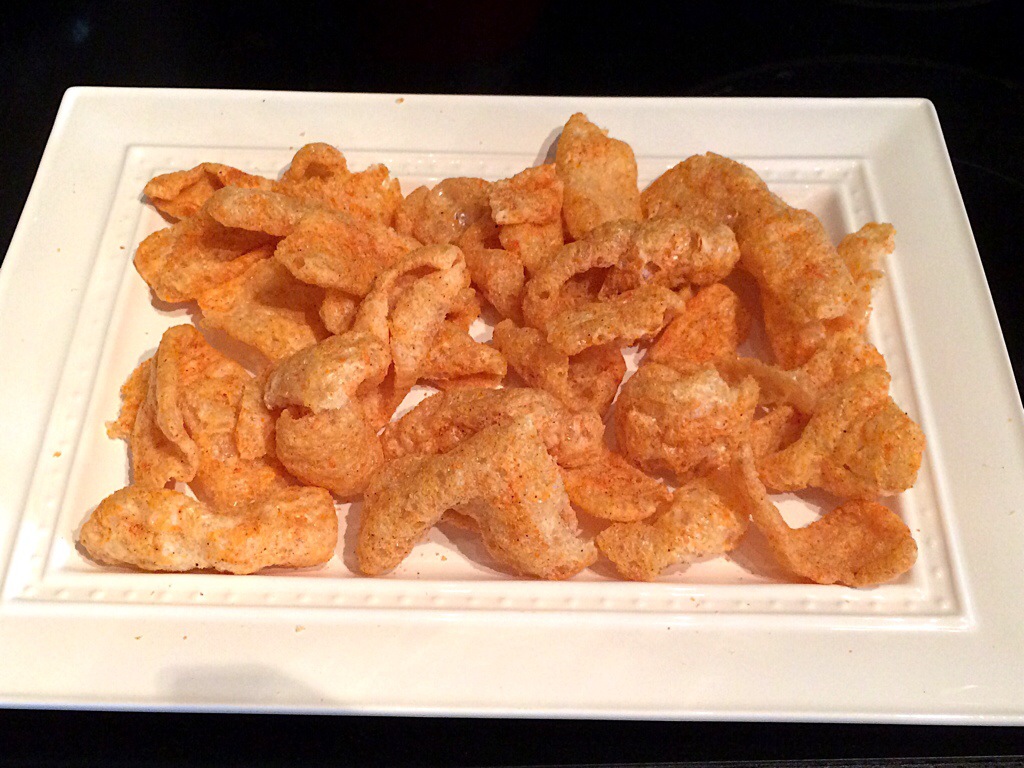
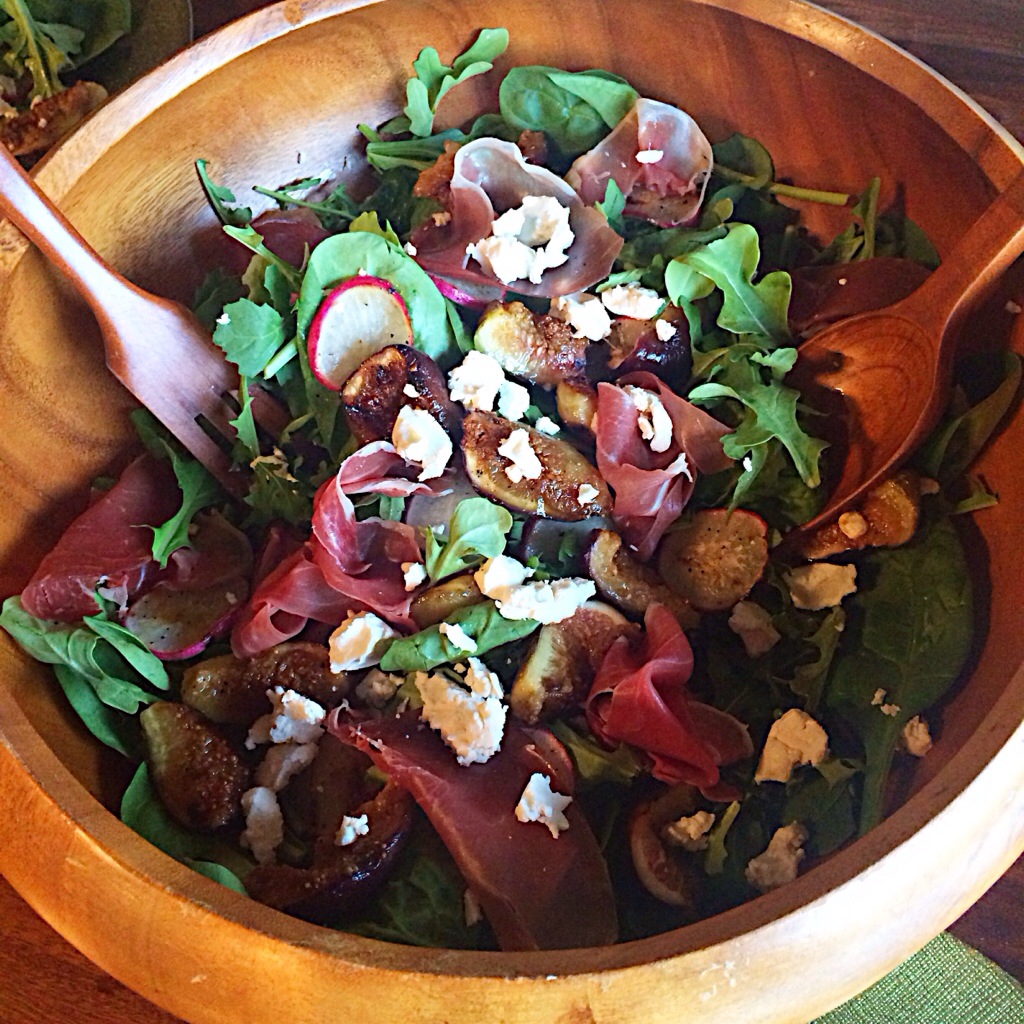
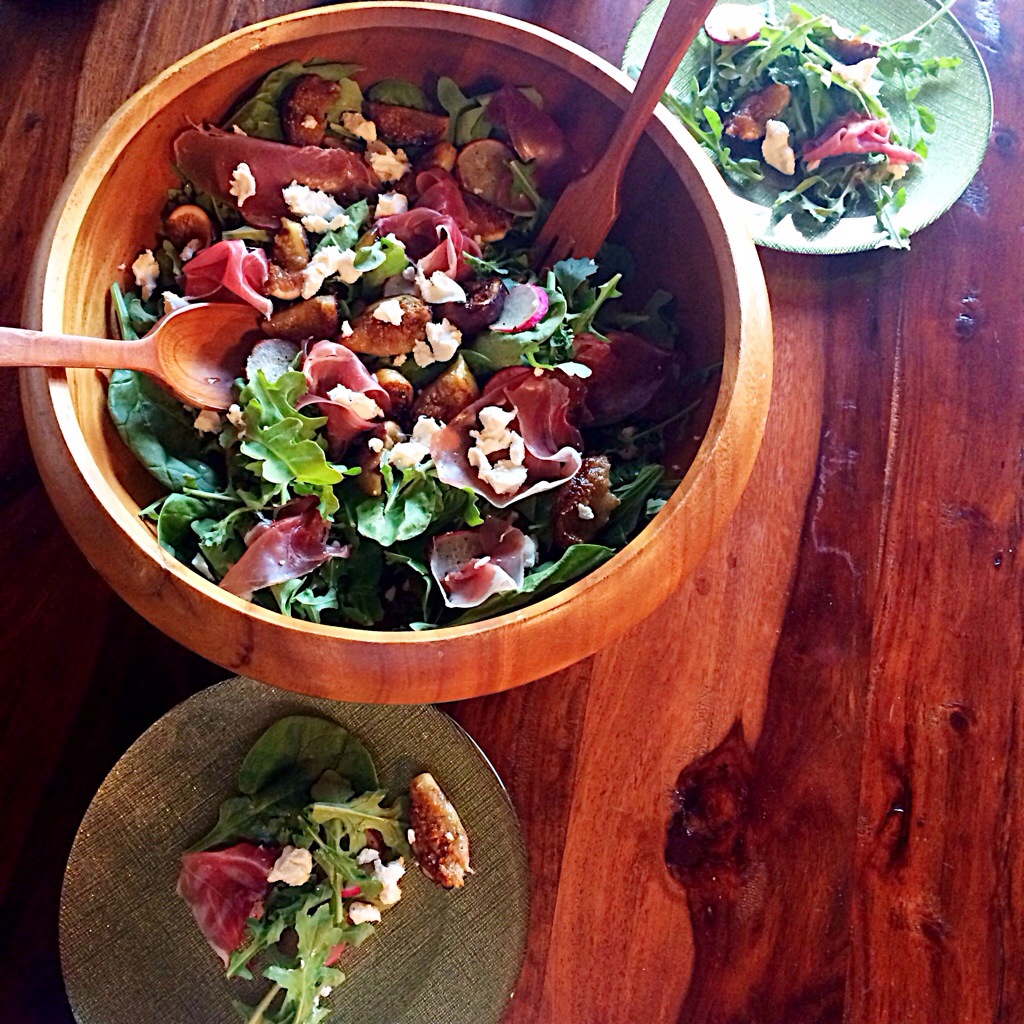
My ideal day of leisure is sitting on a sunny patio ​with Tres or surrounded by my favorite people with a bottle of wine (or champagne) and a fresh, in-season dish or cheese plate at the center of the table between us chatting, laughing, and soaking it all in. That's what I enjoy most. Sometimes in these actual scenarios, I literally stop, close my eyes and breathe it all in because that's how much I love life. Panzanella salad remind me of days like this because it's Italian and "taking it all in" is something Italians do daily. Europeans statistically live longer than Americans, and I'm convinced this is why. Don't ever take for granted what you enjoy the most. Do it often. And stop stressing. 

image.jpg

 Grocery list (4 folks): 

  • 3 tbsp, plus 1/3 cup extra virgin olive oil and more for drizzling
  • 1 small loaf French bread - cubed  
  • Kosher salt
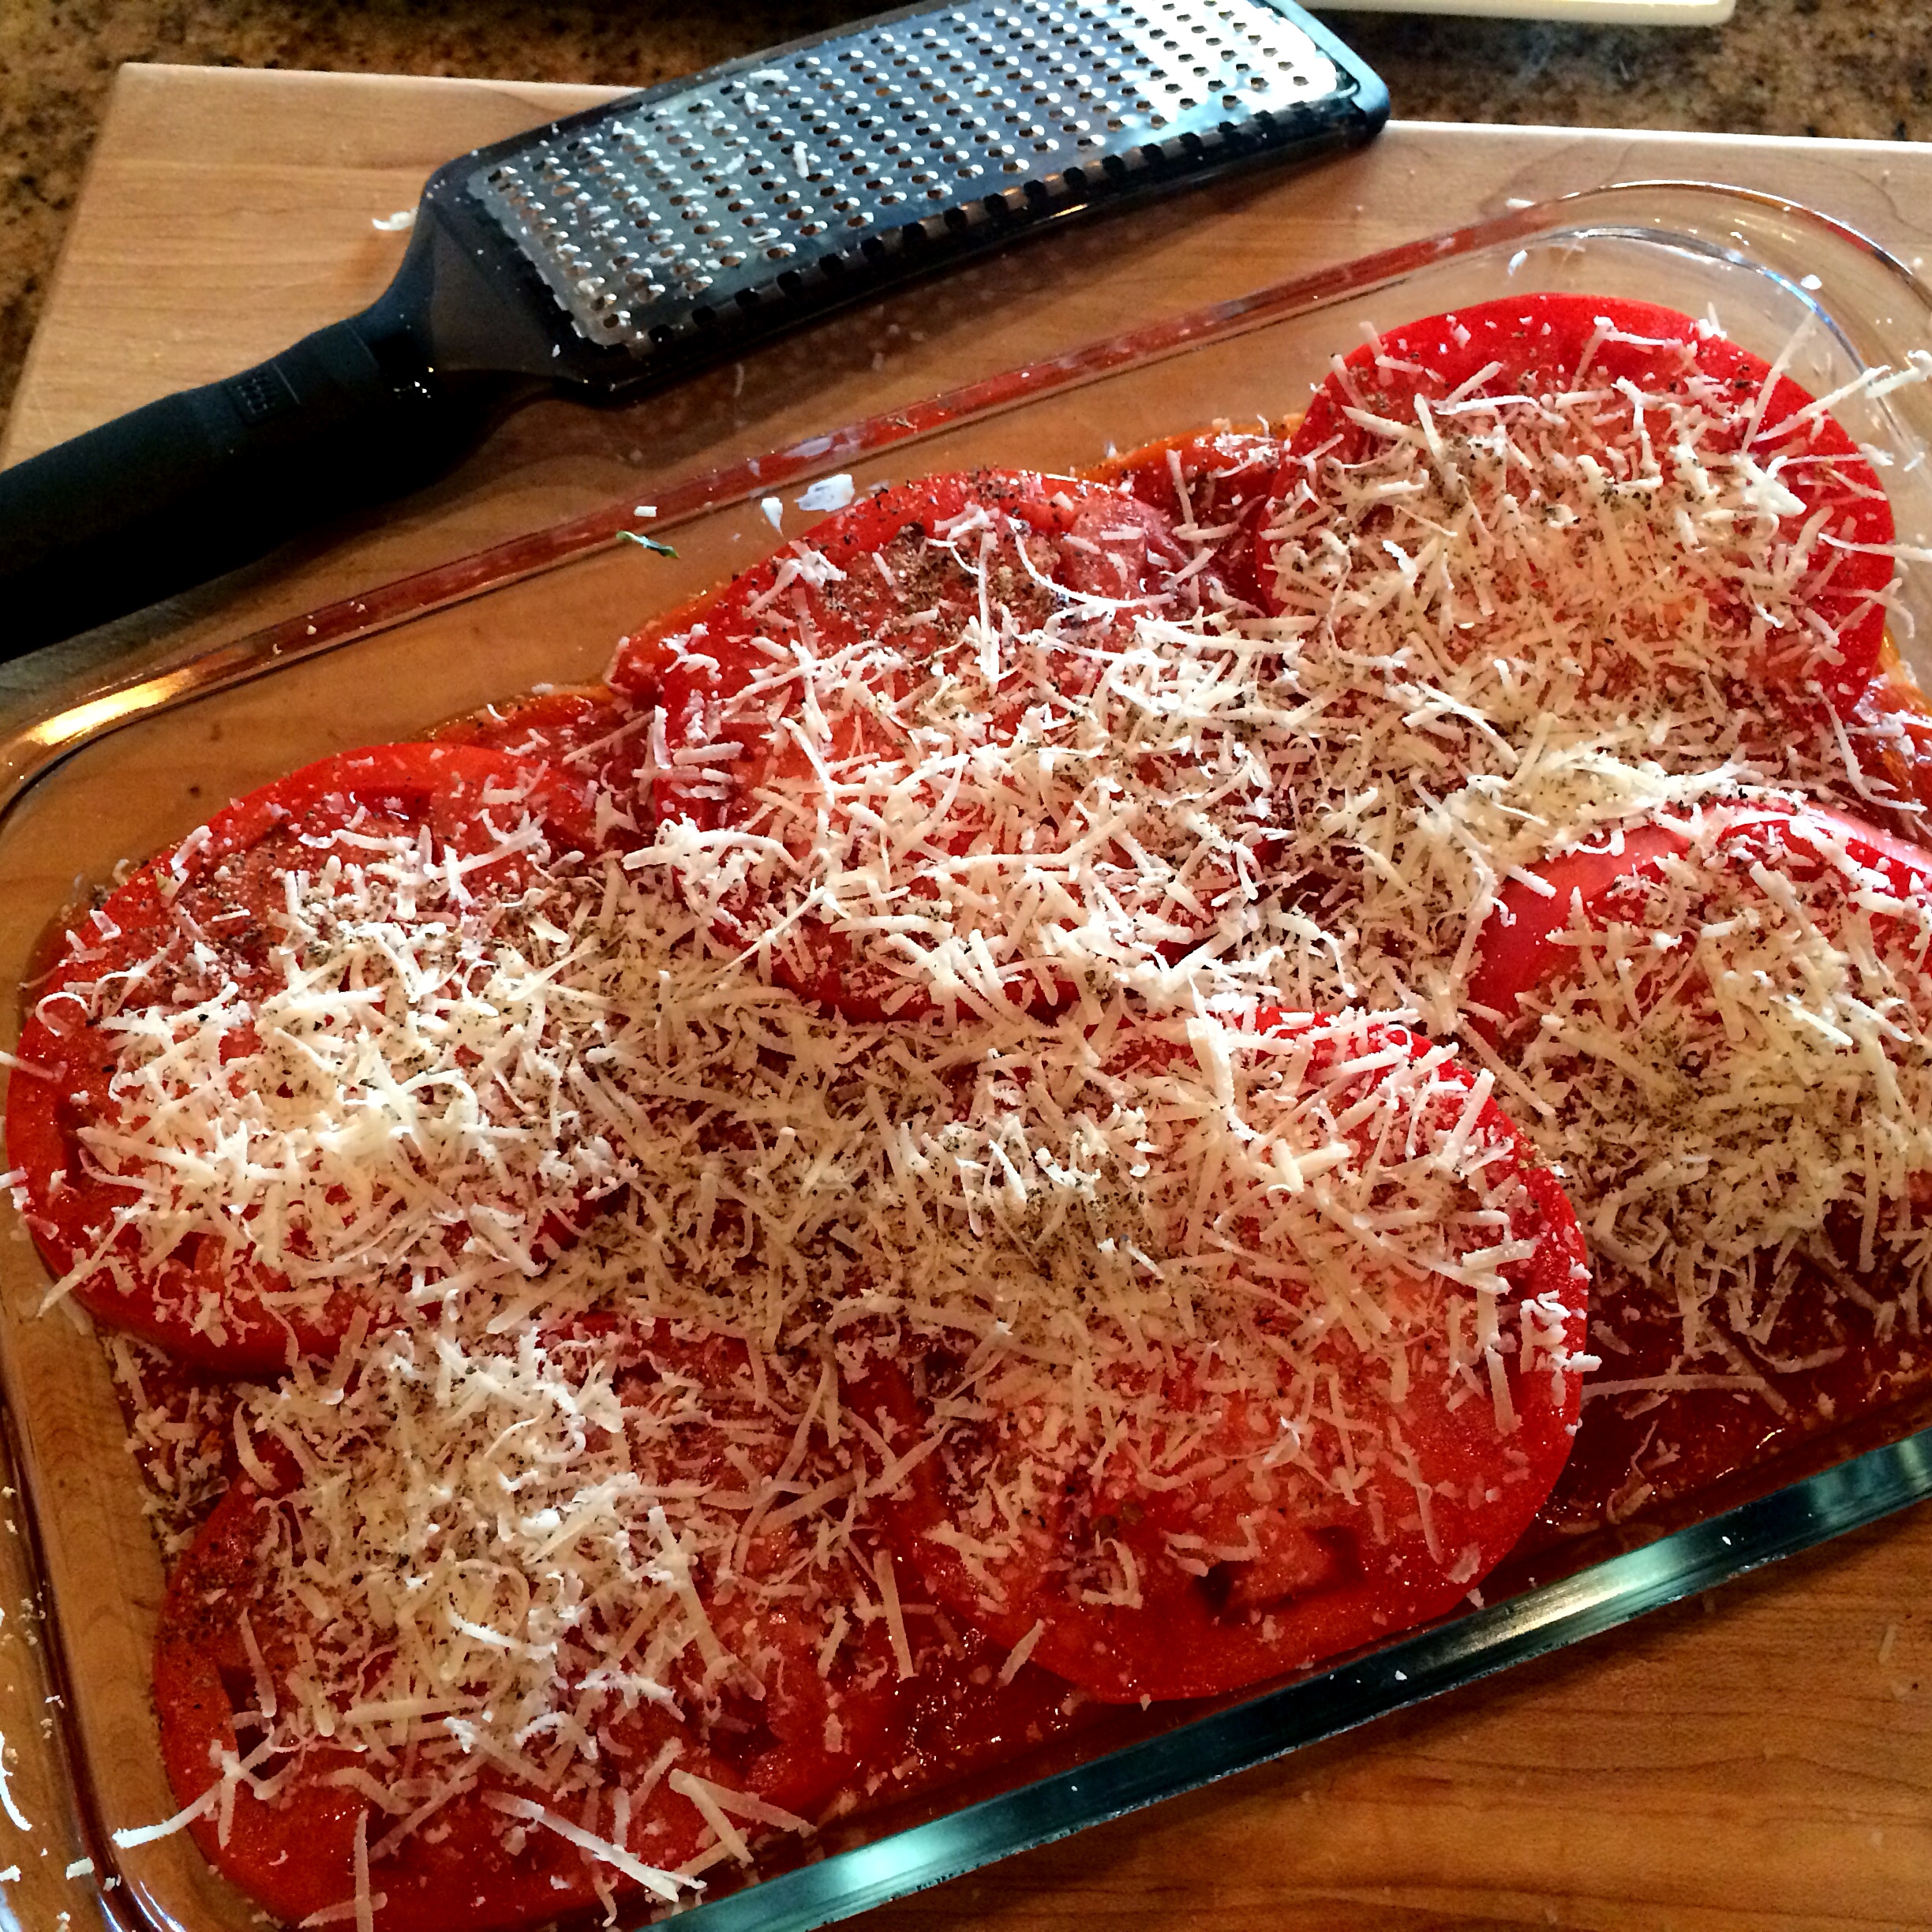
  • Fresh cracked pepper
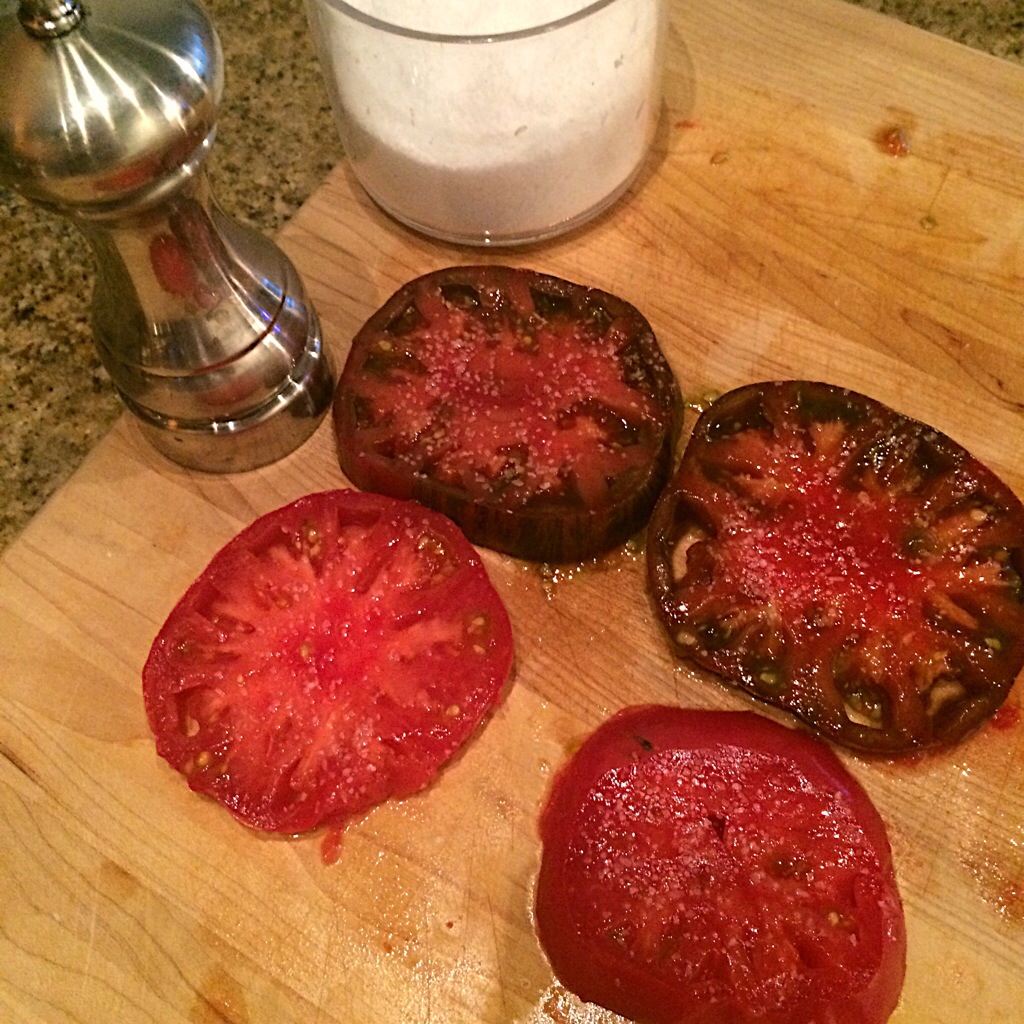
  • 2 large firm heirloom tomatoes - cubed  
  • 2 blood oranges - peeled and segmented  
  • 1 large naval orange - peeled and segmented 
  • 1/2 cup basil - roughly chopped, plus more for garnish
  • 1 tbsp red wine vinegar
  • 1 tsp honey  

Directions: 

1. Heat 3 tablespoons of olive oil in a large sauté pan over medium high heat. Toss in the bread and a sprinke of salt and pepper. Stir and flip until bread is browned and toasty on all sides. Set aside. 

2. To a large bowl, add the tomatoes, blood orange segments, orange segments, and basil. Sprinkle with about 1/2 tsp of salt and stir together. 

3. In a small bowl, squeeze about 2 tbsp of the leftover juice from the blood orange and orange. Add the red wine vinegar, honey, and remaining olive oil and whisk together. Add the bread cubes to the tomato mixture, pour the dressing over, and toss together. When serving, drizzle with more olive oil and top with more basil leaves. 

 CHEERS TO HAPPY EATING!!!

In Lunch, Recipes
Comment

Dirty Cajun Basmati Rice

May 9, 2016 Andrea LeTard
image.jpg

For Mother's Day this year, I asked mom what her top 3 favorite foods were. She said a good steak, Mexican, and Cajun. So I combined the three and made her a delicious meal: Steak with Chimichuri Sauce over Dirty Cajiun Basmati Rice. Plus, Garden Sparkling Cocktails and a Strawberry Basil Galette for dessert! I could never repay my mom for all she's done for me, but I can promise to cook her delicious meals forever!

Read my story on why I think she's the best momma. 

Grocery list: 

  • 2 slices applewood smoked bacon - finely chopped

  • 1/2 lb pork sausage

  • 1/2 lb andouille sausage - thinly sliced

  • 1 yellow onion - chopped

  • 1 orange bell pepper - chopped

  • 2 stalks celery - chopped

  • Kosher salt

  • Pepper

  • 4 garlic cloves - minced

  • 1 tbsp butter

  • 1 lb Basmati rice

  • 1 1/2 tsp smoked paprika

  • 1 tsp oregano

  • 1/4 tsp cayenne

  • 2 bay leaves

  • 1 tsp Worcestershire

  • 2 1/2 cups of low-sodium chicken stock, plus more if needed

  • 4 green onions - sliced

  • 2 tbsp fresh parsley

Directions: 

1. Heat a large cast iron pot or Dutch oven over medium heat. Add the bacon, pork sausage, and andouille to the pot. Cook for about 7 to 8 minutes or until browned, breaking up the pork sausage into small pieces.

2. Add the onion, bell pepper, celery, and a healthy pinch of kosher salt and pepper. Cook for about 6 minutes or until slightly browned. Add the garlic and cook for another minute or until fragrant.

3. Add the butter and rice to the pot, tossing together for 2 minutes or until rice is fragrant (It has a beautiful, toasty smell that you can't miss!). Add the paprika, oregano, cayenne, and bay leaves and cook for 2 more minutes.

4. Pour in the Worcestershire, stock, and 1 tsp of salt. Bring to a slight boil, simmer, and cover the pot for 15 to 20 minutes or until rice is cooked through and stock is aborbed. Taste the rice and add more salt and pepper if needed. Stir in green onions and parsley.

CHEERS TO HAPPY EATING!!! 

In Dinner, Lunch, Pasta and Grains, Recipes, Sides Tags Dirty basmati rice, Basmati rice recipes, best basmati rice recipe, Cajun basmati rice, How to cook basmati rice, Best Cajun recipes, Mother's Day recipes, Best ever basmati rice, Dirty Cajun basmati rice, What to cook Cajun
Comment

Halloween Chili 

October 24, 2015 tatumletard@gmail.com
IMGL0156.jpg
IMG_1685.jpg

Everyone knows Halloween is my favorite holiday of all! The week of Halloween, I always make my famous Halloween chili and we have friends over to watch scary movies. This chili has been a Halloween specialty since I can remember!

SEE THE VIDEO HERE!!! 

Grocery list (8-10 people): 

  • 1 lb ground beef

  • 1 lb ground bison

  • 1 lb ground chorizo

  • 4 slices of bacon

  • 2 tbsp butter

  • 2 onions – chopped

  • 2 Poblano peppers – seeded and chopped

  • 1 Anaheim pepper – seeded and chopped

  • 1 jalapeno pepper – seeded and chopped

  • 1 green bell pepper - seeded and chopped

  • 1 red bell pepper - seeded and chopped

  • 6 cloves garlic – minced

  • ¼ cup brown sugar

  • 4 tbsp chili powder

  • 2 tbsp Kosher salt – plus more to taste

  • 1 tbsp oregano

  • 1 tbsp garlic powder

  • 1 tbsp cumin

  • 2 tsp smoked paprika

  • ½ tsp cayenne

  • 2 chilis in adobo sauce - chopped, plus two tbsp. of the sauce

  • 2 32 oz cans whole San Marzano tomatoes – broken up

  • 1 can Rotel

  • ½ can tomato paste (3 oz)

  • ½ bottle chili sauce

  • 2 cans kidney beans

  • 2 cans mild chili beans

  • 32 oz of chicken stock, plus more for thinner chili

Directions: 

1. In a large skillet, cook and drain the ground beef, ground bison, and chorizo. You can do these one at a time. Set all the cooked meat aside. Wipe the pan out and fry the bacon. Set bacon aside. Heat half of the bacon grease and 2 tbsp of butter over medium high heat. Add the chopped onions with a dash of salt and sauté for about 5 minutes or until they start to brown. Add the Poblano peppers, Anaheim pepper, jalapeno pepper, green bell pepper, and red bell pepper with a dash of salt and sauté until peppers are soft. Add the chopped garlic and sauté one more minute, stirring everything together well.

2. Transfer the veggie mixture and the meat to a very large soup pot over medium heat. Add the brown sugar, chili powder, Kosher salt, oregano, garlic powder, cumin, smoked paprika, and cayenne to the pot. Stir spices together well with the meat and veggies and let cook together for about 3-4 minutes.

3. Finally, add the chopped chilis and adobo sauce, San Marzano tomatoes (continuing to break the whole tomatoes up into pieces), Rotel, tomato paste, chili sauce, kidney beans, chili beans, and chicken stock. Stir together and let come to a slight bubble. Lower the heat and let simmer on the stove. Finally, add the chopped bacon bits and give it one final stir. Serve with cooked noodle shells, tortilla chips, sour cream, cheese, avocado, chopped onions, and whatever your heart desires!

CHEERS TO A HAPPY HALLOWEEN!!

In Dinner, Recipes, Meat, Soups, Lunch
3 Comments

Smoky Pimento Grilled Cheesies 

October 19, 2015 tatumletard@gmail.com
Pimento Cheese 3 Ways_Grilled.jpg

Growing up in Knoxville, Tres was destined to be a Tennessee fan. He received his Undergrad and MBA degrees from there, and hasn’t stopped rooting for them since! When we started dating, I had no choice but to jump on the Vols bandwagon. We try to attend at least one game a year together, but if we aren’t in Knoxville, you can find us surrounded by friends at home watching the game. Usually it’s everyone in front of the TV and me cooking… exactly how I like it! I love little bite size snacks that go good with cold beers, and this smoky grilled cheese is such a winner!

SEE THE VIDEO HERE! 

Makes: 10 mini sandwiches

  • 10 slices of pancetta (Italian style bacon)

  • 3 oz cream cheese – room temperature

  • 4 oz smoked cheddar cheese – freshly grated

  • 4 oz Monterey Jack cheese – freshly grated

  • 2 oz pimentos – drained and chopped small

  • 2 tsp pickle relish

  • 1/4 tsp garlic powder

  • 1/4 tap smoked paprika

  • 1/8 tap cayenne

  • Kosher Salt

  • 3 tbsp mayonnaise – plus extra if needed

  • 20 slices of white bread

  • Butter – room temperature

In a sauté pan over medium heat, fry the pancetta until extra crispy and set aside.

In a stand mixer or using a hand-held mixer and a bowl, add the cream cheese, smoked cheddar, Monterey Jack, pimentos, pickle relish, garlic powder, smoked paprika, cayenne, and a dash of kosher salt. Beat together on low until the mixture starts to come together. Then increase the speed to high and slowly add the mayo until it is the consistency you desire.

Heat a large sauté pan to medium-high. Using large biscuit cutters, cut out one round from each slice of bread. Build the sandwiches by adding a large spoonful of the pimento cheese mixture to 10 slices of the cut out bread. Top each with one slice of pancetta then close the sandwiches with the remaining 10 pieces of cut out bread.

Butter each side of the sandwiches and put into the sauté pan. Lightly smash the sandwiches down with a spatula as they cook. Flip after about 2-3 minutes or when the bread is light brown, toasty, and the cheese starts to melt. Cook on the other side for another 2-3 minutes. Put on a platter and serve!

Cheers to happy eating!!! 

In Recipes, Snacks & Apps, Lunch, Snacks
1 Comment

Perfect Lobster Rolls

October 19, 2015 tatumletard@gmail.com
Lobster.jpg
IMG_1537.jpg

The fall of our first anniversary, Tres and I visited New England, and I was introduced to what is now one of my favorite foods on earth: an authentic lobster roll! I'm a "when in Rome" kind of traveler, so whatever I'm supposed to eat, drink, or do in a city, I do it! We visited Portland, Cape Cod, Salem, Plymouth, and Boston. Between those five cities, I may have had 20 lobster rolls.. No joke! So I had to recreate it, and I tried to make it as authentic as possible! 

SEE THE VIDEO HERE!! 

Ingredients (makes 8 rolls)– 

Homemade Mayo:

  • 2 large egg yolks

  • 1 tbsp lemon juice

  • 2 tbsp red wine vinegar

  • 1 tbsp Dijon mustard

  • Dash of salt

  • Dash of sugar

  • 1-1 ½ cups vegetable oil (or any oil neutral in flavor)

Rolls:

  • 3 large lobsters – meat removed from tails and claws and chopped into large pieces

  • 1/3 cup homemade mayo

  • 2 stalks celery – diced small

  • 2 tbsp fresh chives – minced, plus extra for garnish

  • 1 tbsp fresh dill – minced

  • ½ tsp salt (to taste)

  • 8 hot dog buns

  • ½ cup butter - melted

Directions:

1. Make the mayo. In a stand mixer with a whisk attachment, whisk together the eggs yolks, lemon juice, vinegar, Dijon, salt and sugar until thoroughly mixed. ON high speed, slowly drip the oil into the mixture, drop by drop. Once it starts to come together and become light in color, stream the rest of the oil in slowly. This does take a good bit of time, but it’s worth it in the end. When the mayo comes together and is light in color, spoon it into a container or jar and set aside on the counter. (Homemade mayo makes all the difference in this recipe)

2. In a large bowl, combine the lobster meat, homemade mayo, celery, chives, dill, and salt. Stir to combine. Taste for seasoning and add more salt if needed. (Cook’s note: I like to use live lobster for this recipe. You don’t have to but if your food is alive hours before you eat it, I promise it will taste better.)

3. Heat a grill pan to high heat. Brush the inside of the hot dog buns generously with the melted butter. Place on the grill cut side down for about 1-2 minutes or until charred. Fill each bun with the lobster mixture. Top with extra chives.

In Lunch, Recipes, Dinner, Seafood, Sandwiches and Bread
1 Comment

Copycat Petro's Chili & Chips - University of Tennessee 

October 9, 2015 tatumletard@gmail.com
IMG_1425.jpg

Unless you've been to a Tennessee game, you probably have no idea that Petro's Chili and Chips are a gameday staple at Neyland Stadium. Being wife of a Tennessee alumni and a gal who never misses chili-covered anything, I get down with this classic treat every time I attend a UT game. Petro's, founded in Knoxville and remaining a local favorite, is known for their chili and chips, and at every home game you'll literally see every other person you pass with one of these famous bowls in their hands. If you ever make it to Knoxville for a game, I suggest you get one. But until then, make your own! 

Grocery list:

  • 1 lb ground beef

  • 1/2 lb chorizo

  • 1 large white onion - chopped

  • 4 cloves garlic - minced

  • 2 tbsp chili powder

  • 1 tbsp cumin

  • 2 (15 oz) cans fire roasted tomatoes

  • 1 (4 oz) can green chiles

  • 2 (15 oz cans) chili beans in chili sauce

  • Kosher salt

  • Pepper

  • 2 bags Fritos corn chips

  • Cheddar cheese - grated

  • Tomatoes - diced

  • Green onion - chopped

  • Sour cream

Directions: 

1. Brown and drain the ground beef and chorizo in a soup pot or dutch oven. Add the onion to the beef and saute for 5 minutes or until soft, then add the garlic, chili powder, and cumin and cook one more minute. Add the fire roasted tomatoes, green peppers, chili beans, and 1/2 cup water. Stir together and add salt and pepper to taste. 

2. In paper, plastic, or styrofoam cups, add about two inches of Fritos to cover the bottom. Top with a generous portion of the chili. Finally, top with the cheese, tomatoes, green onions, and sour cream - in that order. Stir all the ingredients together to eat. 

** this recipe should make anywhere from 10 to 20 Petros depending on the cup size used. 

CHEERS TO FOOTBALL SEASON!!!

In Recipes, Snacks & Apps, Dinner, Lunch, Meat Tags classic football recipes, frito pies, UT tailgate food, unique frito pie, copycat restaurant food, university of tennessee tailgate recipes, unique chili cheese recipes, UT gameday food, gameday recipes, copycat sonic, classic gameday recipes, University of TN gameday food, classic university of tennessee recipes, copycat fast food, traditional gameday food, petros chili and chips, university of tennessee gameday food, UT recipes, University of TN recipes, copycat petros, unique gameday ideas, University of TN tailgate recipes, copycat recipes
4 Comments

Drummies w/ White BBQ Sauce

September 18, 2015 tatumletard@gmail.com
IMG_1043.jpg

Grocery list: 

  • 20 drumettes

  • Kosher salt

  • Pepper

  • 2 cups buttermilk

  • Vegetable oil - for frying

  • 1 cup flour

  • 1 tbsp garlic powder

  • 2 tsp paprika

  • 3/4 cup mayonnaise

  • 3 tbsp apple cider vinegar

  • 1/2 lemon - juiced

  • 1 tbsp Dijon mustard

  • 1/2 tsp horseradish

  • 1/2 tsp sugar

  • 1/4 tsp liquid smoke (optional)

Directions: 

1. Salt and pepper the drumettes on all sides. Put them in a large bowl and cover with the buttermilk. Refrigerate for at least 1 hour. 

2. Pour about 2 inches of vegetable oil into a Dutch oven or cast iron skillet. Heat over medium until a thermometer reads 375 degrees. In a shallow bowl, whisk together the flour, garlic powder, and paprika. Remove the drumettes from the buttermilk and dredge in the flour mixture. Fry for about 7 minutes, 3-4 drumettes at a time, not overcrowding the pan. Let drain on a baking sheet lined with paper towels. Sprinkle lightly with salt when they come out of the oil. 

3. In a medium bowl, mix together the mayo, apple cider vinegar, lemon juice, Dijion mustard, horseradish, sugar, a dash of salt, and liquid smoke (if using). Before serving the drummies, drizzle them with the white BBQ sauce.

CHEERS TO FOOTBALL SEASON!! 

In Recipes, Snacks & Apps, Lunch, Meat, Snacks Tags best foos tuscaloosa, sec tailgate recipes, roll tide tailgate food, roll tide food, traditional alabama recipes, tailgate ideas alabama, university of alabama cooking, alabama white BBQ sauce, roll tide recipes, best tailgate recipes ever, university of alabama food, best southern college football recipes, cooking in the south, white BBQ sauce, sec tailgate food, university of alabama recipes
Comment

Roasted Red Snapper w/ White Balsamic Tomatoes 

September 11, 2015 tatumletard@gmail.com
IMGL0143.jpg
IMG_0910.jpg

Every year Tres and I take a trip to Destin with friends. Because we all stay on the same condo, one night becomes a big cook-fest. I plan a menu of fresh gulf fish paired with delicious produce and have some girlfriends come over to help me cook. This year I made this snapper, and it was a huge hit! 

WATCH FULL VIDEO HERE!!!

Grocery list: 

  • 4 (4-6 oz) snapper filets

  • Kosher salt

  • Pepper

  • 2 lbs plum tomatoes - chopped

  • 2 cups basil - chopped, plus extra for garnish

  • 1/4 cup white balsamic reduction

  • 3 garlic cloves - minced

  • 1/2 tsp red pepper flake

  • 1/2 cup white wine

  • 1/4 cup good quality extra virgin olive oil, plus more for drizzling

Directions: 

1. Heat oven to 400 degrees. Place each snapper filet on a large piece of aluminum foil. Season both sides with salt and pepper. Fold the sides of the foil up to make a shallow bowl around each filet. Place on a baking sheet. 

2. In a large bowl, combine the tomatoes, basil, balsamic reduction, garlic, red pepper flake, 1 tsp salt, and ½ tsp pepper. Mix together, taste, and add extra salt and pepper if needed. Spoon the tomato mixture over each filet, completely covering the fish. Add about 2 tbsp of white wine and drizzle 1 tbsp extra virgin olive oil to each filet. Fold the sides of the foil up to close, making a package but leaving a small opening in the top.

3. Roast fish for 15-20 minutes or until cooked through. Serve each filet on a plate with the tomato mixture and juices on top. Top each piece with extra basil and a drizzle of olive oil.

CHEERS TO HAPPY EATING!!! 

In Dinner, Recipes, Seafood, Lunch Tags quick and easy snapper, how to cook fish like a restaurant, quick and easy fish, how to cook red snapper, easy snapper, cooking with white balsamic vinegar, how to use white balsamic vinegar, dinner party dishes, quick and easy tomato salad, easy tomato salad, best summer recipes, restaurant style fish, easy dinner party dishes, best fish recipe ever, best red snapper recipe ever, summer recipes, easy dinner party cooking, what to do with white balsamic vinegar
Comment

Pizza Trio

August 20, 2015 tatumletard@gmail.com
IMG_0564.jpg

Pizza makes me think back to all times I've ever had friends over to play around in the kitchen with me. With pizza, you can mix and match ingredients and everyone can have fun coming up with their own pizza combos. I love having friends over for homemade pizza parties, and these three pizzas happen to be my favorite flavor combos I've discovered! 

CLICK HERE FOR THE FULL VIDEO!!!!! 

Grocery List (4-6 people for 3 pizzas)

Pizza Dough (makes 3 medium pizzas):

  • ¼ cup dry white wine

  • 2 packages of Pizza Crust yeast (no rise necessary)

  • 1 tbsp honey

  • 1 tsp Kosher salt

  • 4 tbsp olive oil

  • 3 ½ cups flour (plus extra for kneading)

Apple, Smoked Gouda, & Bacon Pizza:

  • ¼ cup good quality extra virgin olive oil

  • 1 small onion – sliced thin

  • Kosher salt

  • 1 small Granny Smith Apple – sliced thin

  • 6 oz smoked gouda 5 slices bacon – fried and crumbled

Fig, Burrata, & Prosciutto Pizza:

  • ¼ cup good quality extra virgin olive oil

  • 10-12 dry black mission figs – chopped

  • 8 oz burrata cheese (or mozzarella) – sliced

  • 4 oz prosciutto – sliced

BLT pizza:

  • 2 tbsp sour cream

  • 1 tbsp mayo

  • 1 lemon – juiced

  • 1 tsp garlic - minced

  • 2 tbsp chives – chopped

  • Kosher Salt

  • Pepper

  • 2 medium Heirloom tomatoes – sliced ½ inch thick

  • 8 slices of bacon – fried

  • 2 cups arugula

  • 2 tbsp olive oil

Directions:

Pizza Dough:

  1. Combine the wine with 1 cup of water and heat in a microwave until it’s 100-110 degrees. Add it to a stand mixer with the yeast, honey, salt, and 3 tbsp of the olive oil. Stir with your hand to combine.

  2. With a dough hook attached begin mixing at medium-high speed, slowly adding 1 cup of flour at a time until dough begins to form and is slightly sticky. If it’s too sticky, add more flour. (Cook’s Note: You don’t have to use a stand mixer to make pizza dough. You can just as easily do it manually by putting the wet ingredients into a bowl and slowly incorporating the flour with a wooden spoon until it all comes together).

  3. On a well-floured surface, bring dough together in a ball and knead for about 3-4 minutes or until smooth and elastic, adding flour to the board if it sticks. Pour the remaining 1 tbsp of olive oil into a bowl and spread around with your fingers so the oil completely covers the inside of the bowl. Put the ball of dough in the bowl and roll around, covering in olive oil. Cover with plastic wrap and set aside until ready to use.

  4. When ready to use, flour your board again so dough doesn’t stick. Cut the dough into three even pieces. One at a time, using a rolling pin, roll each piece out into an oval/rectangle shape and place on a baking sheet covered with a thin layer of olive oil. Get ready to build your pizzas! (Cook’s note: you should have your ingredients ready to go once you roll your dough out. If dough sits in open air too long, it can become dry and crack).

Apple, Smoked Gouda, & Bacon Pizza:

Heat oven to 475 degrees. Heat olive oil over medium heat in a sauté pan. and sauté onions with a sprinkle of salt until soft and light brown in color. Pour olive oil mixture over prepared pizza dough and spread evenly. Top with smoked gouda, apples, and bacon. Bake for 10-12 minutes until crust is light brown and crisp.

Fig, Burrata, & Prosciutto Pizza:

Spread olive oil evenly over prepared pizza dough. Top with figs, burrata, and prosciutto. Bake for 10-12 minutes until crust is light brown and crisp.

BLT Pizza:

In a small bowl, mix together the sour cream, mayo, juice of half the lemon, garlic, chives, and a sprinkle of salt and pepper, and spread evenly over prepared pizza dough. Top with sliced tomatoes. Sprinkle the tomatoes with salt and pepper. Bake for 10-12 minutes until crust is light brown and crisp. Toss arugula in a medium bowl with the juice of the other lemon half, olive oil, and a dash of salt and pepper. Top cooked pizza with arugula salad.

In Dinner, Recipes, Lunch, Sandwiches and Bread Tags different party ideas, best pizza recipe, pizza three ways, how to make pizza like italians, italian style pizza, authentic italian pizza, true homemade pizza, best pizza recipe ever, how to make pizza, wine in pizza, fun with friends, wine pizza dough, unique shower ideas, pizza trio, unique summer party ideas
Comment

Peach and Burrata Salad

August 3, 2015 tatumletard@gmail.com
6cooktalespreview.jpg
IMG_0376.jpg

I love having friends over for dinner parties and doing three to four courses paired with wine. It's fun, it's classy, and everyone loves it because they get to try a little bite and little sip of several different things! A good salad is something I love starting with and this recipe reminds me of just that. Tres and I had one of my former work friends over a couple of weeks ago for a dinner party and we had a total blast - particularly because this salad I created for the party was so delicious! She has to travel to Memphis occasionally for work now, so I'm hoping many more of these fun dinner parties happen and I can create more and more salads this wonderful! If you live in Memphis, I highly recommend peaches from Jones Orchard! They're known for their peaches and for good reason! 

Grocery List: 

  • 4 cups arugula- roughly chopped

  • 2 cups mint - roughly chopped

  • 1 tbsp + extra - white balsamic syrup

  • 3 tbsp fresh lemon juice

  • Kosher salt

  • Pepper

  • 1/4 cup extra virgin olive oil

  • 4 peaches - sliced

  • 1/2 cup walnuts - toasted

  • 2 tsp honey

  • 1 tsp cinnamon

  • 8 oz Burrata cheese (or fresh mozzarella)

Directions: 

1. In a medium bowl mix the arugula and mint together. In a small bowl, add the white balsamic, lemon juice, a dash of Kosher salt and pepper, and whisk in the olive oil until thick. Pour the dressing on the arugula and mint salad and toss together. 

2. Evenly distribute the salad mixture onto four small plates. Top with the sliced peaches and sprinkle a little salt on all the peaches. 

3. In a small bowl, toss the toasted walnuts, honey, and cinnamon together very well. All the walnuts should have a little honey and cinnamon on them. 

4. Sprinkle about 2 tbsp of walnuts on each salad. Top each salad with about 2 oz of sliced burrata. Salt and pepper the burrata and drizzle a little white balsamic syrup over each salad. 

CHEERS TO HAPPY EATING!!! 

In Lunch, Recipes, Healthy, Salads, Sides
Comment

Corn Salad with Roasted Shrimp

July 2, 2015 tatumletard@gmail.com
Corn Salad2.jpg
IMG_9848.jpg

Every July 4th, I think of Tom Lee Park on the Mississippi River in Memphis. As a kid, I remember going out there every year and watching the fireworks. Aside from a fantastic firework show, all I really remember was the endless number of picnic blankets that lined the park. I think the 4th is the perfect time for a picnic - to sit back, relax, watch fireworks, and drink some rose! My go-to picnic dish is something I created a few years ago and couldn't wait to feature as a Cooktale! This July 4th and every picnic after, make my Corn Salad with Roasted Shrimp!! You won't be disappointed and neither will your crew! 

WATCH THE VIDEO HERE!!! 

Grocery List: 
 

Salad:

  • 1 lb uncooked shrimp – peeled and deveined

  • 1 tbsp olive oil

  • Kosher salt

  • Pepper

  • 5 large ears of corn – shucked

  • 2 tbsp butter

  • 4 green onions – chopped

  • 1 large avocado – cubed

  • 1 tsp Kosher salt


Dressing:

  • ½ cup cilantro – chopped (more or less to taste)

  • 2 tbsp jalapeno – seeded and minced

  • 3 tbsp white wine vinegar

  • 1 lime – juiced

  • 3 tbsp agave nectar

  • 1 tsp Kosher salt

  • ½ tsp pepper

  • ½ cup good quality extra virgin olive oil


Directions: 

1. Heat oven to 400 degrees. On a sheet pan, toss shrimp with olive
oil and a sprinkle of Kosher salt and pepper. Roast for about 8
minutes, until shrimp just turn pink. Set aside to cool.


2. Heat a grill pan to high heat. Place corn on the grill and turn
every few minutes for about 12 minutes. When ready, corn should have several black, charred pieces. Set corn aside to cool slightly. When
cool enough to handle, take corn off the cob, slicing downward with a
sharp knife directly into a bowl. To the bowl, add the butter, green onions, avocado cubes, and salt. Stir to combine.


3. Make the dressing in a small bowl. Combine the cilantro, jalapeno,
white wine vinegar, lime juice, agave, salt, and pepper. Slowly whisk
in the extra virgin olive oil until the dressing comes together. Pour
the dressing over the salad and toss together.


4. Toss shrimp into the salad or place on top. If you’re a vegetarian, you can leave the shrimp out, and the dish will still be perfect! 


CHEERS TO HAPPY EATING!!! 

In Recipes, Lunch, Healthy, Salads, Seafood, Sides Tags memphis 4th of july, recipes for the fourth, memphis fourth of july events, fourth of july recipes, best 4th of july recipes ever, best picnic spread, best corn salad, creative ways to use avocado, best ever salad, how to make the perfect picnic spread, best salad youll ever eat, 4th of july in Memphis, famous corn salad, star worthy recipes, fireworks on the river in memphis, what to make for the 4th of july, recipes for the 4th of july, 4th of july recipes, tom lee park in memphis, best summer recipes for a picnic, southwestern corn salad, best picnic recipe ideas, how to make the perfect 4th of july spread, best picnic foods, best picnic recipes
1 Comment

Truffle Sliders 

June 26, 2015 tatumletard@gmail.com
IMG_9767.jpg

Once upon a time, I took Tres to the Pearl Jam concert at Wrigly Field in Chicago, and since then we have become Chicago summer regulars. In addition to an awesome concert scene and perfect weather, Chicago has easily become one of my favorite food cities. I had the best sliders of my entire life at Sable Kitchen and Bar in this great city! We found out about the place from a local, and the cocktails and food did not disappoint. When visiting a city with tons of great restaurants, we rarely go back to the same restaurant more than once, but we ended up at Sable three times for their truffle sliders!! So of course, I had to recreate them when I got home, and I have to say, mine are pretty close to the real thing! 

WATCH THE VIDEO HERE!!! 

  • 2 tbsp olive oil

  • 2 tbsp butter

  • 2 onions - sliced thin

  • 1 tbsp balsamic vinegar

  • 2 tsp salt

  • 1 tsp pepper

  • 1 lb Ground Chuck (80 lean/20 fat)

  • 3 oz truffle butter - room temperature

  • 4 oz Taleggio or Havarti cheese

  • 1 tbsp plus 1 tsp honey

  • 10 mini burger buns or rolls

  • 1/4 cup mayo

  • 1 tsp truffle oil

Heat grill to medium-high. On your stovetop, heat olive oil and butter in a large sauté pan over medium-low. Add onions, balsamic vinegar, 1 tsp salt, and 1/2 tsp pepper. Put the lid over the pan and let onions cook, covered, for 10 minutes. Remove the lid and let onions continue to cook for about 30 minutes, stirring occasionally. When ready they should be soft, brown, and caramelized. 

While the onions cook, prep the sliders. In a medium bowl, add ground chuck, 2 oz truffle butter, 1 tsp salt, and 1/2 tsp pepper. Mix ingredients together lightly with a fork - just enough to combine. Be careful to not over mix or the meat will get tough. Using a 1/4 cup measuring cup, shape the meat into 10 patties. In the center of each patty, make an indention with your thumb (this will keep sliders from puffing up too much when grilling). 

Add 1 tbsp of honey to the leftover 1 oz truffle butter and mix together. Open each burger bun and spread the mixture on the inside of each bun. 

Place buns on the grill, cut side down and toast for about 1 minute. Grill sliders for about 2 minutes on each side. When you flip the burgers, top each one with a slice of cheese and close the lid the last minute. 

5) In a small bowl, add the mayo, truffle oil, and 1 tsp honey and mix together. Build burgers by spreading the mayo mixture on the buns. Top with the cheesy burger and the caramelized onions. 

CHEERS TO HAPPY EATING!!! 

In Recipes, Lunch, Dinner, Meat, Sandwiches and Bread, Snacks & Apps, Snacks Tags unique grilling recipes, what to do with truffle butter, copy cat cooking, award winning sliders, truffle butter recipes, what to do with truffle oil, summer recipes, unique sliders, best sliders ever, copy cat restaurant recipes, award winning burger, sable kitchen and bar, ground beef recipes, unique burger ideas, truffle burger, truffle sliders, best sliders, chicago recipes, sable Chicago, chicago cooking, chicago cooking inspiration, truffle oil recipes, best burger ever, best summer recipes, how to cook with truffles, truffle recipes, summer grilling recipes, cooking with truffles, burger fest, what to do with truffles
1 Comment

Spaghetti with Gouda Mornay & Toasted Crunchies

April 8, 2015 tatumletard@gmail.com
IMG_85181.jpg

My husband, Tres, travels a lot for work, and spring happens to be his busiest time of year so I often fly solo when it comes to my meals. As much as I would rather have Tres around to hang out with and eat dinner with (since we ARE the two best friends that anyone could have :), I happen to enjoy my "me" time quite a bit. I do all kinds of things alone: I'll go for long walks on the river. I'll find a coffee shop, beer joint, or wine bar, take a book and read for hours. I'll grab a table on a patio and have lunch, soaking up the sun. Last week, I even went to a nice reataurant for dinner, had a glass of wine and a fancy meal - all by my lonesome! The possibilities are endless when it comes to "me" time!

IMG_8516.jpg

What I mostly think of, though, is curling up on the couch and watching a good movie with a dinner I've cooked for just myself. It can be difficult cooking for just one person but in my opinion, a good answer is always pasta! It's typically always in my pantry, I can measure it out to be the perfect portion for one person, and I can add anything to it that I want and it makes a complete meal! I came up with this recipe one weeknight when Tres was away, and I thought it'd be the perfect recipe to feature for ONE! 

WATCH FULL VIDEO HERE!!!!!

Grocery List (for ONE): 

  • 1 1/2 tbsp butter

  • 1/2 tbsp flour

  • 2/3 cup milk - warmed

  • Dash of salt

  • Dash of white pepper

  • Pinch of nutmeg

  • 1/4 cup good quality gouda cheese - freshly grated

  • 3 oz spaghetti (or whatever pasta you want to use)

  • 1/4 cup Panko breadcrumbs

  • Parmesan cheese (optional)

  • Parsley (optional)

Directions: 

1. Melt 1/2 tbsp of butter in a sauté pan over medium heat. Add the flour and whisk for several minutes, but don't let the roux turn brown. You want the roux to stay white while the raw taste is cooked out of the flour. 

2. Slowly add the warm milk, constantly whisking until it all comes together. Bring sauce to a slight boil and simmer, letting the sauce thicken. Add the salt, pepper, and nutmeg. Taste for seasoning and add more if needed. Add the grated cheese and whisk until melted and smooth.

3. Add pasta to a pot of boiling, salted water. Let cook according to the package directions, until al dente. Drain pasta and reserve 1/4 cup of pasta water. Toss as much sauce into the pasta as you like, and add a little pasta water if you want to create a thinner sauce. 

4. Melt the remaining 1 tbsp of butter in a small sauté pan. Add the Panko breadcrumbs and toast until lightly golden brown. Top pasta with the breadcrumbs and the Parmesan and parsley if you wish. 

CHEERS TO HAPPY EATING!!! 

IMG_8518.jpg
In Recipes, Lunch, Dinner, Pasta and Grains Tags quick pasta recipes, food your kids will love, recipes kids love, best pasta recipes ever, how to make dinner for one, what to cook for your kid, how to make mornay sauce, mornay sauce, spaghetti, pasta ideas, gouda recipes, gouda sauce, what is mornay sauce, pasta sauces, recipes to clean out fridge, restaurant quality recipes, easy pasta recipes, making small portions for dinner, simple pasta dishes, cooking with gouda, recipes for one person, cooking for one, making dinner for one person, recipes to clean out pantry, best spaghetti recipes, rish recipes, restaurant quality pasta, cooking with kids
1 Comment

Butternut Squash Soup with Apple Relish

October 29, 2014 tatumletard@gmail.com
IMGL0183.jpg

Fall is by far my favorite time of year for one reason: Halloween! I live life for this holiday. I look forward to October 31 all year, and aside from my brother's birthday being on November 1, I think that is the worst day of the year (my husband claims it's his favorite day of the year but I can't imagine why? :) My obsession with Halloween goes back to childhood memories. My family always welcomed fall with such open arms, and my dad made a huge deal out of Halloween. We would go to the extremes with decorations - making scarecrows and monsters out of old flannel shirts, hay, and scary masks. Pumpkins and hay bells would always be at the end of our driveway, complete with monsters hanging in trees and scarecrows sitting in chairs. My dad and my Nenne were both big on dressing up, and they always had such memorable costumes! My dad loved to buy a new scary mask every year and play tricks on people with it.

Looking back, I feel like we celebrated Halloween the entire month of October. I can remember being just a little girl, and telling my mom, "There's something extra special about fall.. It's the only season I can smell." That stands true today. I can smell fall when it's coming, and starting October 1, our house smells of pumpkin, chili is often on the stove, our television plays only movies in the scary genre, and I insist on buying at least 20 gigantic pumpkins and squash to decorate with. I get chills just thinking about it.

This soup is special to me because we do a Halloween dinner party every year, and this was the first fall soup I ever created for it. It was a huge hit, so I make a batch (or three) every fall.

SEE THE VIDEO HERE!!!

Grocery List:

Soup:

2 large butternut squash - peeled and chopped into 1 in pieces

1 sweet potato - peeled and chopped into 1 in pieces

1 carrot - peeled and chopped into 1 in pieces

3 tbsp olive oil

Kosher salt

Pepper

1 small onion - chopped

1 stalk of celery - chopped

2 tbsp garlic - chopped

2 tbsp shallot - chopped

2 tbsp apple cider vinegar or apple liquor

6 cups chicken stock

2 tbsp maple syrup

1 tbsp sage

1 tsp cinnamon

1/4 tsp nutmeg

1/8 tsp cayenne

Relish:

1 Fuji Apple - finely chopped

1/4 cup walnuts - toasted and finely chopped

1/4 cup red onion - finely chopped

1/4 cup dried cranberries or cherries - finely chopped

2 tbsp maple syrup

1 tbsp - apple juice

4 small acorn squash (optional)


.

.

.

.

Directions:

Step 1:

Preheat oven to 425 degrees.

Toss squash, potato, and carrot with 2 tbsp of olive oil, salt, and pepper on a baking sheet. Roast veggies for 35 minutes or until soft.

.

.

.

.

Step 2:

While veggies are roasting, heat 1 tbsp of olive oil in a Dutch oven or large pot over medium heat. Sautée onion and celery with a dash of salt until translucent. Add garlic and shallot to the pot with a dash of salt and cook for one minute. Add the vinegar or liquor, stock, maple syrup, spices, and roasted veggies to the pot. Stir to combine. 

.

.

Step 3:

Using a hand blender (or transfer soup to an electric blender working in batches) blend soup together until smooth. Let the soup sit over low heat for 30 minutes or longer (the longer it sits the better it tastes).

.

.

.

.

Step 4:

Make the relish. In a bowl, stir together the apple, walnuts, red onion, cranberries, maple syrup, apple juice, and about 1/8 tsp salt. Make the squash bowls by cutting off the corner of the bottom (this makes a flat surface for it to sit on). Then, cut off about 1 inch of the top. Using a spoon, scoop out the seeds and insides until smooth and in the shape of a bowl. Taste soup before serving and add more salt if needed. Ladle soup into the squash bowls and top with apple relish.

CHEERS TO HAPPY EATING!!!

In Recipes, Lunch, Dinner, Healthy, Soups Tags best cooking videos, unique foos bowls, make food into bowls, fall recipes, halloween recipes, the best soup ever, beat cooking on youtube, how to make squash bowls, halloween ideas, best food on tv, how to make soup, how to blend soup, how to make the best soup, acorn squash bowls, best cooking tv, using squash, cooking on youtube, halloween soup
Comment

Farmer's Market Pasta

October 6, 2014 tatumletard@gmail.com
Farmers Market Pasta (2).jpg
.

.

Any cooking story with mama is a great one. I love being in the kitchen with my mom. It can be the middle of summer, and for some reason cooking with mama makes it seem like it's Thanksgiving or Christmas. It's just so festive and fun. My earliest cooking memories with her were right around the holidays so a day in the kitchen with her always seems like a special occasion. We often go to the farmer's market together on Saturday mornings. One Saturday last summer, we went and I told her whatever we found, I'd make up a recipe with it when we got home. We just so happened to find the most beautiful and unique zucchini, squash, and eggplant - such odd colors and shapes - so when we got home I cooked up a pasta for my parents. They said it was the best pasta they ever had, so I wrote down the recipe and called it my Farmer's Market Pasta!

.

.

 SEE THE VIDEO HERE! 

Grocery list:

  • 2-3 cups of fresh veggies (any will work but I use eggplant, squash, zucchini, tomatoes)

  • 4 slices of bacon + the bacon grease

  • 1 tbsp olive oil 3 garlic cloves - minced

  • 1 1/2 tsp Kosher salt

  • 1 tsp pepper

  • 1/2 cup Parmesan cheese - fresh grated

  • 1 lb penne pasta (or any bite sized pasta)

  • Basil - chopped

Dressing:

  • 1 tbsp garlic - minced

  • 1/2 a lemon - juiced

  • 1/4 cup red wine vinegar

  • 2 tbsp Dijon mustard

  • 1/2 tsp Kosher salt

  • 1/4 tsp pepper

  • 1/2 cup good, fruity olive oil

Directions:

.

.

Step 1:

Heat oven to 450.

Fry bacon and set aside the bacon strips and the grease.

.

.

Step 2:

Cut the veggies into 1 inch cubes and place on a baking sheet. Toss together with bacon grease, olive oil, minced garlic, Kosher salt, and pepper. Roast in the oven for 15-20 minutes.

.

.

.

.

Step 3:

Boil pasta in a large pot with water and a handful of salt. Boil for 6-7 minutes or until al dente. While pasta boils, make dressing. Combine the garlic, lemon juice, vinegar, and Dijon mustard in a bowl. Whisk in the olive oil.

.

.

Step 4:

Put cooked pasta directly into a serving bowl with about 1/4 cup of pasta water. Crumble bacon directly into the pasta. Add Parmesan, roasted veggies and all their juices, and dressing. Toss together to combine. Top with more Parmesan and chopped basil.

CHEERS TO HAPPY EATING!!!

In Recipes, Dinner, Lunch, Pasta and Grains Tags how to cook vegetables, how to cook the best pasta, fun recipes, the best pasta, getting kids in the kitchen, what to do with zucchini, healthy cooking, how to cook veggie, what to do with eggplant, what to do with farmers market vegetables, cooking with kids, vegetable recipes, what to do with vegetables from the farmers market, what to do with squash, kid friendly recipes, veggie recipes
2 Comments

BLGGT - Bacon, Lettuce, & Grilled Green Tomato Sandwich

September 19, 2014 tatumletard@gmail.com
1cooktalespreview2.jpg
20140919-103615-38175394.jpg
20140919-102936-37776127.jpg

I will always think of my great-grandmother, Grams, when I eat tomatoes. When I was a little girl, I would visit her home in a tiny little town in Mississippi called Coffeeville, and what I remember so clearly is having tomato sandwiches for lunch. Grams was always eating tomato sandwiches! We would sit in her kitchen or on her front porch eating tomato sandwiches, talking, and laughing. I remember laughing a lot around Grams. She was a tiny little thing, feisty, funny, and fun! We sure miss her, but I always remember her when I eat a BLT. This recipe comes inspired by Grams with a little spin on it: a BLGGT aka a Bacon, Lettuce, and Grilled Green Tomato sandwich!

WATCH THE VIDEO HERE!

20140919-102831-37711935.jpg

Grocery List (2 sandwiches):

4 slices thick cut bacon

Olive oil

Salt

Pepper

1 green tomato - cut into 4 (1/4 inch slices)

1 loaf country bread - cut into 4 thick slices

2 tbsp butter

1/4 cup mayo

1/4 cup finely minced herbs (basil, parsley, chives)

1/2 lemon juiced

1 heirloom tomato - cut into 4 (1/4 inch slices)

2 large lettuce leaves

Directions:

Step 1:

20140919-102904-37744119.jpg

Fry bacon until crisp. Set aside.

Step 2:

20140919-103011-37811268.jpg
20140919-103039-37839702.jpg

Grill tomatoes. Set a grill pan to high heat. Brush sliced green tomatoes with olive oil and sprinkle with salt and pepper on both sides. Grill a few minutes on each side until charred with grill marks. Set aside. Grill bread. Brush each side of bread with butter and grill on each side for a few minutes until each side has nice grill marks.

Step 3:

Prepare mayo. Add mayo and minced herbs to a bowl. Sprinkle with salt and a dash of pepper and juice lemon in the mixture. Stir to combine.

20140919-103118-37878606.jpg

Slice the heirloom tomatoes and salt and pepper both sides lightly.

Step 4:

20140919-103145-37905405.jpg

Build sandwich. Add mayo to each slice. Top each sandwich with one lettuce leaf. On top of the lettuce, add two heirloom tomatoes, then top with grilled green tomatoes and bacon. Close sandwich and cut in half to serve.

CHEERS TO HAPPY EATING!!!

In Lunch, Recipes Tags what to do with green tomatoes, using bacon to cook, making a good blt, what to do with green tomatoes without frying them, healthy green tomato recipes, making mayo, what to do with heirloom tomatoes, best bacon recipes, making herbes mayo, cooking with green tomatoes, bacon recipes, healthy green tomatoes, frying bacon, best blt, cooking with heirloom tomatoes, heirloom tomatoes
Comment

Pumpkin & Short Rib Chili

September 17, 2014 tatumletard@gmail.com
chili.jpg
20140917-213314-77594582.jpg

I smelled it today... The smell of fall. All it takes is stepping outside in 60-70 degree weather, a small breeze blowing, pumpkins displayed at markets and grocery stores, and chili in the Crock-Pot. As a young girl, I remember my mom making the best chili ever. Chili always meant fall. Fall is a comin, and while I'm certain there are plenty more chili recipes I'll create this fall, I put a little spin on the typical Crock-Pot chili - pumpkin, short ribs, and Red Gold tomatoes! No matter how you make yours or what recipes you try out, Red Gold tomatoes are THE way to bring out the true flavor of your chili. Sweet, crisp, and fresh, you would never know these tomatoes came directly from a can. The Red Gold Diced tomatoes are perfectly chopped, so all you have to do is dump them into your crock pot - no knife skills necessary! And the Red Gold Petite Diced tomatoes with Green Chilis give your chili a tiny amount of heat without over powering it!

For a rundown of the recipe and complete review of Red Gold tomatoes, watch the video!

Grocery list (4-6 people):

2-3 lbs short ribs

2 bottles pumpkin beer

Kosher salt

Pepper

2 tbsp olive oil

1 large onion - chopped

2 garlic cloves - minced

1 orange bell pepper - chopped

3 chipotle peppers in adobo sauce - chopped 2 tbsp chili powder

1 tbsp cumin

1 tsp oregano

2 tbsp brown sugar

1/4 cup maple syrup

1 (14.5 oz) can of RED GOLD DICED TOMATOES

1 (14.5 oz) can of RED GOLD PETITE DICED TOMATOES WITH GREEN CHILIS

2 cups beef broth

1 can pumpkin purée

1 can black beans - drained 

4 cloves

1 1/4 tsp cinnamon

Green onions - chopped (for garnish)

Sour cream - optional

Directions:

Step 1:

20140917-192947-70187921.jpg
20140917-193032-70232521.jpg

Prepare the ribs (to save time, I do this the night before). In a large pot, combine beers and 2 cups water. Bring to a boil and add short ribs. Simmer and let the ribs sit for 10 minutes. Drain and pat dry to remove some of the fat from the ribs. Heat olive oil in a pot over medium heat. Salt and pepper all sides of the short ribs and brown the ribs in batches - about 5 minutes for each batch. Set ribs aside.

Step 2:

20140917-193121-70281553.jpg

In the same pot, add onions, garlic, bell pepper, and a pinch of salt. Cook veggies until soft. Add chipotle peppers, chili powder, cumin, oregano, and brown sugar. Stir together and let cook for about 2 minutes. Step 3:

Dump cooked veggies into slow cooker. Add maple syrup, diced tomatoes, petite tomatoes, beef broth, pumpkin purée, black beans and stir to combine.

20140917-193214-70334442.jpg

Add short ribs into the liquid. Add cloves at the very top so you can find them to discard later. Cover and cook on low for 6-8 hours.

Step 4:

20140917-193300-70380368.jpg
20140917-193338-70418962.jpg
20140917-193425-70465177.jpg
20140917-193606-70566934.jpg

Uncover the cooked chili and discard cloves. Transfer short ribs onto a plate or cutting board. Remove the bones and fat and discard. Shred the short rib meat into small pieces with two forks or your hands. Skim the surface of the chili to remove any extra fat that floated to the top. Add the shredded meat back into the slow cooker and stir to combine. Stir in the cinnamon. Taste the chili and add 1/4-1/2 tsp of salt if needed. Serve in bowls and top with green onions and sour cream if desired.

CHEERS TO HAPPY EATING!!!

In Dinner, Recipes, Lunch, Meat, Soups Tags best chili recipe ever, what to cook for large group, best beef recipe ever, cooking for the fall, best pumpkin recipe ever, what to do with canned pumpkin, easy ideas using pumpkin, braised short ribs, short rib chili, halloween recipes, cooking with ahort ribs, pumpkin chili recipes, cooking in october, unique chili recipes, cooking in september, savory pumpkin recipes, cooking for halloween, halloween party recipes, unique chili, fall cooking, using pumpkin to cook, pumpkin recipes, fun cooking, cooking with pumpkin, short rib recipes, easy pumpkin recipes
Comment

Pork Rind BBQ Nachos

August 20, 2014 tatumletard@gmail.com
Pork Rind Nachos.jpg
20140820-174316-63796980.jpg

To continue my recipes from the Local Memphis Live TV segment on Tuesday, today I'm posting recipe #2: Pork Rind BBQ Nachos. This is a low carb version of the real thing. And I have to say, using pork rinds instead of tortillas may just give the original recipe a run for it's money. If you live in Memphis, you know that BBQ nachos are a staple around here. If you don't live in Memphis and you come to Memphis, the first thing you should eat is BBQ Nachos. I'm not joking. Do it.

This fun snack will always remind me of Redbirds and Grizzlies games. Yeah sure, we love watching the games, love the atmosphere, and love all the fun that comes along with the 'Birds and Grizz, but I have to admit, half the reason me and Tres go to the games are for the BBQ Nachos! We can't be in our seats for more than 5 minutes without getting an order of BBQ Nachos and a beer. It never fails and never will! Now we can make them at home -- low carb!

20140820-174155-63715031.jpg

Grocery List:

1 bag Rudolph's BBQ Pork Rinds

32 oz pulled pork (I like to use leftovers from sandwiches the night before or you can find it in the freezer section of your grocery store)

1 cup cheddar cheese - grated

1/2 cup (or more) BBQ sauce

1 jalapeño - chopped into rounds (optional)

Parsley - for garnish

Directions:

Step 1:

20140820-174535-63935716.jpg
20140820-174236-63756438.jpg

On a large platter, spread out the pork rinds directly from the bag.

Step 2:

Top the rinds with the pulled pork, then the cheese, and finally the BBQ sauce (you can add as much or little of any of these as you like).

Step 3:

If you like a little spice, add the chopped jalapeño. Garnish with parsley.

CHEERS TO HAPPY EATING!!!

In Snacks & Apps, Recipes, Healthy, Lunch, Meat, Snacks Tags southern food, recipes, southern recipe blogger, game recipes, gameday recipes, local memphis, rudolphs food, pork rinds, gameday cooking, party food, party recipes, south recipe, cooking in the south, southern food blog, local memphis live, food blog, party apps, apps, southern blog, southern recipe, southern recipes, food, southern cooking, southern recipe blog, cooking with pork rinds
1 Comment

Fig and Prosciutto Salad with Mint Dressing

July 1, 2014 tatumletard@gmail.com
20140701-162552-59152552.jpg
20140701-155700-57420659.jpg

20140701-155700-57420659.jpg

Simple weeknight dinners are sometimes the best dinners. Easy salads on Monday nights make me think of two things: 1) little stress in the kitchen and 2) clean eating for an after weekend detox. After a long Monday at work, particularly a stressful one, nothing beats coming home, putting our feet up, watching TV, and eating a good meal. Sure, it's always great to do a more formal meal at the dining table or even a fun little wine dinner out on the patio every once in awhile during the week, but most Mondays call for sitting in front of the TV and vegging. Like most of the world, we have become Netflix binge watchers and it's what I love to do on Monday nights. A few hours of mindless TV is just simply something great to look forward to after being at work all day. And nothing makes it more special than doing it with the person I love the most, all while having a delightful meal sitting in between us and the TV. I came up with this simple salad recipe last night and couldn't wait another day to share it!

Grocery List (for two):

5 oz spinach and arugula salad mix 6 large figs (dates would also work if you can't find figs) 3 red radishes - thinly sliced 4 oz goat cheese 4 oz thinly sliced prosciutto 2 tbsp balsamic vinegar 1/2 lemon - juiced and zested 1/4 cup mint - minced 1 tsp honey 1/3 cup olive oil Salt Pepper

Directions:

Step 1

20140701-155747-57467011.jpg

20140701-155747-57467011.jpg

20140701-155828-57508426.jpg

20140701-155828-57508426.jpg

Cut each fig in half and toss them all with a little olive oil, salt, and pepper. Set a grill pan to medium high heat. Grill the figs for 3 minutes cut side down. Flip them and grill another two minutes. Set aside to cool down then slice each half into two pieces. Step 2

Toss radishes with a little olive oil, salt, and pepper. Grill radishes slightly for about 1 minute per side. Set aside to cool.

20140701-155914-57554090.jpg

20140701-155914-57554090.jpg

Step 3

Prep the salad dressing. Mix together balsamic, lemon juice and zest, mint, honey, and a dash of salt and pepper. Slowly stream in olive oil while whisking. Taste the dressing and add salt and pepper to desired taste.

20140701-160027-57627595.jpg

20140701-160027-57627595.jpg

Step 4

Prep the salad. Toss greens into a bowl and add pieces of the sliced prosciutto on top. Crumble the goat cheese over the greens and prosciutto and add cooled radishes and figs. Add the dressing and toss together.

20140701-160125-57685554.jpg

20140701-160125-57685554.jpg

CHEERS TO HAPPY EATING!!!

In Lunch, Dinner, Recipes, Salads Tags easy cooking, lifestyle blogger, cookingblog, lifestyle blog, easy salads, good salads, salads, summer salads, easy recipes, figs, healthy food, blogger, cooking blogger, food network, summer eating, healthy recipes, recipe blogger, summer recipes
Comment

Summer Squash and Zucchini Tomato Bake

June 24, 2014 tatumletard@gmail.com
squashbake.jpg

Tomatoes are to July and August as pumpkin is to October. It's the official start of summer, and for me that means being on the lookout for farmers markets anywhere, everywhere, and anytime. But sometimes, it doesn't take a farmers market to find the freshest produce around. I learned that as a kid, and I'm rediscovering it now. Growing up in a small town in Mississippi, I can remember regularly seeing people in blue overalls sitting on the side of the road in chairs with an old truck backed up to the street, tailgate down, and fresh produce spilling right off the back of the truck. That description may sound like I saw it in a painting in the Cracker Barrel and just decided to roll with it as a "childhood memory," but it is in fact the truth. Even today when I go back to my hometown, I see people in those same spots selling tomatoes, watermelons, and all the beauties of a farmer's summer garden. Because I now live in the city, it's rare to see random farm stands and trucks full of produce on the side of the road, but luckily, I travel to small towns for work and it's a lot of fun to keep an eye out for these little pop-up produce markets. This recipe comes inspired by a random market I found in one of the small towns I regularly visit. Similar to a ratatouille, this dish full of fresh, slowly baked veggies with a little surprise on the inside: cheese! And as for the newest random produce stand I found on the street, I'll just say as soon as I cut into the tomatoes, there was no question that they had just been picked that day. My kind of summer produce!

Grocery List (2 people):

IMG_4028.jpg
  • 4-5 large, even sized summer squash and zucchini

  • Kosher salt

  • 4 oz mascarpone cheese - room temperature

  • 4 oz goat cheese - room temperature

  • 3 tbsp. basil - minced

  • 1 tbsp. parsley - minced

  • 1 tsp garlic - minced

  • Pepper

  • 12 oz marinara

  • 1 tsp red pepper flake (optional)

  • 1 large tomato - sliced thick

  • Fresh parmesan

  • Olive oil

Directions:

1. Heat oven to 350 degrees and heat an oiled grill pan to high heat on the stove.

Cut the ends off of each squash and zucchini. One at a time, sit a squash upright with the cut side down so you have a flat, sturdy surface. Cutting downward, slice squash into long, thin pieces. Repeat with the zucchini. Avoid using the end pieces -- you only want the middle so each slice is even, thin, and easy to roll.

IMG_4036.jpg

Place squash and zucchini pieces on a rack and sprinkle with salt on both sides. Let stand for 10 minutes so the moisture comes out of the veggies.

IMG_4031.jpg

Lightly dry each squash and zucchini piece off with paper towels, trying not to remove all the salt from the veggies.

Grill each squash and zucchini piece 2-3 minutes on each side and set aside to cool.

IMG_4033.jpg

2. While the veggies are cooling, prepare the filling by mixing together the mascarpone, goat cheese, basil, parsley, garlic, and a dash of salt and pepper.

IMG_4034.jpg

Take one piece of squash and zucchini at a time, fill with about 1 tsp of cheese mixture, and roll up.

IMG_4035.jpg

3. Lay each rollup down in a small baking dish (if you double up the recipe, use a large baking dish - 9 x 13 in). Cover the pieces with the marinara and sprinkle the top with red pepper flakes.

IMG_4037.jpg

Top sauce with sliced tomatoes and grate fresh parmesan over the top.

IMG_4038.jpg

4. Bake for 20-25 minutes. Top with more basil and serve immediately.

 CHEERS TO HAPPY EATING!!!

In Dinner, Recipes, Healthy, Vegetarian, Lunch Tags veggie recipes, home and garden, veggies, recipes, food porn, home and garden blog, chef, kitchen, home blog, chopped, home, kitchen fun, cook, home cooking, easy cooking, meatless monday, cooking at home, healthy food, food blog, best recipes, food network, cooking blog, farmers market recipes, lifestyle blog, healthy eating, easy recipes, recipe blog, home chef, eating veggies, cooking
Comment
← Newer Posts

MEET ANDREA

Hey y'all! Welcome to Andrea’s Cooktales. I’m a believer that the best stories are shared and the fondest memories are made in the kitchen, at the dinner table, and surrounded by food. This blog is about storytelling from the kitchen and the dinner table.  (Read more...)

RECENT POSTS

Featured
IMG_1079.jpg
Mar 1, 2024
Better Than a Steakhouse Filet Mignon
Mar 1, 2024
Mar 1, 2024
IMG_1267.jpg
Mar 1, 2024
Raspberry Rose Brie Bread
Mar 1, 2024
Mar 1, 2024
IMG_2041.jpg
Mar 1, 2024
Best Breakfast Burrito in Existence
Mar 1, 2024
Mar 1, 2024
IMG_2037.jpg
Mar 1, 2024
Campari Spritz
Mar 1, 2024
Mar 1, 2024
IMG_2034.jpg
Mar 1, 2024
Truffle Seafood Pot Pies
Mar 1, 2024
Mar 1, 2024
IMG_1066.jpg
Feb 4, 2024
Steakhouse Creamed Spinach Casserole
Feb 4, 2024
Feb 4, 2024
IMG_7278.jpg
Nov 9, 2023
“Season of the Witch” Salad
Nov 9, 2023
Nov 9, 2023
IMG_8931.jpg
Nov 9, 2023
Vampire Aperol Spritz
Nov 9, 2023
Nov 9, 2023
IMG_2388.jpg
Nov 9, 2023
Zombie Meat Spaghetti
Nov 9, 2023
Nov 9, 2023
IMG_4252.jpg
Nov 9, 2023
“Somebody’s Watching Me” Baked Cheese with Chile Eyeballs
Nov 9, 2023
Nov 9, 2023

ARCHIVES

Archive
  • March 2024 5
  • February 2024 1
  • November 2023 6
  • September 2023 12
  • August 2023 6
  • September 2022 1
  • February 2021 2
  • December 2020 8
  • November 2020 9
  • October 2020 4
  • September 2020 6
  • August 2020 7
  • July 2020 3
  • May 2020 2
  • February 2020 5
  • January 2020 3
  • December 2019 3
  • November 2019 4
  • October 2019 8
  • September 2019 4
  • August 2019 2
  • July 2019 6
  • May 2019 3
  • April 2019 5
  • March 2019 2
  • February 2019 2
  • December 2018 6
  • November 2018 7
  • October 2018 5
  • July 2018 1
  • June 2018 3
  • April 2018 1
  • February 2018 2
  • January 2018 10
  • November 2017 1
  • October 2017 2
  • September 2017 2
  • August 2017 1
  • July 2017 1
  • June 2017 3
  • May 2017 1
  • March 2017 4
  • February 2017 1
  • January 2017 2
  • December 2016 4
  • November 2016 7
  • October 2016 3
  • September 2016 5
  • August 2016 2
  • July 2016 4
  • June 2016 2
  • May 2016 9
  • April 2016 7
  • March 2016 7
  • February 2016 18
  • January 2016 8
  • December 2015 10
  • November 2015 14
  • October 2015 14
  • September 2015 13
  • August 2015 5
  • July 2015 6
  • June 2015 5
  • May 2015 6
  • April 2015 5
  • March 2015 6
  • February 2015 3
  • December 2014 3
  • October 2014 7
  • September 2014 6
  • August 2014 6
  • July 2014 7
  • June 2014 6
  • May 2014 6

CATEGORIES

  • TRAVEL TALES
  • LIFESTYLE POSTS
  • RECIPES
  • ANDREA'S COOKTALES
  • QUICK BITES
  • TV APPEARANCES
  • WHAT DO YOU DO WITH THAT

BLOG     |     VIDEOS     |      SERVICES    |       RECIPE INDEX    |      PRIVACY

Copyright Andrea's Cooktales 2016-2017 | Design by Oh Simple Joys Design Studio